Powered by Blogger.
Showing posts with label DIY Pattern. Show all posts

TUTORIAL : Twisted Infinity Scarf

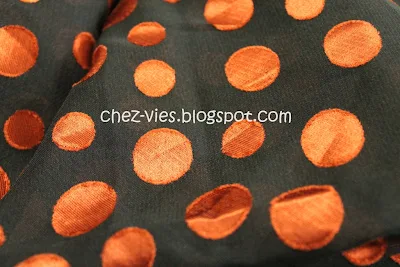
Everyone loves infinity scarf. It's the "grab n go n look fab" kind of accessories. So, recently I've been making my version of infinity scarves. You can use any kind of fabric, cotton, flannel, georgette, crepe, chiffon, etc.  I happened to have these saree blouse fabrics which I got from my MIL. Saree blouse comes with the saree. It's usually less than a meter (80 -90 cm) of fabric which has to be cut off from the main saree. 

I thought of sharing with you how I made my scarves. This is a quick project which make a perfect gift. So, here we go:

What you need:
1. A piece of fabric (depends on how WIDE and LONG of your scarf). and since I'm making from a saree scrap my piece is 80 cm x 115 cm


2. Sewing machine and sewing supplies (matching thread, handsewing needle, etc)

Let's get started:

1. This is my fabric. It's georgette fabric with fancy dots ;). Make sure you straighten your fabric, which means BOTH ENDS have the SAME WIDTH. 


2.  Now, FOLD it once and pin it. ( you can see the selvedges on both sides) .


if you make a longer and wider one, and you'll fold it length wise -  selvedges meet the selvedges. 

3. Sew 0.5" along the pinned side to make a TUBE. 


4. Turn your tube inside out. Lay it flat (iron it if necessary, if you use cotton esp) and now match the open side of the tube by TWISTING the fabric. 


So the SEWN seams will meet the FOLDED sides.


5. Match the middle seam and the sewn seam RIGHT SIDE together and PIN. You can pin all the way around, or like me, I usually put 3 pins at the beginning. 


6. Now start sewing 0.5" along the tube's opening. 


when the opening is getting narrower, you just PUSH the whole SCARF inside the opening. Keep sewing and LEAVE 2"-3" as a turning hole. 

7. You're almost there...now, pull out the fabric and see...you're almost done it ^_^. 


8. Closing the gap with slip stitch using a matching thread. 


And VOILA...wear it as you like ^_^


It's easy peasy, isn't it?

This scarf and a lot more is available at my SHOP.

Until then..

Happy Sewing


Book Review: Design-It-Yourself Clothes


I always like to buy patterns and craft books. And if it comes with pattern it's even better, cos I simply can adjust it to my own or whatever size I need to sew. 
Sometimes, you see those adorable clothes on magazine or internet so badly and your tailor can not do it for you (I'm talking about tailor in India in general *wink*) or if  they  can, they will make a big hole in your wallet for the quality of sewing that below your expectation.

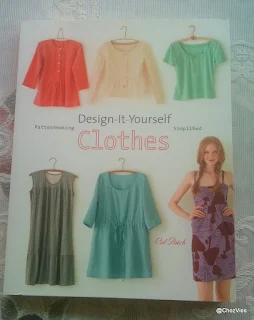
Then it's time you buy this book : Design-It-Yourself by Cal Patch. From the book flap: Cal Patch was a clothing designer for Urban Outfitters and Free People before creating her own label, Hodge Podge. She teaches sewing and patternmaking throughout New York City


It shows you how to draft your own pattern in easy way and how to modify it to whatever style you want. It give a comprehensive illustration from how to MEASURE your self, WHAT measurement is needed, right up to how to LABEL it. And of course how to modify it, now that's the best part. 


If you are like me, then this book is a MUST for you. Be it dress, top, tunic, knitted fabric, pants, skirt..you will find it in this book. 
Here are few snaps from the book

Knickers

Miho Shirt


variation of dresses and Tunics


Skirt


I tried  making the pattern. I made simple A skirts. And here they are:


The fabric is Indian chanderi cotton brocade. It has zipper at the side and I put lining too..
and for the teal one, I got this sarong fabric from Indonesia. The fabric is thick-ish so lining is not required :)


So, go ahead and get the book. It's worth all the penny. If you are in India, you can purchase it via Flipkart , which has wide range of foreign craft books and I wish they had magazines too..haha..

Until then...Happy Sewing


Latest Fabrics

Latest Video