Powered by Blogger.
Showing posts with label 2019 quilting. Show all posts

New Pattern - Dotty Mini Patchwork Purse and Giveaway Link

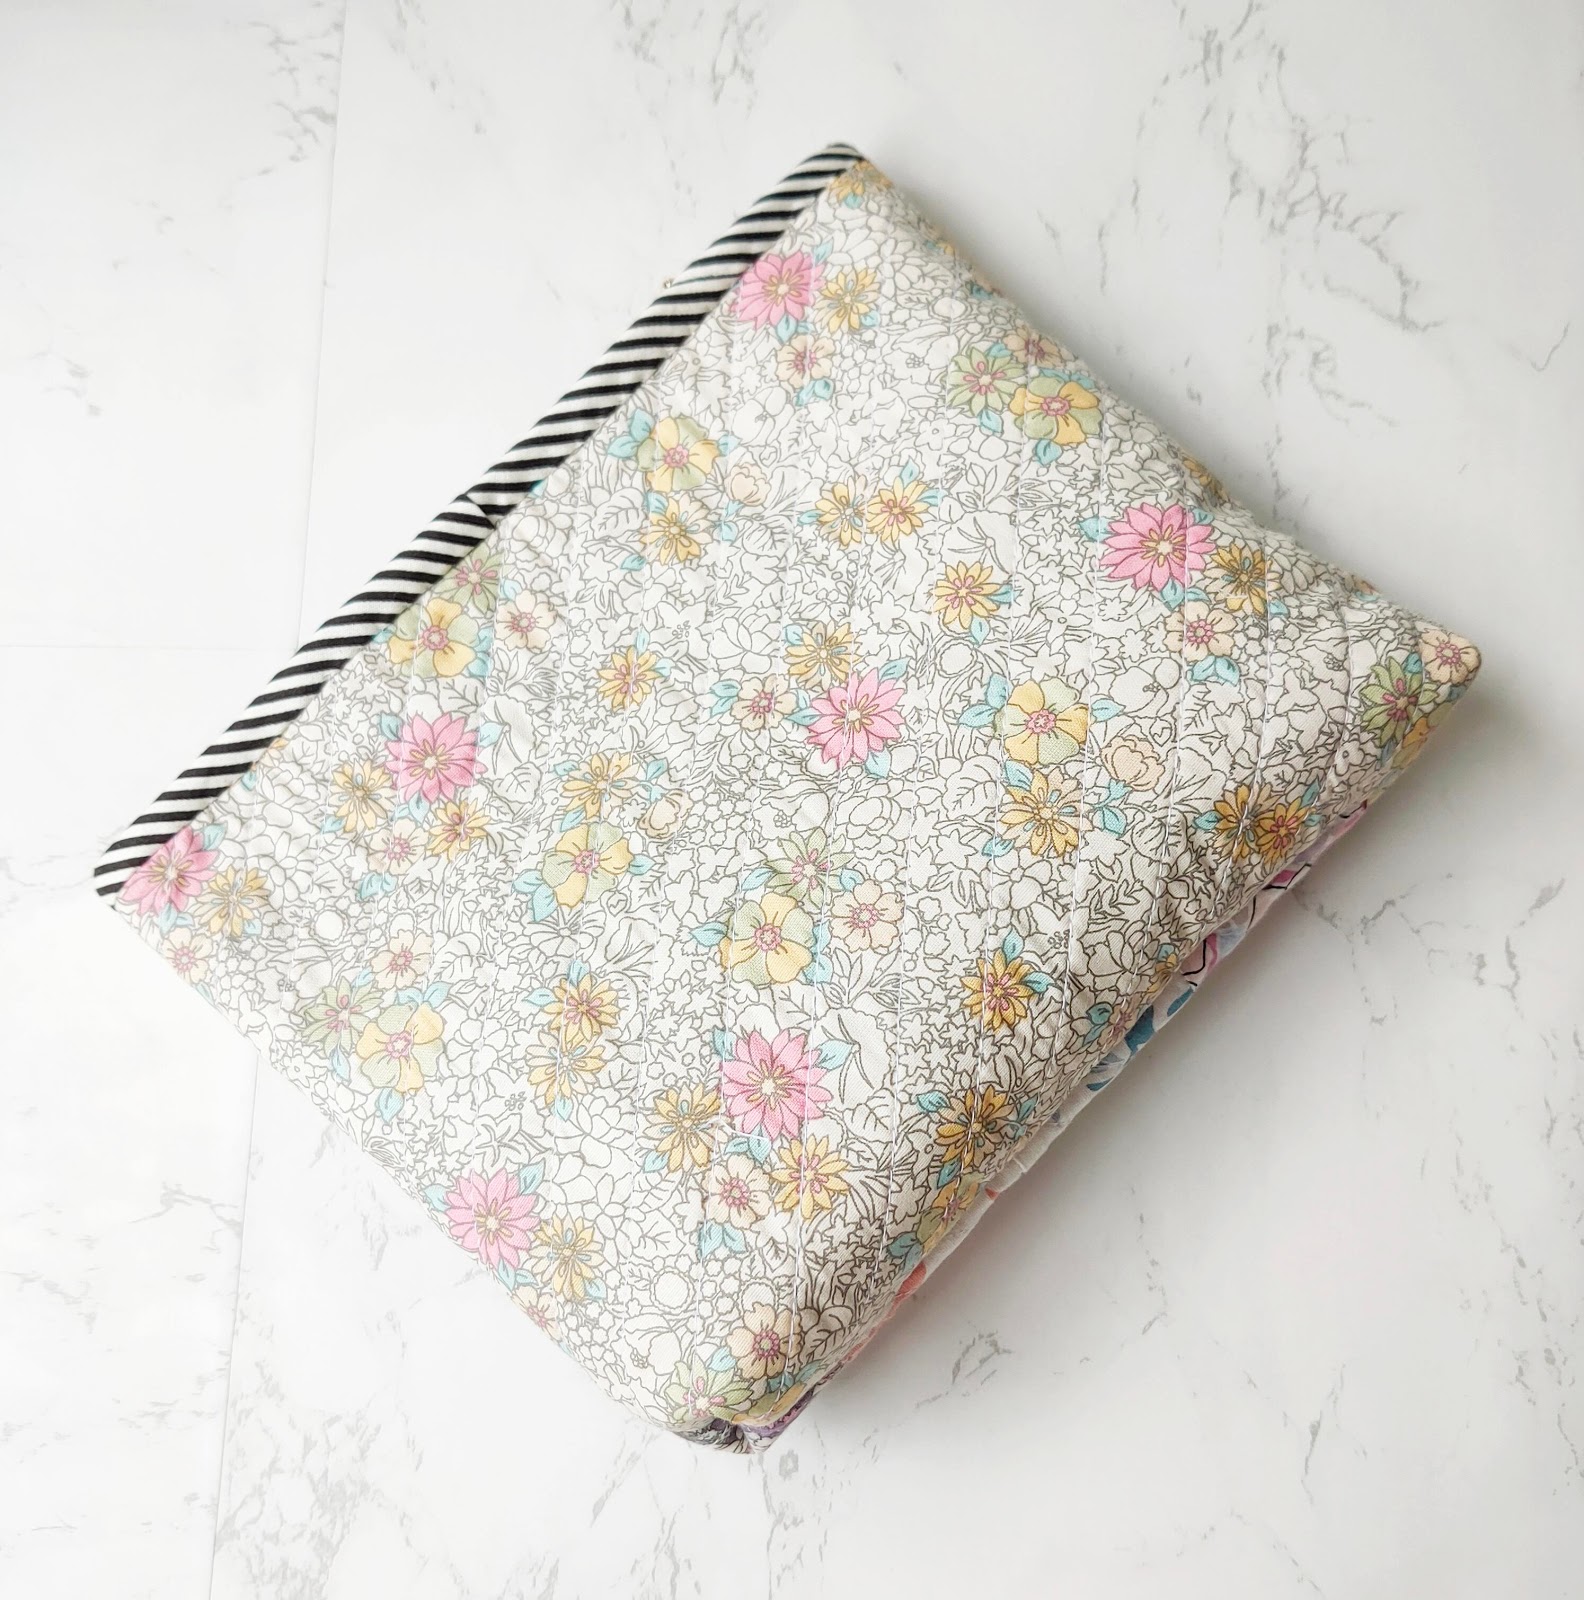
Dotty Mini Pure
ETSY  | WEBSHOP

If you love sewing, the chance is you have lots of fabric scraps! Now, here's one pattern that you can make totally from scraps. This Dotty Mini Purse  really need very little  fabrics. Barely one FQ for lining and the rest you can use the scraps. 

Add long strap for crossbody bag

I am a scrap hoarders, as you may see in many of my posts. Scrappy quilts always amaze me and now I can turn them into pretty bags!! Yay! This pattern is super easy that you can get it done in one afternoon (if the family leave you alone :D ). I made 5 so far with denim, linen, yarn dye fabrics, etc. I will share them in my next few posts along with the fabulous talented tester whom without them, this would not be possible! Stay tuned for the tester photos! 

The Dotty Line Up

Truly, writing pattern is not easy. I told Namrata of Bagstock Design, that I wish I paid more attention during the English class LOL. This bag pattern is written in a simple English, that I hope people whose English is not their first language can understand. 
The bag itself is pretty basic. I included basic patchwork piecing technique for those who wants to learn making patchwork/quilt bag. Really, it's not a rocket science. 


The lining is pretty straightforward, with card slot pocket. I took this out several times and got a lot of compliments! 


By the way Sequoia Lynn Sews is going to have sew along in her brand new YouTube Channel and we'll have giveaway on her Blog and Youtube! Be sure you'll check it out. I will re-post it here, once it's live!! So excited!! 

Happy Sewing!

- Elvira -

Read the Review :


Why blogging is important to me

In the past few months, the Facebook Group of Etsy Sellers have been about the changes in Etsy Advertising. Well, they say change is the only constant. As a seller, we can't do anything about it, because we can't control what the Etsy management or shareholders want, right? 
The same goes with social media ever changing algorithm. As a  user,  we simply has to adjust our step to match their changes. Last week, I found that some of my Instagram Story Highlights are blank! I updated the app and they are still missing. This made me think, that we can't rely too much on social media too. We work so much to make beautiful posts and suddenly one day we'll find they are all gone? What will you do?

I'm glad I still have my blog. Though I haven't been able to write so much recently, but at least this blog is here. I can easily look up  the archives or search the blog for my past works or simply to read my earlier posts. Many friends asked me how to promote their products. Well IMHO, there is no exact formula, simply do what you're comfortable with. What you want to do? What is your future goals? etc. As for me, I want to keep enjoying what I am doing while at the same time, giving something back to the crafting community through this blog by sharing few tips and tutorials. Frankly, my blog is still one of my biggest source of traffic when it comes to Etsy or my Website. 

****

And here's the pouch that  I forgot to post!  Ehm, actually this post was in my draft folder and I forgot about it. Anyway, this another combo of denim and patchwork pouch. You can see the tips and video of another pouch I made in HERE.

Patchwork Pouch


Mini slip pocket for cards


Plain denim at the back

I really love working with denim and I'm glad there is one shop here which carry different kind of denims. But my fave is this dark blue denim. This pouch is very simple, it has one slip pocket inside. The size is perfect to carry your phone or passports. Well, we always need more than one pouch, right? I love making pouches and keep them. They make a great impromptu gifts and everyone love handmade pouch!

The pouch is available in my Etsy as well as in my Webshop

Thank you for stopping by,

Have a nice day!

~ Elvira ~

Bite More Than One Could Chew - A Finish Quilt

"Yes, there were times
I'm sure you knew
When I bit off more than I could chew
But through it all when there was doubt
I ate it up and spit it out
I faced it all
And I stood tall
And did it my way "
(My Way ~ Frank Sinatra)


Yes, that's exactly how I feel when I was working on this quilt in the past few days. This flying geese originally was a commissioned quilt. She gave me the idea from Pinterest and we discussed in details about everything. I even did a little research on how to finish it on a domestic machine without breaking my shoulder LOL, because it's huge quilt! 

Doing the geese panel was all fun and I love HST! Until I tried the partial quilting thingy! I wish I was wiser! From the tutorial it looked doable, well, it was if it was a smaller quilt but not when you are doing king size on domestic machine!! Lesson learnt : Be wise and leave it to the expert (a.k.a longarmer)


So, few days ago, when the house was quiet, I took out the quilt which has been sitting in the corner of my room for 4 years -__- and decided to get it done! After spreading  the crumpled UFO quilt on the bed, I put on a cheerful playlist on my Play Music, and ironing it. Cleared the center table and started pinning. All 3 panels were already quilted separately and I already sewed the backing of the middle and one side panel. Now I only have to pin and sew the front panel together. Well, it feels easier now that I put it in writing hahahaha. Really, it took several bloody moments (from pricking my fingers) and by evening, one side panel is attached! Pheew.


I continued working the next day to attach the other side and realized yesterday's one was all wonky at the back and I had to unpick. Duh!! OK, actually I battled whether to leave it as is, but the nagging feeling won! 


I cut 4" wide binding and if you have not downloaded Robert Kaufman Quilt Calculator Apps, maybe you should! It really helped!! By the way, I used my dependable Jack Machine! I love because it has sturdy wide table that I could manage the quilt easily on it. 


Don't you love the butterfly backing? I do :)

 It's far from perfect but it's done and I love it. Just in time for winter here in Northeast India!  
                          

view from my kitchen window


So, if you have unfinished projects, don't give up on it! Just  work at your own pace ^_^. Now, I can reward myself with few episodes of C-Drama! Yay!


from Kdrama "On the Way to Airport"


Thank you for stopping by!
Have a nice day,
Elvira


****
Linking up to :

Scrappy Patchwork Zipper Bag

Hello,

Patchwork Zipper Pouch


Autumn is here, though we don't have the colorful leaves but the weather is very pleasant. I made few stuff last week, aside from few custom orders. Well, sometimes we have to make time for fun sewing, right?


One was this quilted zipper pouch which I made from scraps. I bought the scraps from Indonesia and the scraps are quite small, around 6" x 18" and some of them are uneven cuts. I cut few of them into 2.5" squares (my fave size) and choosing few dark, medium and light value from the squares. 

Work in Progress

I really love working with small scraps of fabrics and I promised myself that I will make more scrappy projects for myself and also to share with the world :D
I used fun apple print cotton fabric for the lining. It really brighten up the pouch. 


I was going to do the regular zipper top closure, but I want something to zest it up a bit. I have many bias binding from making passport wallets, zipper with binding is the obvious choice! There are 2 ways of attaching the binding that I did. The one like in THIS pouch or THIS one where I attach the binding strip to the main fabric before attaching the zipper.  On this pouch though,  I sewed the zipper first then attach the binding with machine on one side and then finish it with hand sewing. Insha Allah I will make a tutorial when I am working on the next one. 


I did simple diagonal quilting here with the help of  washi tape! Well, I usually just eyeball it though :D. On the other side, I used floral print and quilt it in the same manner. And if you're wondering about the tag which I attached on the side, it was not intentional. The fact is I forgot to attach D ring and had to make an improvisation here. 


 Please let me know what you think in the comment below. Thank you for spending time reading my post, I hope I can inspire you in a small way ^_^.

Happy Sewing,
Elvira


The finished quilts

Hello,

My quilts have come back from Tsala Quilting Studio, Bangelore and I finished the binding last week. I'm so happy with how it turned out. Thank you Vatsala and team! The quilts finished just in time for my elder son's birthday and he chose the blue and yellow marble star  quilt one! 


Now, we have several long arm quilter here in India and Tsala Studio is one of them. I was speaking on the phone with Ranjana Ma'am and discussing about quilts and bag making in general. And we wished we had one long arm quilter here in Guwahati, which is from climate point of view, we should have one, since we have quite cold winter. But I have not seen a quilting culture so much in here. Most people will do knitting or weaving woolen blanket. Hopefully one day!! 


Back to my quilts, the star quilt one, as I mentioned in my previous post, is from the Desi Quilter Quilting bee. I used yellow block print mulmul fabric for the backing. Why mulmul ? Because it's soft!


Here another shot on the sofa :D. I hope you can see the quilting details.


I really love the Batik Double Star Quilt! I did a wide binding, inspired by Laurie on Instagram. I cut the binding 5" wide, double fold it and stitch a scant 1/2" on the back. Deciding which color for the binding was tough! But everyone at home voted for blue. And it looks lovely, IMO! :)


As for backing, I used this ikat print glace cotton fabric. The fabric is also soft. It has a smooth sheen finished. I guess we can use it as a reversible quilt :D

I have 2 more quilt tops, I am yet to decide the backing though. I plan to send it to Tsala Studio by next month so it will be in time for my younger son's birthday! 

Thank you for stopping by!

Happy Crafting!

- Elvira-


Finishing star quilts

Hello everyone,

It's almost end of August and I have not written any blog post this month. There are so many things going on this month. Sometimes, I open my laptop and trying to write something but I can't think of something. Too many things going on in my mind. 
Image result for my mind is like internet browser
source : Pinterest

Well, sewing wise, I finished 2 quilt tops (yay!!) and now are with Tsala Studio in Bangelore for quilting. 


The quilt top above is from the quilting bees we did in Desi Quilter in 2013 (OMG!!). Thank you Sudha Sekhar, Prasanna Narasimhan, Nikhat, Damayanthi Bhat, Manju Narain, Tina Katwal, Sandhya and Aliya Mir for making these blocks for me *group hugs* 

I posted the tutorial for the block in HERE in case you want to try it :)


For the backing, I wanted in yellow. I have another yellow and blue print which I thought I will use but when I put them together, I feel it's too busy. So I stick to the original idea. I found this mulmul cotton fabric in yellow with small white flower print. It's perfect!! 


The second quilt top is this Double Friendship Star quilt. The block is based on MSQC Youtube Tutorial. I started this quilt last year. I posted my progress in Instagram . I used batik Jellyrolls and white cambric cotton for the background. The batik part finish at 40" x 48". I thought I will finish it as another throw quilt but then I want the quilt to be usable. I have a few throw quilt which mostly end up in my cupboard :D

After browsing Pinterest for idea, I decided to add wide borders in white. I added 9.5" wide on the sides and 12.5" wide on the top and bottom. I love how it turned out! 


For backing I chose multi color ikat print in glace cotton. Glace cotton is very soft and it has a glossy finish. I love it!! 

Oh and I have 2 blocks left which I will make cushion covers! Yay! 

Well, finished is always better than perfect, right? Finally this winter, we will have new quilts. yay!

I still have one more bee blocks to assemble. I already got an idea and hopefully it will work out :D

Thank you for stopping by and have a nice weekends!

~ Elvira ~


Scrappy Patchwork Pouch


Few weeks ago I made few scrappy log cabin blocks and share it in my Instagram. I was cleaning my sewing room and sorting out my scraps and instead of finish my cleaning, I sat down and started making a few blocks.


I really really love scrappy blocks and log cabin is just the easiest. The no rule log cabin blocks!  Since I completed my log cabin quilt I really want to make another one. 


These blocks are 6.5 x 6.5 inches and I really don't have any particular plan. So a few days ago, I made this pouch. Simple flat pouch.


I added a scrap denim which I have in my blue scrap bucket. I love using lightweight fusible interfacing and batting for quilted pouch. They are a perfect combo if you don't have fusible batting. I used fleece batting here. Really, you can use any batting like foam, flannel or even your old fleece blanket. Re-purpose or up cycle is always a good idea!

I used metal zipper this time. I really love the look of it. You can check my IGTV where I show you how to install metal zipper pull. Once you learn the technique, you will love it! 


I made a time lapse video :) I really want to make a proper tutorial video but it needs a lot of preparations and set up. Hopefully later on I can start sharing a better videos. In the meantime, I hope you enjoy this one. (don't forget to share and subscribe :D ) 
The pouch size is 6" x 8" which is a really great size. Just big enough to carry your phone and few stuff. 

Thank you for stopping by.

Happy Sewing!

- Elvira - 

Linky Party
Handmade Monday
Moving it Forward

Handmade monday featured.jpg

Wool Quilt Bag

"Learn to use other’s success as inspiration. Instead of focusing on our failure, we can see their achievement as something to motivate us ~ Twitter "


This is the continuation from my previous Post about the Kits! This wool quilt bag I finished in March. I bought the kits from Country Quilt Market shop in Tokyo.


This patchwork wool bag came with a pre cut wool squares of different textures. The kit didn't include the batting or interfacing and lining. So you have to figure it out yourself. I use a lightweight fusible and add batting for this tote bag.


Since there was no instructions for the lining, I just made it up myself. I added slip pocket and zipper pocket. I thought of using snap button closure as per the pattern but decided to go with zipper. 


Here I learned how to do the bottom and so glad that it lined up beautifully! Working with wool and different textures and weight of fabrics was a challenge. Most of Japanese quilt bags are hand quilted and I was too excited to finish this one. So, I only did quilt in the ditch, just to be on the safe side :D.


And that's me with the bag when I went to Shillong with my SIL in March! 
Now it's my fave tote bag! Nothing like carrying handmade bag ^_^.

What about you? Do you like to buy kits? 

Thank you for stopping by,

Have a nice day,

Elvira


Scrappy Log Cabin Quilt


I started this scrappy log cabin quilt last year after I organized my scraps in buckets. When this does not really make a dent to my scrap baskets but I'm super thrilled to finished this one just before the trip to Japan last January. My friend and me, we decided to take at least one quilt this time too. Last year I took the small log cabin quilt :D 


Last January I only had 6 blocks completed. The block size is approx 12 x 12 inches and totally made from scraps. 


This was my "just having fun" kind of quilt. I cut the scraps into 1.5" strips and using sew and cut method. Almost like quilt as you go method without the quilting part. 


The fabrics were of all kind of weight, as long as the color match! I did not follow any rule and I kind of loving this process. 


I pieced and quilted using my Jack sewing machine. I decided to just do wonky lines quilting ehmm it's called organic lines, right? And I loved the result! and so are my family and friends :D 


And here's my quilt hanging on the tree trunk at Inokashira Park! It was a nice sunny day when we decided to take the quilts out and find a good place to take photos :D. Yeah, we're crazy like that! Many morning walkers were glancing/looking and smile at us :D . 


And another shot at Arashiyama Bamboo Forest
I still have a lot of scraps. I've cut a few in different sizes and have a couple of ideas. Let's see I hope I can create something bigger than this scrappy log cabin! 
Thank you for stopping by & spend time reading my blog!

have a nice day!

- Elvira -


Linking up to:

Handmade Monday
Oh Scraps!

Latest Video