Powered by Blogger.
Showing posts with label quilted bag. Show all posts

I Made Boxy Pouches Again


Quirky Keychain Mini Boxy Bags


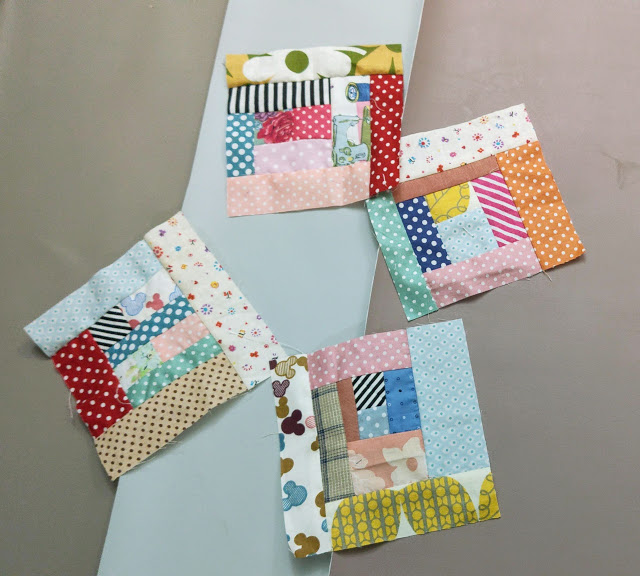
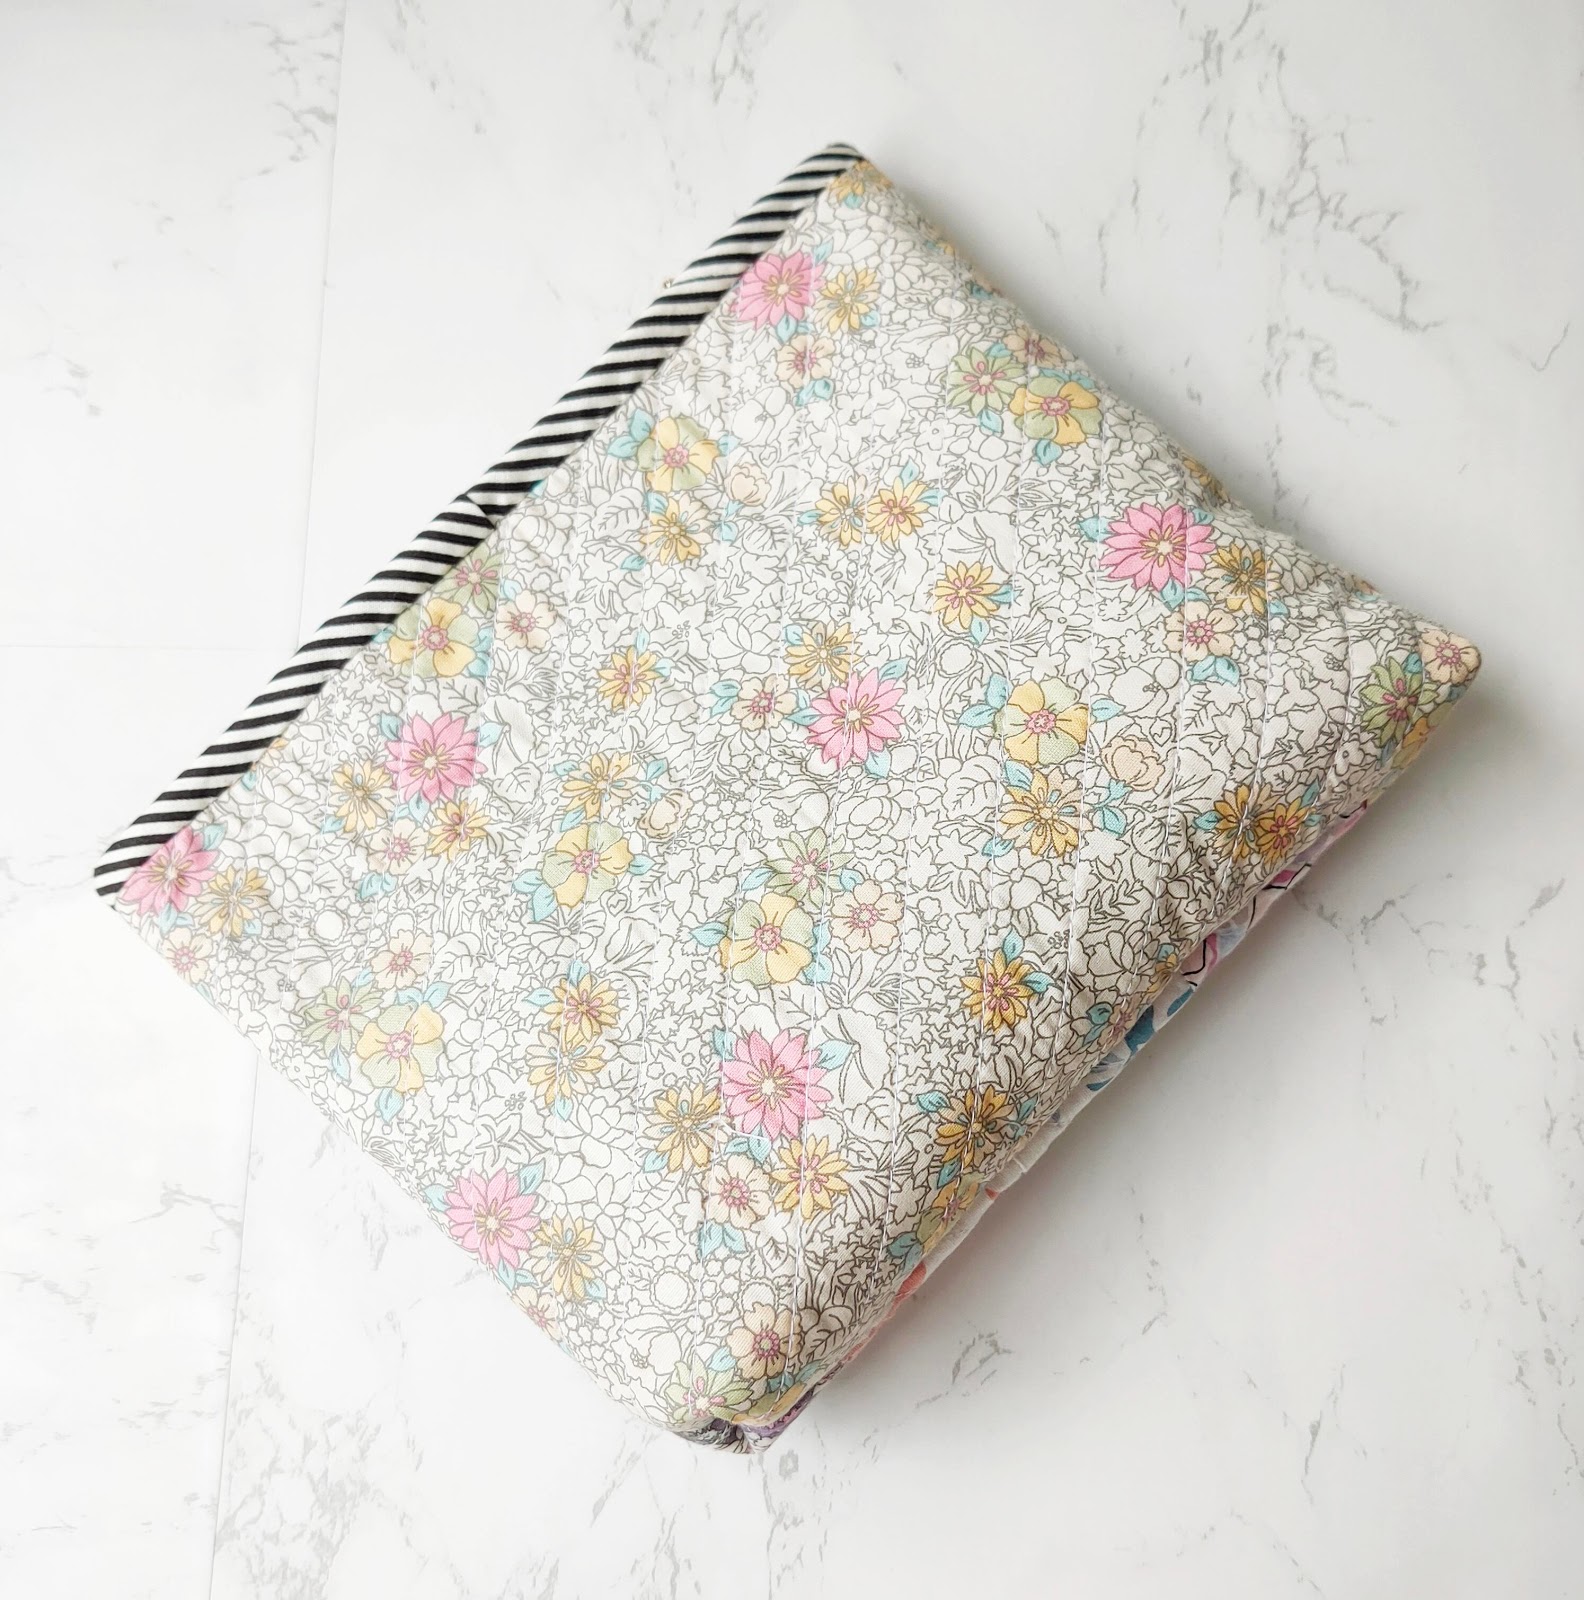
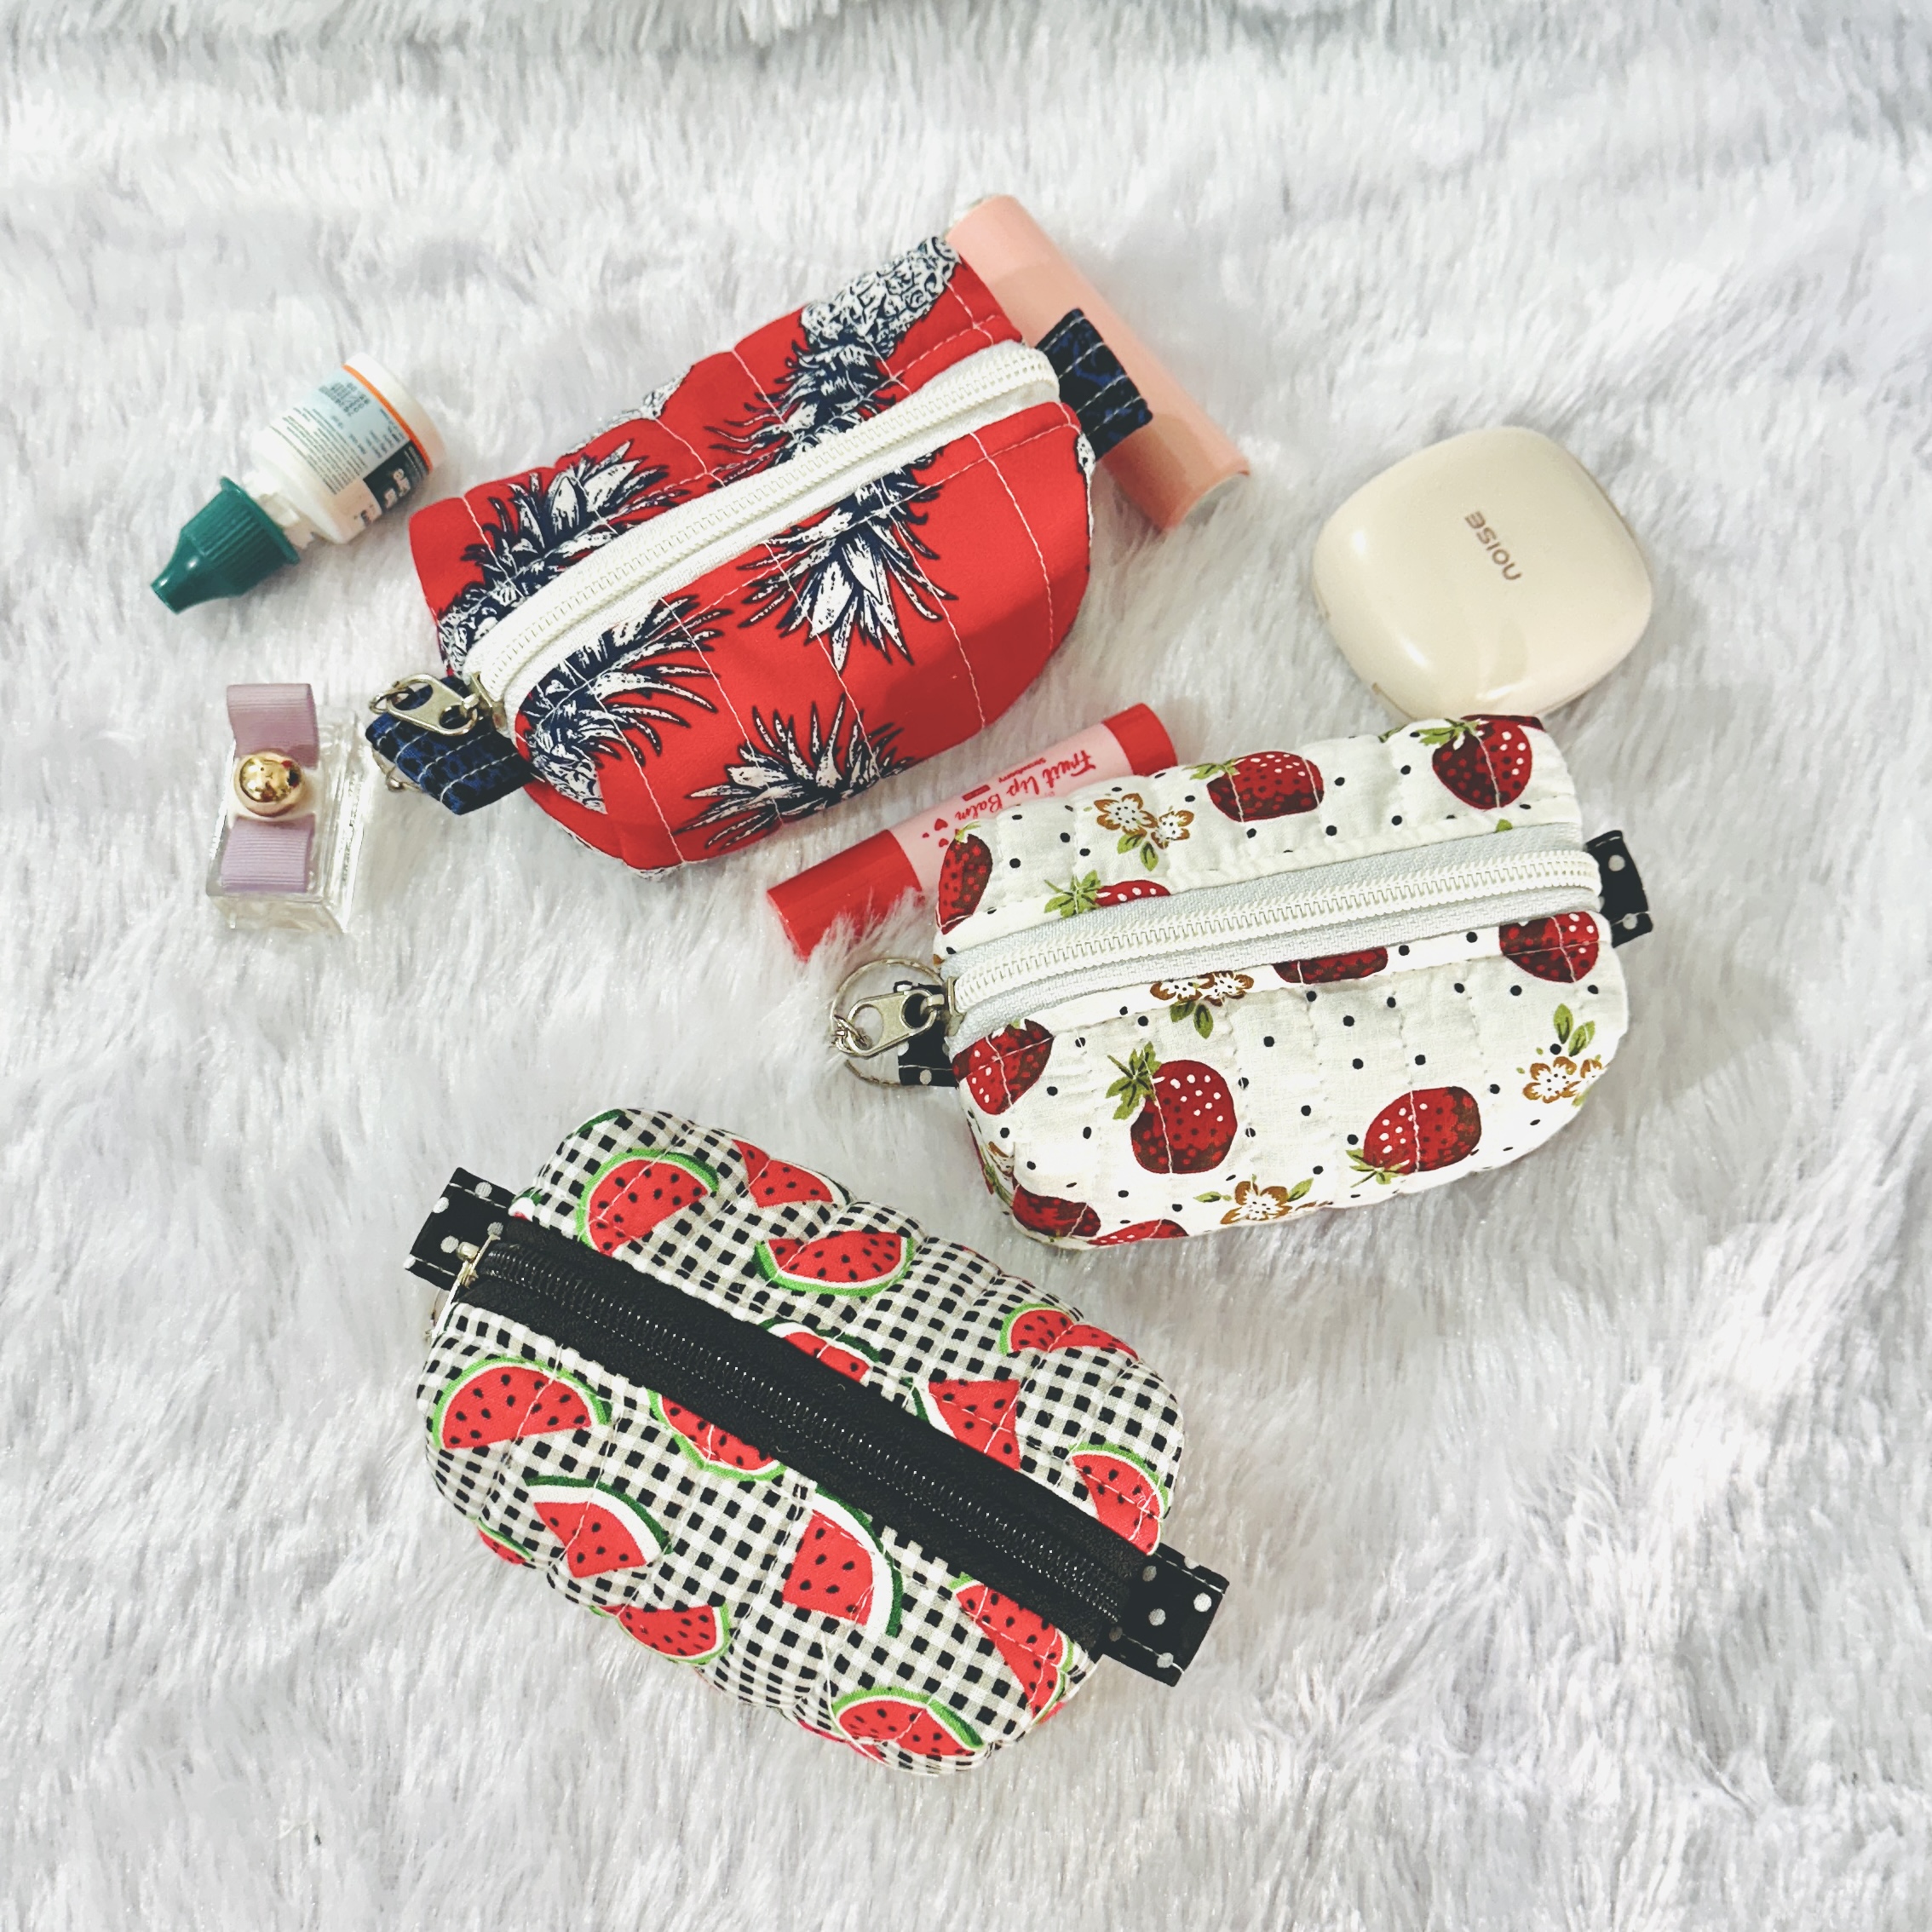
It's already mid of May. How time flies! Since my last post, I've been busy with a couple of things! The most recent ones, I am having fun making quilted boxy pouches. It's been ages since I make one! 

There are so many ways to make boxy pouches or bags! One of them is like in this video

mini boxy pouches
Mini Keychain Bags


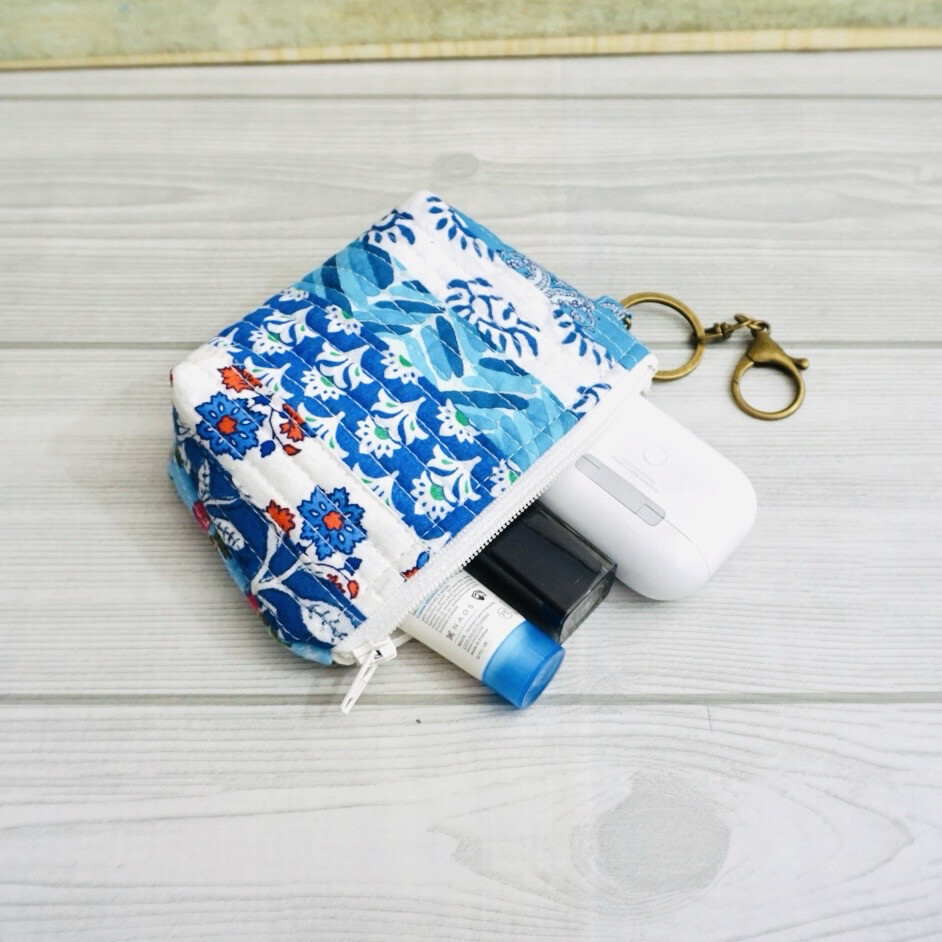
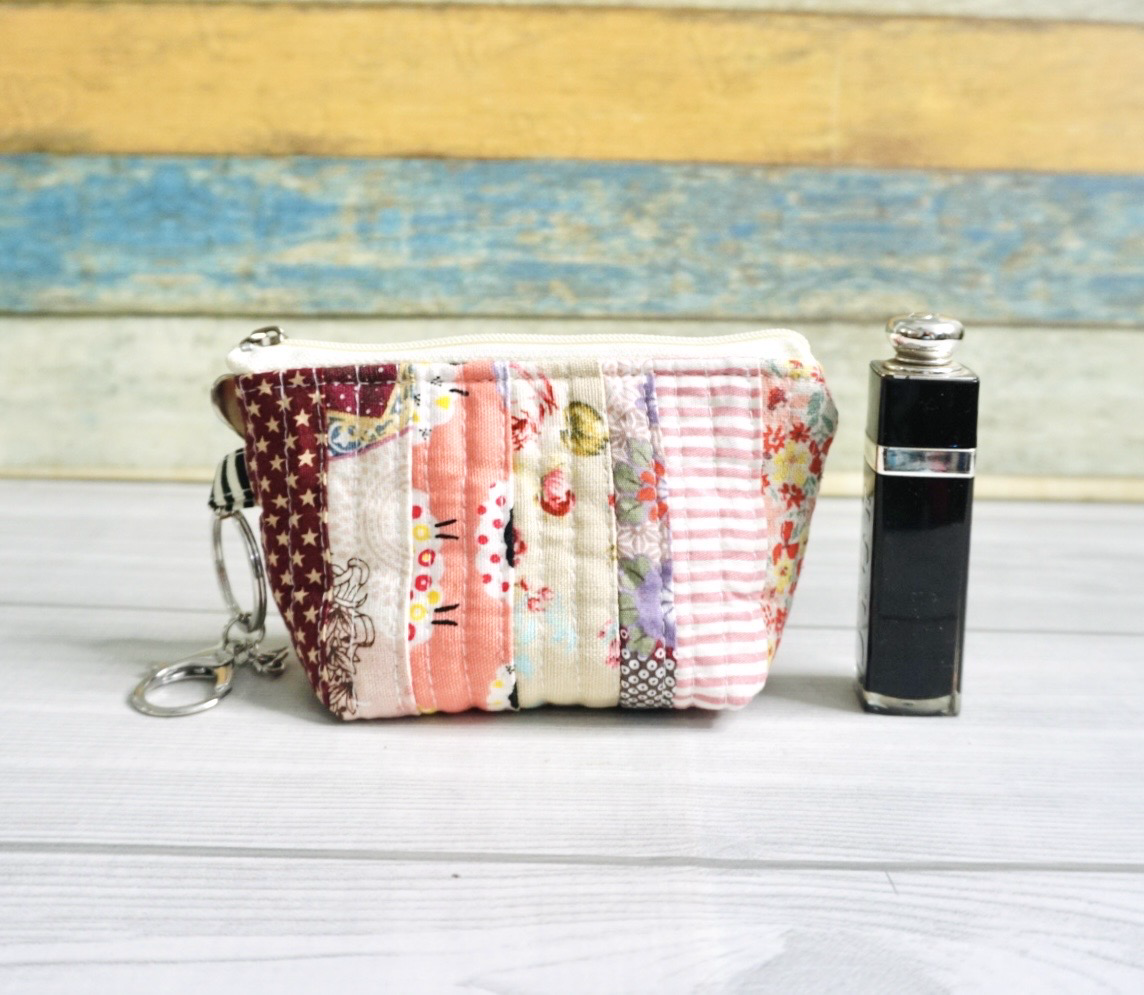
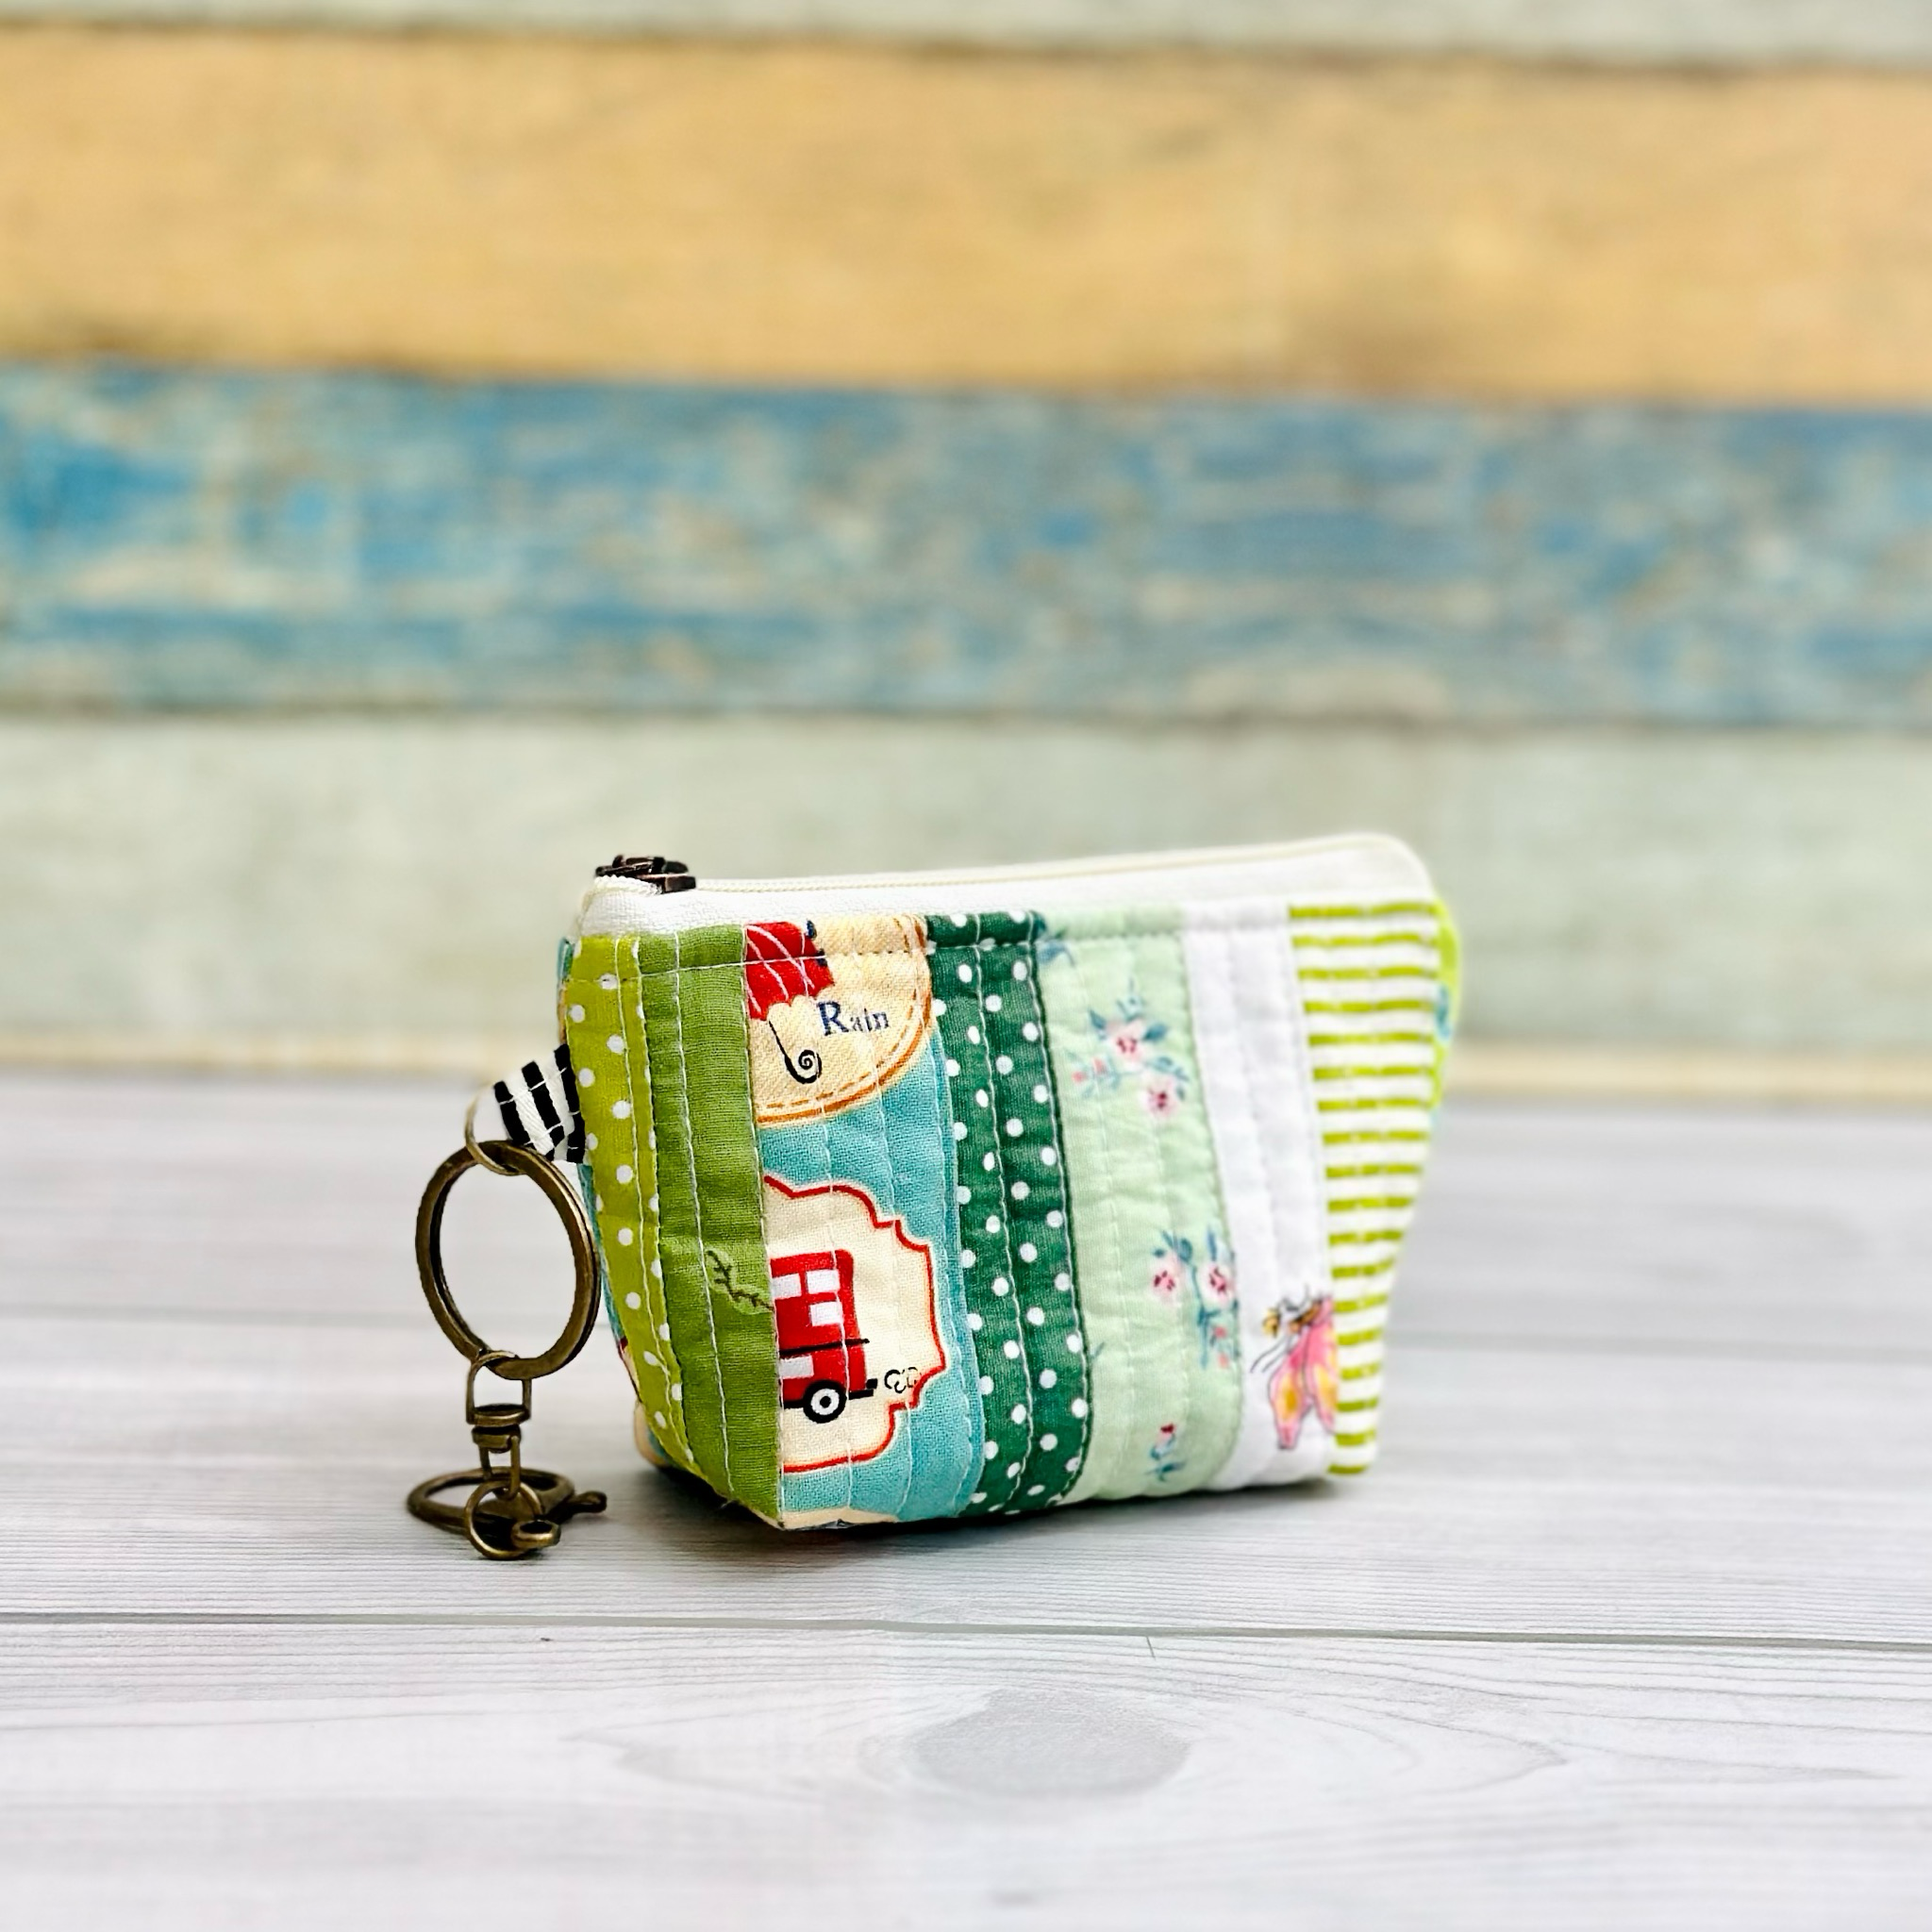
I made 3 sets so far and all of them are available in my Etsy shops. While making the bigger boxy bags are easier, but I enjoyed making the small ones more, the smaller ones bring a delightful sense of accomplishment!

These boxy bags are very handy. The spacious size is literally great for any storage like make up, crochet or knitting projects, to gym bag. I gifted my sister one a few years ago and she used it to keep spare clothes whenever she went out of town on work. 

The size is pretty generous:

Large: 9" W x 4.5 " H x 5"D
Medium: 7" W x 4" H x 4" D
Small: 5" W x 3.5" H x 3.5" D

Here are the sets that are now available in my Etsy Shop

Strawberry Boxy Pouches


Quirky Moustache Boxy Bags

Pineapple Boxy Bags


And now sneak peek to my personal project! The embroidery journal. I am finishing April right now but here's what January and February look like. My plan is to work on it in the evening before bed time and during weekends, but that's not always happening. So now, the progress is a bit slow! I keep adding icons and when I get time and mood I will sit and embroider. 


Last month I went to Singapore again to help the son with the move. He's completed his international study exchange program in SMU Singapore. During video call, it looked like we could easily fit them into just two suitcases, but it turned out we had to fill in 2 small suitcases plus backpacks! With the new travel restriction regarding hand luggage or carry on, somehow we manage to "not be caught" carrying more that the allowed weight on Singapore-Kolkata flight, but while boarding from Kolkata, his carry-on was taken to be checked in. But without additional charges! I guess now I have to learn to travel light! 

fabrics
My fabrics from SMH

The view at Vivo Mall


It was a short trip, but I managed to go to SMH for a few minutes and bought very few fabrics! The rest of the trip was just packing and having fancy lunch and coffee and strolling around Bugis street. This time, my legs and back did not give trouble. I guess, the protein diet and weight exercise that I've been doing helps and of course the glucosamine! Welcome to menopause life!! 


So more or less that what has been going on in my life. Another thing, I try to start journaling on my iPad. I realized my hand writing is so bad! We are so used to tapping on phone/iPad or typing on keyboards. I mean I always send hand written note to my buyers, but it's a short note. When I have to write longer, it's getting worse and worse haha. So now I really enjoyed writing on my iPad Notes. Nothing aesthetic right now, just simple one writing my fave quotes, or song I listened to, or how I feel and stuff.  By the way those aesthetic notes like on YT takes a long time to set up. With digital journal, I can easily copy paste photos or quotes or song. So it's been fun so far!  

That's all for today, thank you for stopping by and read my blog. I hope you enjoy your visit :)


Have a nice day,

Elvira


Linking up to these wonderful BLOGS

DIY Labels and a lot of quilted bags

Quilted coin purse


Hello,

Guess what? I finally made DIY fabric labels! Yes, using my the new printer and the iron on heat transfer paper. The paper is actually vinyl. So once you have your design in place, all you have to do is print it on your Inkjet printer, peel off the vinyl and iron it on to the fabric! It's such a quick process. The paper is available for laser printer also, but the result is not as good as inkjet. What's more, you can even draw on the vinyl - maybe using fabric pens. It's fun project. I bought the paper from Amazon (not affiliated link). 
I put a  short tutorial on my YOUTUBE channel
On the video I iron the labels onto fabrics. I also iron it directly on the wallets for personalization, like in this post


DIY handmade labels


I love how I can customized the labels according to my liking (mood).  And of course I have to start using the labels! I have many prepped pouches in my WIP bins, so that would be great projects to utilize the labels. It's fun because I can use the color that match the fabrics. Maybe next time I will make labels with colored background! 


Quilted Coin Purses


For the small makeup bags and pencil pouches, I made folded labels. It's 1" x 2" labels but it was a little too big. Next time, I will make 1" x 1.5". I wanted folded labels for a long time but could not find vendors who can do for a small quantity.  I guess, good things come to those who wait is true!! 


block print makeup bags
Block Print Small Makeup Bags

quilted pencil bags
Quilted Pencil Pouches


And, my happy mail this week is this book! I decided ( a little late) to join the embroidery journal bandwagon on my Sewing Circle whatsapp group. I am so bad at drawing icons and whatever I drew looked so weird! This book is a gem. It has so many designs! I will share my progress next time, for now let me catchup on the embroidery! I try to work on the embroidery before I am going to bed at night unless I have orders to finish. 


That's all for today, thank you so much for stopping by! 

Have a nice day,

Elvira


So many pouches

black and white zipper pouch
Trapeze Zipper Pouches

This week is all about pouches! Not your regular zipper pouches but the FUN nested pouches, the kind that you cannot make just one. At least for me! 

It's been a while since I make this trapeze zipper pouches. I usually make only one size, but this time I made more. 

First is the black and white set, it was a custom order and I decided to make 2 full set. The customer asked for only 3 sizes. For the whole 4 sets, I only need 1/3 yard of each exterior fabric, lining fabric, interfacing and batting. I used cotton batting here and of course zipper of your choice. I used metal zipper to give a rustic look. 


Trapeze Zipper Pouch 

Then I decided to make another set in this pretty leaf fabric. It's a digital cotton fabric I got from local shop a few months ago. I only bought 1 yard, maybe I will ask them if they still have a few yards in stock. I really love it. 


Trapeze Pouch 

DOWNLOAD THE PATTERN


I really like using these trapeze zipper pouches to store things like pencils, crochet hooks, reading glasses, and wrist watches.  I think they’re super versatile and you can do so much with them. As much as I love my bags, I've also made them as gifts for friends and family. If you're looking for a quick and easy sewing project, I highly recommend making these. The pattern includes 2 video tutorials for making quilted pouch and faux leather pouch


lipstick holder
Cute Lipstick Holder

eye glasses case
Specs Case

craft supplies bag
Extra Large Pouch 

crochet hook bag
Crochet Hook Holder


And look, I got new heat transfer label!! I've been looking for this kind of label. You can find all sorts of fancy labels, even in small quantities these days. Sometimes they’re expensive, but if you’re like me, then anything is better than nothing! I ordered some multicolor ones and I think I'll get black and white later on. They stick great, and all I have to do is iron them. A decade ago I have to order from Indonesia for my labels in a small quantity. I even tried making my own label like in HERE and HERE (this is like 15 years ago!!)


New Label!! What do you think? 


These handmade pouches are now available in my Etsy Shop and also my Webshop


Thank you so much for stopping by. 

Happy Sewing!

Elvira


Quilted Tote Bag


Quilted Bag


Hello,
It's a bit late for this post, but I just want to write it down here on the blog. Last month, I went to Singapore for a few days. As usual, before I travel, I always have this urge to make a new bag! 

I dug into my fabric stash and found this patchwork print cotton twill fabric I bought from Nippori. Now to decide what kind of bag is another dilemma. I was in two minds between this Batik Bag and the woollen bag (which is my fave). 


I decided to go with the tote bag like the woollen bag. It has gussets on the sides and bottom. I used light denim for the gusset. The colour matched perfectly with the fabric. For the main front and back panels, I just did straight-line quilting around 3/8" apart. And for the gusset, I did curvy lines, just eyeballed them as I go.  On the lining, I used light indigo colour block print cotton fabric that I have in my stash. I added all-purpose fusible woven interfacing to make the bag more structured. 

The tote bag turned out slightly slimmer than the woollen bag.  It still can hold quite a lot of stuff. I did not follow any pattern here, I just made up the bag measurements based on the fabric. I only have a fat quarter and after making the bag, only a few inches left, I am thinking of making a matching mini sling bag

I added a key ring on the front handle to hold a small keychain wallet. Although I can actually also use the side D-ring :D. Anyway, the keychain wallet has proven very handy to keep my hotel room key, transport card and small change during my stay in Singapore. 


Tote bag with keychain wallet


Here's what the inside look like. The bag has 2 slip pockets for my phone and my reading glasses. It also has a zipper pocket. As shown in the picture below, it can hold my safari passport wallet, the triple zippered bag and more. I sewed a long lanyard inside the bag to keep small pouches so that I could retrieve them quickly. 


Mini pouch to keep my spare camera battery & earphones 


I added D-rings on the sides so that I could attach a long strap and use it as a crossbody bag when I roamed around the city and just remove the strap when I am on the plane. I am quite happy with the size as it's not too big for me. 


That's all for today. Thank you so much for stopping by. 

Have a nice day!

Elvira


VIDEO TUTORIAL - making scrappy mini pouch


Hello,
Working with scraps is always satisfying. I made these mini pouches using scrap from my wallets and other bigger projects. These mini pouches are really quick and easy to make. They also make a great gift for your family and friends. 

Blue Patchwork Pouch


The finished size is about 5" x 3.5" (13 x 8.5 cm). Just perfect for carrying small items, like chapstick, lipstick, small change or even AirPods and a phone charger. 


Here's the material you need: 

Templates - 6" W x 4.5" H (15.5 W x 11.5 H CM)
The box corners - 1" x 1" (2.5 x 2.5 cm)
Fabric strips in various widths 1" ~ 1.5" wide (2.5 ~ 4 cm) X  5.5" long (14 cm ) 
(the strip should be enough to make 2 patchwork panels measure 7" x 5.5" (18 x 14 cm)
Lining Fabric ( cut 2)  : 6" W x 4.5" H (15.5 W x 11.5 H cm)
Lightweight interfacing ( cut 2) 7" x 5.5" (18 x 14 cm)
Scrap Batting ( cut 2) 
All-purpose zipper #3 - 6" long  (you can use scrap zipper) 
0.5" D-ring 
D-ring tab - 2" x 2" (5 x 5 cm)
Keyring (optional)


Pink Patchwork Pouch


Green Patchwork Pouch


If you have many favourite scraps, this could be just the perfect project. Quick turnaround and satisfying project to make. 
Do let me know in the comment if you have any questions, I'll be glad to help. 


Resources: 


Thank you for stopping by today!

Happy Sewing!

Elvira

Scrappy Patchwork Pouch


Another scrappy patchwork but this time it's a flat pouch!! I made few quilt as you go pouch few weeks ago from the scrap bag I keep near my sewing machine. The bag is overflowing with my recent scraps now and waiting to be sorted out. 


I took out a bunch and started playing with it for fun. I made 4 scrappy blocks and each is around 5" squares. And since I got new faux leather sheets, I decided to try to combine it. 


I use cotton batting, a scrap batting from my flying geese quilt and quilt it around 1/4" apart. I really love the effect of dense quilting on the pouch. I used high grade faux leather here. The color is almost salmon pink, a bit darker.


I added small slip pocket inside. I love the cute bear print lining. I found it in my stash! So glad to finally use it. 


I added this pretty pouch in the SHOP in case you want it ^^. The pouch dimension is 8.5" W x 5.5" H.

Working with patchwork is really fun, especially scrappy one. If you have orphan block lying around and want to try your hand on making patchwork bag, you might want to try THIS PATTERN.

Thank you for stopping by!

Happy Sewing,

- Elvira - 

****


Scrappy Patchwork Zipper Bag

Hello,

Patchwork Zipper Pouch


Autumn is here, though we don't have the colorful leaves but the weather is very pleasant. I made few stuff last week, aside from few custom orders. Well, sometimes we have to make time for fun sewing, right?


One was this quilted zipper pouch which I made from scraps. I bought the scraps from Indonesia and the scraps are quite small, around 6" x 18" and some of them are uneven cuts. I cut few of them into 2.5" squares (my fave size) and choosing few dark, medium and light value from the squares. 

Work in Progress

I really love working with small scraps of fabrics and I promised myself that I will make more scrappy projects for myself and also to share with the world :D
I used fun apple print cotton fabric for the lining. It really brighten up the pouch. 


I was going to do the regular zipper top closure, but I want something to zest it up a bit. I have many bias binding from making passport wallets, zipper with binding is the obvious choice! There are 2 ways of attaching the binding that I did. The one like in THIS pouch or THIS one where I attach the binding strip to the main fabric before attaching the zipper.  On this pouch though,  I sewed the zipper first then attach the binding with machine on one side and then finish it with hand sewing. Insha Allah I will make a tutorial when I am working on the next one. 


I did simple diagonal quilting here with the help of  washi tape! Well, I usually just eyeball it though :D. On the other side, I used floral print and quilt it in the same manner. And if you're wondering about the tag which I attached on the side, it was not intentional. The fact is I forgot to attach D ring and had to make an improvisation here. 


 Please let me know what you think in the comment below. Thank you for spending time reading my post, I hope I can inspire you in a small way ^_^.

Happy Sewing,
Elvira


Latest Fabrics

Latest Video