Powered by Blogger.
Showing posts with label 2017 quilting. Show all posts

From Bundle to Quilt

India
Hello,

I hope you had a wonderful weekend. On Saturday, my boys had a music competition in their school. It's a rock band competition. Both the boys performed with their own group and too bad parents were not allowed to see. So I had to rely on their information. The younger one was busy practicing with his friend for the last few days before the D-Day. He played guitar and just started to learn for the last few months. When I showed my mom  his practice video, she asked: "what song is that?" LOL.
The boys also got new pets - a pair of rabbits- my BIL brought back from the village. They were excited but I hope this is a short-term thing, though they are really cute.

And from my sewing room, I finally finished this mini quilt. The quilt sandwich was done one year ago or so. I meant to do hand quilting, but I used the wrong batting. I did few diagonal lines of hand quilting, but because the batting is thick and uneven cotton, it was too tough.
After chatting with Mbak Belly - my quilting friend, I decided to just go ahead and finish it by machine. After all, finish is always better than perfect, right?

Indian Quilt

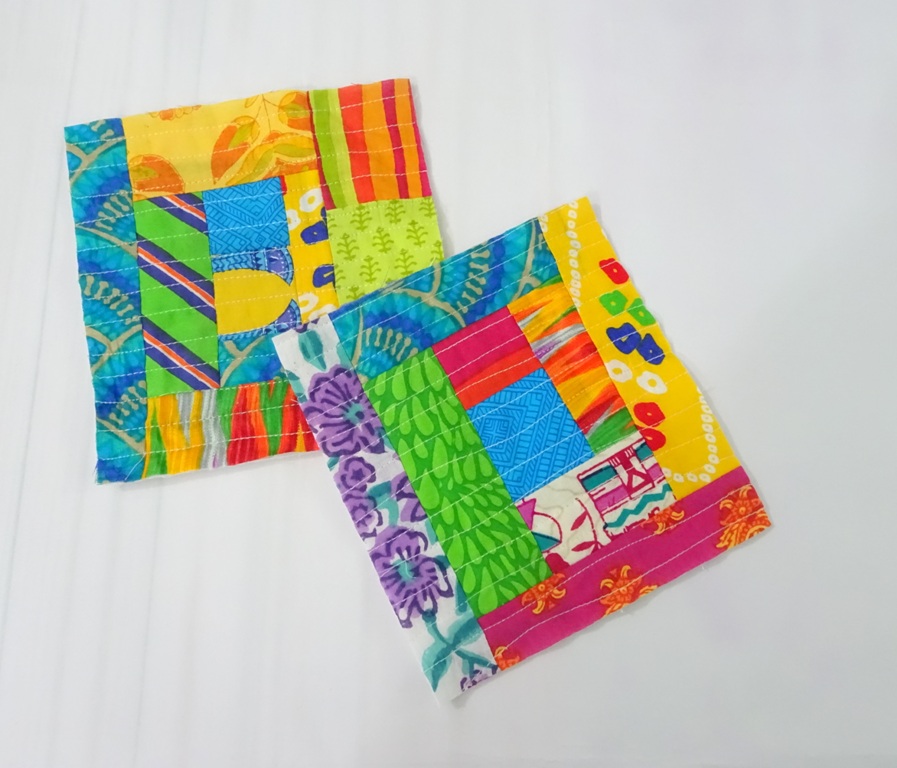
I used Indian fabric for this quilt. IMHO, Indian fabric has gorgeous colors and prints that even a simple quilt will look attractive.

This quilt size is around 34' x 34" square. I quilted using straight line quilting 3/8" apart. I just kind of eyeballed it. I really love a dense line quilting. It sort of pop the quilt up easily.

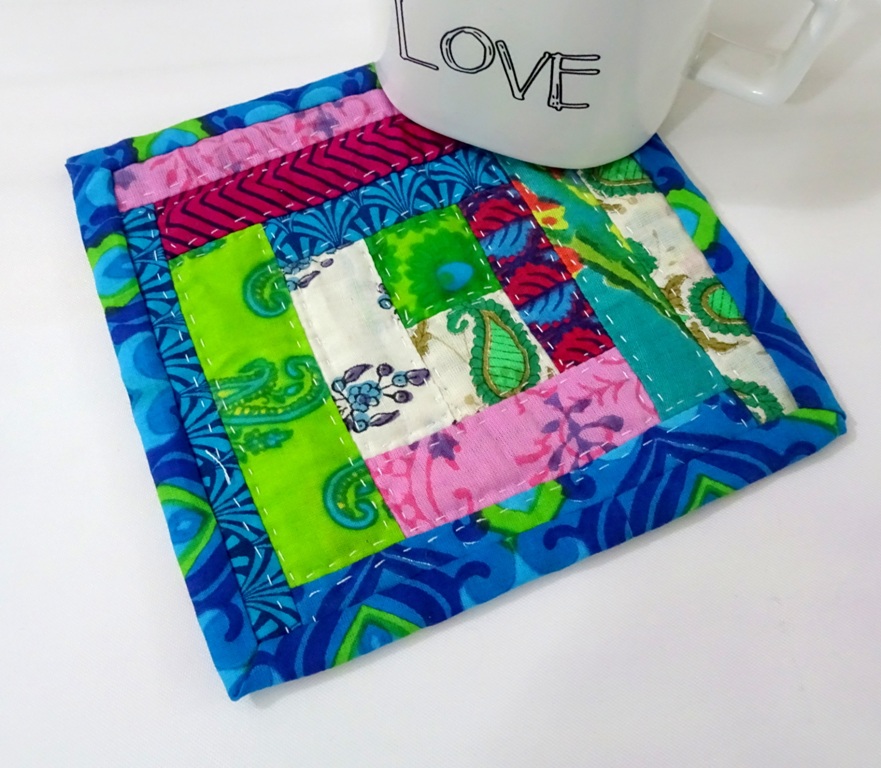
Straight line quilting on my Usha Stitch Queen

Don't you love the backing? :D

 Many Indian quilters hesitate to use Indian mulmul fabric, like the one I use here. They are lightweight but have the coolest color shade and prints. The trick is to always starch it. Normally I will prewash the fabrics and dip in a starch solution water. Just like my MIL did with her sarees. That will give just enough stiffness. 

After cutting and after each piecing, whenever I iron the seam, I spray a little bit starch too. You can buy spray starch or make your own solution using starch powder. Nowadays we even get liquid starch! 


After finishing this quilt, I want to make a bigger version. May not be the same design but using the Indian Fabrics. Since I love Indian Kantha Quilt, I thought making my own quilt will be fun. Let me. If the batting is right I might do the hand quilting too. 


As usual, when I am not sure what binding to use, I always use black and white! The binding fabric, I got from Namrata. It was a diagonally print stripe fabric. Simply love it!! Just cross cut it and you get a bias-look binding!!

here are the rabbits
So, what are you working on this week? Whatever that is, I hope you enjoy working on it! 

Happy Sewing,

Linky Party:

(Mini Tutorial) How I do my Foundation Piecing Quilted Pouch

Hello again,

I hope you all had a great weekend. Well, I did. Last Saturday the boys went to school picnic and would be back by evening. That means I have a whole day and afternoon free. Woohoo!

I was working on one custom order of mini sling bag, but my mind kept wandering to the bag under my computer table. The Pandora bag (not box) that hold my  Quilted Bag Kit from my bestie, Winda. She gave it to me 2 years ago when we met in Jakarta. The kit was a bag kit and she already started making 2 or 3 blocks. So I put away what I was working on and pulled out the bag, sorting out the pieces, interfacings, batting, etc. That was on Friday evening. The next day, after the boys were out of the house and a quick housework,  I started piecing the blocks and here's my pouch. 


At first, I thought of making a tote bag after I saw this Instagram Post. Then decided to do less ambitious one first.

Here's what I learned during the weekends. 

Many blogs wrote about using Freezer Paper for foundation piecing, which is not available here in North East India (or even India for that matter). The kit (it's Japanese Craft Kit) used a fusible stabilizer which is a thicker version of what we called "pasting" in here.  That is a thin lightweight nonwoven fusible interfacing. So I tried using our own desi interfacing and it worked like a charm. Yay! I remake the pattern on my computer based on the original size and print it on the interfacing. I cut the interfacing slightly smaller than the A4 size paper, fuse it lightly on the paper and run it through the printer, et voila! No more tracing pattern one by one !! (it's the same method I used for this DIY Printed Label)


 I didn't really follow the pattern instructions. What I did as cutting a strip of fabrics that will be used and do it like quilt as you go method. 
First, lay the 1st piece of fabrics on the glue side of the interfacing, right sigh up. 


Then place Fabric No. 2 on top of fabric No.1 right side together matching the seam. Make sure that when you flip the fabric (no.2), it will cover the triangle no. 2 plus around 1/4" seam allowance. 


Flip it to the reverse side, pin and sew on the line 

Like this


Now open fabric no. 2 away from the seam and finger press. 

Trim fabric No. 2 so that it has 1/4" seam allowance. 

Continue in the same manner until you cover the template. Don't be discouraged when it looks ugly ^v^.


Because after you trim the excess fabrics you will get this pretty little blocks.

Reverse Side After trimming
Aren't they cute?
Front View

I almost proud of my self (well, I do actually) to be able to complete this. Paper Piecing is something that I always feel it's difficult and a lot of work. Especially if I have to trace the pattern one by one. 
After an hour here what I got!

Blocks size : 3 1/4" x 3 1/4" after trimming

After lunch and a quick nap, I started working on the pouch. I decided to do hand quilting. Hand quilting is one thing that I always want to do. I realized with the right batting, hand quilting is so easy to do. And if you have your fave Korean drama on, it's the better. It's like killing 2 birds with one stone. LOL. 

Hand Quilting with Gutterman Cotton Thread
I didn't tear off the interfacing since I am making a pouch and I love a slightly structured pouch, so the interfacing will work out great. I just needed to add the batting. 
Front Side 
I used Sevenberry fabric for the back of the pouch. Isn't that lovely? I picked up the fabric during my visit to Indonesia last year. 


Sometimes, we have to face our fears and just do it. Sometimes things look difficult and complicated until you actually do it.

So, what are you making this week? 

Until then,

Happy Sewing, 

Linky Party:


Tutorial Reversible Quilted Trivet or Coaster

Hello,


I'm still in scrap buster mode. Now, let's make Reversible Trivets or coaster. It's really easy - mind numbing project. This is the kind of project that lifts up your spirit or gets your sewing mojo back.

Alright, here's what you need:
- Fabrics scraps of various sizes and colors. 
- Batting scraps - I am using flannel in this tutorial. 

First, you need to decide the size. I normally go with the whatever size of the batting scraps. In this project, the batting is roughly 6.5" x 7". 

Now grab 2 small pieces of fabrics and put them RIGHT SIDE TOGETHER in the middle of your batting piece. Sew with 1/4" seam allowance. You can go with 1/2" or 3/8 seam allowance. It doesn't really matter. 


Now flip them open and finger press. I trimmed the pink stripe fabric a little bit. For a small project, the narrower the fabric strip the better. At least for me.


Now take another strip of fabric and put them Right Side Together along with the longer side of the previous unit. Sew down with 1/4" seam allowance. 


Flip it open and finger press. 


Repeat the process until the batting area is covered. Once done, start quilting the panel. I love doing line quilting. You can quilt it in whatever design you like. Don't worry even if it's not straight. It's "your quilt, your rule" kind of project. 


Once it's done, trim the panel to the desired size. In this tutorial, I trimmed the panel into 5.5" x 5.5" roughly. It doesn't have to be square. 

Repeat the whole process with the other piece of batting and now you have 2 bright and beautiful quilted fabrics ready to make into something F U N. 


If you want to make a pot holder, you can add another piece of batting in between the two quilted panels. 


for trivet or coaster, it's not necessary. Put the quilted panels right side together, and sew all around, leaving 2" gap for turning. 


Trim the edges by cutting the corners diagonally. Be careful not to cut into the stitches. 


Now turn the coaster inside out. Close the gap by hand sewing the opening or apply fabric glue. 

Voile, your one of a kind coaster is done and you can admire it. 


Actually, whenever I made something from those small scraps I feel like I saved the world. LOL. I wish I could sew clothes like Zero Waste Daniel . 


Here is another one I did. This one was hand quilted and hand sewn the binding. 


You can make many things with those tiny scraps. 

Now go and make few from your scraps. Tag me on Facebook or Instagram if you made something from this tutorial.

And if you ever need fabric scraps, you are most welcome to join the CLUB or check the CHEZVIES SHOP

Thank you for stopping by.

Until then,

Happy Sewing

**************************************

Indian Fabric Bundles


Patchwork Pouch

Hello,

Never threw out even the smallest piece of your favorite fabrics! You can turn them into this pretty patchwork pouch


I was organizing my small scraps last Saturday and as a bonus, I decided to make this pouch. Actually I started out with card holder in mind. I even took out Suzuko Koseki book for guidance. 

I decided to do quilt as you go method since some of the scraps are quite tiny. And when the panel is ready, I was thinking, it will be better to make pouch! 
So here is the QAYG pouch with 2 different sides. One side is sober color and a bit brighter on the other side. 


I love zipper with binding, I made once and have not attempted again. So, this time I decided to do just that. Zipper with binding! and I love how it turned out.


I added faux leather tassle too. It's uber cute!! Each piece of fabrics in this pouch has a memory of it's own. Some of them are from the leftover binding, some are from the corner cuts of a bag, etc. It is  a special pouch! If you want to purchase the pouch, it's available HERE

I know I'll be making more, but there are so many other things I want to sew. My list keep growing. 

Thank you for stopping by!

Until then,

Happy Sewing


Latest Video