I made this patchwork batik wallet a few months ago for my Kawandi guru. She wanted Rosie Wallet after seeing these patchwork wallets. After series of discussion, we decided to use Bali batik. So excited!
She wanted more space for cards, so I added more more slots from the original pattern and increase the height by 1 inch to accommodate it.
The wallet is pretty small, so deciding the patchwork style took longer than I expected. I tried different style of log cabin blocks but decided to settled for this on-point log cabin using 1" wide strips. I really love how the blocks turned out!
I did not use interfacing in this wallet since the fabric is thick enough but I used needle punch polyester batting and hand quilting it all around. The jewelry plyers really helps pulling the needle when hand quilting. I kind of liking it as I can stab a few stitches and pull it without any difficulties! But frankly, I really need to catch up with my weight training workout this year!
Rosie Wallet is beginner's wallet that is easy to put together. I have full step-by-step video tutorial HERE. I really enjoyed the process of making this wallet! Here's more photos of the finished wallet.
The wallet is already received with love :). I'm so grateful for the support of fellow crafters here in India. It's really a great honor for me to make something for other makers!
That's all for today. Thank you so much for stopping by!
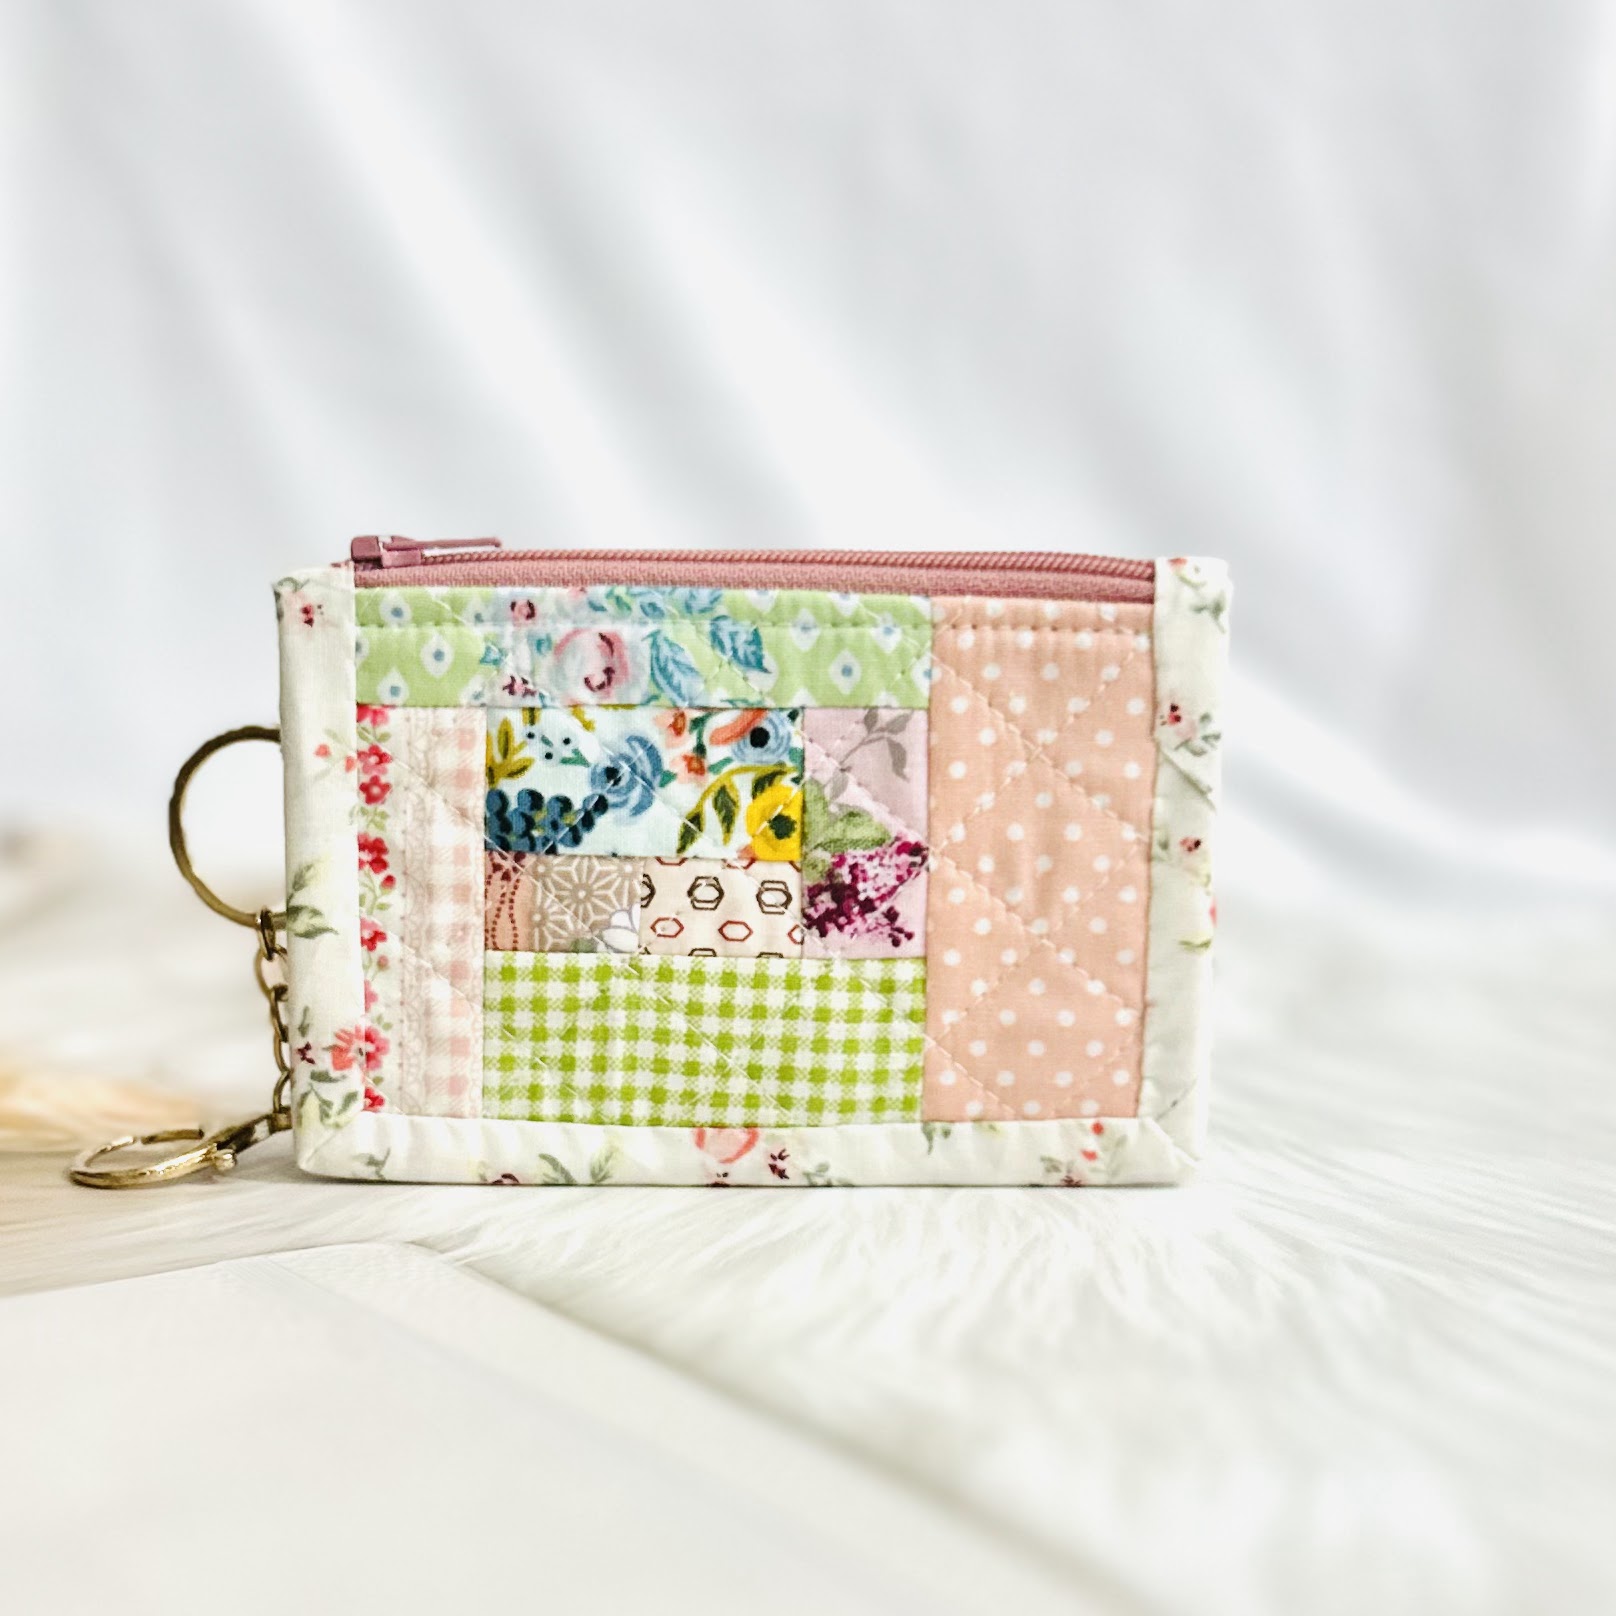
Last week I had a quite productive week. After a long time, I made a small batch of patchwork wallets. This time I used the Rosie Wallet pattern. Since the wallet is pretty small (the finished size is 4" x 5"), I use skinny strips of fabric. I cut the fabrics between 1" to 1.5" wide.
It started with a message on my Etsy shop that she wanted pink and green patchwork Rosie Wallets. She said she loves floral prints. So I started working on the order making the patchwork panels first. And of course, I cannot stop making just one wallet, right?
Making patchwork wallets is always fun. From sorting out the scrap fabrics to choosing the best combination and binding.
I happen to have pink floral scrap bundles that I bought from Indonesia. So from those, I choose a few for the card slots.
This time I used polycotton batting 180 gsm which is pretty sturdy so I did not use lightweight interfacing on the patchwork panels like the previous patchwork wallets. If using low-loft cotton batting, I'd suggest using lightweight interfacing before quilting it.
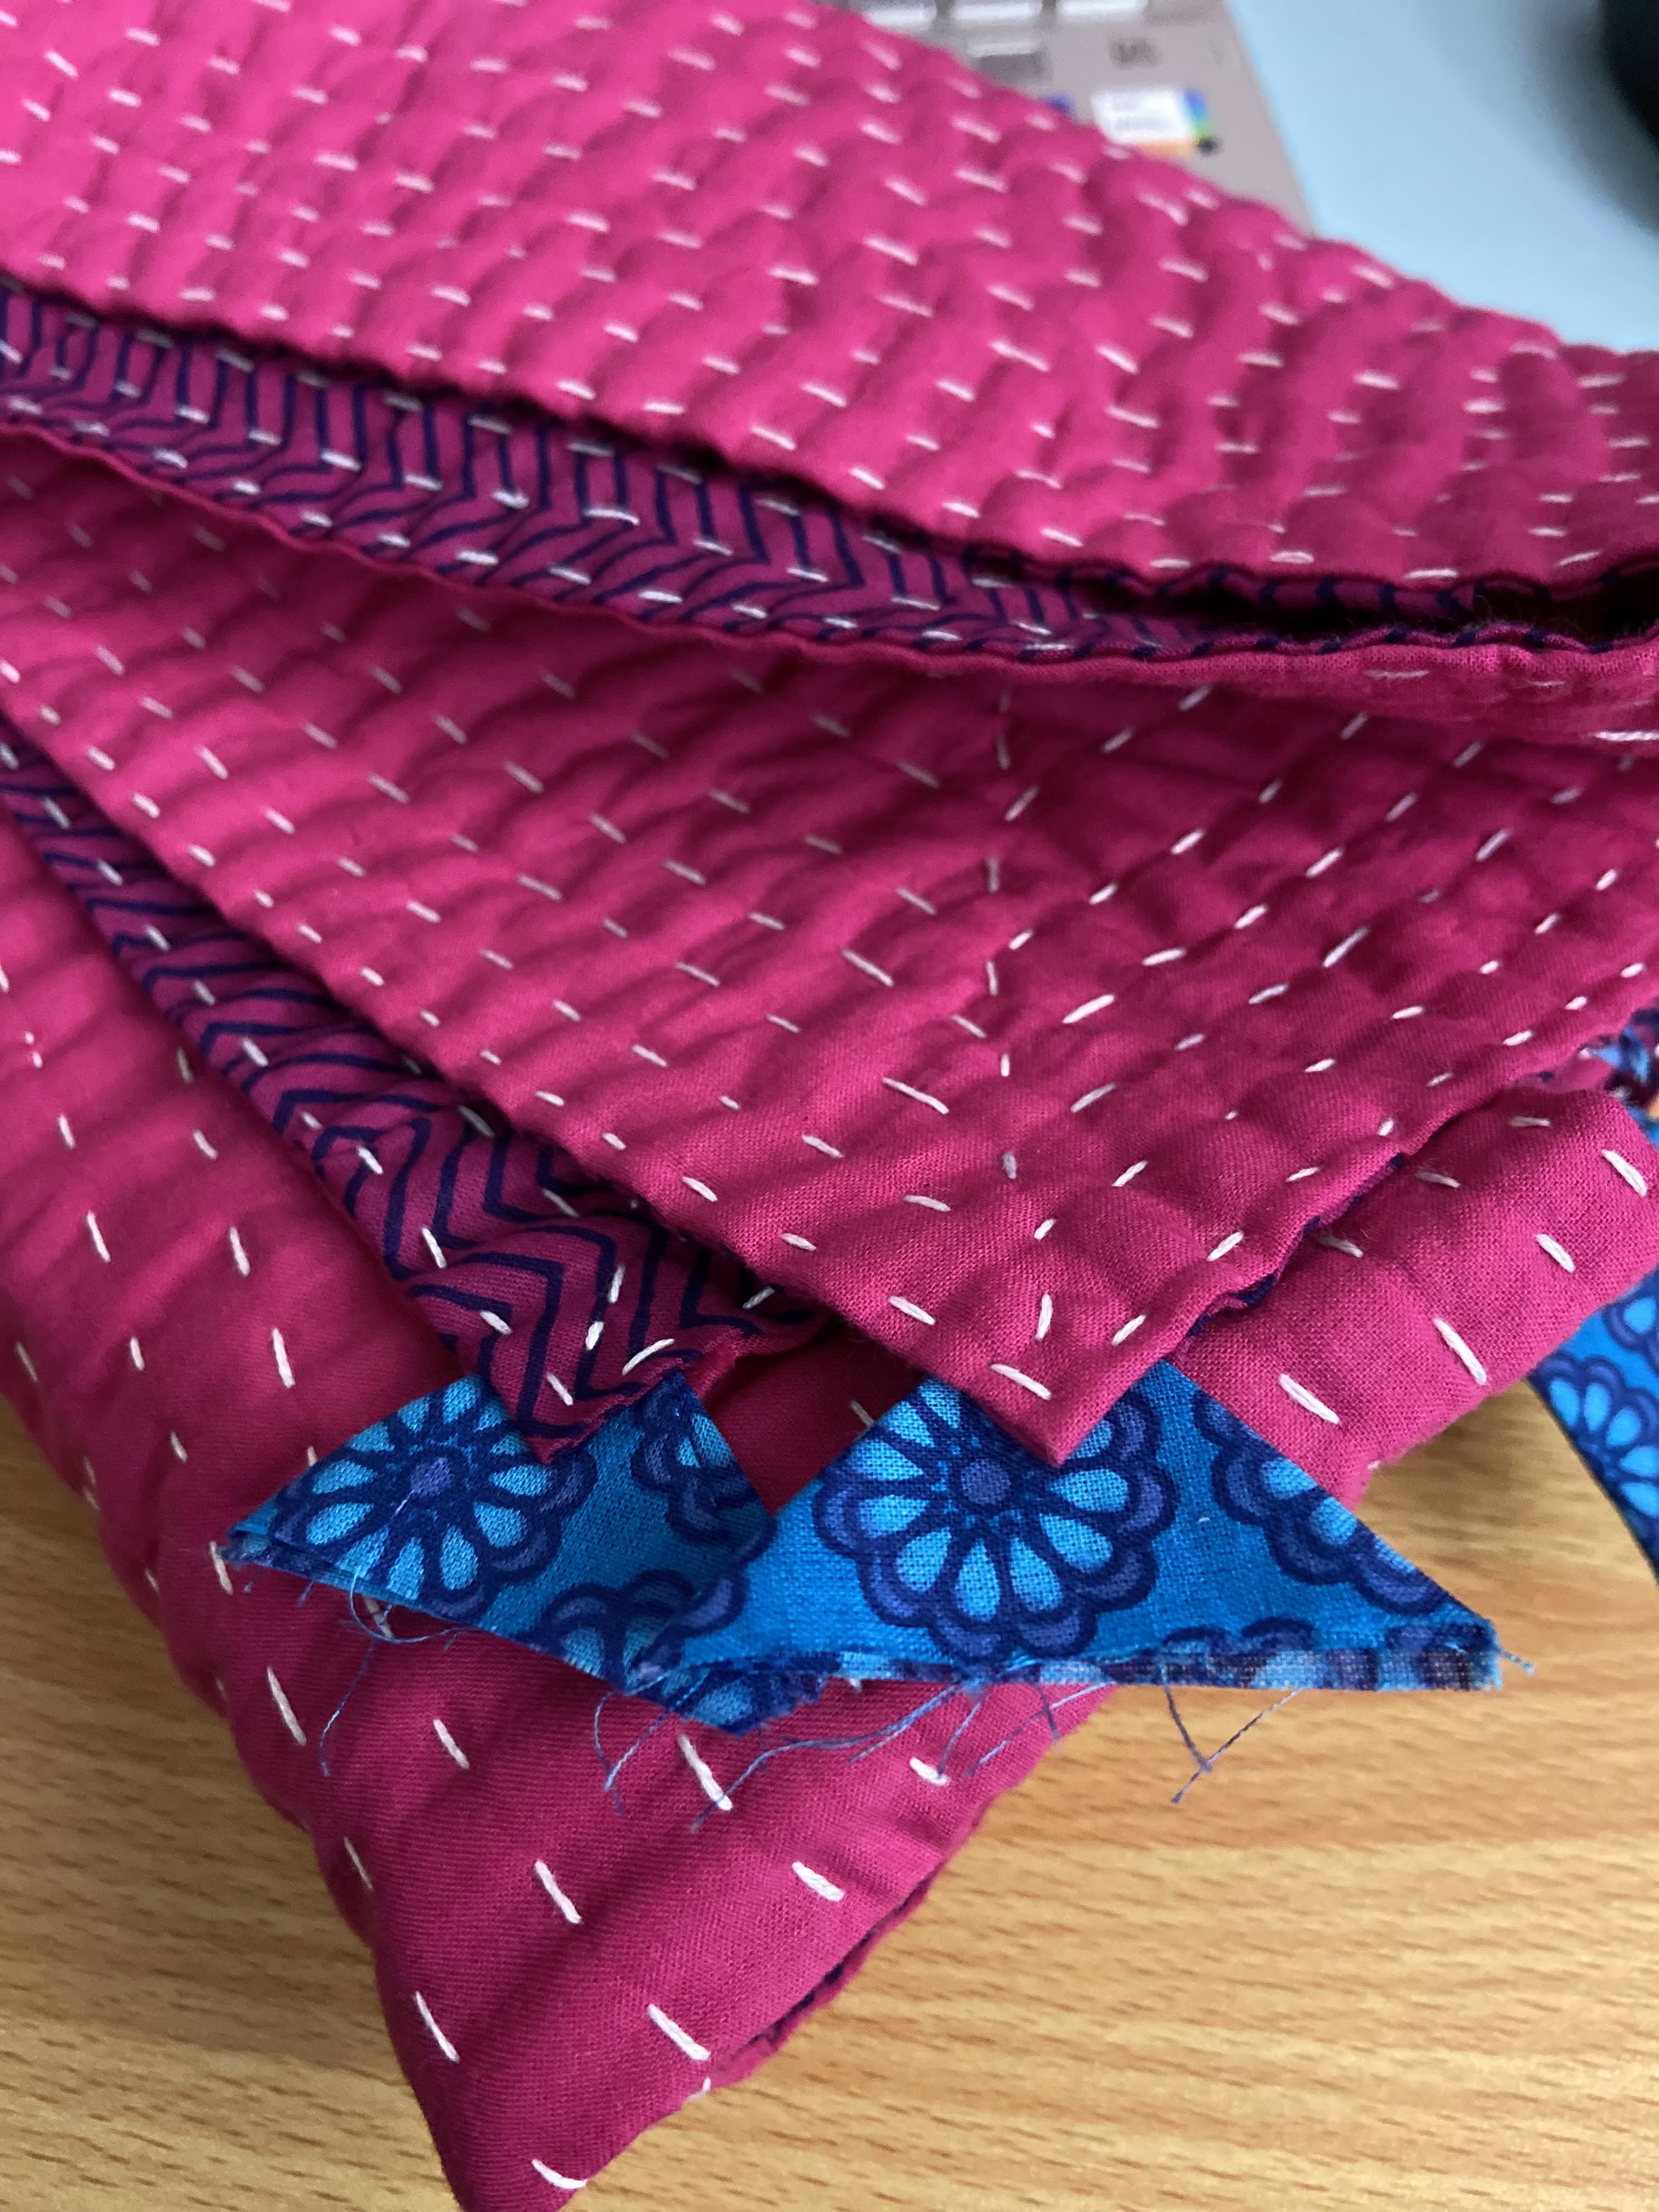
This time, I also did hand quilting in 2 wallets and in one wallet I did machine quilting. For the hand quilting I used pearl cotton thread no 8 and I really love how it turned out.
Deciding which binding to use is also another fun part. My go-to choice for binding is either polka dots or stripes. But this time, I decided to try floral binding too and I think it's turned out pretty great.
Rosie wallet is a versatile wallet. I carry it often as it fits perfectly in my small crossbody bag. It can hold quite a few cards (6-10 cards) and the 2-in-1 zipper pocket is handy to keep small changes or items. As we mostly use mobile payment, for me personally carrying a small wallet is very convenient.
I plan to make more patchwork wallets in the future. I need to seriously use my overwhelming scraps and of course my stash! I have a few ideas in my head, so hopefully I'll be able to share another Scrapbuster video tutorial soon!.
It's been a month since my last blog post. In the past few weeks, I've been having fun making doll quilts and even trying to make a few accessories. I always love making small quilts and wondering what else I can use them besides the usual mug rugs or coasters. I started reading blogs and watching videos on doll quilt making. And decided to try it.
I started making mini patchwork pillows from scrap. Those are 1:12 scale pillows. So much fun to make. The best part is I can use my leftover batting for the insert.
I looked up on YouTube for a DIY doll bed. OMG, there are just so many of them with different ideas, from using ice cream sticks to using cardboard and twigs.
I tried making it from cardboard too but not as good as that on YouTube haha! Instead of painting or using fabric to cover the cardboard, I used leftover wallpaper. It did not stick properly tho! I hate working with glue. I try to avoid as much as I can. The bed was OK but it's not good as a photo prop I think.
DIY Doll Bed from Cardboard
Next, I tried making the armchair following this tutorial. I used an Amazon box and cut them into round shapes. I stacked around 5 pieces of cardboard and then added batting on the top before covering it with fabric. For the sides of the chair, I use double-fold binding to cover it. For the chair back, I used cardboard from the toilet tissue roll! Glueing the fabric is a bit tricky but I managed pretty OK. For the chair legs, I used the satay sticks! I am thinking of getting a thicker stick but have not found any. For the time being, this will do!
I made 2 more quilts in Blue. These are 12x12 inches and also come with 2 pillows. For the first one, I made a simple 8-patch using 2.5" squares and then added blue stripe borders. I did hand quilting here using cotton thread and it turned out very soft!
And for the second one, it's just a very simple quilt using 2 pieces of fabric. I used 2 FQ fabrics from block print fabrics bundle.
For the front and batting, I cut 12" x 12" and then cut 16" x 16" for the backing fabric. The faux binding is done by machine and then I hand quilt the rest. It's great experimenting. For the faux binding, depends on the finished width you desire, and then multiply that by 4. So if the quilt size is 12x12 inches and you want 1" wide binding, it means 12" + 4" = 16". So you need to cut the backing 16" x 16".
If you're wondering about the doll bed, I got them from Amazon India (search for Laddu Gopal bed). It's a real wood and comes intact with the mattress so it's pretty heavy. The size is just perfect.
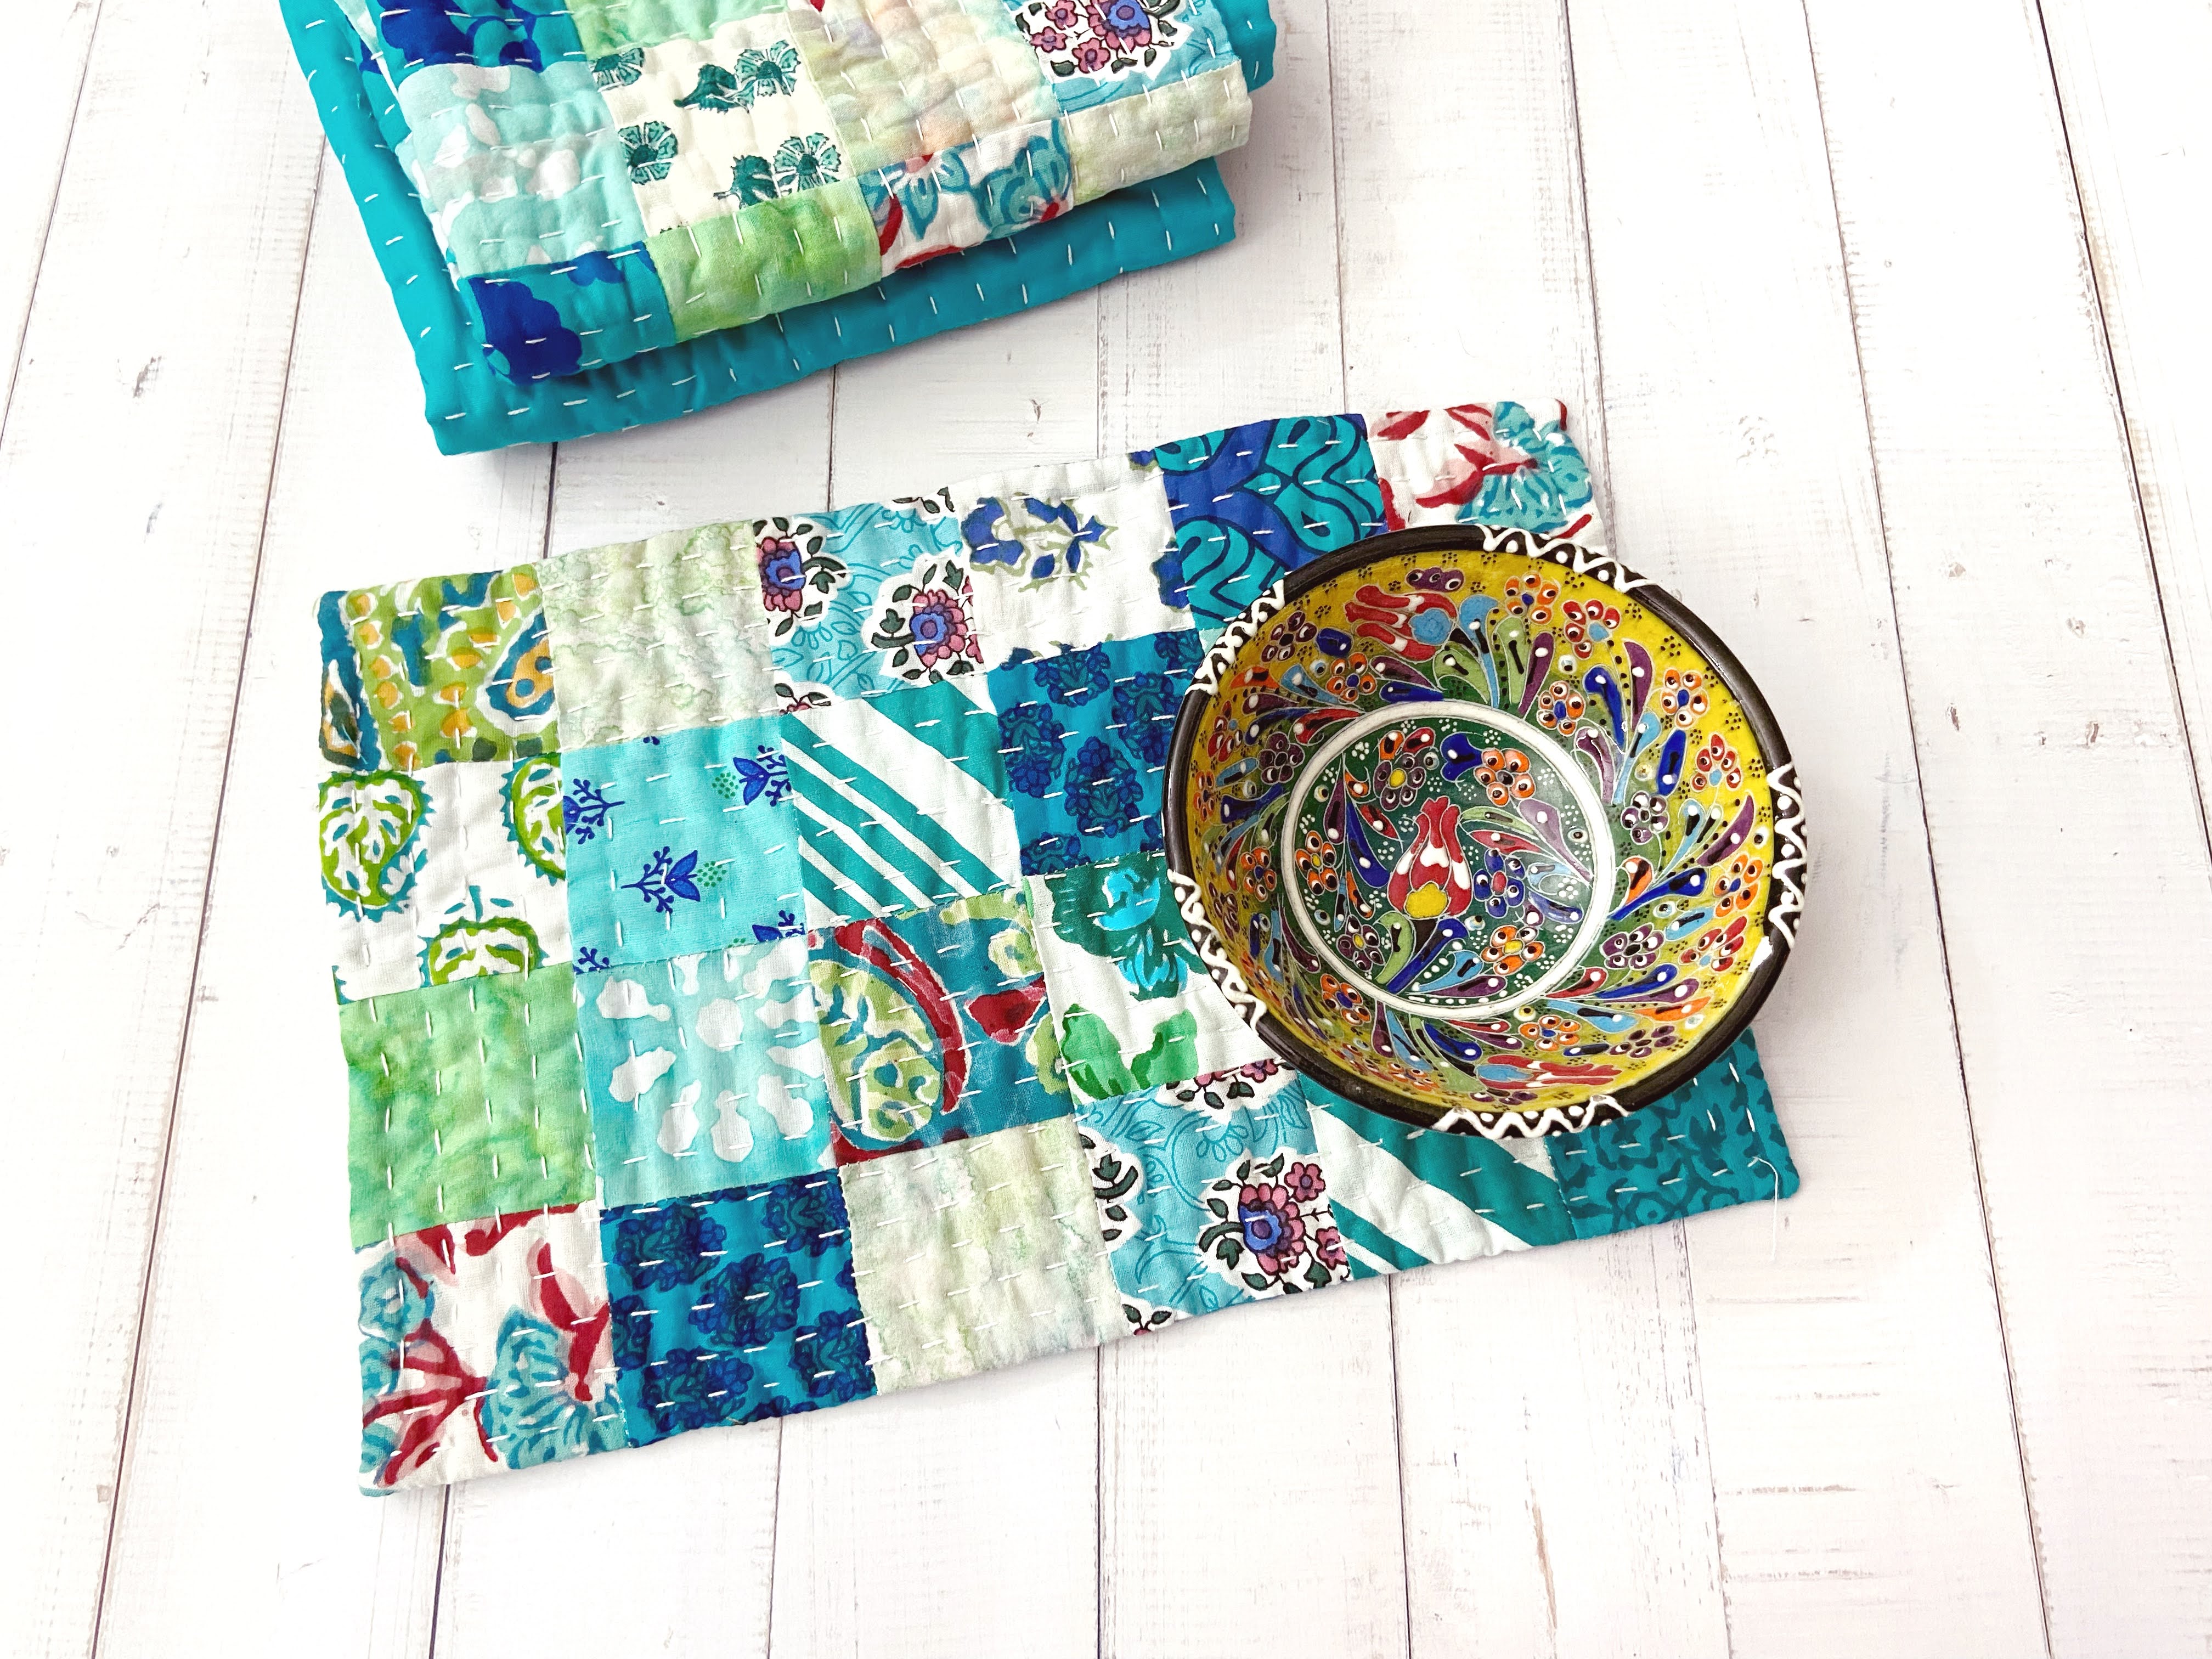
I made this teal mug rug a couple of weeks ago. Still use the green and teal scraps from my scrap buckets and I cut them into my fave square 2.5" x 2.5". The size is rather biggish - the finished size is 7.5" x 11.5". I think it will be great as a mug rug or mat for smaller tables, side tables, etc
This scrappy mug rug is very easy to make. All you need is assorted 2.5" scraps and you are good to go. And if you prefer you can always machine quilt it but I love to hand quilt it in the kawandi style. That is quilting from the outside edge first and moving inwards in a circular way. The effect on the reverse side (if using solid backing) is just beautiful. Plus with hand quilting, the quilt always turns out softer.
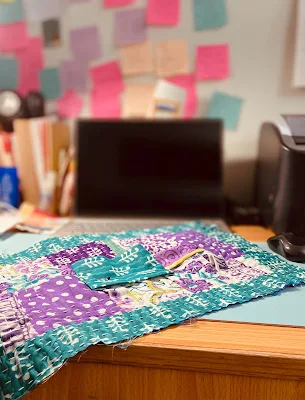
I made many small quilts that I quilted this way and here's one that I recently did. I keep a bunch of ready-to-quilt small items near my computer table and I can easily pick them up and quilt away as I am catching up on the Kdrama or Cdrama!
For the scrappy mug rug, I used Indian mul mul fabrics for the patchwork and poplin cotton for the back. I added a thin fleece batting, sometimes I used cotton batting too. I made placemats in the same color hues earlier.
Don't you love the effect of this big stitch quilting style on the back? This can easily become a reversible mug rug!
If you've been thinking to start learning about hand quilting, you may want to start with this kind of big stitch quilting and you don't have to start with a big quilt! I wrote and uploaded the video about what needle I used and the process in THIS POST
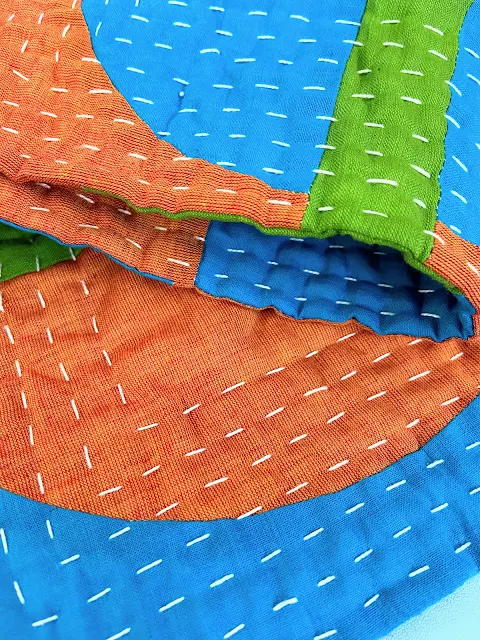
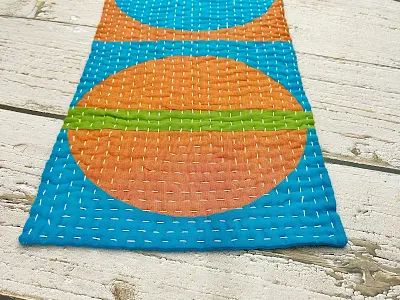
I started this skinny table runner a few months ago, but I only finish hand quilt it yesterday. Well, as usual, a lot of distractions along the way. The day before yesterday after I finished my wallet's orders I thought I'll start another Kawandi pillow but then I saw this runner and thought " let's get this done first!"
Still in my favorite design from Suzuko Koseki's book and quilted it in kawandi style. I want to make a bigger one but not sure if I can do the hand quilting. And I'd love to hand quilt it. For now, it will be on my bucket list. I will practice more now.
By the way, if you watch Margareth Fabrizio's video that I mentioned in the previous blog post, I saw that she was holding a small pillow when she was quilting and I also saw the Siddi ladies were doing the same. I thought maybe that will make my hand /palm less painful (I have a CTS problem). So I decided to make one and have been practicing when I was working on this table runner. And yes, my hand feels more comfortable. It takes a little time to get used to it but I liked it.
Now that is done, I can start the Kawandi Pillow that I want to start. Somehow doing Kawandi is relaxing and I can sit and just sew without worrying about anything else.
Ah, today I learned a new saying from one of the dramas "sometimes we have to walk slow, to let our body catch up with our soul". I did some googling and found this article by Beth Bruno "Be Still; Your Soul is Trying to Catch Up With You" on Medium. Here are a few lines that I can totally relate to:
"Sometimes life comes at us so fast and furious we have no time to sit with our souls and check-in." Beth Bruno
"Remember that your list will still be there tomorrow. And many of the things on it can wait. In fact, some things on that list don’t matter at all, when you really examine them. But your soul needs you. And you need it. Take time to reconnect as often as you can. You will be glad you did. - Beth Bruno"
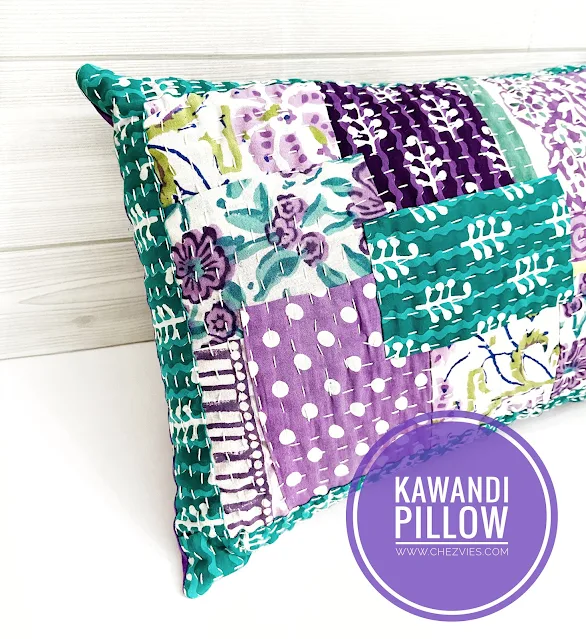
When the stars aligned, I can finish the Kawandi pillow in 2 days! LOL. I bought the lumbar pillow form sometimes in November and keep thinking to make a quilted pillow cover for it. So a few days ago, I was like why not make the kawandi pillow cover? So I took out these purple and emerald/teal scraps which I keep near my cutting table. As usual, many ideas played at the back of my mind, I thought I will just cut the scraps in 5" charm size and will just go along. But after I cut the charm pieces, I left with different sizes of leftovers and decided to use some of those too.
Handquilting and Catching up on my Kdrama
I documented the process in the videos below. In the first part, I talked about the thread and needles that I use. Hopefully will help those who are in India and wondering what materials to use and where to get them. Really you do not need much to start a kawandi quilt.
Materials:
The Kawandi Quilt Top should finish approximately at 12" x 18"
For the Kawandi you need assorted scraps of your choice.
Quilt Backing: 2 layers of cotton fabrics approx. 12.5" x 18.5", I cut bigger because it shrunk after the quilting is done.
The PILLOW backing has 2 parts:
The top part is 12" x 5.5"
The Bottom Part: 12" x 12"
All-purpose zipper #3 - 12" long or so.
Note: In the video, I cut the pillow backing longer but in a way it's good. Make sure the backing after putting the zipper is the same size as the top.
In the second part, I showed how to make the pillow. It's super-duper easy! The pillow closes with an exposed zipper in contrast color. I am so obsessed with this color combo!
I hope you find the tutorial helpful. If you have any questions, just leave a comment and I will be glad to help you.
The year 2021 is certainly a learning and experimenting year for me, I am looking forward to more learning adventures in 2022. And kawandi and kantha is definately on my top list to explore more.
Finally, I finished the Kawandi QAL! I said that I am not good at following QAL but this time I did it and I am pretty proud of myself. Even though the quilt is not big, but this is the first bigger quilt that I pieced and quilted by hand. The finished size is about 19" x 42".
If you're on Instagram, you can see all the progress I put up in my Instagram Stories. Especially when I do the motif. I really love the motif and upon seeing Brinda Ma'am's kawandi, I really want to learn more about making the motif.
I learn a lot of things while working on this Kawandi table runner.
1. Batting or no batting?
Well, if you following the Kawandi Quilt hashtag on Instagram, you can see the Kawandi are making a comeback in a big way this past year! Many that I saw are using batting and so I wanted to try. But the problem is I ended up with a bulky batting in the center as I am finishing it. I thought I should not have a problem as I've done many small quilts which I quilt the Kawandi Style, including this Batik quilt.
For this table runner, as it is done in the quilt as you go style, I found that the batting - or least the needle punched batting that I used, is stretched in the process. Which did not occur in the quilts that I made using pieced top. So, I carefully cut the batting and overlap it. This solves the problem!
So, my vote will be no batting! Also, working without batting like in the first Kawandi I did during the workshop is so much easier on my fingers. Also, it will be a perfect summer quilt!
2. Don't worry too much!
Brinda Ma'am keeps reminding us to let go. Let go of the urge to do perfectly matched colors, the even stitches, perfectly straight lines. The Kawandi is about embracing imperfections and being proud of them! In the end, your quilt will reflect your personality. Your mood while you're making the quilt, your state of mind. I did unpick lines of stitches in the beginning, as I go along, slowly I was able to accept that it is OK if the stitch length is not even, it is OK to reinforce the stitches even if it looks odd.
Imperfectly Perfect
Learning Kawandi, first, we must unlearn all about quilt making, be it the color theory, the matching seam, the quarter-inch seam, etc. Don't worry, it will turn out unique and beautiful!
In this table runner, I mostly use leftover fabrics from making fabric bundles in the shop and also, a few pieces from my kurtas' sleeves. During summer, I usually cut off the sleeves of my quarter or long sleeve kurtas and keep the cut pieces.
I recorded a video as I was working on this quilt for my own record as well as a reference. In the video, you will see how I bury the tread in different ways. Do check out the video and let me know if you have any questions. If you want to learn to make Kawandi Quilt, you can contact Brinda Ma'am via her Facebook Page.
Now, I have one small Kawandi WIP and thinking of starting a bigger one, maybe a single-size quilt. It's going to be a long-term project. I really enjoy doing the hand quilting and wonder why took me so long to try it.


