Powered by Blogger.
Showing posts with label patchwork pillow. Show all posts

Doll Quilts


Blue Doll Quilt


Hello,

It's been a month since my last blog post. In the past few weeks, I've been having fun making doll quilts and even trying to make a few accessories. I always love making small quilts and wondering what else I can use them besides the usual mug rugs or coasters. I started reading blogs and watching videos on doll quilt making. And decided to try it. 


Crochet doll with pillows

I started making mini patchwork pillows from scrap. Those are 1:12 scale pillows. So much fun to make. The best part is I can use my leftover batting for the insert

I looked up on YouTube for a DIY doll bed. OMG, there are just so many of them with different ideas, from using ice cream sticks to using cardboard and twigs. 

I tried making it from cardboard too but not as good as that on YouTube haha! Instead of painting or using fabric to cover the cardboard, I used leftover wallpaper. It did not stick properly tho! I hate working with glue. I try to avoid as much as I can. The bed was OK but it's not good as a photo prop I think. 


DIY Doll Bed from Cardboard


Next, I tried making the armchair following this tutorial. I used an Amazon box and cut them into round shapes. I stacked around 5 pieces of cardboard and then added batting on the top before covering it with fabric. For the sides of the chair, I use double-fold binding to cover it. For the chair back, I used cardboard from the toilet tissue roll! Glueing the fabric is a bit tricky but I managed pretty OK. For the chair legs, I used the satay sticks! I am thinking of getting a thicker stick but have not found any. For the time being, this will do! 


korean doll on a quilt
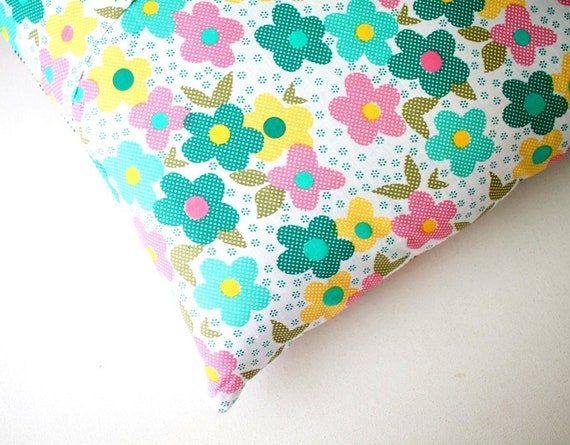
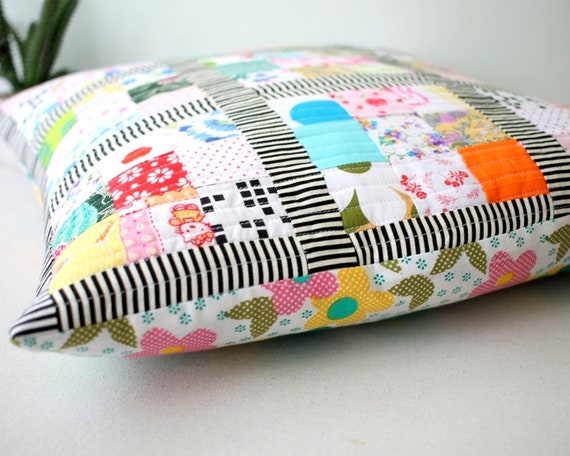
Pink Doll Quilt with Patchwork Pillow
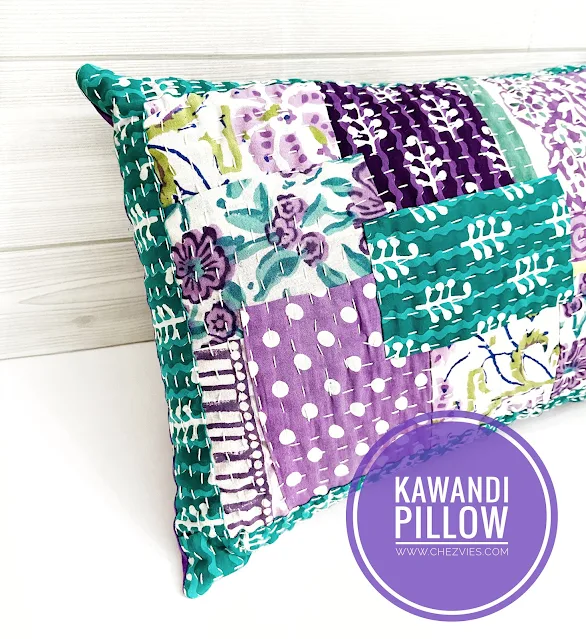
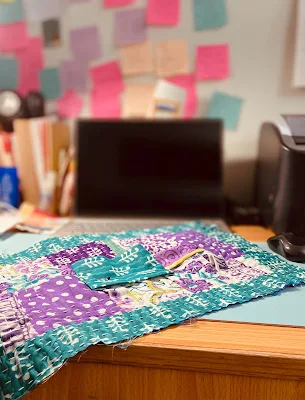


Kantha Doll Quilt 


I made 2 more quilts in Blue. These are 12x12 inches and also come with 2 pillows. For the first one, I made a simple 8-patch using 2.5" squares and then added blue stripe borders. I did hand quilting here using cotton thread and it turned out very soft! 


Blue Doll Quilt with 2 Pillows 


And for the second one, it's just a very simple quilt using 2 pieces of fabric. I used 2 FQ fabrics from block print fabrics  bundle.  

For the front and batting, I cut 12" x 12" and then cut 16" x 16" for the backing fabric. The faux binding is done by machine and then I hand quilt the rest. It's great experimenting. For the faux binding, depends on the finished width you desire, and then multiply that by 4. So if the quilt size is 12x12 inches and you want 1" wide binding, it means 12" + 4" = 16". So you need to cut the backing 16" x 16". 

If you're wondering about the doll bed, I got them from Amazon India (search for Laddu Gopal bed). It's a real wood and comes intact with the mattress so it's pretty heavy. The size is just perfect. 


Block Print Doll Quilt with Pillow


1:12 Scale Doll Pillows 

That's all for today. Thank you for stopping by, leave a comment or two if you happen to be here or have any questions. 


Happy Sewing, 

Elvira


Linking up to these wonderful BLOGS

Some quilting and sewing

mini quilt
Mini Quilts


Hello, how are you doing? I've been busy with many random things the past few weeks. I share this scrappy mini pillow on my Instagram a few weeks ago. I made it for fun and to test hand quilting using cotton thread which I got from the local shop.  The mini pillow is for wrist pillow when I am working on my computer. And I just had fun while taking photos. Hmm, I think it can be a doll pillow too. 


quilted pillow

I also finished a couple of wallet orders and face mask orders too. Thank you for always supporting handmade! I know there is a lot of more pretty stuff out there that is cheaper and prettier, so I am truly grateful when someone chooses to buy my handmade instead. It really means a lot. 

In the past 2 years, the e-commerce business has really boomed and the online market is flooded with all kinds of products. And of course, the competition is tougher too. It is a very challenging year but I believe that if we create with heart and sincerity, it will pay off. I always try to move forward at my own pace. Although sometimes, I got caught up in the 'rate race" of social media. I think we should not lose focus on our goals, things that make us happy. For me, to be able to create something and share my knowledge makes me happier. This reminded me of one quote from one drama I watched that goes

" you cannot just move forward and leave your heart behind".
 
This statement stuck with me for a few days, trying to make a sense of it. What do you think of the quote? 


Small wallet
Mini Zipper Wallet


Family Passport Wallet
Ikat Family Passport Holder


Singers face masks
Singing Face Masks


I started another Kawandi pillow too and this is the current state! I am still not able to get time to continues as I am currently working on my next pattern! I hope I will be able to release the pattern by end of next week. 

There are so many things  I want to learn and experiment with.  Well, I did a couple of experiments that were halfway done and stashed in my WIP box. I think I will just make a video and show you all what's on my WIP box one day. 


Kawandi Pillow
Kawandi Pillow WIP


I also went with my son for his IELTS tests last week. The place was near my fave shop, so I went there (after 2 years!)  and a pick up a couple of kurtas. I can't resist Indian print tunics! 

And when you saw the window with patterns that remind you of quilting lines, you must take a photo! Yup, that was me, taking a selfie with the window :)


looking out 


garden

The weather is pretty chilly and dry these past few days. My MIL's flowers are blooming beautifully this time. No, I can't grow plants. Somehow, they always die when I try to grow one. LOL. 

We also got a new baby calf yesterday.


Thank you for stopping by! Wherever you are, please take care and stay safe! 

Have a nice day,

Elvira

*******


Kawandi Lumbar Pillow - New Video


Kawandi Pillow Tutorial
Kawandi Pillow Cover


When the stars aligned, I can finish the Kawandi pillow in 2 days! LOL. I bought the lumbar pillow form sometimes in November  and keep thinking to make a quilted pillow cover for it. So a few days ago, I was like why not make the kawandi pillow cover? So I took out these purple and emerald/teal scraps which I keep near my cutting table. As usual, many ideas played at the back of my mind, I thought I will just cut the scraps in 5" charm size and will just go along. But after I cut the charm pieces, I left with different sizes of leftovers and decided to use some of those too. 


Kawandi quilt
Handquilting and Catching up on my Kdrama


I documented the process in the videos below. In the first part, I talked about the thread and needles that I use. Hopefully will help those who are in India and wondering what materials to use and where to get them. Really you do not need much to start a kawandi quilt. 

Materials:

The Kawandi Quilt Top should finish approximately at 12" x 18"
For the Kawandi you need assorted scraps of your choice. 
Quilt Backing: 2 layers of cotton fabrics approx. 12.5" x 18.5", I cut bigger because it shrunk after the quilting is done.
The PILLOW  backing has 2 parts:
The top part is 12" x 5.5" 
The Bottom Part: 12" x 12" 
All-purpose zipper #3 - 12" long or so. 

Note: In the video, I cut the pillow backing longer but in a way it's good. Make sure the backing after putting the zipper is the same size as the top. 


In the second part, I showed how to make the pillow. It's super-duper easy! The pillow closes with an exposed zipper in contrast color. I am so obsessed with this color combo! 


Zipper Pillow Tutorial


I hope you find the tutorial helpful. If you have any questions, just leave a comment and I will be glad to help you. 

If you want to know more about Kawandi, make sure to watch Margareth Fabrizio Interview on Youtube!  I really admire her passion and courage! 


Kawandi pillow


The year 2021 is certainly a learning and experimenting year for me, I am looking forward to more learning adventures  in 2022. And kawandi and kantha is definately on my top list to explore more. 


garden


Happy holidays, everyone! 

Elvira

Scrappy 9 Patch Pillow

Hello,


I mentioned in my previous post about the #100dayproject that is going on in Instagram. I decided to play along and sewing up my scraps, UFOs, and PHDs. 
It feels so rewarding when I able to complete something that has been in my UFOs box. Like these Pillows I made last week. 

This week, quilty wise I finished this modern 16 x 16 inches scrappy 9 patch cushion cover. 

Scrappy Patchwork Pillow
I have a small jar of 2" squares which I collected for quite sometimes. I made a couple of 9 patch blocks from them. Some of them, I turned it into mug rugs for a swap.  And a few coasters which I gave them away. 

So last week, I decided to make a dent to my 2" jar and started piecing them into 9 patches, while watching my kdramas. Luckily there are so many good korean dramas to keep me company. 

Work in Progress

This patchwork top is totally made of scraps, right down to the black and white stripe borders, which came from my wallet binding scraps. I add sashing to the 9 patched and added long border. I really love this black and white stripe. I will need to get a few yards next time when I go to Indonesia. I used it alot for wallet. When nothing else work, black and white stripe always the solution!


I am using fleece batting for this pillow which I got from Tina of the Square Inch. Quilting it using straight line quilting on my jack sewing machine while watching Love in the Moonlight drama. I know, it's an old one (2016 drama) and I don't usually enjoy period drama, but Park Bo-Gum and Kim Yoo-jung are just too cute together. 


The back of the cushion cover is a colorful floral cotton fabric. I'm glad I saved up the last piece of this fabric, it matched perfectly. 

Envelope Closure

This pillow will make a cute decorative pillow in the living room or a baby room. I added this cushion in my Etsy Shop and also in my Indian WebShop. There are still many scraps I need to sew and I am so excited to sew smaller projects like this. 

Meanwhile, I made a small progress with the scrappy log cabin. I finished 3 color blocks so far. I hope I will be able to add one or two color blocks this weekends. 


Until next time,

Happy Sewing

Linky Party: 

my patchwork pillows

Just a quick post, since my laptop battery is running out...yeah, again our electricity supply's gone dead for the last 36 hours...eeerrrgghhhhh..Thank God for the mobile modem..:P

Anyway, sometimes back I stumbled upon this lovely tutorial at Bright and Blithe about 9 disappearing patch.
There's more tutorial HERE and HERE

It looks so easy and finally I got a chance to try it cos my sofa badly needs cushion covers and I don't want to buy the usual one from the shop. So here what I came up with


Thanks Gina for sharing such a lovely Tutorial:)


Latest Video