Powered by Blogger.
Showing posts with label quilting. Show all posts

Best of 2021

 Hello and Happy New Year! 

Cheryl at Meadow Mist Design holds an annual "Best of " blog post and I thought I'll join this year.  It's some kind of Instagram best of 9, but in the blogosphere, we can always go back to read the full stories. 


Best of 2021


Looking back in 2021, here are my best 5 blog posts:


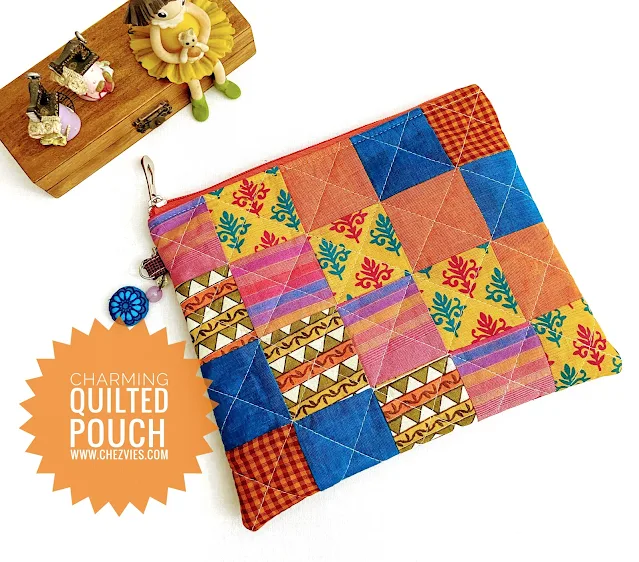
1. Let's make a charming quilted pouch  - 1338 Visit


This free basic pouch tutorial was made for Love and Healing Swap in Desi Quilters Facebook Group. 


2.  Potholders from Scraps - 802 visits

Another Video Tutorial from A Swap - We really had fun making potholders.

Scrappy potholders


This one was an additional tutorial for adding an exterior zipper pocket in a wallet. Make sure to watch the video too. 


how  to add zipper pocket


4. Kawandi Quilt Finish - 630 Visits 

This is my personal finish quilt in 2021. A lot of learning!! And of course, another fave is my new Kawandi Pillow! 


Kawandi Quilt


The quilt was not a Kawandi quilt but I quilted the Kawandi style. It took me a while to finish this and I learned a lot of things in the process. 


Hand quilted Wall Decor


In 2021 most of us learned how to live amidst Covid with its new variants that keep emerging every few months. When I looked back at my Best of 2020 blog posts, most of the posts were about Face Masks. And now face mask is part of our must-have accessories, if I may say so. 

Thank you to everyone who visited my blogs, commented on them, and encouraged me throughout the years. Also, the wonderful bloggers who are hosting linky parties every week and give us a chance to read and learn from other bloggers, from different niches! I love reading blogs even though I don't always leave a comment. 

This year, I don't have any specific plans, but  I want to learn more about Kawandi, Kantha, and more hand quilting. Also sharing more tutorials and video tutorials.  On the family front, as the son is going to college this year, Insha Allah, so there will be a lot of focus on that front too. So, let's just do our best this year! 


Until next time, stay creative and stay healthy! 

Elvira

************
Linking up to: 


Mini Tutorial - DIY Templates for Hummingbird / Periwinkle Block


I posted the coaster I made using the hummingbird pattern in my Instagram  and I love how cute it is. Now, I love foundation paper piecing but I don't like wasting the paper or the fabric. If I'm going to make them into bag or pouch, I usually use lightweight fusible interfacing as foundation paper, which is very practical. I wrote HERE about it .


This is totally inspired by the Japanese quilt books. I've learnt that many of them tracing the paper pattern on to the fabric or they cut the fabric according to the pattern shape and draw the seam allowance. That way, no paper and fabric waste but it's a bit slow process for an impatience people like yours truly ^_^.  And no, I don't want to collect more acrylic template ruler because 1) it's expensive 2) Amazon will take forever to deliver and by the time it arrives, my mood will be gone LOL. 

So, here's my jugaad (hack): I use lamination sheet!! 
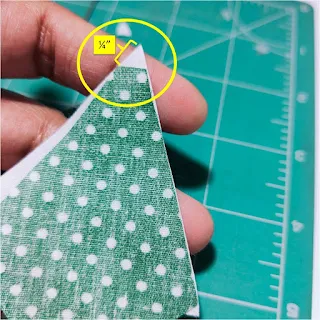
I cut the pattern  pieces (without the seam allowance) and laminated it. Ehm, I ironed it using silk setting. Then mark 1/4 inch around the perimeter and cut on the mark. 


Now your DIY templates are ready and you can trace the fabrics using erasable pen or carefully cut using rotary cutter (I do this :D ) 

Stack your fabrics and you're ready for chain piecing. 


I need to arrange my pieces according to the pattern (I'm more of visual learner) to make sense to my brain.


Put together the center piece (C2) and  the right  piece (C1) right side together like the picture above and sew with 1/4" seam allowance. Repeat the process with the left piece (C3). Don't forget to press the seam towards the background piece. 


chain piecing done! Yay! 


Once done, straighten the triangle blocks and arrange them like shown in the above picture. Sew 2 triangles together using 1/4" seam allowance to make Half Square Triangle (HST). If you're a beginner, this 1/4" seam allowance is our lifeline LOL. It seems daunting but with practice it will come. Don't worry!! 


Now, sew the HST together with 1/4" seam allowance and your block is done! 


I am using cotton cambric for the background fabric here and it stretched a little with every ironing process, so I need to keep trimming to straighten it. According to the original pattern, the block should finish at 5 inch square, but mine is finished at 4.75 inch. But I'm happy, cos I waste less paper and fabric ^^. Now I am going to make few more. Maybe scrappy blocks? 

I hope you enjoy this mini tutorial and if you do, please share on your social media account so that many people can benefit from it. 

Happy Weekends!

Elvira

****

Linky Party
TGIFF - Madame Tailor

Quilted Mug Rugs

Hello,

I finished 2 mug rugs last week and another 2 I still need to finish the binding. Though it's not making a dent in my UFO quilts piles, but I am happy that I am making (very) slow progress.

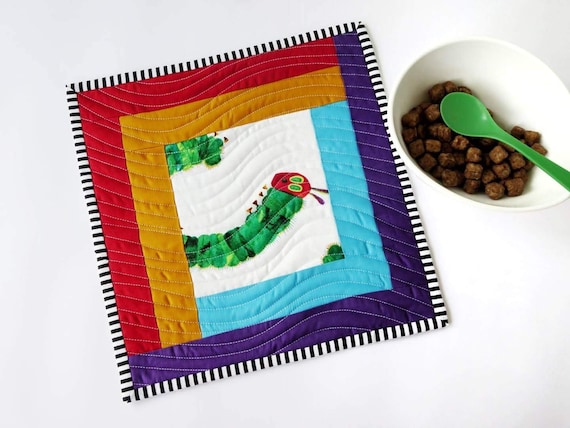
Very Hungry Caterpillar Mug Rug

I was wondering for a few days how to quilt these two very hungry caterpillar mug rugs. I love straight line quilting and also wavy or serpentine. But I don't feel like setting up my HV machine. So I decided to go organic. People love anything organic nowadays :) 

Since the blocks are quite colorful, I decided to use white thread and did the organic wavy lines. One thing I learn that to be creative, it really doesn't matter what machine you have. We should not limit ourselves based on what tools we have on hand, instead the limitation should make us more creative! 

Reversible Snack Mat


Quilted Mug Rug
When I took this picture, my son was about to have his breakfast and I borrowed the bowl for a quick photo session :D.  Don't you love the back of the mug rug? It makes this quilted mug rug reversible!!


image 0
Caterpillar Mat

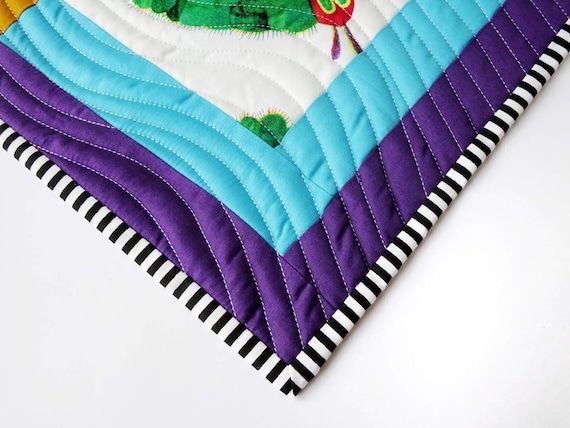
As usual when I am not sure what to use for binding, the black and white stripe is always my first preference. And I love how modern it looked!

Hand sewn binding

The binding is machine stitched on one side and finished by hand on the back. I always use 1.5" wide binding for mini quilts, like placemats, mug rugs, or coasters. 

Apple core patchwork WIP

Meanwhile, I also started apple core patchwork. I'm doing hand piecing this time. It's going to be a tote bag, Insha Allah. I'm sharing the progress photos in my Instagram
Also, more mini quilts are queing to be quilted now. I have so many projects  going on at the same time. I tried to stick on one project at a time but somehow never work out for me. 
But as long as I can be creative, I'm happy! 

What about you? What project are you working on right now? 

Thank you for stopping by!

Happy Sewing

~ Elvira~ 

Book Review - More Adventures with Leaders and Enders

Hello,

If you're a seasoned quilter, the chance is you already know Bonnie K Hunter from Quilt Ville. I'm following Bonnie since years ago, I often watch her Quilt Cam series on youtube.

I finally recently bought her book More Adventures with Leaders and Enders. I must say, it's simply amazing for someone who love to collect tiny scraps like me.

More Adventures With Leaders and Enders
At first glance, you might find the quilt design is a bit intimidating, but after slowly read the instructions it all made sense. Last week, I tried out the Scrap Crystal. I started digging my scrap baskets for blues and greens. But I was so eagerly trying it, I thought I will do with a single color background.


After making one block I showed to a couple of friends and they said, it looked great, but I want the Crystal-y effect like the one on the book!!


So, I started cutting the neutral colors. The best thing is Bonnie includes all the details of what neutral colors she included in her quilt so that we can get ideas.


Here is the first scrappy block look like. I have not stitched them together.What say?


I mostly used Indian fabrics since they have bright and lots of shades. I'm hoping to finish the quilt after I come back from my holiday! Wish me luck, everyone!!

Until then,

Happy Sewing

Elvira


**********
Some of my posts may contain Affiliate links,which mean if you purchase something through the links in my blog, I may get a small commission at no additional cost to you. I only recommend products and/or services that I personally use and believe will add value to my readers. Thank you so much for your support!


Handmade Happiness 4 - Pelican Tote Free Pattern

Hello and welcome to Handmade Happiness!


When Namrata of Bagstock Designs asked if I could test her new tote bag pattern, I said yes immediately. The Pelican Tote bag is an easy beginner pattern. When I saw the design, I wanted to do a quilted one but I didn't have much time left after finishing my last orders of the week.

Luckily I have a patchwork print fabric and decided to use that instead. I did a simple diagonal grid line quilting on the pink fabric and wavy lines on the denim. The denim I used here is a lightweight denim. The pattern is very easy to follow with clear photo step by step instructions. 


The bag size is also perfect at 15” W x 12” H x 3" D. 
. Though it said to be a market tote, but I think it will be good as college tote or maybe a diaper bag. It has a front zip pocket, interior zip pocket and a magnetic snap closure. Easy and Quick project. The pattern is FREE and is available at Bagstock Designs Website.

That's one of my happiness from last week. Now, let's see who's the MVP from last week post:

Sonalee made this beautiful tulip quilt based on tutorial by the Missouri Star Quilt and the photo she posted on her Instagram even got re-posted! How cool is that!!  The color is just perfect for summer quilt! 

Totally Tulip 

Rashida from No3 Quilt studio is having a quilt a long on her blog. And I really love this blog. If you want to learn the basic of quilting, run along and check her blog. Who knows you might even won the prize!! 


I love this red and black & White version
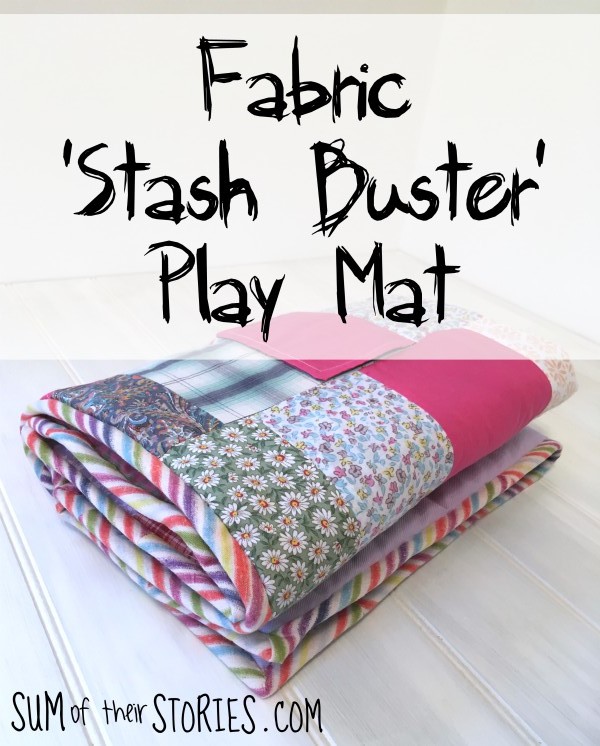
Julie of Sum of Their Stories shared this quick Play mat tutorial. It's a perfect stash buster project and a perfect gift to make for a new mom! If you need one, go ahead and check her blog. Julie's blog is one of my personal fave. She shared all kind of tutorials with gorgeous photos. It's like a cozy home!! 

 Fabric stash buster baby play mat

Congratulations to all of you! Do share in your social media account that you're being featured <3. Spread the love!! 

Now, it's your turn to share happiness. 

What is this linky party about?
This linky party is some  kind of show and tell party, whether you do it as a hobby or as a mompreneur.
Post anything handmade by you – not mass produced “handmade” please - which you recently completed and have not been shared in here. Your link can be from your:
  •  BLOG – do link up your blog if you have one , anything from new product   release to behind the scene story, tutorials, etc.
  • Facebook Page – New products from your FB business page. 
  • Instagram – if you play more in Instagram, you are most welcome to share your latest creations. 
  • Etsy Shop or other webshop - show off your latest listing.  

How to Play:
  • Submit your link by clicking the blue button under each handmade happiness’ post. If you submit your blog post , please submit your BLOG POST URL and NOT the blog URL. 
  • Visit some of the links that catch your eyes. Give them a comment or a heart to encourage them. Be generous. 
  • If you don’t want to miss another link up post, it’d be great if you subscribe to my blog (form on the right panel). 
  • Do share the Handmade Happiness post in your Social Media account, sharing is caring :).


Handmade Happiness #3 - Batching or Multitasking?

Hello and welcome to Handmade Happiness!


Thank you for linking up in my first link up last week. So lovely to see your creations.

Last week I didn't complete much - sewing wise. However I did a couple of batching work! Yay!
I posted in my Instagram Story a few days ago whether you prefer Batching or Multitasking. Surprisingly the result shown 50% for each. As a woman and a mom, I think we are born multitasker. However when it comes to doing your home-based business, I read that batching is more appropriate. Batching is doing one task at a certain time and only concentrate on the work at hand, while multitasking is keep switching between two or 3 works at a time. Read the complete article HERE.

Passport Covers

For me, while sewing, I keep checking my phone for email or messages and sometimes get caught up in the conversations while my machine is on. Or I suddenly want to post updates in my Instagram and ended up scrolling endlessly. It is very distracting.

A gift for a friend -Owl Wallet

Since I read the article, I tried to practice it. For someone who always multitasking all the time, it is tough job! But I did it. I completed many wallets, prepping a couple of works that  need to be done, getting all the winter clothes sort out. I also took photos for my shops, finished the owl wallet above for Namrata which is long due!! Thanks for your patience ^__^. I'm still working out my schedule. I hope I will be more organized in the future.

Now, let's see our MVP (most visited post) last week's post:

Sowmya from Prime Needlers on Facebook made this pretty green and blue kaleidoscope quilt. A delightful baby quilt. She's also currently working on her quilt for the First India Quilt Festival next January 2019.


Neepa made this oh so pretty dress. All little girls love pretty dresses, especially if it's pink, right? Check out her pretty dresses on her Facebook Page A quaint stitch. 

Diptee from Diptea (don't you love that?!)  made this girly quilt. I really love the centre panel of this quilt. This quilt will surely make a girl happy! you can also read her blog HERE.


Now, it's your turn to link up. You can link up anything HANDMADE by you from your blog , facebook, Instagram, your shop or Etsy or your tutorial. 
Do visit and give some love to the link you visited and also share them on your Facebook, twitter or Pinterest! 
Sharing is Caring, right?


Happy Tuesday!!


The Link up will run from Tuesday to Sunday Evening (India Standard Time ) so you will have a plenty of time to share you craft of the week.

Disclaimer: 
By Linking up, you are giving me permission to share your links on social media and also on my blog features (if any in the future). Of course all the sharing from my part will always be properly linked up to your original post.


Latest Video