This tutorial is based on the Hummingbird Block Foundation Paper Piecing by Redpepper Quilts.
I posted the coaster I made using the hummingbird pattern in my Instagram and I love how cute it is. Now, I love foundation paper piecing but I don't like wasting the paper or the fabric. If I'm going to make them into bag or pouch, I usually use lightweight fusible interfacing as foundation paper, which is very practical. I wrote HERE about it .
This is totally inspired by the Japanese quilt books. I've learnt that many of them tracing the paper pattern on to the fabric or they cut the fabric according to the pattern shape and draw the seam allowance. That way, no paper and fabric waste but it's a bit slow process for an impatience people like yours truly ^_^. And no, I don't want to collect more acrylic template ruler because 1) it's expensive 2) Amazon will take forever to deliver and by the time it arrives, my mood will be gone LOL.
So, here's my jugaad (hack): I use lamination sheet!!
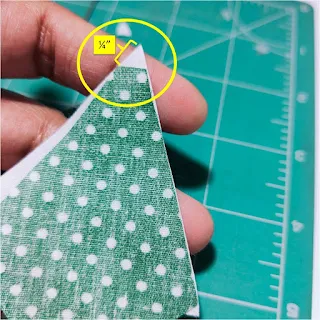
I cut the pattern pieces (without the seam allowance) and laminated it. Ehm, I ironed it using silk setting. Then mark 1/4 inch around the perimeter and cut on the mark.
Now your DIY templates are ready and you can trace the fabrics using erasable pen or carefully cut using rotary cutter (I do this :D )
 |
| Stack your fabrics and you're ready for chain piecing. |
I need to arrange my pieces according to the pattern (I'm more of visual learner) to make sense to my brain.
Put together the center piece (C2) and the right piece (C1) right side together like the picture above and sew with 1/4" seam allowance. Repeat the process with the left piece (C3). Don't forget to press the seam towards the background piece.
 |
| chain piecing done! Yay! |
 |
Once done, straighten the triangle blocks and arrange them like shown in the above picture. Sew 2 triangles together using 1/4" seam allowance to make Half Square Triangle (HST). If you're a beginner, this 1/4" seam allowance is our lifeline LOL. It seems daunting but with practice it will come. Don't worry!!
Now, sew the HST together with 1/4" seam allowance and your block is done!
I am using cotton cambric for the background fabric here and it stretched a little with every ironing process, so I need to keep trimming to straighten it. According to the original pattern, the block should finish at 5 inch square, but mine is finished at 4.75 inch. But I'm happy, cos I waste less paper and fabric ^^. Now I am going to make few more. Maybe scrappy blocks?
I hope you enjoy this mini tutorial and if you do, please share on your social media account so that many people can benefit from it.
Happy Weekends!
Elvira


