Powered by Blogger.
Showing posts with label Tutorials. Show all posts

Best of 2021

 Hello and Happy New Year! 

Cheryl at Meadow Mist Design holds an annual "Best of " blog post and I thought I'll join this year.  It's some kind of Instagram best of 9, but in the blogosphere, we can always go back to read the full stories. 


Best of 2021


Looking back in 2021, here are my best 5 blog posts:


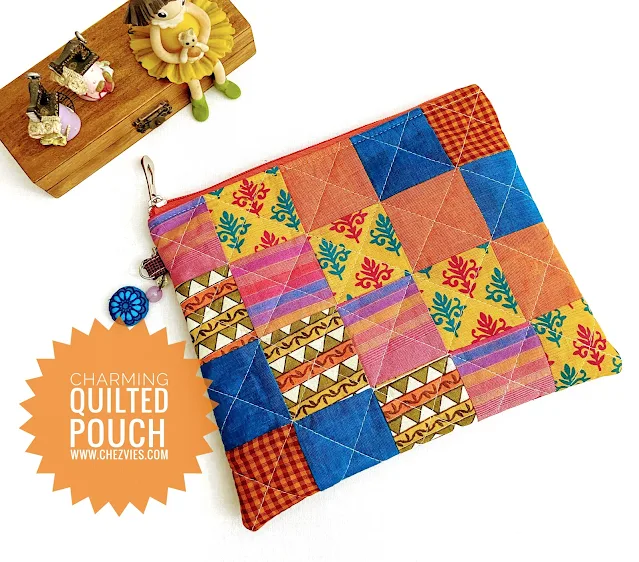
1. Let's make a charming quilted pouch  - 1338 Visit


This free basic pouch tutorial was made for Love and Healing Swap in Desi Quilters Facebook Group. 


2.  Potholders from Scraps - 802 visits

Another Video Tutorial from A Swap - We really had fun making potholders.

Scrappy potholders


This one was an additional tutorial for adding an exterior zipper pocket in a wallet. Make sure to watch the video too. 


how  to add zipper pocket


4. Kawandi Quilt Finish - 630 Visits 

This is my personal finish quilt in 2021. A lot of learning!! And of course, another fave is my new Kawandi Pillow! 


Kawandi Quilt


The quilt was not a Kawandi quilt but I quilted the Kawandi style. It took me a while to finish this and I learned a lot of things in the process. 


Hand quilted Wall Decor


In 2021 most of us learned how to live amidst Covid with its new variants that keep emerging every few months. When I looked back at my Best of 2020 blog posts, most of the posts were about Face Masks. And now face mask is part of our must-have accessories, if I may say so. 

Thank you to everyone who visited my blogs, commented on them, and encouraged me throughout the years. Also, the wonderful bloggers who are hosting linky parties every week and give us a chance to read and learn from other bloggers, from different niches! I love reading blogs even though I don't always leave a comment. 

This year, I don't have any specific plans, but  I want to learn more about Kawandi, Kantha, and more hand quilting. Also sharing more tutorials and video tutorials.  On the family front, as the son is going to college this year, Insha Allah, so there will be a lot of focus on that front too. So, let's just do our best this year! 


Until next time, stay creative and stay healthy! 

Elvira

************
Linking up to: 


VIDEO: Making an Adjustable Handle

India


Hello,
Today I shared a short video for making an adjustable strap with a buckle for the mobile sling bag. This may look easy but for those who just started their journey in bag making, this can be a bit confusing.

In the video, I am making 3/4" wide strap with patchwork. The length of the strap can be varied, between 50" to 55" inches. If you're making it for kids, 50" should be long enough. 

Here's what you need to make the long strap: 

 * 2.75" W X 50" - 55" inches long fabric 
 * if making patchwork strap: 2.75" W x Wof (44") plus 2 - 2.75" W x 7" Long accent fabrics 
 * All-purpose interfacing: cut 1 - 2.75” W x 49” or 54” 
* If using interfacing roll: cut 2 – 1.25” W x 49” or 54” 
*  2 x 0.75" swivel hooks 
* 1 x 0.75" Buckle

First, if making a patchwork strap, sew the accent fabrics on each end of the main fabric. Then fuse the interfacing on the wrong side of the strap piece.

Let's watch the video:


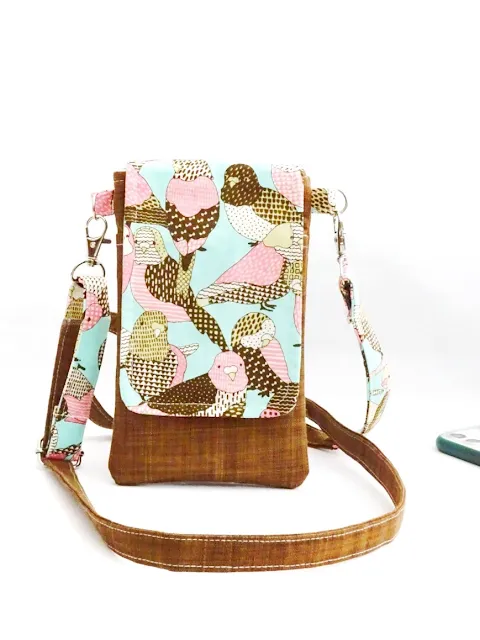
This mobile sling bag is my fave project to go. I am using one regularly too when I go out also use it to store my hard disc and power bank. It's super versatile. Today I made one using this pretty bird print fabric that I have in my stash. 
mobile sling bag
Mobile Sling Bag


mobile pouch
Mini Sling Bag


On the home front, not much sewing happened last week, except finishing a few wallet orders. Instead, I was busy trying out a few recipes I found on Youtube. I've been craving lemon tart after I watched one Cdrama. We used to have a few shops selling in my town before the pandemic but I am not sure now. I decided to look up the recipes on Youtube and the result is yummy! Well, I am not much of a baker, when this turned out good (my boys approved), I feel good. 

lemon tart
Resource: Tart Shell | Lemon Curd


I hope you enjoy the video and thank you so much for stopping by. 
The weather is changing, so stay safe & healthy!

Happy Sewing,

Elvira

*****


Let's make charming quilted pouch


patchwork bag tutorial
Charming Quilted Pouch (video tutorial)


When Tina Katwal asked me if I'd like to make a quilted pouch tutorial for our Desi Quilters group, I immediately said yes. I was thinking of making one with handloom fabrics as the 7th of this month was National Handloom Day! So it was like serendipity. 

So, I decided to make this pouch or bag using my fave precut - mini charms (2.5" x 25" pieces). To make this bag, you don't need much. 

Materials you need:
20 pieces mini charms of your choice
(40 pieces if you make a patchwork of both sides)
A few Fat Eighth or FQs for Back Panel and lining
Batting (fleece or cotton)
#5 Zipper at least 10" long
(you can use #3 zipper if you wish)
Non-Woven Lightweight Interfacing  
Finished Size 9.5" x 8" (approx)

This patchwork pouch tutorial is for the Love and Healing Swap in our Desi Quilters Group on Facebook. The pattern is for using mini charms but you can easily adapt it using any kind of block or orphan blocks that you have in your UFO baskets. The key is to make the patchwork piece the same size as the interfacing. 
The interfacing will give a perfect finish for the quilted pouch or bag, no matter what batting you're using. I made many patchwork quilted bags and I found this combo is the best. 


Working with handloom fabrics is pretty challenging. If you decided to make one using handloom fabrics, consider prewashing your fabric first. I normally don't ;). As handloom tends to shrink and become out of shame from frequent ironing. Spray starch also helps. 


National Handloom Day


I'm getting a little bit better with the new editing app. I also found a good angle to place my ring light while recording videos :)
Editing does take time but when the mood is good and the boys are happy with Domino's, I can get it done pretty quickly ^^


zipper charms


I hope you enjoy the video! Do let me know in the comment :)
Now, download the pattern below, and let's start sewing those scraps!


Happy Sewing,

Elvira


Video Tutorial : How to Make Zipper End Fabric Cover

Zipper End Fabric Cover DIY
DIY Zipper End Fabric Cover 


Hello, I hope everyone is doing well. I'm pretty busy these past few days making few wallet orders, which I thoroughly enjoy. I cut a few extra for ready stock items in the shop. This time, I thought I'll make a fabric button to cover the zipper end of the zip-around wallet. It's one of my lists to do and as I go about it, I recorded a short video so you can make it as well.
 It's very easy and fun to make. 

Fabric yoyo DIY


The materials you need:

1. Fabric scrap - 2 pieces of 2" x 2"
2. Used business card (or similar weight paper)
3. Bobbin for templates (you can use a small coin too)
4. Fabric Glue
5. Scrap batting 
6. Thread and needle

Now watch the video below and we can sew along :)


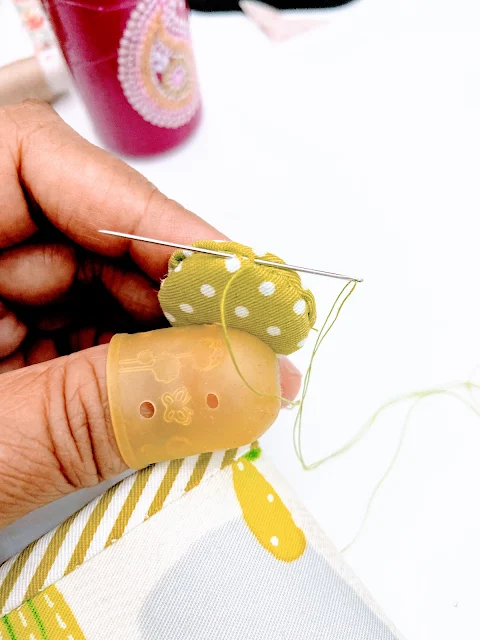
In the video, I used bobbin for the template. The size is just perfect for the wallet. Depends on your zipper size, you can make a smaller or bigger button. The principle is, the fabric should be 2X in diameter of the template. The bobbin I used is 3/4" in diameter and I cut the fabric circle approx. 1.5" in diameter. 


Fabric button DIY


For the batting, depends on how "plump" your button looks, you can add accordingly. In the video, I used my old business card for the "button". I find the cardstock from the business card is just right. Plus, why throw it away if we can reuse it, right? 


slip stitch


Maybe some of you find the slip stitch a bit daunting. Well, don't be. Good things take time, so practice more. Use only 1 strand of thread while sewing the button together and use small stitches. Try to catch the fabric with the smallest stitches you can manage. 

In the end, it will all be worth it when your customers are happy, right? 


small bifold wallet
Small Bifold Wallets


Now, I have to finish a few more wallets and I hope I can finish them by next week.  I still have to finish editing another tutorial video. This time I managed to learn the new editing app on my new laptop. I used to use Windows Movie Maker on my old laptop which is apparently is no longer available in Windows 10. This one, I edited using Film Forth and I kinda like it. My old brain needs time to process new information so learning new apps do takes time. LOL. Do let me know if you have a recommendation for a super easy video editor for windows 10. Well, I love inshot app for mobile editing, so much of a choice there but editing on mobile is not convenient. 


small wallet DIY


WIP Small Wallet

  Thank you for stopping by today. Take care & happy sewing!

Elvira

********


Heartbeat Kantha Coasters


I wanted to make this coaster for a long time. I drafted the pattern and was actually thinking of doing an applique and embroidery combo. But after learning Kantha embroidery, I thought I could just use the kantha stitch and I love how this turned out. 


The materials needed (for 1 coaster) are:

1. 6 x 6 inches cotton fabric - 3 pieces
(I'm using Linen for the beige coasters and handloom ikat for the indigo one)
2. Anchor pearl (Perle) cotton no. 8  or 3 strands of embroidery yarn (I am using this for the linen one). 

This is a super-fast project and very beginner's friendly. All you have to is download the template  HERE and follow the instructions. Next, watch the video below.  (in the video I did freehand drawing using an erasable pen, but I created a template for you :).


Don't worry if your stitches are not even, it's hand-sewn, it's organic. You will get better as you go along. 
The kantha stitch is done on one layer of fabric only. If you want to do it on all through the 3 layers, be my guest! I did it on single layers, because it's easier for me :)
Feel free to experiment! 


I'll be making a few coasters for my small quilt shop. It's one of those projects that you can do while watching your fave shows or drama :)


Linen Coasters


If you're wondering about my photo props, the teapot mini plate I got from The House of Tea in Central Mall Delhi Aerocity a few years ago, and the mini teacups, I got them as a gift from a shop in Uji when we went in 2019. I love buying cute decorative stuff or souvenirs, most of them are useful as photo props :D. My boys always wondering, what I am going to do with all those. 

I better get going now, I have a few more coasters and bags to finish, but very little time to craft nowadays. Thank you for visiting my blog and stay safe!!

Happy Sewing, 

Elvira


Looking forward with hope


2020 was a challenging year for all of us and also a year where we learned about a lot of things. It changed our lifestyle and our way of thinking in a way we would never imagine. We learned to appreciate and be grateful for what we have. 

This year, let's be a better version of ourselves. Be more responsible as an individual as well as a member of our community. Love more and hate less. Appreciate more, and complain less. More focus on things that really matter! 


*******

I promised myself to write a blog more often in 2020 and I wrote 73 blog posts! Almost double from 2019. I am glad that I did. Even though social media have been very popular, I still feel to put what I make on a blog is important. It's always nice to look back and read what's been happening in the past years. 

Here I put up 5 popular blog posts from Chezvies :D. Just to give me a mental booster! I really appreciate your supports and thank you so much for reading my blog! 


1. Free Pattern - DIY Dust Mask with Nose Wire

I wrote the blog on February 4, 2020, and who would have thought that 2020 was the year where everyone needed to wear a mask! 


2.  Free Pattern- Pleated mask with Filter Pocket

By March 2020, many countries started to close their borders. Mask wearing was made mandatory but there was a huge debate about whether mask-wearing will be effective to curb the virus. Meanwhile, our hospitals and health workers experienced a huge lack of stock for disposable face masks. And our sewing tribe took the plunge and started making masks for their local hospitals, nursing homes, etc. 


3. 3D Face Mask with More Breathing Space

Within a span of 2 months, we learned a lot about face masks. There are people who felt claustrophobic if they have to wear a mask,  how many layers are effective, etc, as the countries around the world trying to cope up with the virus. The news on all media was only about Covid-19.


4. DIY Face Shield - Free Pattern

I remembered seeing a picture of a Chinese family cover themselves in plastic while trying to fly out of Wuhan in the early days of the Pandemic. Maybe it was around the end of January 2020 or early February 2020. And I was amused and did not realize that the next best thing after a face mask was a face shield! Especially for small children and those who cannot wear a mask for a long time. 


5. Spacious Face Mask 

By summer 2020, people are used to wearing a mask without being lathi-charged by the police :D (it happened in India!!). But the humid weather made mask-wearing a little bit tough. We need a new mask that made us comfortable wearing it for a longer period. I came up with this Trio 3D face mask. So far, it's a fave! You can wear it while talking or singing without your voice being muffled :)


Now entering 2021 with an updated version of COVID-19, I hope we keep vigilant and be a responsible citizen by maintaining SMS - Social Distancing, Mask Up and Sanitize! Just because the government doesn't publish updates about Covid-19 does not mean the Pandemic is over! Please remember in your prayer for all the doctors, nurses, health workers, and all the Covid Warriors who sacrificed themselves for the well being of the rest of us. 

Stay safe and healthy!

Happy New Year!!

Elvira


Linking up this these wonderful BLOGS


Sunday Stash - Fun Fabric Bundles and Project Ideas


I've been busy making a few fun fabric bundles again for the shop. Most of them are one of a kind bundle, which means only 1 bundle is available. I really love creating bundles but my time is limited and being a solopreneur doing 101 things, I feel a bit overwhelmed sometimes :)


This time mostly I made fat 8 bundles and a few fat quarter bundles as well. Check out below some of the bundles that I already put up in my Etsy Shop.

Kalamkari Fat Quarter Bundle


Fat 8 Bundle


Fuchsia Teal Fat 8 Bundle


If you just started your sewing or quilting journey, a fabric bundle is a good start. You can make many things from bundles. I made a few face masks and pouches and of course a few quilts too. 

Fun Fabric Face Masks


one of a kind fabric face masks


I made this pouch and the coaster too. I shared the tutorial for the pouch in my last post or you can see it on my Youtube Channel.


Or you can practice making fabric lanyard.


Thank you for your supports all these years, let's hope 2021 will bring some good news for us. 

Happy Crafting,

Elvira


Scrappy Patchwork Mug Rug - Scrap Buster Project


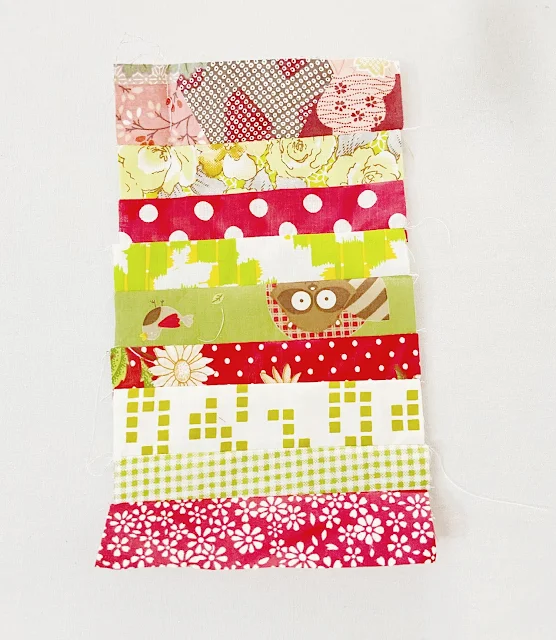
Making patchwork mug rug is my fave scrap buster project. This time I made this super easy one using strips of fabrics from my scrap bin. It's fun and quick to make plus it's a perfect project to make if you're looking for a quick last-minute gift.

Without further ado, here's what you need: Assorted fabric 5" long fabric strips 1" to 1.5" wide Contrast or solid fabric 6" W x 8" H Backing Fabric 12" W x 10" H Batting 12" W x 10" H

Binding 1.5" Wide x Wof (40")

Let's get sewing!

1. I used narrow strips, less than 1.5" wide. They should be enough to make 8" long patchwork panel. Don't be afraid to mix and match. The narrower the better, IMO :).


2. Sew the strips together using 1/4" seam allowance. You can use those selvages scraps too. My panel here finished at 5" W x 9" H. Iron the patchwork panel flat. 


3. Now sew the patchwork panel and the solid panel right side together using 1/4" seam allowance. Now your top panel is almost ready.


4. Iron the top panel flat and trim it into 10" W x 8" H. The patchwork panel is about 4" wide after trimming.


5. Now sandwich the batting in between backing and top panel and quilt it as desired. This time I did a diagonal gridline quilting which you can watch in the video tutorial at the end of this post. 


6. Once the quilting is done, trim the quilt top into 10" W x 8" H and now it's ready for binding. Watch the video below on how to sew the binding. I cut the binding 1.5" wide for small quilts, so it won't be too bulky. 


If you want to finish the binding by machine, attach the binding on the backing first. I attached the binding on the front first because I prefer to finish the binding by hand for small quilts.


Now your scrappy mug rug is ready to use. Make a few for your family and friends! 

I hope you find the tutorial helpful! Don't forget to subscribe to my blog or YouTube channel for more tutorials. 


Thank you for stopping by, 

Take care & Happy Holidays

Elvira


Linking up to these wonderful BLOGS


Latest Fabrics

Latest Video