Powered by Blogger.
Showing posts with label fabric key fob tutorial. Show all posts

Sunday Stash - Fun Fabric Bundles and Project Ideas


I've been busy making a few fun fabric bundles again for the shop. Most of them are one of a kind bundle, which means only 1 bundle is available. I really love creating bundles but my time is limited and being a solopreneur doing 101 things, I feel a bit overwhelmed sometimes :)


This time mostly I made fat 8 bundles and a few fat quarter bundles as well. Check out below some of the bundles that I already put up in my Etsy Shop.

Kalamkari Fat Quarter Bundle


Fat 8 Bundle


Fuchsia Teal Fat 8 Bundle


If you just started your sewing or quilting journey, a fabric bundle is a good start. You can make many things from bundles. I made a few face masks and pouches and of course a few quilts too. 

Fun Fabric Face Masks


one of a kind fabric face masks


I made this pouch and the coaster too. I shared the tutorial for the pouch in my last post or you can see it on my Youtube Channel.


Or you can practice making fabric lanyard.


Thank you for your supports all these years, let's hope 2021 will bring some good news for us. 

Happy Crafting,

Elvira


Tutorial : How to Make Easy Fabric Key Fob


I got a bunch of key fobs that I ordered from Aliexpress before the Pandemic. I'm lucky that I got all my hardware before the lockdown started in March. 

Personally, I love using a swivel hook for a wristlet, like the one I shared HERE but this key fob looks fancier, isn't it? 

This is a beginner-friendly project for you who just started a sewing journey. It's super easy! If you're in India, you might want to refer to THIS POST about bag interfacing in India. 

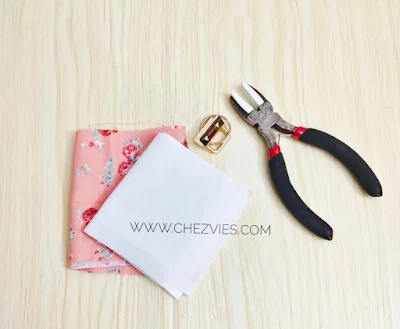
Materials needed: 
1. Main Fabric of your choice (preferably cotton) - 3.75" W x 11" H" 
2. All Purpose Interfacing - 3.75" W x 11" H
3. 1" wide key fob
4. Plier (I have one with attached cushioning, if you don't have one just use a flat plier and cover the key fob with batting or fabric scraps so it won't scratch the hardware).

Fabric Key Fob Tutorial

Let's start!

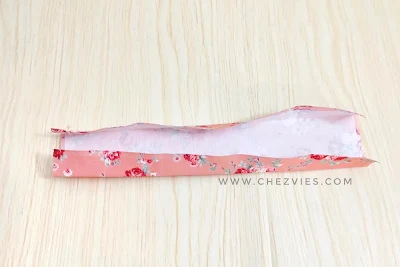
1. Fuse the interfacing on the wrong side of the fabric, and fold the long edges towards the center. Then fold it again to make a scant 1" wide strip. Use wonder clips to hold it in place. 


2. Topstitch using scant 1/8" seam allowance on both long edges, then sew a few lines 1/8" apart. The dense stitching will make the wristlet sturdier. 


3. Notch the raw edges using pinking scissors or simply using normal scissors. This will stop the fabric from fraying. (you can also apply clear nail polish on the raw edges).


4. Bring the short ends together and sew in place. 


5. Fit the key fob and mark where the prongs are. Make a hole in the marks you just made. This way you won't break the prongs. Trust me, I broke a couple of them :D. 
 

6. Carefully replace the kef fob and use the plier press it nicely and make sure it won't come off when you pull it. 


et voila! Your key fobs are ready. This will make a great gift for your family and friends!


If you like to use a swivel hook, you can follow my previous tutorial. In this key fob tutorial, I am using all-purpose interfacing which gives the wristlet enough structure. 
But if you're using a swivel hook, you can use medium weight interfacing or a combination of all-purpose interfacing and batting. If it's too thick for your sewing machine, you can always use rivets.  Don't be afraid to experiment to see which one you like better. 

If you find this tutorial useful, please share it because sharing is caring :). 


Thank you for reading my blog.

Stay safe & happy sewing!

Elvira


Latest Fabrics

Latest Video