Powered by Blogger.
Showing posts with label handmade label. Show all posts

DIY Labels

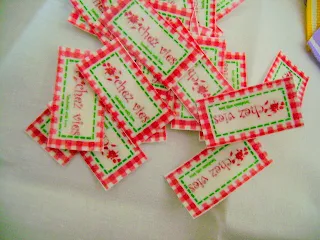
I got this Iron-on Transfer paper which I always wanted to have from my BIL in Indonesia. I've been wanting to try the fabric label like I saw in Patchwork Pottery's Tutorial few months back. Finally, yesterday I got the chance to try it after my DH bought me a canon pixma ink jet printer...Thank you so much, dear..:). The printer worked wonderfully. In fact, I tried both using my friend, Agnes' design and I tried the plain letter one.
 I love the colored ones (though I should have made it bigger). It turned out very clear and I iron it on a plain  cotton fabric and know what..after I cut it, the fabric don't fray...yay!!!..


Second one, I used the plain letters "chez vies" and I iron it on  grosgrain ribbon. The mistake I made here is I cut the strips too narrow. Well the letter perfectly fit in the middle part of the ribbon but I should have cut it about 1' wide. Lesson learnt!


Another lesson I learn is that while ironing, DO NOT move your iron (like when you're ironing). Just press it firmly on the design. Otherwise it will smudge.


Now let's get down making something and start using those labels...:)

Happy Crafting


Handmade Label - Tutorial *EDITED*


I have been wanted to have my label made but I could not find any shop here in my town. I tried once using interface fabric and print it out but I guess it won't last.

The other day I suddenly thought about this handmade label. The photos may not be sufficient enough, but I will try to update it later.


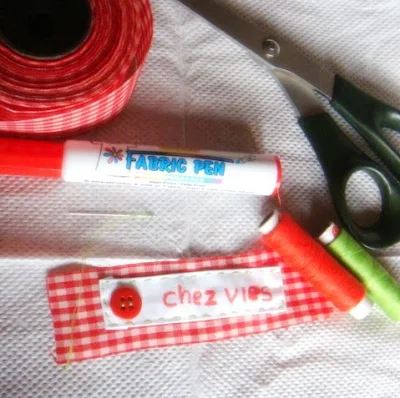
INGREDIENTS:

1. Fabric pen
2. Gingham fabric tape (or any fabric scrap will do)
3. Plain fabric (prewashed and well ironed)
4. Button
5. Contrast color thread


How To:

1. Cut the plain fabric & the gingham according to your desired length/width
2. Fold the plain fabric on all side and place it exactly in the middle of the gingham


3. Pin in place and stitch a running stitch all over or you can sew it (I think it will be easier to machine stitch:D )


4. Write your (brand) name on the plain fabric carefully


5. Attach the button and voila, your handmade label is ready


You can even make the label to match your handmade stuff (bags, clothes, etc) by using the scrap of the same fabric as the base and can add button as a spare button (if your handmade has one)


I put one on my journal cover :D


What do you think? Do let me know if you make one too...:)

happy crafting
Posted by Picasa

Latest Fabrics

Latest Video