Powered by Blogger.

Placemats and New Books


Patchwork Placemats


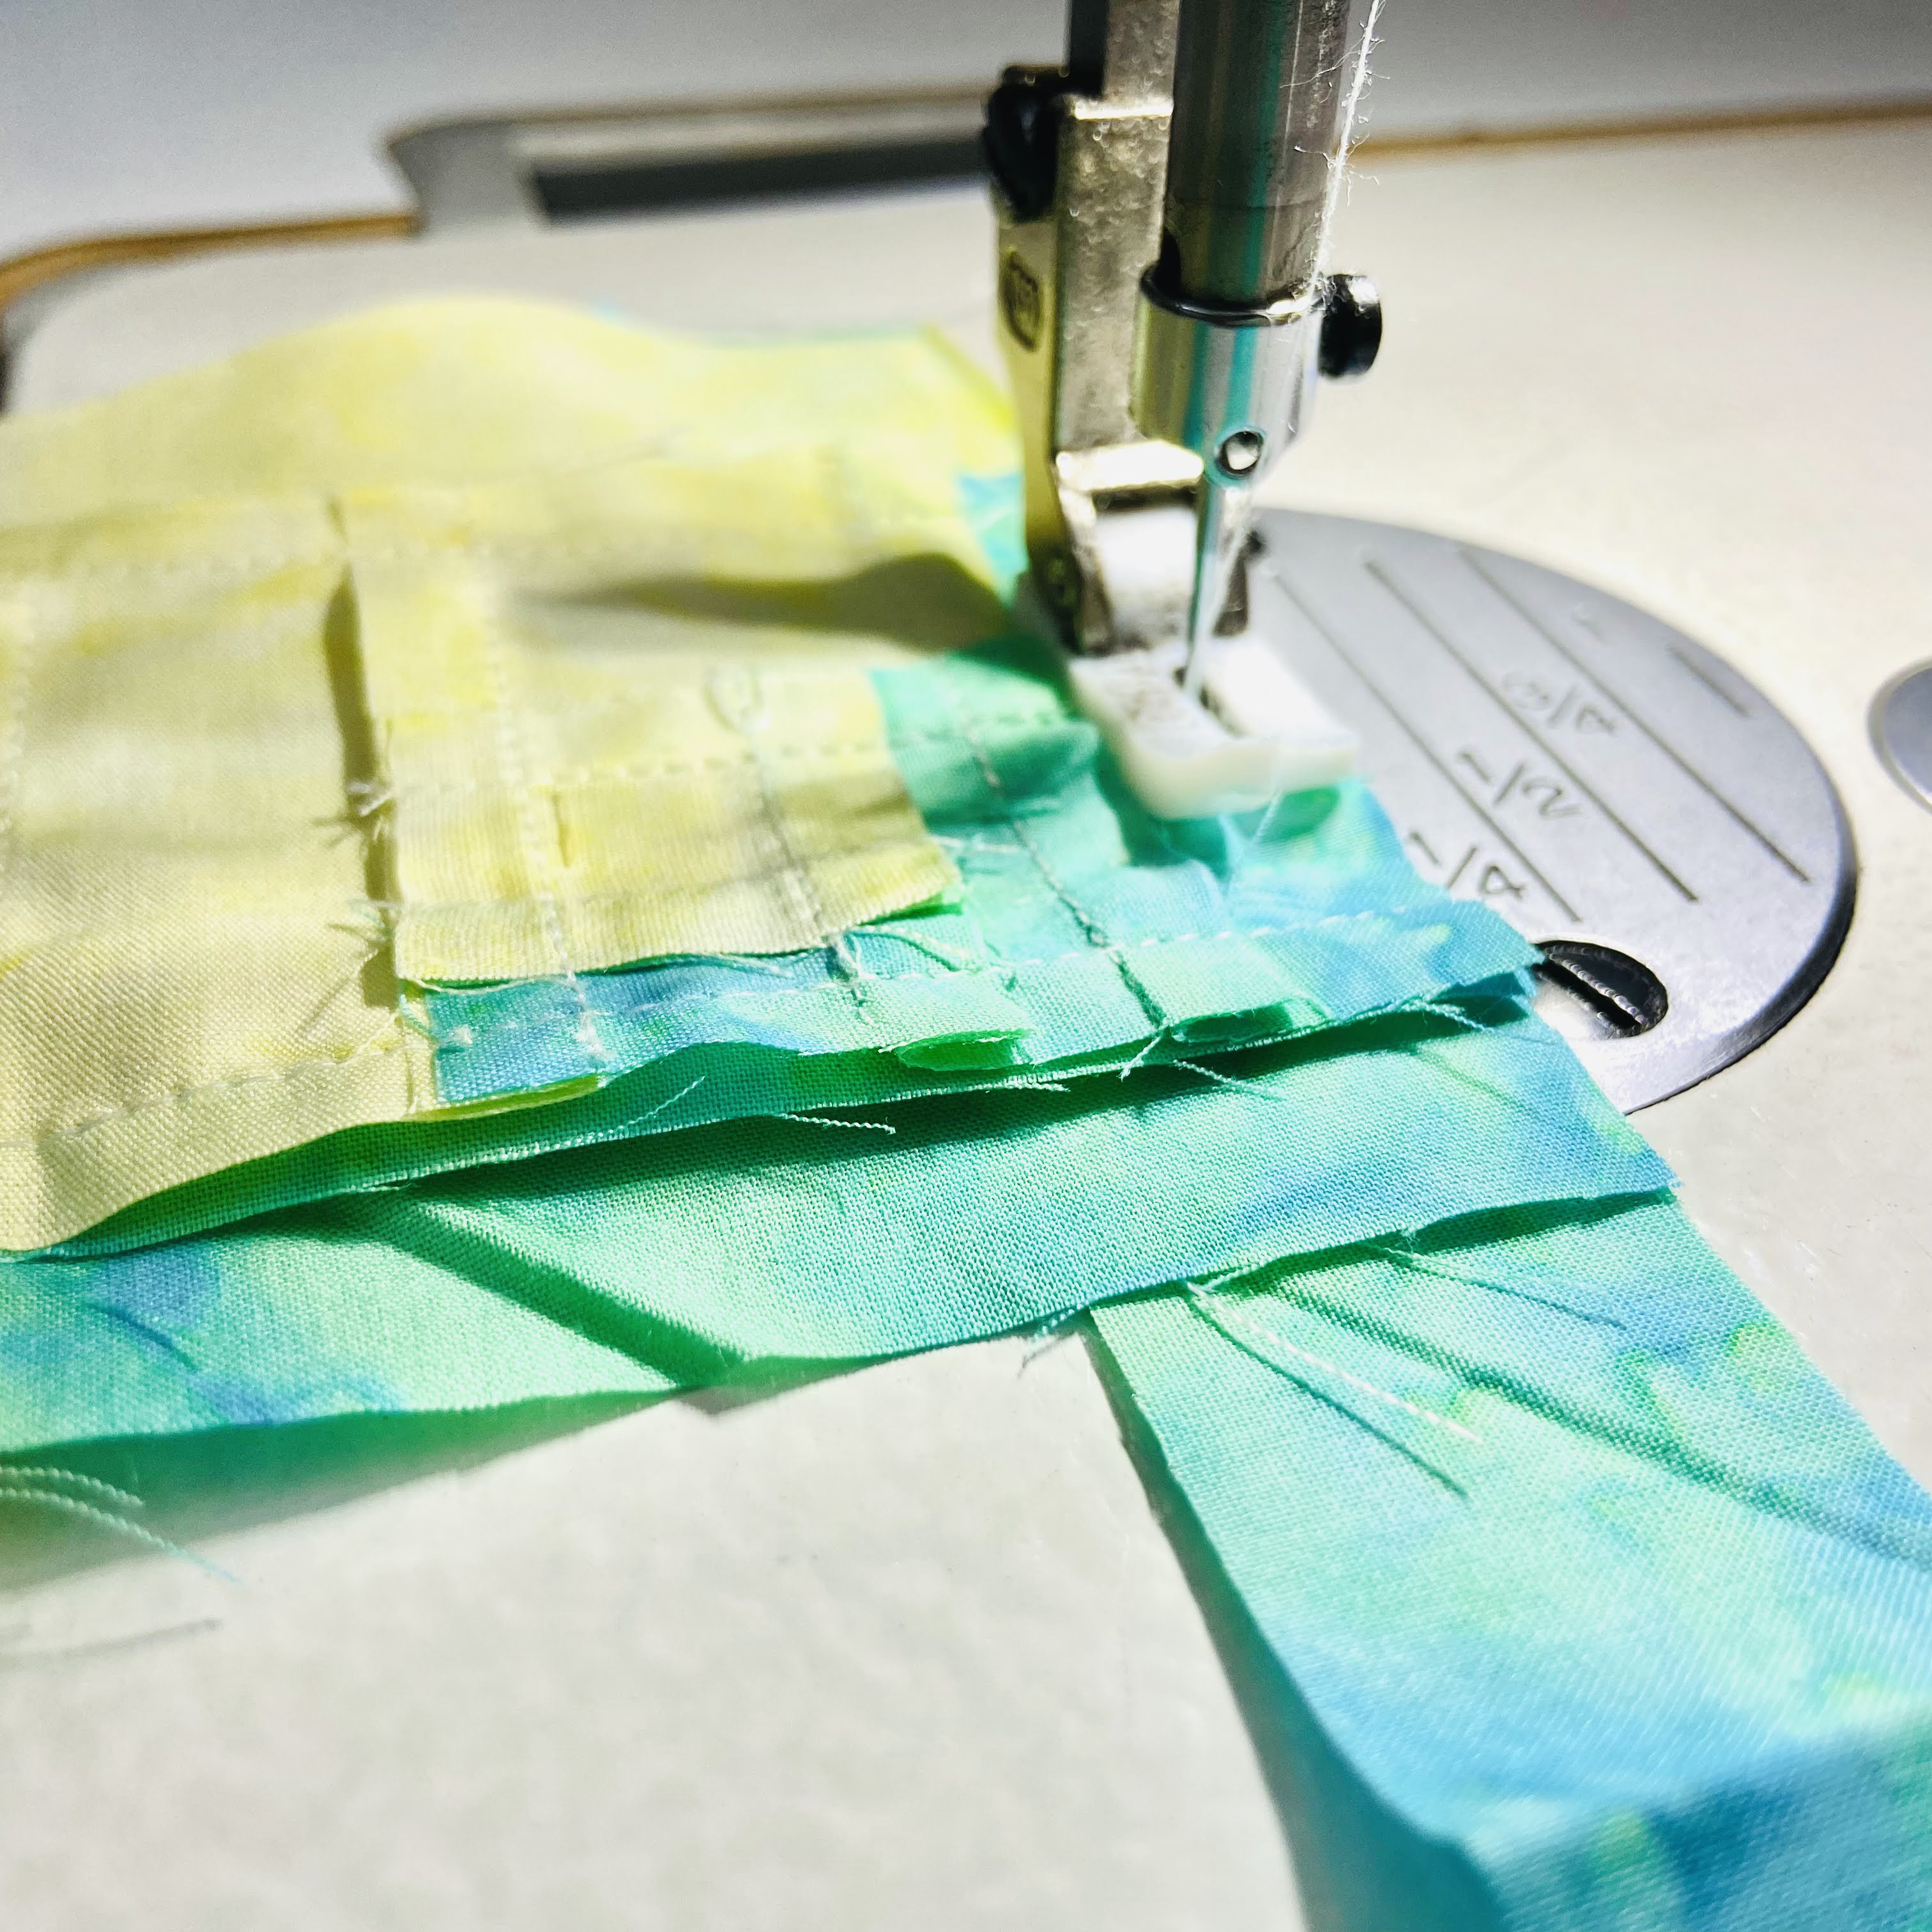
I made more placemats! Not really make a dent in my mini charms bin but I'm pretty happy with how these placemats turned out. Mini charm is my most fave pre-cut and t is also my mood booster. When I don't feel like sewing anything, I just open the mini charms bins and start piecing. 

As I started piecing, all sorts of ideas come into my mind but I decided to make a couple of placemats.  The placemats finished at approximately 12 x 15 inches each. The pink ones are slightly smaller. 

I thought of making all charms for the top, like this one, but decided to make it differently. So I added borders on both sides. For the mustard yellow placemats, I used Indian block print fabric for the patchwork and handloom cotton for the borders. On the back, I used pretty paisley print glace cotton in a matching color and quilted diagonally. It turned out very soft! 


patchwork placemats
Mustard Yellow Placemats


As for the pink placemats, the fabrics are mostly leftover from wallet and bag projects. I used cotton poplin for the borders and the backing. As usual, black and white striped binding when I could not decide what binding to use. 

I love to use these placemats as a center table mat too or to put in my side tables. My MIL used in her dressing tables. They do make the room brighter and I always love to see the quilts being used. 


patchwork quilt placemats
Pink Patchwork Placemats


Patchwork Quilt Placemats
Patchwork Placemats


OK, let's talk about quilting lines. My fave of course is serpentine but sometimes I am just too lazy to set up my HV machine! I always end up using my Jack machine and doing either grid, diagonal, or organic wavy lines. Hmm, it's time to read WALK - Walking foot quilting book by Jacquie Gering again! 

OK, I admit the downside of the digital era is even if you have the books, you  I still first go to Pinterest or Google. 


Recently I bought 2 books! First is Raina Gillman's Create Your Own Improv Quilt which I bought after watching her video on Youtube.  And I am glad I bought it cos there are a lot of basic things to learn from the book. 

The second one is Kaffe Fassett and Liza Prior Lucy's  Shot and Stripes. Well, the book is packed with knowledge. I decided to buy it because I love working with shot cotton fabrics (even though not the Kaffe Fassett brand).


 Sometimes, we see the preview on Amazon and the quilt looks simple and then think "I can do that too" but actually there are a lot of small important details (at least to me)  in the book. However, there are many books that have a preview of attractive projects but very little "educational" information, and some even do not have "proper" tutorials. I feel like this kind of book is only for visual pleasure, which we can freely get from Pinterest or Instagram. What do you think? 

But I still love buying books, especially Japanese Craft or Quilt Books. They have detailed diagrams (which I personally prefer), full-scale patterns, and also additional step-by-step photos. And of course the visuals!

What about you? Do you love buying craft books? Let me know in the comment below! 


Thank you for stopping by!

Happy Sewing

Elvira


*******

Linking up to this wonderful BLOGS

Learn to Time Blocking


Time Blocking Tips


I learned about time blocking recently as I always struggle to manage my "working time". Running a small business from home means everything is mixed up. Sometimes I barely have time to do my work, or most of the time, I left my work half done. 

What is time blocking?

Time blocking is a time management method that asks you to divide your day into blocks of time. Each block is dedicated to accomplishing a specific task, or group of tasks, and only those specific tasks. Instead of keeping an open-ended to-do list of things you’ll get to as you’re able, you’ll start each day with a concrete schedule that lays out what you’ll work on and when. (Todoist.com)


For someone who cannot stick to a plan like me, this time blocking method helps me to focus on a single task. 


How to start time blocking?


1. First, find out the time when usually your mind is free to do your craft. As for me, I prefer to sew in the evening when everybody relaxes. This is when my mind is also free from other chores that I need to do. 


2. Set this time to do Admin Work like editing the listing, taking photos, packing, and sending orders. Oh yes, running an online business is a LOT of work! And set time to do  "batching work". I like to do admin work before noon. Find the time when you usually have a little free time after lunch to do craft-related work, like cutting fabrics, fusing the interfacing, etc.  I also set a siesta time for an hour! 


Packing Fabrics

Mobile Sling Bag
Mobile Sling Bag

3. Set a theme day. This is where you work on specific tasks. As a creative person, mood plays an important role. There are days when I don't feel like sewing. By setting a theme day, you can break down the boredom from doing the same thing every day. I set twice a week to work on my fabric shop. like making new bundles. Cutting and folding fabrics always bring my sewing mojo back! Or I set time to clean my sewing room once a week! You know, putting the fabric away, sorting out scraps, etc. 

Indian fabric scrap bundle
Indian fabric bundle

4. Limit social media time. I mean the time when you mindlessly look at memes and funny reels. Well, I do love doing that too! So, I'm trying to do a "social media diet" now.  I block 2 times for social media but insert a little time here and there. Like when I wait for the food to get cooked, I use the time to catch up with my social media posting, like creating reel videos or stories.  I'm so grateful for these easy-to-use apps like Canva and InShot, creating a beautiful post is so much easier with them. The 2 blocked times for social media, I use to schedule posting in Pinterest and Twitter, either using Buffer or Tailwindapp.


5. Don't be too rigid and most importantly, enjoy what you're doing. Go out meet friends or have a good day at Spa. Well, we also need to pamper ourselves, right? Like last Monday, I went out with my SIL to the mall. The girls at MakersHub were having a craft exhibition in City Centre Mall.  I think the last time I went to the mall was around the end of December 2019! So it's been almost 2 years. It was good to be able to go out and about, feels like a pre-covid era but with a face mask. Nowadays most malls, shops, and offices still make masks mandatory. 


Speaking about face masks, I made a few snug-fit facemask orders. You can download the template for free HERE and watch the tutorial on YOUTUBE.


Fitted Face Mask


What Apps to use for time blocking? 

I'm using Google Calendar app on my phone. You can use other apps whichever you're comfortable with. Why google calendar? Because I found it simple to use and I can get reminders on my phone or desktop without installing other apps and also you can personalize it by adding color to a specific task, like in this videoI am still using my daily journal to write down a list of works I have to get done in a day for my reference. 


journal cover
my Journal 


With time blocking,  I can multi-task but in a more organized way. Even if I only have  15-30 minutes of the time I blocked for a certain task, at least I am making a little progress because I only focus on one particular task. It is better than no progress at all. I started this method recently and I surprised myself with how much work I can get done without stressing over it. 

 I have projects which are ready to sew which sitting on my cutting table for some time now. Since I started time blocking, I am able to finish two wallets, a couple of patchwork placemats, and also make progress with my Kawandi QAL. 


double zipper pouch
Double Zip Wristlet


fabric wallet

Bifold Wallet for women
Floral Wallet


Kawandi 


Scrappy Placemats


As a mompreneur, it is not easy to divide the time. Family and home always come first, but with this time blocking method I hope I can work better and smarter. How about you? How do you manage your time between your small business and family?


Thank you for stopping by today,

Happy Sewing,

Elvira

********

Linking up to these wonderful BLOGS


Potholders Swap


Patchwork Potholders


Hello, I hope everyone is doing fine. It's the end of October already. The past few weeks, I have not done much sewing, cos my spondylitis is giving me trouble again. The therapist told me to stop working for a couple of weeks and exercise more regularly. The latter I'm still struggling with. Ha! 

But I managed to finish the potholders swap for our Desi Quilters Pot of Gratitude Swap. It's now received with so much love. Thank you, partner!! Well, working with the mood board assigned to you is pretty challenging. I was assigned this cool mood board by Kuppulakhsmi.  


mood board


It took me a couple of days to think about what would be the best fit. I browse Pinterest and Instagram and even made a couple of blocks that I thought would work out, but it was not. So I add those blocks to my PHD bin. I decided to make mini granny square blocks, using 1.5" squares and the color palette in the photos. Well, some shades and added green to brighten it. I found the blue bird print in my stash that is perfect for backing. 


pot of gratitude


WATCH NOW: HOW TO MAKE SCRAPPY POTHOLDER


And I also got my swap package from Preetha. When she posted the pineapple potholders in the group, I sort of know it's for me but I was not sure. So I'm very happy when they arrived with all the other goodies she sent. The color thread cones are fantastic. I've been searching for one but did not find it in my regular shop. And don't miss the pretty keyring, my initial!! The potholders are so cute that  I put them up in my sewing room now. I don't have the heart to use them. Thank you so much Preetha for the thoughtful gifts! She told me the lady who made the beautiful keyring is battling cancer. If you happen to read up to this part, please send a prayer to her.


pot of gratitude

As I said, making these potholders is pretty challenging. Besides we have to make according to the mood board, we also learn to make a small block that fits the idea. You can choose, either color or shape from the mood board or a mix of those. I was thinking of different ideas, including making flower appliques, but decided to make a simple one, a granny square block, but using smaller pieces so that I can fit in more colors. Now that reminds me of my UFO Granny Square quilt


ALSO READ: How to make a granny square pillow with zipper


All in all, swap is a great learning process and the feeling of receiving gifts of love from our online friends is really warms my heart. 


Thank you for stopping by,

Take care & happy sewing!

Elvira


The Chatai Fish Kantha

 Kantha framed work


After the Kantha Workshop last year, I bought  Inspiration Kantha by Anna Hergert on Amazon to learn more. The book is very good if you're looking for some in-depth knowledge about Kantha, which I also learned during the workshop. Anna also wrote very detail about what kind of fabrics and thread to use, etc. Well, reading the book is not enough, right. We must try and experience it to learn more.

Frankly, when people heard about Kantha, the most common response would be "ah it's only running stitch, right?" but believe me, this "only running stitch" business can be overwhelming or intimidating especially for beginners. I mean, you have this notion that "it's easy" but when you get down to work on your piece, you will start to feel anxious because your stitches are not even, too big, too small, too ugly, etc. Also, there's a question of where should I start, how to end the stitches neatly, and a lot of other things going on inside your head. Well, at least that's what I felt when I started working on this Chatai fish design. 

chatai fish kantha


When working on the fish, I tried to follow the book. The outline work was not tough but when I started the running stitches, I made a few detours. By the way, I am using 2 layers of cotton khadi which I got from the local market just before the pandemic. I tried my best to do smaller stitches but in the beginning, I did a lot of unpicking, because as I said, I feel the stitches are too big or the gap between the lines is too wide. It took me a while to get into the rhythm because I was doing this piece after I finished the placemats which have bigger stitches. 

chatai fish kantha
I love the texture of this khadi fabric


Now, doing the fill-up stitches, I was confused should I work from inside out or just working from the top row by row. It's pretty tricky. I decided to work from inside out by echoing the fish. I imagined the echo stitches are like the splash on the water as the fish swimming away. After a few lines, it's time to take the stitches in a different direction. 


I worked on a section here, one corner at a time started from the bottom. When filling up the top part, I decided to go row by row moving upward. You can see the stitches are going in different directions in the picture above. It showed how confused I was while working on this piece. I even browse Instagram and blogs/websites to learn more about Nakshi Kantha and stumbled upon Fairly Worn website . Valerie is working with an NGO in Bangladesh and Tripty Boutique. Check them out, they are simply stunning. 

The back


Well, I still have a long way to learn and I really really enjoyed doing the hand quilting /hand sewing and this ancient technique is really intriguing and interesting to learn. Yes, there is a lot of work that goes into one piece of (original) Kantha, fair trade or not. But as you start learning the art, you will start to appreciate it more. Kudos to Valerie who decided to work with the NGO in spite of everything. It takes courage to support those people, especially across many continents. 

I hope more people especially in India and Bangladesh will revive this art of Kantha to its former glory. Because Kantha is not just a running stitch! I hope one day I can travel to Bangladesh (which is actually pretty near to my state) to see more about Kantha. 

Kantha Wall Hanging


Now this Chatai Fish Kantha is done, framed, and put up on my wall. I still have a few hand quilting projects for my small quilt shop and have a few ideas for my next Kantha project! Stay tuned! 

Check out more of my Kantha Journey 

Until next time,

Happy Sewing,

Elvira

*****


Latest Fabrics

Latest Video