Powered by Blogger.

{Tutorial} DIY Printed Fabric Label


There are so many tutorial you find online how to make DIY fabric label. I have one DIY Label tutorial using fabric pen and now I am going to share how I do DIY printed fabric label. 

First of all, here in India I don't get freezer paper, so I used fusible interfacing which is called "pasting" by my local supplies shop. It's a thin woven interfacing which is used as backing for machine embroidery. There is one with glue on one side (hence it's fusible) and there's one without glue. I used the one with glue on one side. 

So what you need is :
~ a piece of fabric --- cut into A4 size 
~ a piece of fusible interfacing --- cut into A 4 size
~ transparent nail polish
~ Computer & printer (I used laser jet by the way) 

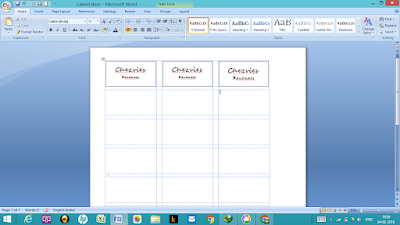
#1 - Design your label on your computer. I am not very savvy with computer program, so I use MS word and used a mailing label template to create my label :D 


#2. Fuse your fabric on to the fusible interface. Be careful with the setting. Set the iron on WOOL and press few second on one side before moving it around. Than way you will get a crisp papery fabric. I used linen in here. 


#3. If you're happy with your design, print it out onto the fused fabric. I suggest you run a little print test on paper or at the back of the fabric (the interface side)

and when you're done, cut and dab the edges with a little transparent nail polish to prevent it from fraying. Well, unless you have fray check, which I don't ^_^. 


It's easy, right? You can add your logos or if you have color printer that will be wonderful. 

I made my quilt label the same way and I read somewhere (sorry forgot the blog), if you soak your printed label in white vinegar for 10-15 mins that will prevent the ink from fading. 

This label is for stuff which does not need frequent washing. 

And you can check HERE for more tutorial. 


Until then,

Happy Crafting 


Week 4 of January

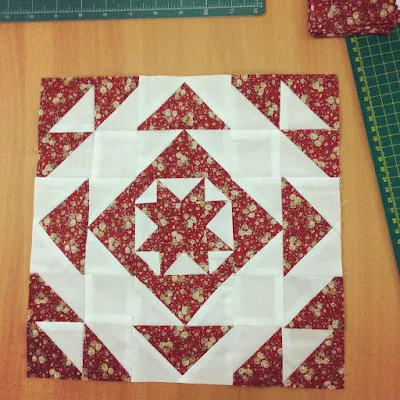
I bought  this 200 blocks book last year and this is one block I bookmarked. 
I really love this one


I esp. love the tiny star in the middle.


Let see how I will progress here. This is going to be my "one block at a time" project. Like maybe 3 or 4 blocks in a month or maybe less. 

********************************

Aaaand I finally finished the TOP of this quilt. Started last year but somehow never got around to join the blocks.
too much of distraction 0_0


it will be finish at 40" x 50" 

I am still thinking what to put at the back, maybe a grey chevron will look good. 


and another quilt is basted. Plan to do the quilting next week after finish my custom orders


***************************
and my son is growing =_= 
how time flies!! 
He is taller than me now
listening to rock music
and best part is  now we can sing Bryan Adams and GnR songs together
though I am still trying to convert him to Bon Jovi <3 


*************************

Another thing I did was I started doing  machine embroidery. 

I have few orders where customers want their wallet personalized and  I thought might as well I make a good use of my machine :D

I am still trying to figure out how to make it work with rayon thread. This husqvarna viking Topaz 20 seems to hate rayon thread :( . I am asking in few of my quilting groups and hopefully one or two tricks will help me ^^. 


The bigger patches are  for custom quilt I am making for our high school reunion next summer. Yeah yeah...I am adding another WIP in my list. I haven't decided on the design as yet, but I think it's going to be a traditional blocks. 


 **************************

and I am also playing with leftover jelly rolls cos I want to try one poly batting sent by one supplier. I am not quite happy with the batting tho. I am still looking for a better one. 


so that's my story of the week. 
What's your story?

Until then,

Happy Quilting


Latest Fabrics

Latest Video