Powered by Blogger.

A bright week

This week was quite a busy week and I seem to be in a bright mood as you can see from the works I've completed this week. 

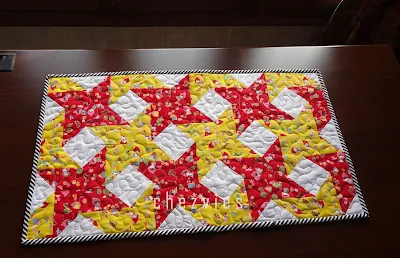
Today I finish this mini runner after watching MSQ Youtube  Tutorial on Double Friendship Star block. It's so easy and fun to make. I made this with  2 red riding hood FQ  and a scrap of solid white. 


And I still love using my variegated thread so I used a light red-white one and love how it turned out. 


Very often when I'm cutting fabric order for my customers, idea will pop out in my mind. This mug rug happened like that. I thought I just had to make a quick mini mat with this one. I made pink one earlier and gave that to one of hubby's aunt. Indian fabrics print and color are so attractive that practically you only have to quilt it. 


Still in orange mood, this mobile pouch was made for a client. She saw my patchwork pouches and wondered if I can make a similar patchwork for iPhone pouch. And why not? 

frankly creating your own patchwork so much more fun than using printed patchwork fabric, right?


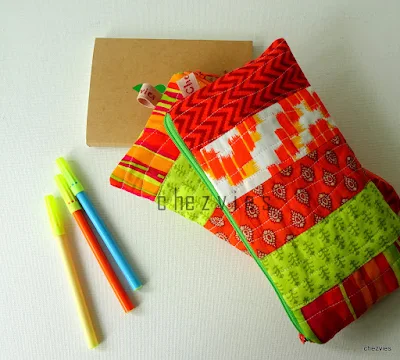
and with the same fabric she wanted 2 patchwork pencil cases

I did this passport wallet with this african print. I have mini quilt still in WIP state with the same print. I added names in the passport wallet but not in the pic ;)


in the last post, I mentioned about embroidery patches. I did the pouch and add the patch but not happy with how it looked. So, I took out my embroidery machine again and did the embroidery directly on the pouch. Now, I like this better! 


That's all for this week. How about your week? I hope you had a good one too


Until then,


{Tutorial} DIY Printed Fabric Label


There are so many tutorial you find online how to make DIY fabric label. I have one DIY Label tutorial using fabric pen and now I am going to share how I do DIY printed fabric label. 

First of all, here in India I don't get freezer paper, so I used fusible interfacing which is called "pasting" by my local supplies shop. It's a thin woven interfacing which is used as backing for machine embroidery. There is one with glue on one side (hence it's fusible) and there's one without glue. I used the one with glue on one side. 

So what you need is :
~ a piece of fabric --- cut into A4 size 
~ a piece of fusible interfacing --- cut into A 4 size
~ transparent nail polish
~ Computer & printer (I used laser jet by the way) 

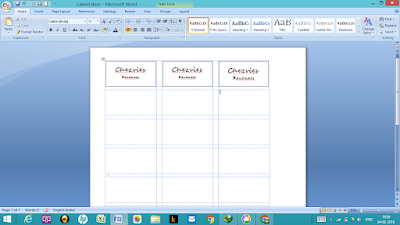
#1 - Design your label on your computer. I am not very savvy with computer program, so I use MS word and used a mailing label template to create my label :D 


#2. Fuse your fabric on to the fusible interface. Be careful with the setting. Set the iron on WOOL and press few second on one side before moving it around. Than way you will get a crisp papery fabric. I used linen in here. 


#3. If you're happy with your design, print it out onto the fused fabric. I suggest you run a little print test on paper or at the back of the fabric (the interface side)

and when you're done, cut and dab the edges with a little transparent nail polish to prevent it from fraying. Well, unless you have fray check, which I don't ^_^. 


It's easy, right? You can add your logos or if you have color printer that will be wonderful. 

I made my quilt label the same way and I read somewhere (sorry forgot the blog), if you soak your printed label in white vinegar for 10-15 mins that will prevent the ink from fading. 

This label is for stuff which does not need frequent washing. 

And you can check HERE for more tutorial. 


Until then,

Happy Crafting 


Latest Fabrics

Latest Video