Hello,
What do you plan to sew this weekends? I've been making few small projects and learning new things. I want to share with you how to make this quick quilted project. This will perfect gift to make or to sell in your weekends market.
Ok, let's start
What you need:
Fabric scraps at least 8" wide - Fat Eighth would be great
Coordinated or contrast lining fabric
Fleece/Batting
Thread
First, you can download the templates from HERE
Print the templates at ACTUAL of 100%
Cutting Instructions:
Cut the interfacing and fabrics according to the instructions written on the templates.
Seam allowance already included in the templates.
Now the fun part:
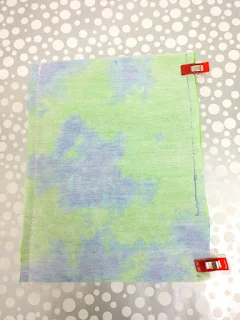
Place the sleeve pockets on each short side of the Main Body A (RIGHT SIDE TOGETHER) and sew with 3/8 seam allowance.
Cut the batting slightly bigger than the templates. Place the exterior on the batting Right Side Down. (if using fusible fleece, here's HOW)
Start Quilting using your fave quilting lines. I love this decorative stitches in my HV machine. Once done, trim the excess batting.
I love the look of serpentine stitch. Alway!
Fuse the lightweight interfacing on the wrong side of lining fabric and place it together with the exterior piece, right side together.
Sew the short edges with 3/8" seam allowance, turn the right side out, press the seam and top stitch with 1/8" seam allowance.
(you may find the lining is a bit longer, DO NOT TRIM)
Now fold in one short side towards the lining (to create sleeve).
and pin the folded sleeve with the lining piece, like the picture below.
then turn the wrong side out again.
it should look like the picture below.
Now pin them all together
There should be separate fold of lining and exterior (see picture below). I hope I make sense here ^^
Now sew one of the longer seam with 3/8" seam allowance.
Backstitch at the beginning and end.
Mark the other long edge and stop 1.75" from the end. Flip the lining fold and draw mark line on the wrong side of the batting. Sew along the mark line on the lining and back stitch as you stop at the end of the line.
Flip the fold of the lining backward and sew the exterior close along the line you made earlier. Backstitch at the beginning and the end.
trim all the stitched corners.
Turn the passport cover right side out through the small opening. It's a bit difficult but doable ^^.
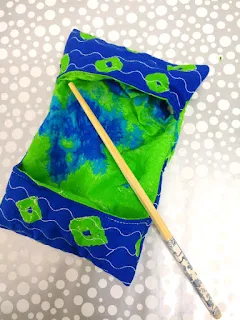
Take out your chopstick and start pushing those corners.
Pull the opening out, you can sew the opening by hand or machine.
Now spray your passport cover with diluted starch water and and give it a good press.
Voila, your weekends project is done!!
 |
| Shibori Tie Dye Passport Cover |
Show me what you make by tagging me in INSTAGRAM.
As usual don't forget to sign up for blog updates by subscribe through email.
Until then,
Happy Sewing

Linky party to Show Off Saturday


