Powered by Blogger.
Showing posts with label free tutorial. Show all posts

TGIFF - How to Make Quilted Sling Bag

Hello and welcome to TGIFF!

This week, I'm sharing a tutorial for foldover sling bag. 
A few weeks ago, hubby's aunt came and she said her morning walk friend wanted a sling bag like the one I made for her. It's a simple foldable sling bag with elastic closure. Very light and handy.

UPDATE : Download the PdF version HERE


So, here is what you need:

- Assorted of fabrics for exterior and lining
- batting (you can use fleece, flannel or cotton)
- Fusible lightweight interfacing (skip this if you are using fusible batting)
- Elastic cord or hair band
- Large Button
- Grosgrain ribbon
- Woven Interfacing Strip
- Swivel hook 0.5"

Measurement and cut

- Exterior Fabric :
   Top Panels  8" W x 3" H - cut 2
   Bottom Panel 8" W x 8.5" H- Cut 2

- Interfacing : 8" W x 22" H - Cut 1
- Lining Fabric : 8" W x 22" H - cut 1
- Batting  : 9" W x 23" H - Cut 1
- 0.5"Wide Ribbon  : 2" Long - cut 2
- Strap Fabric : 2" W x 44" H  - cut 1
- Woven Interfacing Strip 1" x 43 - cut 1

*RST - Right Side Together


Let's sew :

1. Sew the top and bottom panel together  on the 8" side (RST) with 3/8" seam allowance.
2. Sew the bottom of both exterior panel together (RST) using 3/8" seam allowance. You will get a long piece of exterior panel 8" W x 22" H.


3. Fuse the interfacing on the wrong side of the exterior panel and then place the it on the batting Right Side Up  and pin generously. The pins will prevent the fabric from shifting while you quilt it. Quilt as desired. Once you finished with the quilting, trim the excess batting.


I'm not very fond of free motion quilting, so I always use my walking foot. I quilted my bag using organic wavy lines approximately 0.5" apart.  Walking foot is just awesome! It goes through layers effortlessly like this bag and this bag.

4. Fold and attach the ribbons on the longer sides of exterior panel. Place it on the bottom panel part, just under the stitching line between the top and bottom part.


5 . Fold the elastic cord and make a knot. Center it on one of the exterior panel top edge. Top stitch with 1/8" Seam allowance. Run a couple stitch and back stitch to secure it.


6. Put the lining  and exterior  panels RST and sew the short edges (top) together with 3/8" seam allowance. Repeat with the other short edge.


7. Turn the bag inside out , pull the lining away from the exterior. Press the seam towards the exterior side and top stitch with 1/8" Seam Allowance.


It should look like the picture below.


On the wrong side , it should look like the picture below. 
Do not cut the knot.


8. Now pull out the lining and exterior panels separately, so that they are on opposite side. Match the top seam and secure it with wonder clips. 


9. Sew the longer side starting from the exterior panel with 3/8" seam allowance. Repeat with the other long side, but leave a gap around 4" or so for turning. Don't forget to back stitch at the beginning and end .


10. Diagonally cut the corners and turn the bag inside out through the opening, iron it and sew the opening closed.


Make the strap:

1. Center and fuse the interfacing on the wrong side of the strap fabric. You can opt out for the interfacing if using thicker fabric. Since I was using thin linen, I use  1" woven interfacing strip.
2. Fold it lengthwise and press to create a middle crease. Open the fold. (DIAGRAM A)
3. Fold in both short ends by 1/2” and fold both raw edges lengthwise towards the middle crease. (DIAGRAM B)
4.Press and fold it in half lengthwise again. Top stitch on both long edges with 1/8” seam allowance. (DIAGRAM C)


5. Install the swivel hooks on both ends of the straps and stitch the strap to secure it.


6. Sew fancy wooden button on the front of the bag. Fold top of the bag and mark the placement as you desired. And it’s done!! Yay!!


Do tag me on Instagram @chezvies if you make one!

Now, it's your turn to link up and show us your finish this week! Click the blue button below and start sharing~


Happy Sewing

Elvira


Interfacing Guide for Handmade Bag in India

Hello,

Today I want to share about interfacing. Not the famous brand interfacing because we don't have those branded interfacings here in India. I often receive a message asking what interfacing I used in my bags, pouches, and wallets.

Many of you probably already read interfacing guide by Sew Sweetness but since we - in India - don't have all those brands, we are back to square one, right?

I have been experimenting with many kinds and quality of interfacings. Which interfacing to use depends on what kind of project and what look that I want. Floppy, firm, sturdy, quilted, etc.

I recently purchased a roll of heavy woven interfacing and I am happy that I finally found it. It took me several trips to the wholesaler. He was kind enough to let me check through all kinds of interfacings without asking  "what are you making, ma'am?" which is pretty much the habit of an Indian (male) shopkeeper/salesperson. And it always pisses me off, cos what I am making is none of his business ^^.

Anyway, I found what works best for my projects.


I use this very frequently to make small projects like small pouches or pencil pouch, and also bags.  This will make cotton fabric feel like home decor weight fabric. Not as thick as canvas though. I used this to make the Phone Pouch and Kindle Cover, pencil pouch, and Tote bag.  With this interlining, adding batting to the pouch won't be a problem.


Result: Soft /floppy and wrinkle-free, which means you can smoothen it with a warm iron.


I discovered this recently. It's thicker than all-purpose interlining. It gives a good shape to the bag and pouches.

You can see the fabric print more prominent on the all purpose interlining
Medium = MCL 3001 Madura Coats India

I use this for a  pouch or any purse that I don't need to be padded or add batting, but more sturdy without being too stiff.  Sometimes I use this interfacing for wallet or passport wallet too, combined it with Heavy Interfacing.


Heidi Mini Foldover Bag


This is also woven but heavier. This will make your fabric feels like canvas.

MCL 1616 (Madura Coats India)

I use this for my family passport wallets and women's wallets. The result is a firm/sturdy but soft wallet. Since it's a cotton base, it makes the hand sewing less painful.

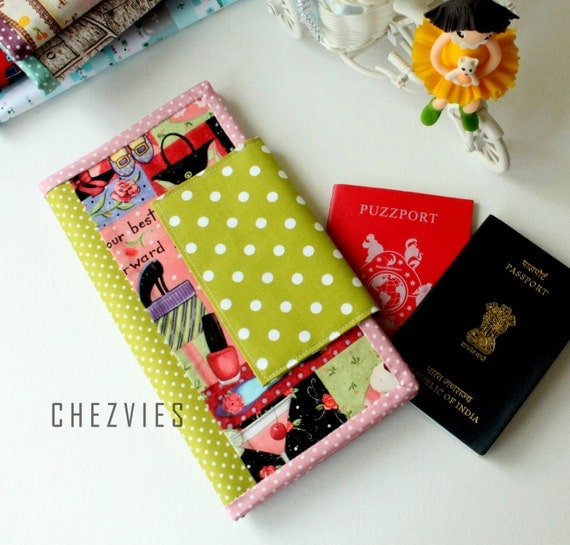
Quilting Family Passport  wallet, large passport holder, passport case, family travel wallet, family passport cover, 6 passport organizer

4. Buckram 

This is my alternative if I could not get the heavy interfacing for my wallet. This is the one with a papery feeling and it makes the fabric very stiff. I only use this for wallets. Since I don't have to do "birthing", it works out fine. You can read HERE to learn more about Buckram.


I remember I made a tote bag with buckram and it wrinkled beyond repair LOL. I used it for a shopping bag. (Update: I stopped using buckram for my bag and wallet projects) 

All the above are iron-on or fusible. Which means one side is glue coated. I normally spray the fabric with water and place the glue side on the wrong side of the fabric, and iron it on a cotton setting. For lighter interlining use a setting in between wool and cotton.

5. Lightweight Non-Woven Interfacing.

This transparent fusible interfacing is called "pasting" in India. I use this a lot for my wallet card slots, quilted pouches, and also applique. 


It's good to give just enough thickness especially for card slots, or the inner pocket of a bag. But you have to be extra careful because it will shrink and wrinkled if the iron is too hot. I use a wool setting while ironing this interfacing. If you're careful, you will get a nice and smooth result. 


Card slot from Trifold Women's Wallet


I always use this interfacing to make a quilted purse. With this interfacing, the quilted bag or purse will be soft but sturdy, even after washing 

I also use this for quilted pouches and bags, especially when I work with Indian Fabric.

You can easily buy this interfacing in a "button shop" in India. Sometimes, they sell it meterage, but I always buy in a full package. It's around INR 150 for a pack of 10 meters.


Quilted Zipper Pouch
Quilted Zipper Pouch 


UPDATE: There are many brands of interfacing in India, what I wrote here is the one I am using and that works best for me. 

Where to buy it?
I bought my interfacings from a local dealer in the market. You can get them online on Amazon India or other websites, but make sure to contact the seller first. Because there is no clear description in the listing that I saw in Amazon India, and the seller will casually write interfacing or interlining as buckram. 

That's all for today. Don't be scared to experiment. Make the best of what you can find locally. I hope this simple guide will be useful for you. 

Thank you for stopping by and read my blog. Don't hesitate to leave a comment or two.

Until then,

Elvira


{TUTORIAL} Adding Zipper Pocket

Hello,

The last two days was euphoria for me. It's the first time I got published in an online media and that too on Ecwid Blog! I was contacted by them by email early this month and was so excited about it. You can read my Behind the Scene Story in Ecwid Blog. I hope I can inspire more mothers who decided to left 9 to 5 job and pursue her dreams.

adding zipper pocket tutorial

Now let's get down to the fun stuff. I got email from Patti, asking about how to add zipper pocket on the Phone Pouch. Thank you so much Patti!!
Adding zipper pouch is very easy. If you already got the pattern  here is what you have to do. (if you haven't,  you can get it at the end of this post)


After you cut all your Exterior, Lining and Interfacing pieces as per pattern instructions, cut 2 extra lining pieces of Main Panel.


1. Fuse the interfacing on to the wrong side of the back exterior piece. Mark 1.5" down on one of the short end and cut.

Mark down 1.5" 

Do the same with one of the lining piece.


2. Put the lining and exterior pieces right side together (see picture below) and sew with 1/4" seam allowance. Once done turn right side out and press the seams.

sew with 1/4" seam allowance

3. Take 8" zipper and place the lined exterior pieces you just made on both sides of the zipper. Refer to the picture for placement.


4. Top stitch close to the seam and repeat with another line of stitching, approximately 1/4" apart.


I used a leftover zipper and added a contrast color zipper pull. So fun!!

I hope you can see the double line stitching there. 
5. Now, take one piece of lining and place the zippered exterior panel on the lining. All right side up.


6.  Pull the zipper head to the middle and baste stitch all around. I love doing baste stitching instead of using pin or wonder clip. It's totally personal preference.


7. Trim the excess zipper and now your Main Exterior with Zipper pocket is ready.  


Once this part is done, you can proceed as per the pattern instructions. 

It's easy, isn't it? 

You might ask whether you should cut the main exterior piece - that you want to add zipper pocket - bigger? It's not necessary. The zipper will make up for the seam. But if you're not sure about the 1/4" seam allowance, you can cut the exterior piece and 1 lining slightly bigger. Maybe 1 inch bigger to be on the safe side. You can always trim it later.


While making this pouch, I also made the flap slightly rounder. YOu can do that too by drawing  a curvy lines like in the picture below. Use a bottle cap or  plate to draw the curve.

You can use this technique to add zipper pocket in any pouch or bag.


I hope you enjoy the tutorial. Let me know what you think about it and don't forget to share so others can learn too. Sharing is caring ^^.

Thank you for stopping by


Until then,

Happy Sewing

Like this tutorial? Subscribe to get more updates !


{TUTORIAL} Quilted Passport Sleeve

Hello,

What do you plan to sew this weekends? I've been making few small projects and learning new things. I want to share with you how to make this quick quilted project. This will perfect gift to make or to sell in your weekends market. 
Ok, let's start

What you need:
Fabric scraps  at least 8" wide - Fat Eighth would be great
Coordinated or contrast lining fabric
 Fleece/Batting
Thread

First, you can download the templates from HERE 

Print the templates at ACTUAL of 100%  

Cutting Instructions:
Cut the interfacing and fabrics according to the instructions written on the templates. 
Seam allowance already included in the templates. 

Now the fun part: 

Place the sleeve pockets on each short side of the  Main Body A (RIGHT SIDE TOGETHER) and sew with 3/8 seam allowance. 


Cut the  batting slightly bigger than the templates. Place the  exterior on the batting Right Side Down. (if using fusible fleece, here's HOW)


Start Quilting using your fave quilting lines. I love this decorative stitches in my HV machine. Once done, trim the excess batting.


I love the look of serpentine stitch. Alway!

Fuse the lightweight interfacing on the wrong side of lining fabric and place it together with the exterior piece, right side together. 


Sew the short edges with 3/8" seam allowance, turn the right side out, press the seam and top stitch with 1/8" seam allowance.
(you may find the lining is a bit longer, DO NOT TRIM)


 Now fold in one  short side towards the lining (to create sleeve). 


and pin the folded sleeve with the lining piece, like the picture below.


then turn the wrong side out again. 


it should look like the picture below. 


Now pin them all together


There should be separate fold of lining and exterior (see picture below). I hope I make sense here ^^

Now sew one of the longer seam with 3/8" seam allowance. 
Backstitch at the beginning and end.  


Mark the other long edge and stop 1.75" from the end. Flip the lining fold and draw mark line on the wrong side of the batting.  Sew along the mark line on the lining and back stitch as you stop at the end of the line. 


Flip the fold of the lining backward and  sew the exterior close along the line you made earlier. Backstitch at the beginning and the end. 


trim all the stitched corners. 


Turn the passport cover right side out through the small opening. It's a bit difficult but doable ^^. 


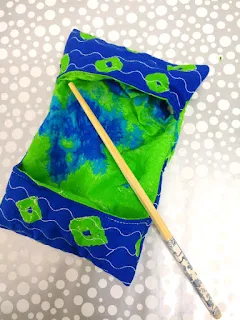
Take out your chopstick and start pushing those corners.


Pull the opening out, you can sew the opening by hand or machine. 

Now spray your passport cover with diluted starch water and and give it a good press. 

Voila, your weekends project is done!! 


Shibori Tie Dye Passport Cover


Show me what you make by tagging me in INSTAGRAM.

As usual don't forget to sign up for blog updates by subscribe through email. 

Until then,

Happy Sewing


Linky party to Show Off  Saturday


Latest Video