Powered by Blogger.
Showing posts with label passport sleeve. Show all posts

Small Travel Wallet and Social Media

I made another mini travel wallet from THIS Pattern and this time with the improvisation based on this tutorial. 
This is one of my fave combo. I am using handloom and block print fabric here. If you have not tried the handloom a.k.a shot cotton, maybe you should. They have unique colors! Like the blue fabric in this wallet, has a shade of purple.

Anyway, recently I read this blog post at Sew Can Do where she was saying she's leaving social media. I had my share of problem with Facebook and Instagram too, like I wrote in this Post. I absolutely agree with her that we're at their (i.e social media) mercy. We never know when our page will suddenly disappear without rhyme or reason. As always, it's better not to put your eggs in one basket, right? 

saw this on Facebook :P

What do you say? What's your experiences with social media? Let me know in the comment below! 

Until next time,

Happy Sewing 

- Elvira -

******


More Passport Covers

Hello,

Purple Flower 

Time flies when you're having fun! That saying is quite true. This week started with meeting a new friend, who happened to travel to Guwahati. It was a fun meeting her though very briefed since she had to go back to Indonesia. 

Traveling alone needs a certain degree of organization. Everyone has their own way of keeping everything organized. Some people love to carry many things and always need to print out the e-tickets and hotel booking, etc, that they need a bigger passport wallet where they can keep everything in one place. Many people also prefered a multi compartment zippered bag. 

perfect gift for mom

I do love to carry a bigger family passport wallet whenever we travel as family. However, when I travel alone, sometimes I like to go minimalist and carry a compact passport sleeve just for my passports and a few cards like the one above. 

Slim and Compact

I can easily put this inside my sling bag and the snap button will keep it secure. 
I made another passport cover using the fabric I bought from my Japan trip this year. It's a cute Mickey Mouse print in Denim! It is the same fabric as the Snoopy Passport Cover.

Disney Passport Cover
image 0
Mickey Mouse!

hand sewn binding

Hand sewn binding is always my prefered method and in fact my fave part of sewing wallets! When it's done and the binding turned out beautifully, it always gives me joy, a sense of victory! 

What about you? What is your traveling style? 

Thank you for stopping by. 

have a nice day!

~ Elvira ~


NEW PATTERN - Passport Cover Pattern & Tester Photos Part 1

Hello,


I just released a new pattern! When I first posted the passport cover I made in Instagram, many of my fellow crafters asked if the pattern will be available. Well, I said, why not? It's a super quick pattern to sew and I'm sure it will be popular in your handmade markets or pop up stores. The pattern itself is highly adaptable. One of my tester, Maria, said it is perfect for an everyday wallet. 
The pattern is now on 20% off both in my ETSY SHOP and WEBSHOP.

I'd like to thank my amazing testers for their effort to help me perfect this pattern. There was a lot of discussion in the group and I learned that certain countries' passports are bigger. The pattern comes with full-size templates and measurements are given in Metric as well as US System. 


Without further ado, let's check out a few photos from the testers! Make sure you click the link to check more of their works.

Ulrike's The Busy Sewing Room - FACEBOOK, INSTAGRAM, ETSY

Shweta's ArnelsMommy : INSTAGRAM

Mia Creates on INSTAGRAM
Allison's Florida Girl At Home  - INSTAGRAM

Shanti's Hastakrita on FACEBOOK

AnDrea's Charlene Bag - WEBSITE, FACEBOOK

Raji's Home Maker's Hustle - FACEBOOK, INSTAGRAM

Aren't they beautiful? Some of the testers said it was the first time for them to try sewing the binding by hand and they loved it!! I included step by step photos how to create a neat mitered binding in the pattern and planning to add a video soon. As soon as I learn how to take a decent video, without embarrassing myself or my sons LOL. 

I will show you more photos tomorrow! Follow my blog by email so you won't miss the post or join the Facebook Group and mingle with the like-minded crafters. 

Until then,

Happy Sewing

- Elvira-


{TUTORIAL} Quilted Passport Sleeve

Hello,

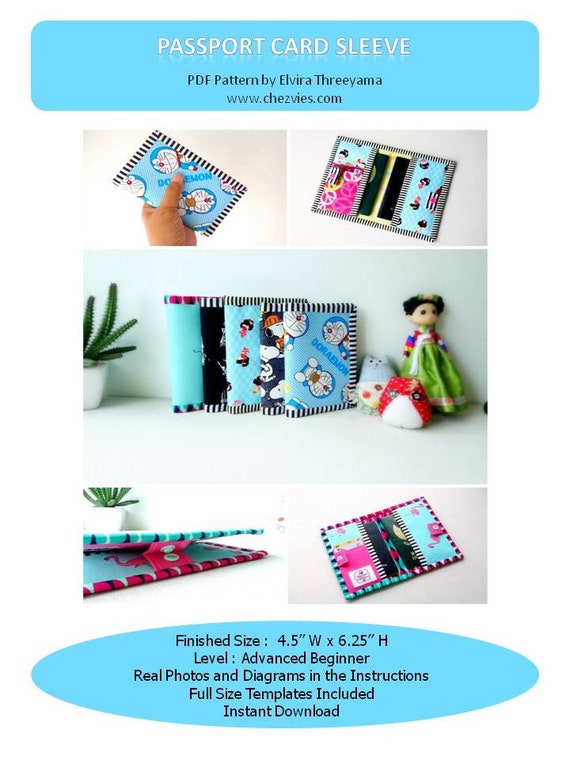
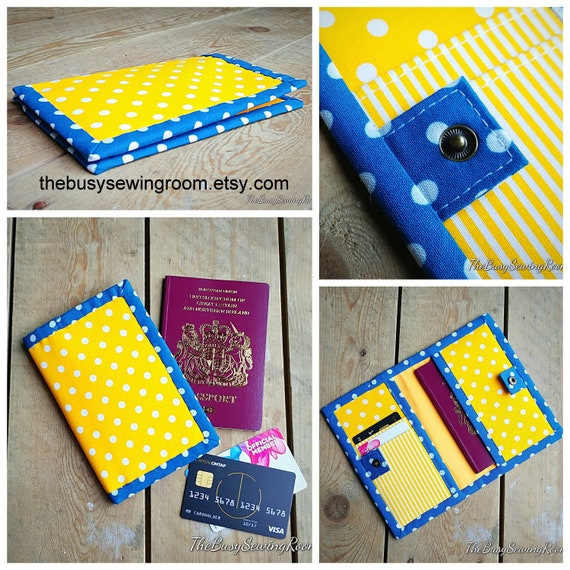
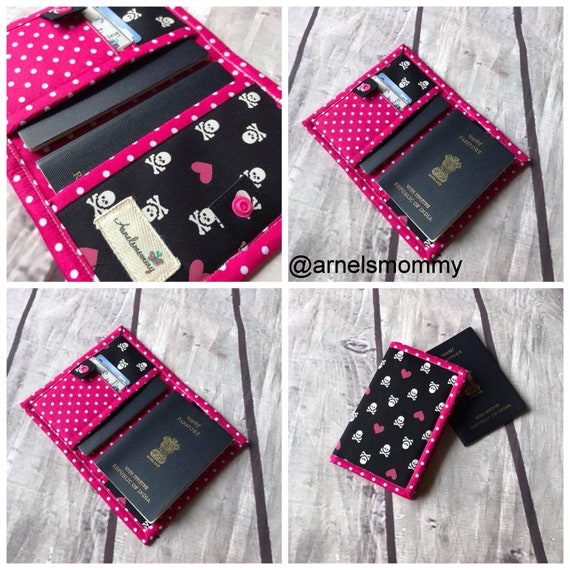
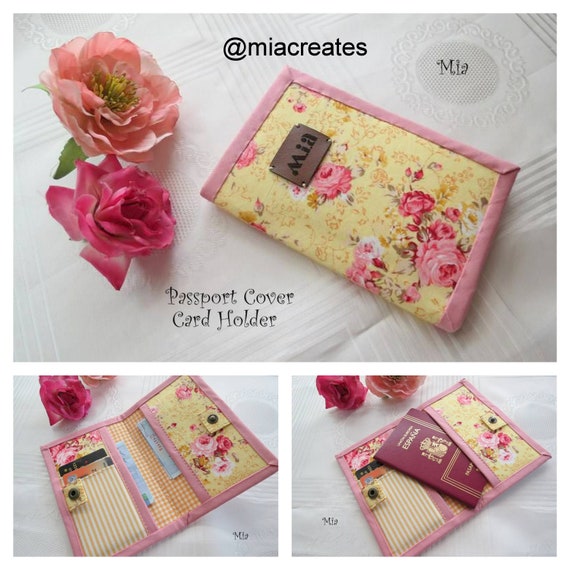
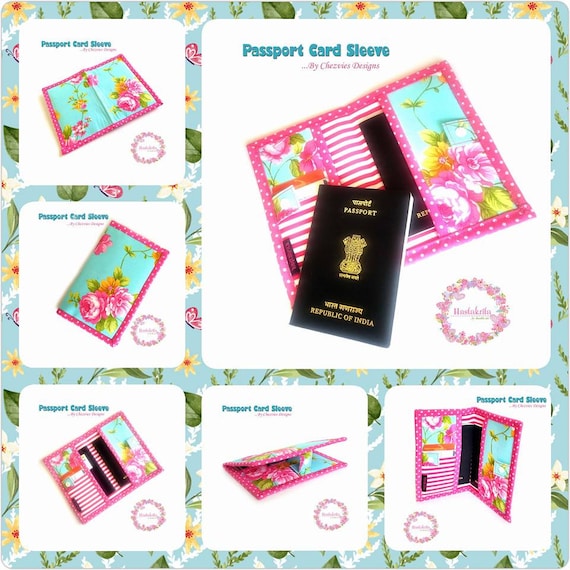
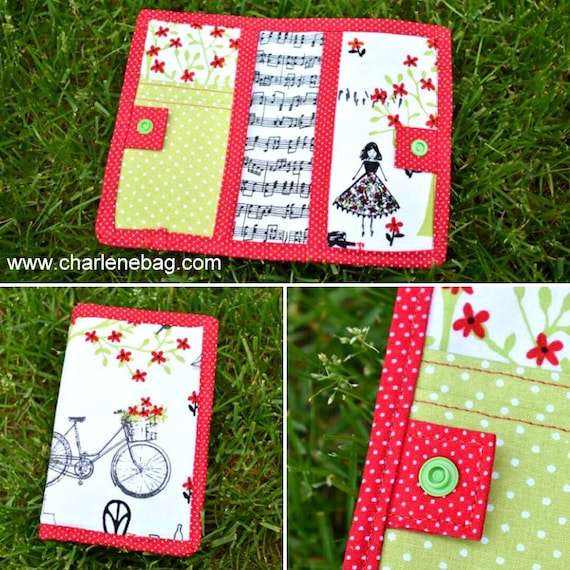
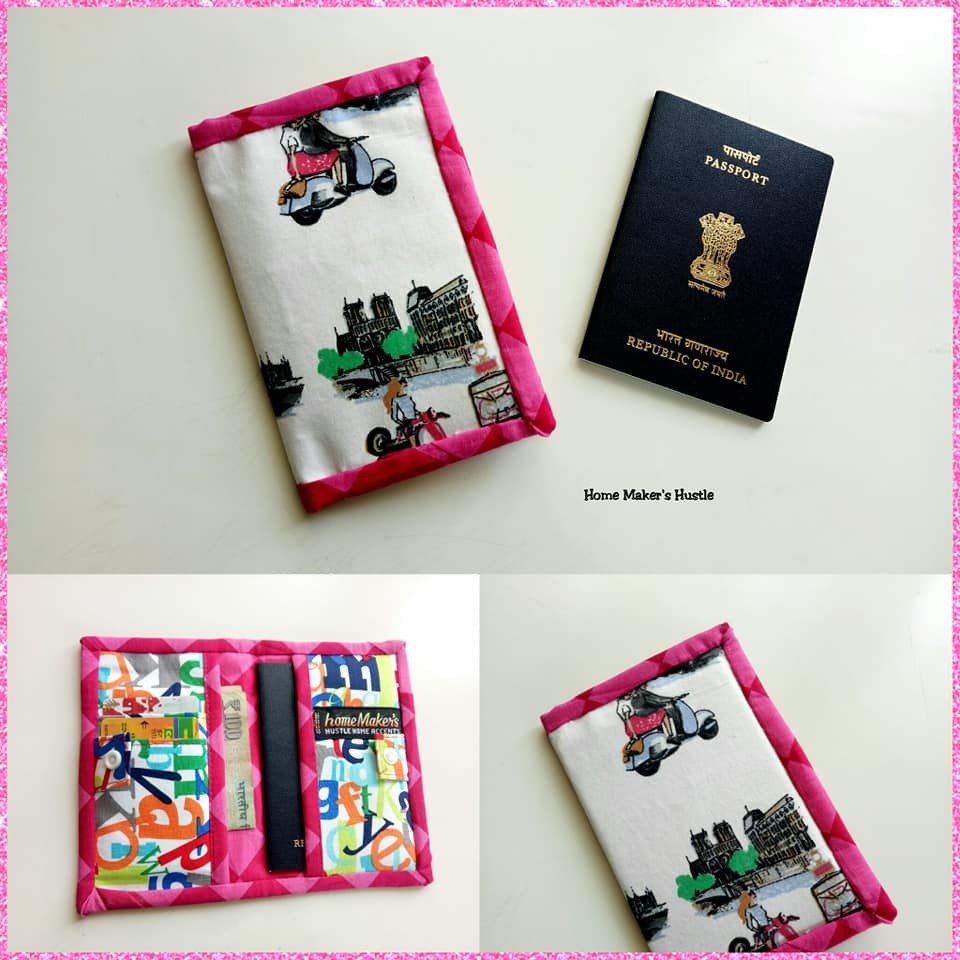
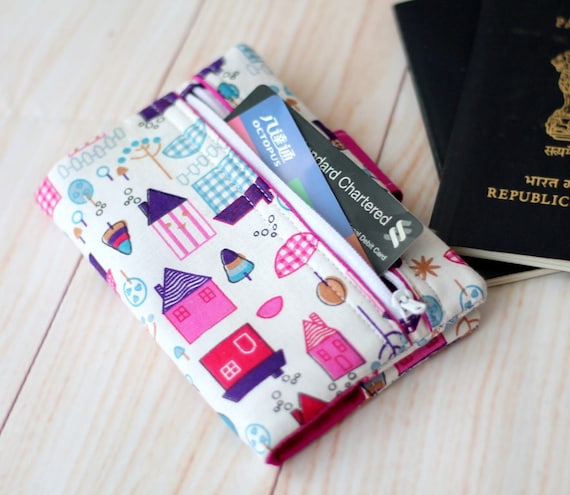
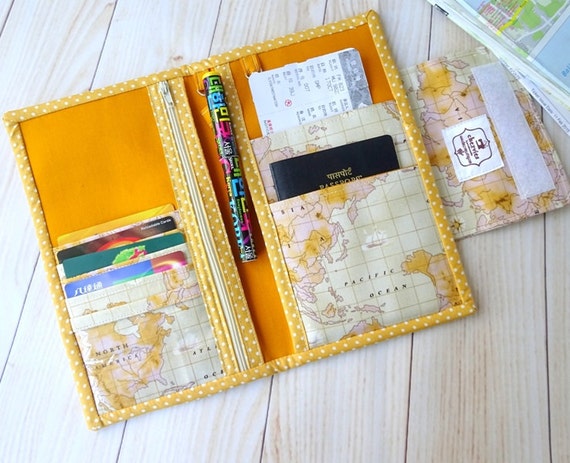
What do you plan to sew this weekends? I've been making few small projects and learning new things. I want to share with you how to make this quick quilted project. This will perfect gift to make or to sell in your weekends market. 
Ok, let's start

What you need:
Fabric scraps  at least 8" wide - Fat Eighth would be great
Coordinated or contrast lining fabric
 Fleece/Batting
Thread

First, you can download the templates from HERE 

Print the templates at ACTUAL of 100%  

Cutting Instructions:
Cut the interfacing and fabrics according to the instructions written on the templates. 
Seam allowance already included in the templates. 

Now the fun part: 

Place the sleeve pockets on each short side of the  Main Body A (RIGHT SIDE TOGETHER) and sew with 3/8 seam allowance. 


Cut the  batting slightly bigger than the templates. Place the  exterior on the batting Right Side Down. (if using fusible fleece, here's HOW)


Start Quilting using your fave quilting lines. I love this decorative stitches in my HV machine. Once done, trim the excess batting.


I love the look of serpentine stitch. Alway!

Fuse the lightweight interfacing on the wrong side of lining fabric and place it together with the exterior piece, right side together. 


Sew the short edges with 3/8" seam allowance, turn the right side out, press the seam and top stitch with 1/8" seam allowance.
(you may find the lining is a bit longer, DO NOT TRIM)


 Now fold in one  short side towards the lining (to create sleeve). 


and pin the folded sleeve with the lining piece, like the picture below.


then turn the wrong side out again. 


it should look like the picture below. 


Now pin them all together


There should be separate fold of lining and exterior (see picture below). I hope I make sense here ^^

Now sew one of the longer seam with 3/8" seam allowance. 
Backstitch at the beginning and end.  


Mark the other long edge and stop 1.75" from the end. Flip the lining fold and draw mark line on the wrong side of the batting.  Sew along the mark line on the lining and back stitch as you stop at the end of the line. 


Flip the fold of the lining backward and  sew the exterior close along the line you made earlier. Backstitch at the beginning and the end. 


trim all the stitched corners. 


Turn the passport cover right side out through the small opening. It's a bit difficult but doable ^^. 


Take out your chopstick and start pushing those corners.


Pull the opening out, you can sew the opening by hand or machine. 

Now spray your passport cover with diluted starch water and and give it a good press. 

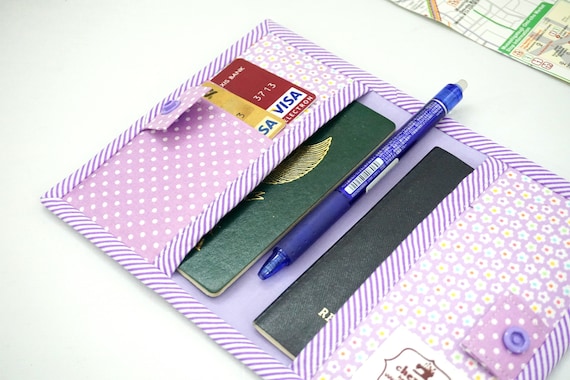
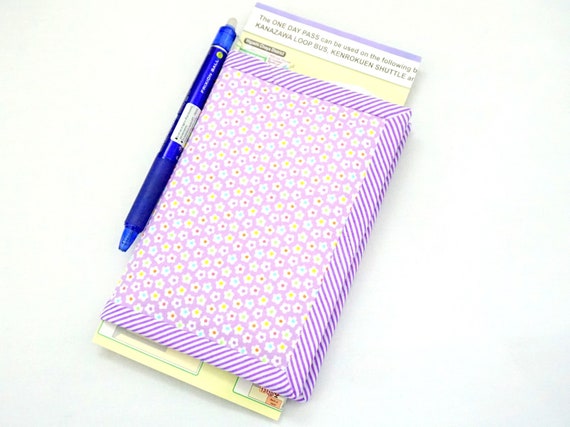
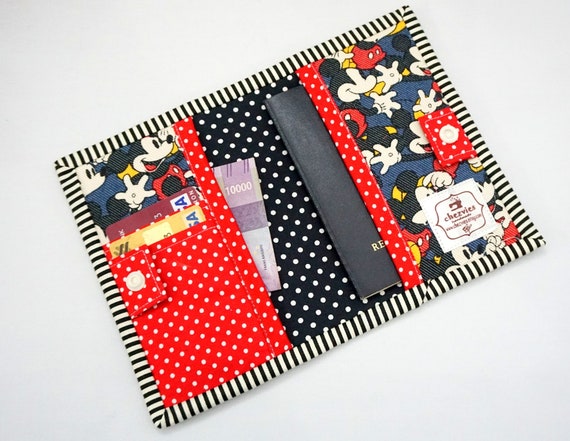
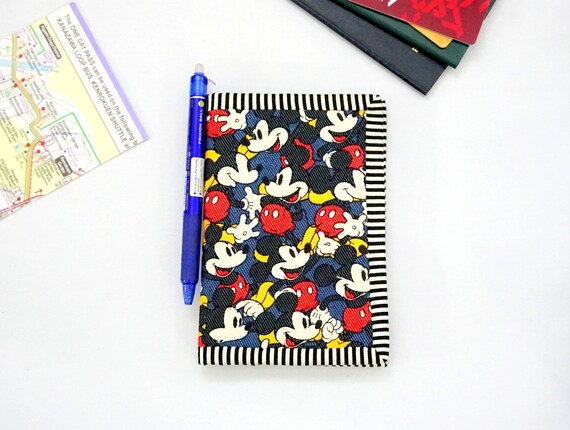
Voila, your weekends project is done!! 


Shibori Tie Dye Passport Cover


Show me what you make by tagging me in INSTAGRAM.

As usual don't forget to sign up for blog updates by subscribe through email. 

Until then,

Happy Sewing


Linky party to Show Off  Saturday


Solo Travel Passport Cover

Hello,
I've been working on new  products for the shop for sometimes now.  I'm happy that since it's first released a couple of years back, my Family Passport holder is remain the most popular one in my shops, both Etsy and locally. 

The recent trend of solo travel prompts me to create this small passport cover. 


It's similar to any other passport cover out there, the only special is I added mini zipper pocket at the back. 

Passport Cover with Mini Zip Pocket

I realized during my solo travel early this year that I do NEED this small passport holder. I'm using the Single Passport Holder Card Organizer from my shop and it worked great during my solo traveling. I can keep all my hotel bookings, forwarding boarding passes, tickets, travel insurance paper, frequent flyers card and foreign currencies all in one organizer. 


However, when I reached my destination, I only need to carry my passport while I'm exploring the city. I need something small, but secure that I can tuck in inside my sling bag. The big passport organizer can be kept in the safety box at the hotel.

Red  Passport Cover, Basic Passport Sleeve, Sleek Passport Case, Passport Credit Card Holder, Mini Passport Holder, Gift for him
Minimalist Passport Cover

Currently I'm listing these 2 passport covers. More will be added as soon as I finished my custom orders :D.

Meanwhile, if you want an updates and exciting offers, sign up for my newsletters at the top right corner of this blog. 

Until then, 

Happy Sewing


Latest Video