Powered by Blogger.
Showing posts with label Tutorial. Show all posts

No rocket science


I've been posting wallets on my Facebook Page and a lot of people ask how did I do my binding. Well, it's quite easy, basically like binding a quilt. I used to use single fold binding but now I find using a DOUBLE FOLD bias binding is easier. About how to make continues bias binding, I talked about it in this POST.

I cut the binding fabric 1.5" wide or 1.75" wide if the wallet is thick to make 1" (++) binding. Using double fold binding makes it easy for you to maintain an even width binding. 
Second tip is always  neaten/straighten the edges before attach the binding. That really makes a difference.

Here, I will just show you how I do it ^_^. Insha Allah next time I'll make a better tutorial.


For wallet, I always machine stitch the inside and then turn it around and hand stitch (slip stitch) on the outside. I find that neater.

See, it's super easy
all you need is a little practice and patience ;)

Anyway,
I've been wanted to try quilt as you go and happened to see post  by Jera at Quilting in the rain  in Instagram.  She has this QAYGmademodern QAL in her blog. It's based on her book of the same title.
I downloaded the digital copy in my kindle and get down to work. 
it's so FUN and I feel silly, cos when I saw few tutorials on youtube I was kind of afraid hesitant to try 0_0


and in less then an hour (from cutting to hand-sewn the binding) I got this little mug rug done


now, we can have tea or coffee  in style


See, it's  no rocket science

I have cut more strips to join the Quilt Along
it's just started
so run along and let's have fun

Happy Quilting


A little tutorial : how to make less stressful lanyard

While making lanyard for custom order today, I remember those days when I started sewing again. When WiFi  was not yet heard and modem connection was very slow and making those funny crackling noise ^_^ 

Yes, I learned most of my sewing tricks and tips from bloggers who generously share their step by step pics. I am a visual reader {is that the correct term?}. So, I need tutorial with lots of pics in it. 

Anyway, here's a little tip how to make lanyard less stressful ;)

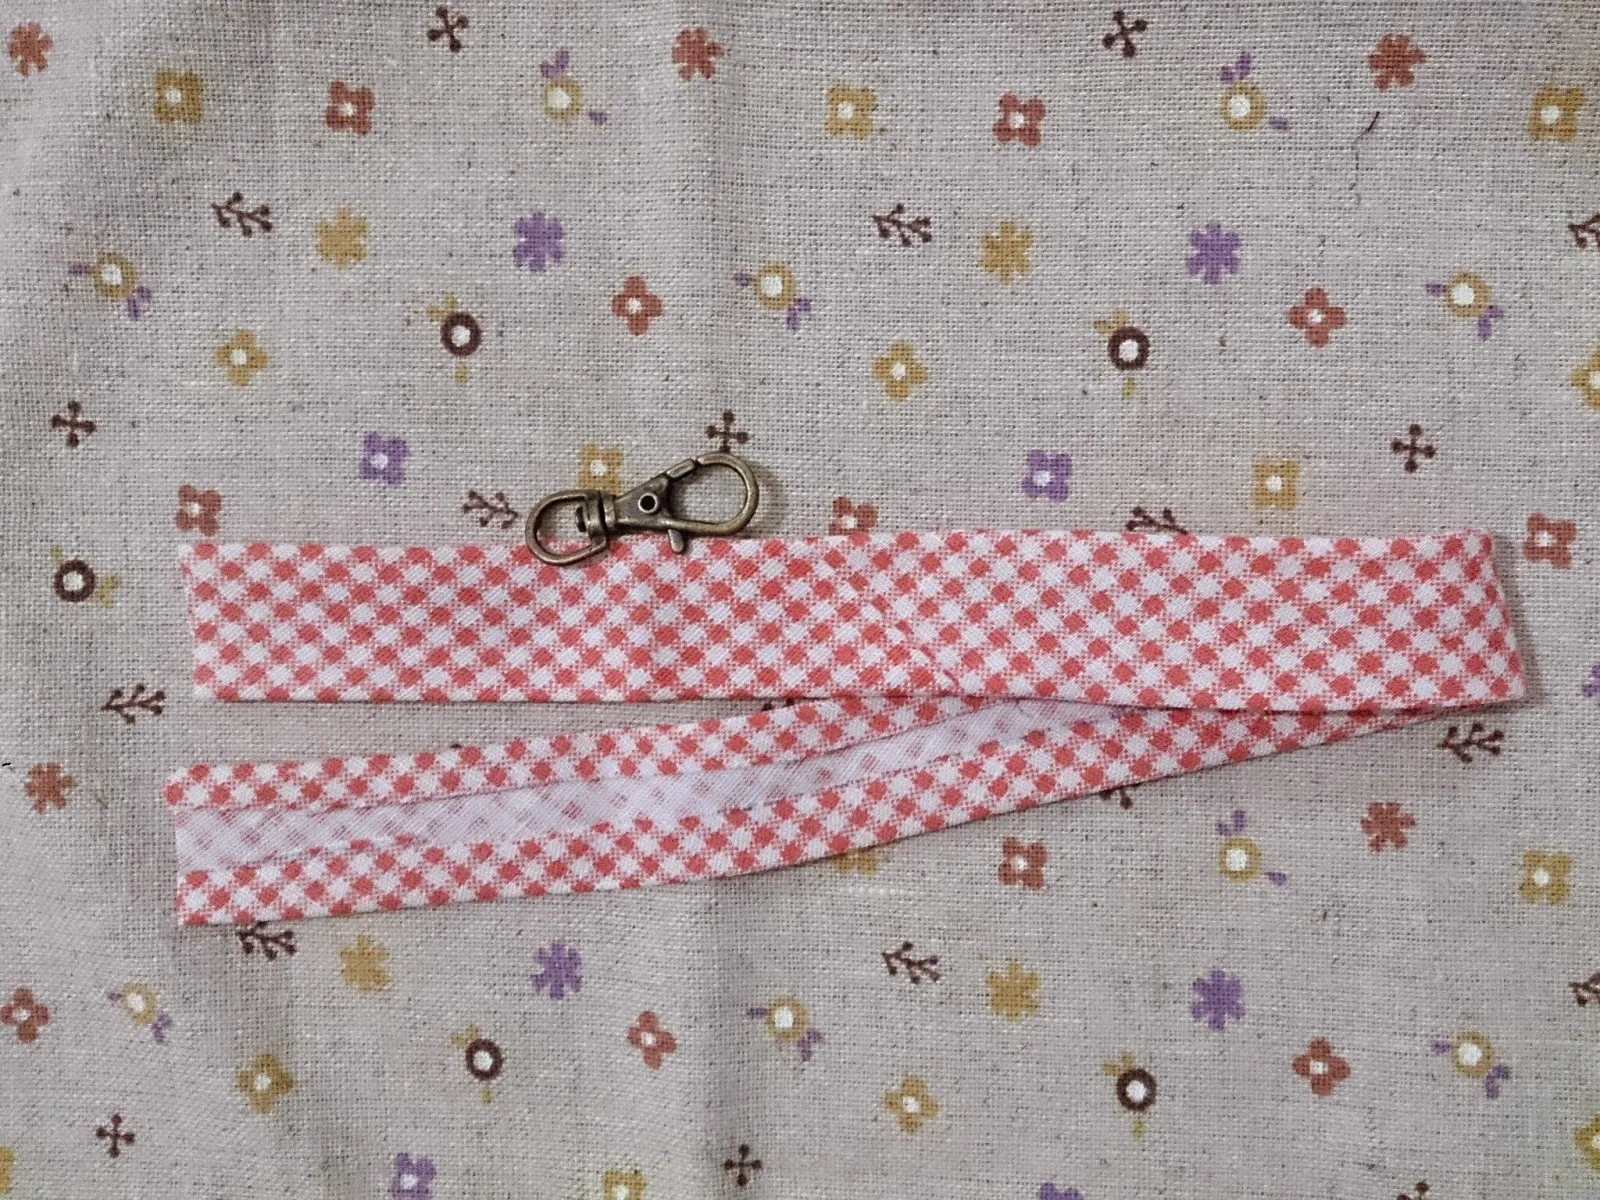
First you need your DOUBLE FOLD bias tape or any binding tape and the hook. I like using bias though.

{bias tape tutorial video in my previous post)


and then, insert the tape into the hook


now, put the end of the tape, right side facing and sew 1/4" 
open the seam and press it flat 
make sure you put it correctly, or else you'll end up with twisted lanyard {I did once :D }


Now fold the bias tape and start sewing closely to the edge


Now you're almost done
you just have to double stitch around 1/2" under the hook


Voila! you get a pretty lanyard with no stress ^_*


Oops, looks like someone is looking for me. Ha!!


I hope the little trick will help you
Now, time to relax with my fave drama

Until then

Take care and happy sewing


DQ Sunny Bee - Blue and Yellow Flower Marble Star Tutorial

Hello everyone..

I've been wanting to make this blue and yellow combination since I saw one wall design in one restaurant here in my town. Sunny Bee is a perfect time to make my dream block into reality. It's pretty simple one. Since I'm not very good with words, I took few number of pictures which I hope will be helpful.  This is similar to my QAL's in Desi Quilters, but instead of using flying geese method I used  5" squares and 4.5" squares. 

Let's do it...

WHat you need:
1. Solid white poplin cotton
2. Navy blue floral cotton
3. Yellow floral cotton

I'd love poplin kind of cotton which is easily available in India. 

A.  Cut the fabric according to the pictures:

 1. White Poplin - 4 (5" x5") 

           2. White Poplin - 4 (4.5" x 4.5")

3. Floral Blue - 4 (5"x5")

4. Floral Yellow - 4 (5" x 5")

Finished block size : 16.5" x 16.5"


B. How to do it

1. Make HST but pairing (right side together)  each fabric. whites and blues, whites and yellows, and blues and yellows and shown in the picture. 


2. Mark diagonally and the sew along 1/4" on BOTH SIDES of the LINE


then cut across on the LINE . Sorry I was in a hurry and forgot to take the pic of the cutting piece :(.

3. Once you cut everything, iron them flat and take out the 4" squares SOLID WHITE and arrange them according to the pic below:


sew them together row by row 

and Voila your block is ready


Easy peasy isn't it?

Let me know if you have any questions :)

Happy Quilting



TUTORIAL : Twisted Infinity Scarf

Everyone loves infinity scarf. It's the "grab n go n look fab" kind of accessories. So, recently I've been making my version of infinity scarves. You can use any kind of fabric, cotton, flannel, georgette, crepe, chiffon, etc.  I happened to have these saree blouse fabrics which I got from my MIL. Saree blouse comes with the saree. It's usually less than a meter (80 -90 cm) of fabric which has to be cut off from the main saree. 

I thought of sharing with you how I made my scarves. This is a quick project which make a perfect gift. So, here we go:

What you need:
1. A piece of fabric (depends on how WIDE and LONG of your scarf). and since I'm making from a saree scrap my piece is 80 cm x 115 cm


2. Sewing machine and sewing supplies (matching thread, handsewing needle, etc)

Let's get started:

1. This is my fabric. It's georgette fabric with fancy dots ;). Make sure you straighten your fabric, which means BOTH ENDS have the SAME WIDTH. 


2.  Now, FOLD it once and pin it. ( you can see the selvedges on both sides) .


if you make a longer and wider one, and you'll fold it length wise -  selvedges meet the selvedges. 

3. Sew 0.5" along the pinned side to make a TUBE. 


4. Turn your tube inside out. Lay it flat (iron it if necessary, if you use cotton esp) and now match the open side of the tube by TWISTING the fabric. 


So the SEWN seams will meet the FOLDED sides.


5. Match the middle seam and the sewn seam RIGHT SIDE together and PIN. You can pin all the way around, or like me, I usually put 3 pins at the beginning. 


6. Now start sewing 0.5" along the tube's opening. 


when the opening is getting narrower, you just PUSH the whole SCARF inside the opening. Keep sewing and LEAVE 2"-3" as a turning hole. 

7. You're almost there...now, pull out the fabric and see...you're almost done it ^_^. 


8. Closing the gap with slip stitch using a matching thread. 


And VOILA...wear it as you like ^_^


It's easy peasy, isn't it?

This scarf and a lot more is available at my SHOP.

Until then..

Happy Sewing


Tutorial: Let's make a headband

I love wearing this headband under my scarf. It holds my hair in place plus it's not slippery since it's made of cotton. This headband is very popular..even little girls love it, cos it's so comfortable to wear. 

Now, let's get down to business.

WHAT YOU NEED:

1. Rectangle fabric measuring 12" x 9"
2. Strip of fabric 2.5" x 11" 
3. 1/2" elastic : 5" 

HOW YOU DO IT:

1. Sew  0.5"  hem of the rectangle on both sides


2. Make a tube from the strip of fabric. Once the tube is ready, insert the elastic like the picture below:


3. Now, your covered elastic is ready. Put it in the middle of the rectangle (length wise) RIGHT side facing you. Pin in place


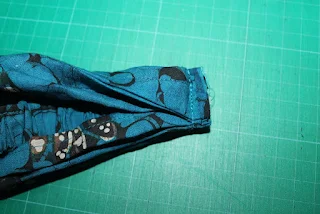
4. Make pleats and put it on top of the elastic with the edge/hem  ON TOP. Do the same with the other half.


5. Stitch in place. Double stitch if necessary.


6. Repeat STEPS 3, 4, 5 with the other side.

7. and YAY, you made it...now go and make few...it makes a nice gift too..;). Even my son loved it. He thought he looked like a rock star :P


I hope it's clear enough. Let me know if you have any questions :)

Happy Sewing ^_^


Fabric Flower Tutorial from Flying Geese remnants


I hate to throw away even a lil bit if fabric scraps. Yesterday after making one star block, there are lots of remnants from the  flying geese blocks. So, here what I do.


  1. Pick up 5 or 6 triangles. Fold them and sew on the side.


  1. Turn around, poke to take out the corner as much as you can, and make a string of the new folded triangle by hand sewing it using a running stitch. One TIP: Leave around 1.5” of thread on the knot. Sew away until all 6 are strung nicely and evenly.


  1. The pull slowly and adjust the flower. Pull it tight and tie the thread nicely.


  1. Now, take out one button (I love the fabric cover button) and sew in place.

  1. At the back, take a small piece of felt, cut it round and glue in place and then attach the pin or hair pin, according to your fancy.


See..now more wasted fabric remnants ;)

Until then...Happy Sewing


Latest Video