Powered by Blogger.
Showing posts with label cell phone. Show all posts

the placemat story

Last week I was browsing youtube for free motion quilting and I tried on what suppose to be a placemat. I did the yellow flower quite sometimes back during those 'sewing-block' days..:D. It was just lying around so I decided to use it as a guinea pig ^__^.

It turned out quite....OK   naah...it was bad...especially the back part :(. I was thinking I'll use it as a duster (eewww) and just toss it into my "on going project" bin.

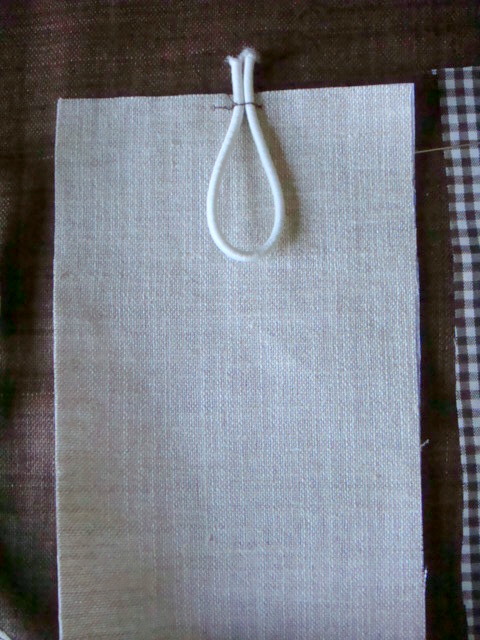
Last night, I wasn't feeling very well, but I'm aching to sew something just to distract my self from my boredom. I saw this one and start cutting. I thought I will make a mug rug with it, but then who needs mug rug when I already got a pretty one from my friend?  So instead I decided to make a goggles case. The other half, I thought of  making the same goggle case, but after several tossing and turning, I decided to make simple mobile phone case..


Posted by Picasa
So, there you are...with one placemat you can make those things....what about you?


happy crafting ^_^

TUTORIAL: MOBILE PHONE POUCH with POCKET


I love making this easy peasy mobile pouch. It’s great gift and it needs only a little bit of scraps and time

So, now here we go:

First of all, measure you mobile phone from sides to side and ADD 1 inch (or you can add a little more if you’re unsure/newbie)


Mine was 3” x 5 “ (4” x 6” with seam included).

Now the FUN part:

1. Get your scrap and do the following


a. CUT 2 pcs ( 4” X 6”) of each MAIN FABRIC, LINING, INTERFACE & BATTING

b. Cut 1 pcs of (4” x 4”) of MAIN, LINING &  INTERFACE (for pocket)

c. Cut 1 elastic cord according to your desire

d. Cut 2 decorative ribbon for the side loops


2. Iron the Interface to the MAIN fabric


3. Let’s do the pocket now. 


Put the MAIN  the LINING (right sides facing) and stitch along the TOP part (1/4”). Turn it around, press nicely and top stitch it.


4. Put the pocket to the bottom front part of the MAIN fabric and stay stitch around the sides the bottom.


5. Attach/Stay stitch the elastic cord and the ribbon to the back part of the MAIN fabric


6. Now arrange: MAIN (right sides face up),  LINING (Right sides face down) & Batting,.


7. Now sew along the TOP part (3/8”).


8. Open the seam (I put the batting with the LINING which is actually NOT ADVISABLE), put the LINING &  the MAIN (with batting) Together, good sides facing. Match the seam & carefully PIN it.


 I usually pin this part first and then pin the rest . 
Once you satisfied, start stitch it around, START from the SIDES of the LINING fabric (do reverse stitch when start and end your stitch). Leave around 2” gap (when making small pouches I love to leave the gap a bit more at the sides. It’s easier to maneuver it later.


9. You’re almost there….Cut the corners and make a small snip at the corners) and now you turn it around. Ok it’s a bit difficult but you’ll manage…there you go…do a little bit of poking on each corner. It will look more of less like this..


10. Stitch close the opening and push the lining part inside the main part. Do a little more poking and when you satisfied, stitch down the top edge. This is how I usually do it.


11. Attach the button and now your mobile pouch is ready. 


You can put long cord on the loop or detachable strap.


(*TIPS: while doing No. 8, I usually stitch the lining a bit smaller than the main part. It gives a better finish for bags  & pouches).

I hope this is clear enough, do email me if you have any question(s) ^_^

Have a nice CRAFTY weekends


Latest Video