Powered by Blogger.
Showing posts with label pouch. Show all posts

Wallet Pouch Story

Hello,

I have not done any sewing since I came back from my trip to Delhi last week. I have not been well these last few days due to my usual winter rash problem and had a diarrhea for a few days. My friend, mbak Sari in Japan who owned the pretty Kanzashi shop in Etsy, told me that during winter it's better to consume food that grow under the ground. Well, I am not a fan of potato, but upon reading her suggestion, suddenly I was craving for boiled potato and have been eating potato for the last few days. I feel much better today and hopefully tomorrow I can finish my custom order due on Monday.

Anyway, I think have not shared this wallet pouch I made in October. I needed a pouch-cum-wallet which can fit it my phone, a couple of cards and a zipper compartments for cash/change.


This is my 5th wallet that turned out perfectly. There was a few ideas I tried with the previous wallets for the card slots but didn't work out as I would like it to be. Esp. the card slots. 


But I love the flower print. It's so feminine :)


My first idea is to use wristlet that the picture above. But on second thought, the detachable one would be better.


Then decided how many cards should I incorporated. Some people carry a few cards but some carry many. So, I thought 6 cards should be good enough. I am quite minimalist, I carry 2 cards and 4 cards when I travel. We don't have so many shops which offer membership cards here, and if they do, it is enough to tell them my phone number to avail the points. 
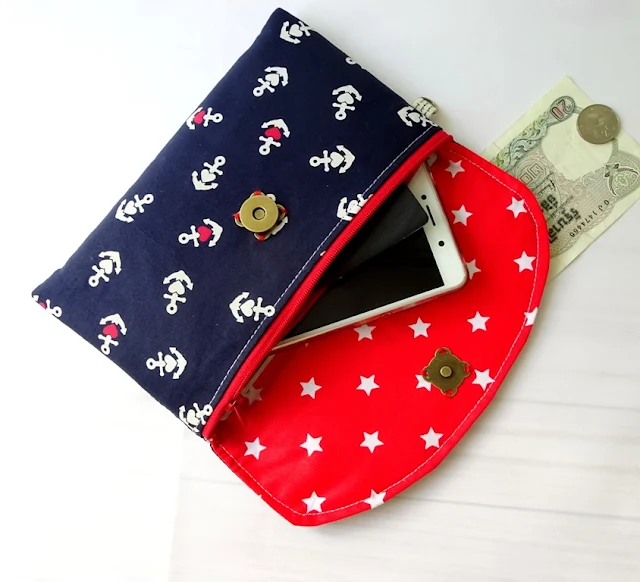
Anchor Wallet Pouch 

The blue anchor and the orange patchwork one are made slightly bigger than the floral one. As I was working on these wallets, I thought this will be a good travel wallet too. Especially for those who loves practicality and often going for solo trip.


 and if one want to go for a quick coffee with friends, a detachable medium short strap can always be added. 


Patchwork Wallet Pouch
 I am making the pattern for this Wallet Pouch, but still finalizing for a few details and need to make a couple more to try out which material combination and technique that will work best/easiest even for beginner sewist. I love wallet that is light and sturdy but easy to make.  What about you?


Until then,

Happy Sewing!


Let the music play

Few weeks back, the boys' piano teacher said that she loved the pencil pouch I made for the boys. 
She didn't believe that I made that my self *ahem* 
So I said I will make one for her


I guess fabric is like destiny. I admit that I collected fabric faster than I sew [any body with me?] >_< 
but then you never know when ideas strike or when you're going to need certain print, right?
Just like this time


I decided to make with the black and white one and gave a red lining to match with the zipper
well, black and white and red never goes wrong ^_^

oh and she loved it! 
What can be a better reward than someone who received your handmade with pure delight in their eyes? I'm blessed _/\_

As usual, I made few more but of different type

Boxy long pouch, which is perfect as amenity or toiletry bag 


and another one is the triangle pouch.
The triangle pouch is good for keeping sewing or quilting tools, isn't it?


I didn't use any interfacing or stabilizer here

Instead I used flannel as batting and quilted it using decorative stitches.
oh I love using decorative stitches for quilting. it gives personality to the whole look of the quilt.


Flannel batting is my favorite, since it's easily available here. It's perfect for tote bags and runners.
It's light but give enough structure to the bag/quilt.

I tried using thin foam but I was not satisfied with the result plus it's rather difficult to sew. At least for me.

The pouches are available for purchase at my Etsy Shop

Fabric : Toko Chan


Until then,

Happy Quilting


Lots of pleated purse

The last one week I've been making these pretty pleated purses


They are wide open and roomy purses. You can carry a lot of things in it. Including your mini I-Pad or Tablet.


the pleats are in coordinated but contrast colors. It's so much fun to carry around.


it's also a perfect gift for bridesmaids 

I can make them in any fabrics you want
 Simply drop me a line in my ETSY shop or EMAIL me

Until then...

Happy Sewing


Everyone needs Family Passport Wallet

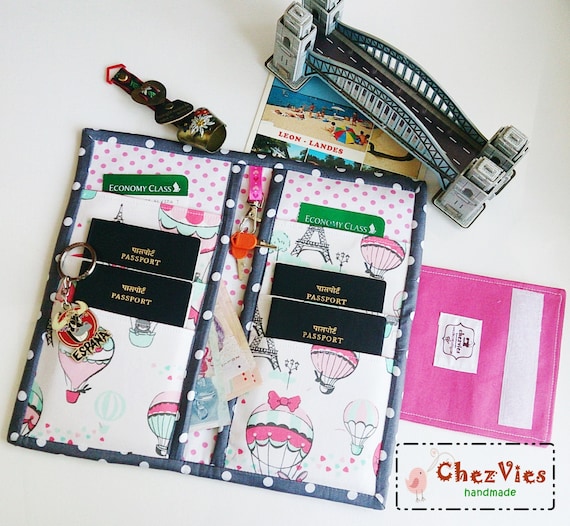
Oh yes, I know how it feels carrying 4 passports, residential permit, marriage certificate, exit permit plus my PIO card while travelling. Not to mentions the tickets - several of them since we always have to have several stop overs >_<.  The options I have are store bought leather passport wallet or the one from the travel agents, which barely survived one trip.

So, why not make one? Yes..so, benchmarking from the store bought wallet, here's my straight and simple {and cute} Family Passport Wallet


This wallet can hold up to 6 passport and spacious long pocket on the sides to keep your travel documents and small change. 


It has a small swivel hook for your luggage keys (yay)

I used Indian cotton fabric and heavy interface. It's sturdy and  a wide velcro closure will keep everything in place. 

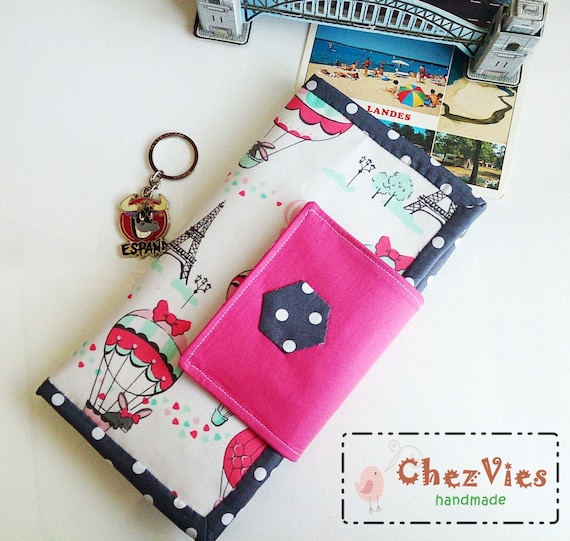
Another one I made was using this cute hot air balloon over the Eiffel Tower fabric. Bought them from this shop during my trip back home last July. 


when folded


I love that little hexagon there ^_^

This wallet will make a perfect holiday gift. 
Both the wallets are listed in my ETSY SHOP
Visit the shop or my Facebook Page if you want custom order


Until then
Happy Sewing


When I'm bored

These are pouches I made based on Japanese craft book. Since I didn't have linen fabric I used cotswool instead. Cotswool is nice to sew, esp. hand stitching. It's been a lot of fun doing these pouches:


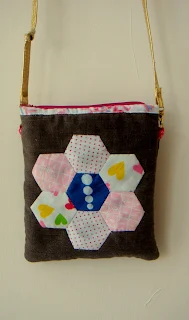
I made these hexagon flowers sometime back and I didn't know what to do, so I made this pouch. Using the Japanese method, I hand sewn the zipper. It looks so "handmade" (u know what I mean..^_* )


I got several Japanese craft book, the crafts look so cute but it  really takes a lot of patience to do, since most of it are using hand stitch method, which I must admit is not very much my favourite -__-". But it's a good stress buster when I'm bored ^_*

Until then,


Looking Back

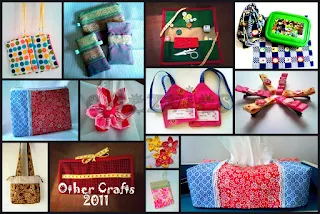
Looking back to the year 2011, here  are few collages of what crafts I have completed in 2011.
I may say I had quite a busy days last year. This year, I want to be more serious on doing patcwork and quilting. Didn't I told you that I have joined the Indian Modern Quilt Guild? *yay*...I'm very excited to learn and share with like-minded people. And so far it's been very exciting & enlightning, if I may say..


I bought few felt when I went home in 2010 and start trying doing felt craft when I don't do anything else.

and at times I love making small dresses for my niece or my friend's daughter or make few stuff for my friends:)

or try making other things. I used to love making bag and pouches and I still do have few patterns which I wanted to try making. Hopefully this year I will be able to make them :)


Happy Crafting ^_^

My first Hexies

It's just a quick update. These last few days I've been sort of 'addicted' to making hexagons. I spent a loong time browsing & blogwalking and admiring all the lovelies hexies on the net. Finally I found one this this tutorial by GOLDILOKS.See, I did the 'tacking' at each corner of the folds and it saves me sometime to do the thread cutting..:D.

So far here's what I have made...I don't know yet what to make out of these...LOL. But I'm glad I didn't throw away all those fabric scraps.


and here's my first hexies pouch. I'm so in love with nanikist in flickr, how she combined the polkadots and she  inspired me to make this pouch. I put side pocket inside to keep the cards and cash. The pouch is padded with thin pellon and the lining is interfaced for sturdiness.

Posted by Picasa

I'm going to make few more little hexies and hopefully can finish few stuff before I go for holiday ^_^

Thanks for stopping by & Have a nice carfty days

TUTORIAL: MOBILE PHONE POUCH with POCKET


I love making this easy peasy mobile pouch. It’s great gift and it needs only a little bit of scraps and time

So, now here we go:

First of all, measure you mobile phone from sides to side and ADD 1 inch (or you can add a little more if you’re unsure/newbie)


Mine was 3” x 5 “ (4” x 6” with seam included).

Now the FUN part:

1. Get your scrap and do the following


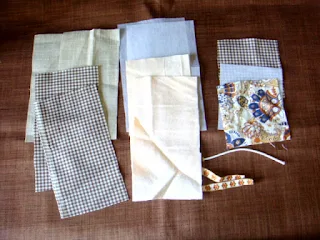
a. CUT 2 pcs ( 4” X 6”) of each MAIN FABRIC, LINING, INTERFACE & BATTING

b. Cut 1 pcs of (4” x 4”) of MAIN, LINING &  INTERFACE (for pocket)

c. Cut 1 elastic cord according to your desire

d. Cut 2 decorative ribbon for the side loops


2. Iron the Interface to the MAIN fabric


3. Let’s do the pocket now. 


Put the MAIN  the LINING (right sides facing) and stitch along the TOP part (1/4”). Turn it around, press nicely and top stitch it.


4. Put the pocket to the bottom front part of the MAIN fabric and stay stitch around the sides the bottom.


5. Attach/Stay stitch the elastic cord and the ribbon to the back part of the MAIN fabric


6. Now arrange: MAIN (right sides face up),  LINING (Right sides face down) & Batting,.


7. Now sew along the TOP part (3/8”).


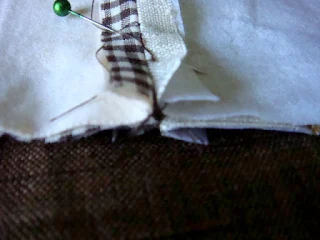
8. Open the seam (I put the batting with the LINING which is actually NOT ADVISABLE), put the LINING &  the MAIN (with batting) Together, good sides facing. Match the seam & carefully PIN it.


 I usually pin this part first and then pin the rest . 
Once you satisfied, start stitch it around, START from the SIDES of the LINING fabric (do reverse stitch when start and end your stitch). Leave around 2” gap (when making small pouches I love to leave the gap a bit more at the sides. It’s easier to maneuver it later.


9. You’re almost there….Cut the corners and make a small snip at the corners) and now you turn it around. Ok it’s a bit difficult but you’ll manage…there you go…do a little bit of poking on each corner. It will look more of less like this..


10. Stitch close the opening and push the lining part inside the main part. Do a little more poking and when you satisfied, stitch down the top edge. This is how I usually do it.


11. Attach the button and now your mobile pouch is ready. 


You can put long cord on the loop or detachable strap.


(*TIPS: while doing No. 8, I usually stitch the lining a bit smaller than the main part. It gives a better finish for bags  & pouches).

I hope this is clear enough, do email me if you have any question(s) ^_^

Have a nice CRAFTY weekends


Latest Fabrics

Latest Video