
Powered by Blogger.

Starting Kawandi QAL


Kawandi QAL
Kawandi QAL


Hello and happy Monday! 
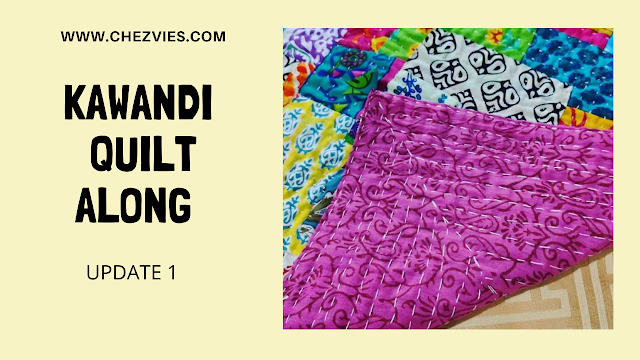
I mentioned in my previous post about the plan for Kawandi QAL. It was started a few months ago by Brinda Ma'am and we have a Whatsapp group to share our progress. 
 Well, I finally get my quilt prepped up and started making the border. I have a few mulmul fabrics in half-meter cuts and decided to use one of them for this. It's going to be a big-ish table runner. 
I thought of making a lap size quilt but I don't have the confidence to finish it. At least this one will be doable for now. We have to finish it by end of the year. Well, I have a long list of Historical Chinese dramas to company me LOL. 


Kawandi Quilt progress


To motivate me, I make a progress video and will update as I make more progress. I'm very bad at following QAL or SAL, so I hope by making a progress video I can push myself to finish it. 


Hand sewing side effect :)


Kawandi Quilt Making


And why not making two kawandi ? Yup, I'm easily distracted like that. I was searching for scraps and found leftover strips from the Jellyroll Quilt I made earlier. I thought why not started another one? I am making one without border as I plan to turn it into maybe a tote bag? My mind keeps changing as I am quilting it. 

What about you? What are you working on this week? 


Happy Sewing,

Elvira 


Linking Up to these wonderful BLOGS

Video Tutorial : How to Make Zipper End Fabric Cover

Zipper End Fabric Cover DIY
DIY Zipper End Fabric Cover 


Hello, I hope everyone is doing well. I'm pretty busy these past few days making few wallet orders, which I thoroughly enjoy. I cut a few extra for ready stock items in the shop. This time, I thought I'll make a fabric button to cover the zipper end of the zip-around wallet. It's one of my lists to do and as I go about it, I recorded a short video so you can make it as well.
 It's very easy and fun to make. 

Fabric yoyo DIY


The materials you need:

1. Fabric scrap - 2 pieces of 2" x 2"
2. Used business card (or similar weight paper)
3. Bobbin for templates (you can use a small coin too)
4. Fabric Glue
5. Scrap batting 
6. Thread and needle

Now watch the video below and we can sew along :)


In the video, I used bobbin for the template. The size is just perfect for the wallet. Depends on your zipper size, you can make a smaller or bigger button. The principle is, the fabric should be 2X in diameter of the template. The bobbin I used is 3/4" in diameter and I cut the fabric circle approx. 1.5" in diameter. 


Fabric button DIY


For the batting, depends on how "plump" your button looks, you can add accordingly. In the video, I used my old business card for the "button". I find the cardstock from the business card is just right. Plus, why throw it away if we can reuse it, right? 


slip stitch


Maybe some of you find the slip stitch a bit daunting. Well, don't be. Good things take time, so practice more. Use only 1 strand of thread while sewing the button together and use small stitches. Try to catch the fabric with the smallest stitches you can manage. 

In the end, it will all be worth it when your customers are happy, right? 


small bifold wallet
Small Bifold Wallets


Now, I have to finish a few more wallets and I hope I can finish them by next week.  I still have to finish editing another tutorial video. This time I managed to learn the new editing app on my new laptop. I used to use Windows Movie Maker on my old laptop which is apparently is no longer available in Windows 10. This one, I edited using Film Forth and I kinda like it. My old brain needs time to process new information so learning new apps do takes time. LOL. Do let me know if you have a recommendation for a super easy video editor for windows 10. Well, I love inshot app for mobile editing, so much of a choice there but editing on mobile is not convenient. 


small wallet DIY


WIP Small Wallet

  Thank you for stopping by today. Take care & happy sewing!

Elvira

********


Latest Fabrics

Latest Video