Powered by Blogger.

Pre-cut Indian Cotton Fabrics

Guwahati, Assam, India
Hello again,

I am still destashing fabrics and make them into fun and unique fat quarter bundles. I cut quite a lot but have not got time to create all. I got a few bundles which are ready to list. 


Indian fabrics have such an interesting prints and unimaginable range of colors, that sometimes you don't need other colors or prints to compliment them.

Pink Purple Fat Quarter Bundle 
Although nowadays, many novelty prints also make an appearance in Indian block print fabric, I personally still prefer the classic timeless prints. 

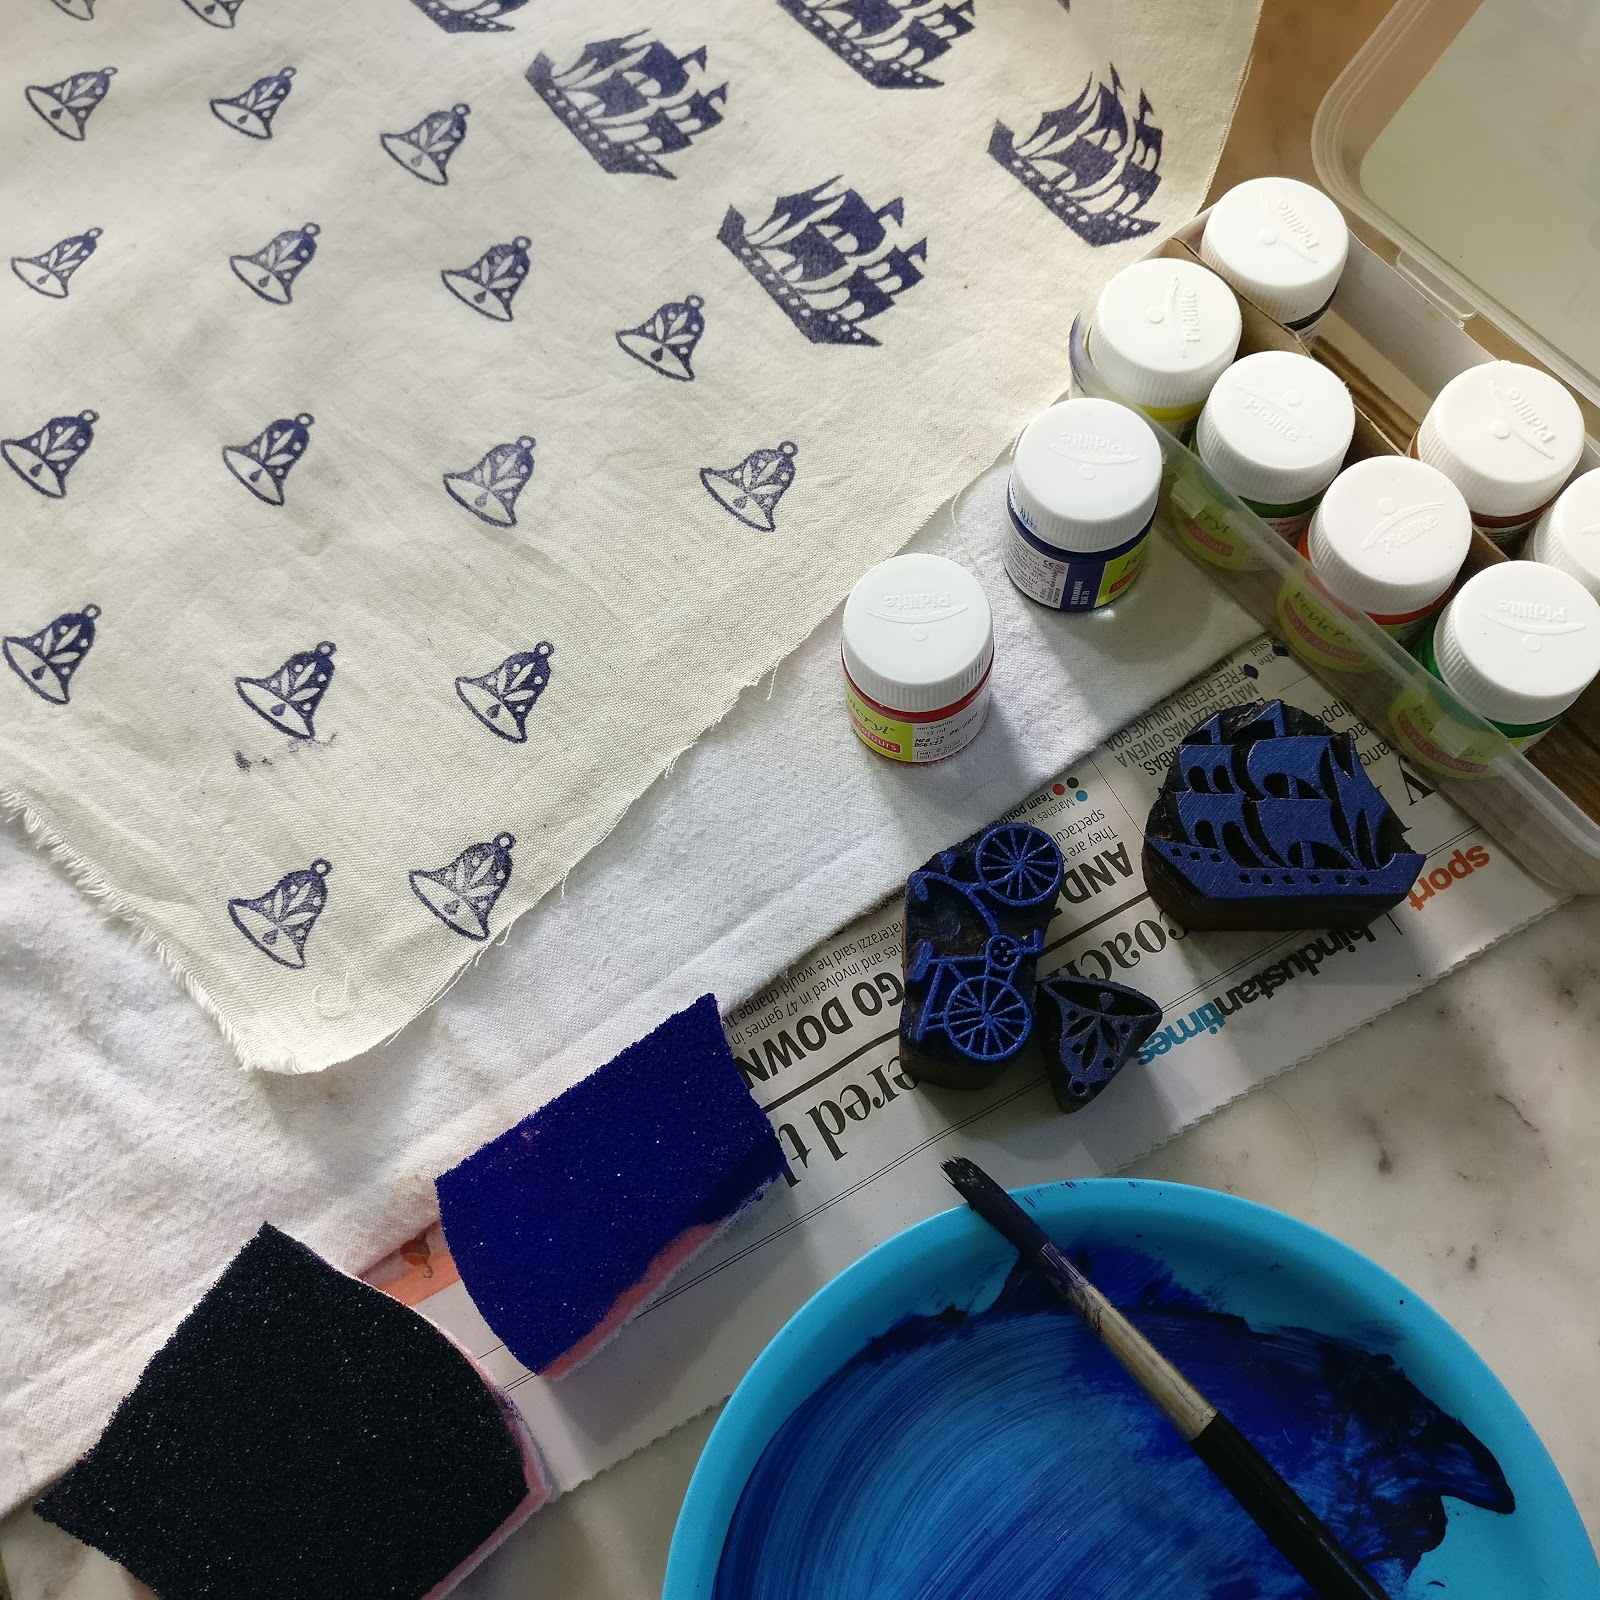
Like this Indigo Fabric. 

Indigo Block Print Cotton 
Or these lavender pink fat quarter bundle. This kind of prints (with paisley design) usually will always be available. In India, during the summer month, people prefer white of or off-white based cotton fabric. 

Lavender Pink Paisley & Flower Prints

I am making a few pouches and passport sleeve from some of these pre-cut fabrics. They are just super fun and fast! 

Here is one of them. Isn't that cool? It's totally one of a kind!!

Aqua Green Passport Cover
Come to think of it, there are just so many things you can make from these pre-cut fabrics. I love buying pre-cuts whenever I go. With pre-cut fabrics, you can have more time to sew rather than to choose fabric combination, right? 

So, what are you making this week? 

Thank you for stopping by,

Until then, 


===================================
small notes: 
I feel I bit off more than I could chew lately. For that, I will discontinue the newsletter. As much as I love to share news, tutorials, and tips with you all, I feel sharing on my blog and occasionally in my Facebook Group will give me more freedom to write extensively. I will do my best to share more tips on small business marketing and sewing ideas with you all. If you would like to keep receiving an update in your email, you can click the subscribe button at the top right of this blog or use the Bloglovin' below. Thank you so much for your support! 

===================================


Follow

More DIY Block Print Pouches

Hello,

I completed 2 more pouches using the fabric I printed last month. This time I made a medium size zipper pouch and a kindle cover. 

I used indigo processed jute fabric for the combination. I really love the fabric and have been waiting for the perfect project. 

Indigo Bell Kindle Cover

The bells are quite cute, aren't they? I think I may make more in different colors, maybe orange, yellow or green. I already have a red one, which I have not found a perfect match for it. 

Kindle Paperwhite Sleeve

I used my own Kindle Cover pattern  and added a short strap, just long enough to carry it like a purse. The kindle size is the favorite of many, because the size is perfect, for a mini cross body bag, perfect for both adults and children. 


As for the zipper pouch, this time I attached the zipper with reference to Noodle Head Tutorial. I really love the method.


I used a metal zipper. It was a bit fiddly to do the zipper, but I found an effective way to do it. I didn't take any photo, but I promise I will share in my next blog post. 

Sailing Ship Zipper Pouch 


This sailing ship pouch is a bit different than the previous large pouches. In this one, I used batting which I ordered from Tina of The Square Inch. Tina was kind enough to send me samples of the battings that are available. I chose 3 different battings. This one I used the 150 gsm polyester fleece batting and I really love the result. It's firm and gives enough cushioning so that one can keep gadgets in it. 


It's been fun and productive week for me. What about you? What have you been working on?

Until then,

Happy Sewing


Mini Zipper Pouches

Hello again,

Yesterday I spent my day cutting interfacing scraps and how! I used my regular rotary cutter and cutting 2-3 layers of woven interfacing at one go. I must admit, it took up a lot of energy!

I ordered an electric cutter online last week and they said they will deliver it by 2nd of November. But at night, DH brought my electric cutter and I was so excited. Today morning I tried cutting several more interfacing, fabrics, and lining fabric. I LOVED it! I can cut 9 -10 layers of regular cotton and around 6 layers of woven interfacing at one go!! Howzzaat! 

 And out of excitement, I made these cute mini pouches today. 
 Two of the pouches are zipper tissue pouches and one coin pouch. 
You can find the mini zipper tissue pouch pattern HERE or go the Pattern Category in my blog. It's always fun to make things with cute and pretty fabrics, right?

Mickey Mouse Tissue Zipper Pouch 

I guess I made the right decision by ordering the electric cutter. It makes "batching" work so much easier. For me, cutting interfacing is the most tedious job of purse/wallet making. 


This pretty pink fabric was from my scrap bin. Last Friday I cleaned my scrap bins and threw out quite a bit, esp the smallest pieces, like the corner cuts of bags and big pouches I made earlier. I made this coin pouch using the same pattern, but without the tissue holder pieces. 

Floral Pink Card Holder

Sorting out scrap bins always feel like opening a treasure box. My DH always laughs at me, because I always end up keeping most of the scraps again, instead of throwing them out. But how can you throw a pretty fabric like this, right?


These are the Before and After Photo of my interfacing scraps. I sorted out the woven interfacing and still need to sort out the heavy interfacing ones. 

Scraps - Before
For now, I rolled them up according to the projects. Now I have enough interfacings to keep me busy for a couple of weeks. 

Scraps - After 

And here is the picture of my new toy.  

Image result for zipsnip cordless cutter amazon india
Photo is from google 

How do you do your "batching"? Do share in comments, I'd love to learn. I'm pretty bad with keeping things organized LOL. 

Until then,

Happy Sewing


and I'm featured in Handmade Monday! Yay!


Large Pouches

Hello again, 

Here is my report from my DIY Block Print experiment. Verdict: I LOVE IT! I am ordering more wooden blocks and can't wait to make more! 
Many asked me if the color stays after washing. I tried washing a small piece and the color stayed. The thing is you have to follow the manufacturer's instructions. I waited for 24 hrs before start ironing the fabric.  Yes, good things come to those who wait, Bon Jovi said so :D. 
So what did I make? 
I made one large pouch with the red floral one and I really love how it turned out. Even my boys loved it! The rest are all ready to sew but after I finish a couple of custom orders. 


This time I am using my metal zipper. I always feel wary to sew with metal zipper, but I think maybe I just lack practice. After a couple of pouches (scroll down for more photos), I can confidently sew metal zipper without breaking my needle. 
  

The above photo is to show the approximate dimension of the pouch. The phone is 6.5" phone and all those fit in nicely into the large pouch. 


Isn't that great, I mean we always need a pouch, small one, medium one, a large one, quilted, waterproof, cute, etc. I always picked up a few pouches whenever I travel as a gift and keepsake. And everyone loves it. More so if it's handmade, right? 
So, the past few days, I've been making few pouches using different of material and they all turned out unique and beautiful. I used heavy interfacings for these pouches and love the result. The pouch feels sturdy and you can carry it as a clutch, like when you go out for lunch or going for an errand. 

This pouch can easily fit an iPad mini or tablet, phone, Passport, coins, keys, or use as a Toiletry bag and other things that we need to carry.

The yellow pouch is made using kalamkari mud cloth fabric. I prewashed the fabric and really love the vintage look of it. 

This grey red pouch has 2 different colors, on one side the chevron is red and grey and only gray chevron on the other side. A Very unique, One of a kind pouch.

This chevron fabric is one of my faves. Sometimes I feel that fabric also has its own destiny. Just like this one. The Chevron Pouch has 2 different print on each side. 
Brown Large Pouch, Zipper Pouch, Traveler Bag, Travel Organizer, Ajrakh Block Print Clutch, boho style zipper pouch

The above brown Ajrakh pouch is another story. The fabric was a gift from my facebook friend, Madhu Mathur of Betukbandi, when I visited her in Jaipur.  She is one talented lady, I really admire her quilts and quilting innovations. Really inspiring. I am so happy to finally able to use it. I still have few more of the fabrics with different prints. Can't wait to use them!! 

Stay tuned for more pouches from my Indian Fabrics collection. Sometimes, you don't need a fancy pattern to turn your fabrics into a pretty pouch. Let the print speaks for itself! And making simple pouches can be a skill-building project for a beginner. I really recommend it. Don't be afraid to make mistake and experiment with new materials. 

Until then,

Happy Sewing


Block Print DIY

Hello,

Do you remember this song?

"Celebrate don't you wait, never hesitate
Celebrate while you still got time

Celebrate, yeah it's great, do it right away

Turn your back it's celebration time"


Well, today I decided I will try the block printing!! Afterall I got the wooden blocks and fevicryl fabric paints a few months ago. 
I saw this tutorial on youtube (it's in Hindi) and decided to try it. And I did! 


So, here's few things I learned:

1. First, soak the wooden blocks in a cooking oil. She suggested til ka tel a.k.a sesame oil. I used whatever  I have in the kitchen. she suggested to soak overnight, I soaked for about 3 hours or so. 


2.  While the wooden blocks are being soaked,  wash the fabric that you are going to use. I used linen, the lady in the video used mulmul or voile cotton. 
After the fabric dried up ironed it nicely. I used layers of newspaper and flannel fabric as a base and laid out my piece of fabric there.


3. Now, take one kitchen scrubber, the sponge one, and a small plate to mix the colors. Transfer the paints onto the sponge. Wipe the wooden block with a paper towel first then press it onto the sponge and start stamping. One at a time. 

And here is the result.
 I love this bicycle print. 

 The Ship and Bell, more or less the same size as the bicycles. 


and I love the red florals and bells here. 

Now, I have to wait for 24 hours before I can sew them into something pretty. A wallet, sling bag, or maybe a pouch

If you ask where do I get the wooden block from? I bought it from Amazon India. There are lots of sellers who sell them in a set of few pieces. I think I am going to buy one more set. It's kind of fun. I will let you know how it is after 24 hrs. Subscribe to my blog if you don't want to miss the post. 

Yes, it's a small achievement today that worth celebrating. 
It was not perfect but then that's the beauty of handmade, right?

Until then,

Happy Diwali!!


Latest Fabrics

Latest Video