Powered by Blogger.

Industrial Sewing Machine Review - Jack F4

Hello,


I mentioned in my last post that I got a new machine! Yes another one. I always wanted to get one industrial machine but hesitating a lot. Reading a lot of reviews and visited the machine dealer in my town didn't help much. So last year I decided to get Singer HD instead. It was after I saw Donna Jordan of Jordan Fabric Youtube video that I decided to get one this year.


Well, I am a firm believer that everything will happen at its own time and place. Man proposes, God Disposes. I was chatting with Raji of Homemaker's Hustle and she told me she got Jack industrial machine. I saw so many video about it last year when I researching for industrial machine. I called up my dealer, and voila he said he got Jack machines! I watched youtube review again and decided to get the F4 model. And the verdict? It's so worth the wait!! Why?


The machine is pretty quiet and you just have to switch on and you're ready to go. This was my main concern last year. Most of the industrial machine that is sold here has a clutch motor. 


I've been playing with it for a few days now. Getting used to the speed and love that I don't have to keep changing machine foot. Not even when I sew zipper! I finished 2 passport holders and a couple of mug rugs and quilt tops.


Other features include: Adjustable speed, half stitch and needle up button, and the best thing it sews beautifully from mulmul fabrics to thick layers of quilt and passport holder. 


Now, I'm looking forward to sew more wallets and quilts! Let me know in a comment if you have any questions! 


Until then,

Happy Sewing


Bifold Wallet and binding mini tutorial

Hello,

 Red Wallet


The sons are having their annual exam until next week. Wish us luck!! Since my MIL is away in Delhi, I tried a few baking recipes from youtube which surprisingly turned out well. 

Another great news from my sewing space is I decided to gift myself an industrial machine. I've been thinking for a long time and finally decided to get this one. I will write a review next week, Insha Allah, after it's assembled. 

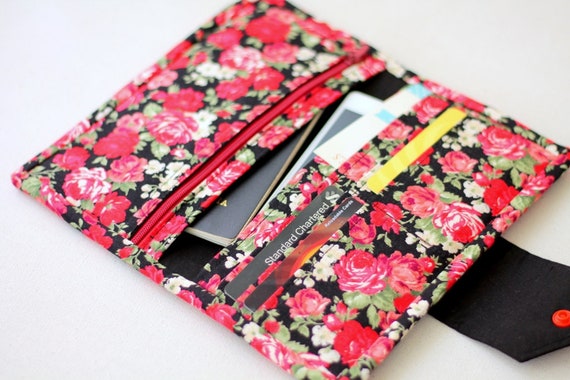
Meanwhile, servicing my Singer HD, I whipped up 2 bifold wallets. It is slight upgrade from the previous one. I made slightly wider version so that it can double up as a phone wallet or to keep passports while traveling.


This red roses wallet was the second one I made. It was finished with binding, as usual. And frankly, it is my preferred method of finishing a wallet. 

The first one I made was a birthing style. If you're a bag maker, you'd know what it means? ^_^. It means, you sew the wallet panels right side together, leave a gap in certain part unstitched to turn the wallet right side out. 


Though it came out really nice,  my sons and SIL all voted for the binding one.I really love the peachy pink color though!


For this peach wallet, I used only woven interfacing without any padding. In the red roses wallet, I added fleece batting. 


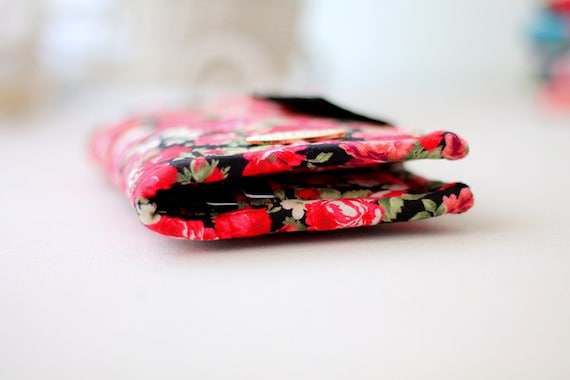
Both wallets are the same size and even after filling it up with cards, phone and passport, it still close up pretty nicely. Love how slim it remained. I wish I could be too (after stuffing myself with homemade cakes and puddings! that too with extra cream! LOL)

Day before yesterday, Shweta from Arnel's mommy asked how to finish the corner of the binding. As with my other wallet patterns, I sewed the binding by machine on one side and hand sew the other side. Why hand sewing? Because I love a neat finish. So, here is a mini tutorial, how to sew when you reach the corner. 
But before cutting the binding strip, make sure that the fabric grains are straight. This is important to get a good finish!


1. When you reach the corner, fold the raw edge and pull out the edge so that you get that straight diagonal line. Finger press it. 

2. Fold it over, so that it covers the previous stitching line and clip in place. Trim the wallet raw edge if necessary. I usually trim as I go along.

3. Now continue slip stitch until you reach the corner intersection. 
  
4. Then slip stitch towards the wallet's corner

5. And stitch back towards the inner corner/intersection. 

6. Continue stitching !
I hope that helps! 
So, that's all for today. Keep experimenting, keep sewing! 


Have a blessed Friday!

Linky Party:
Finish it up Friday

Latest Fabrics

Latest Video