Powered by Blogger.

Monday Updates

Hello again,

Last week I completed another improv on the family passport holder. This time I converted interior slip pocket into a zippered pocket.


Hopefully, I can write a tutorial for that soon. I forgot to take photos this time. It's very easy and I love how this turned out. I hope she will like it!!


I think I am going to offer this option in the shop along with other options, like an exterior zippered pocket 


 Sewing wallet binding is my favorite. It's like a lava cake after a Pizza dinner LOL. I have a tutorial coming up tomorrow! 

In the meantime, I'll be working on another improvisation this week. Don't you just love when with a single pattern you can make so many varieties?

You can get the passport holder pattern HERE.

It's Monday and here sneak peek to cheer you up this Monday ^^
All these beauty will be available tonight! Limited stock available! 

GO TO SHOP to see what other fabrics are available now 

Pretty Paisley 
  
One of a kind Travel Theme Cotton Fabric

Glace Cotton Ikat Print Fabric

That's all for today,

Until then,

Happy Sewing


{Tutorial} Another Wallet Mitered Binding

Hello,


Many friends asked me how I do my wallet binding. I love wallet with binding because it's stronger and it's one of a kind! You won't find the same wallet in the world. I guarantee that ^^

Handmade Family Passport Holder
Ok, so here's how:
(you can use cross cut or bias binding. The binding width is 1.5" ).

1. Start sewing the binding with 3/8" seam allowance. See the picture below, I folded the binding diagonally. 

This is the beginning of the binding

 Stop approx 3/8" from the corner, and turn the wallet diagonally and sew to the corner.


2. Now flip the binding strip to outward to the right 


3.  And flip it back again like shown in the picture below.  Make sure the fold at the top is lined up straight with the edge. 


4. Now sew the binding from the top with 3/8" seam allowance. Continue in the same manner until the end. 


At the end of the binding, overlap the binding strip like in the picture below


When you finish and fold the binding to the other side, you will have a neat mitered corner 


Nothing like a perfect ending, right? 


Now, finish your binding by hand. I love hand sewn binding. I tried several times to finish it with a machine but not very happy with the result.

This tutorial is an update version of my previous post. 

I hope you find this helpful. Let me know in the comment if you do or if you want more tutorial. 

Happy Sewing 


Something New

Hello again,

Few days ago, I was reading my past blog posts from way back in 2009 and 2010. I even read the comments and checked the profile of the commentator. Most of the bloggers are no longer writing. After the Facebook and Instagram, many people think writing a blog is too time-consuming. I was also caught up in the same trend. I mean, isn't it easier and more practical to just click photos and upload it to Facebook and Instagram, instead of writing all the details on the blog. The thing is, Facebook and Instagram is a fast moving, it's difficult to track what you have posted, even with the hashtag. Unlike a blog, where everything is properly documented. It's like a diary. We can always go back and read. Some cute moment, some ridiculous photos, and of course it warms my heart to read all those. Anyway enough of feeling nostalgic.

Yesteday, in between finishining my orders, I made this cute hipster cross body bag. It's been on my mind for several days, and it sort of bug me (you know what I mean?), so after cutting interfacings and fabrics for my Passport Holder orders, I draft the pattern and here it goes:

Originally, I wanted to make the pleat slightly closed, but I changed my mind. I love how the pleat turned out here.  It gives a patchwork look which was my initial intention.


I also made the front exterior pocket with hidden/concealed zipper. From far it will look like a slip pocket when it's actually a zippered pocket. 


I was thinking to finish the top without a zipper, I guess that can always be an option later. I use beige linen for the solid and an orange diamond print fabric
Also, don't miss the patchwork removable strap! I love patchwork strap. 

Besides that, I finished another mini crossbody bag from my Phone sleeve pattern. I used the kindle size for this one which turned out pretty cool.


It's such a fast sewing and how scrap friendly this pattern is. The paisley fabric is just perfect, it's like waiting for the right project to come along. 


and of course the additional zippered pocket is always great option, right? Especially when you are traveling and want to keep all the small necessities with you without having to rummage the big backpack. 

That's all for today. I have to go and take the boys to their music classes today and I hope the weather holds.  

Until then,

Have a nice crafty weekends


This post is linking to Finish it up Friday 

Supplies Links : 


Last Week of April

Hello,

The past week, I was pretty busy. I started the Newsletter and really really happy I am able to share few things, like a free pattern! If you want it too, you can SIGN UP today.

On Friday night, there was a big storm and we ended up with no electricity until Saturday Night.
Few of our trees fell down and my younger son was really sad about it. He's fierce boy but very soft at heart. He loves animals and always goes to pat our newborn calf and feed the cows with his leftover tiffin whenever he comes back from school.


So on  Saturday afternoon, I spent my time cutting out interfacings for my Passport Holder  and mini crossbody bag orders. The shop wa quite busy the past few weeks, so I better get organized. Luckily I came across this post about batching from Jules of Sew Me Something. It's very inspiring!

(Batching is a form of time management that allows a person to maximize concentration and decrease distraction

I'm glad I did it, so today I can quickly make this Frozen Mini Crossbody bag for my friend, Wulan's daughter - Anisha. I hope she will like it. They will go to Indonesia for summer break next week. I hope it will reach them on time.

No automatic alt text available.
Frozen Mini Crossbody Bag
If you want to make the mini sling bag, the pattern is available at the end of this post or just go to the Pattern category in my blog.


I added the back zipper too. While deciding which fabric combo to use, I ask my elder son. He has a good taste and I often consult him whenever I am stuck with a color choice. Though he's only 13 years old :D. We initially agreed with the off-white linen but since Anisha is still small, I decided to go for more girly color.


No automatic alt text available.

Another one I completed (besides my passport wallet orders) is this cute reversible drawstring pouch. I followed a tutorial on YouTube. There was no measurement written on it so I just make my own. I am using 2 Fat Eight (9" x 18") and love the result. Yes, just 2 pieces of fabric. No interfacing! Isn't cool? I used quilting weight cotton from my stash and the green stripe cotton mix fabric.

No automatic alt text available.

Yes, sometimes you don't need interfacing. Depends on what is the purpose of the bag, like a foldable shopping bag, it's better off without interfacing because we can just roll  and put it inside the purse.

No automatic alt text available.

This will be a great quick pattern to make for a gift.

So, what are you working on this week?

Thank you for dropping by. Don't be shy to leave a comment or two ^^

Until Then,


Happy Sewing


Pattern Link : 


==========================

Frozen Elsa Crossbody Bag


If you like to receive more tips on handmade tutorials and handmade business tips, sign up for Chezvies Weekly Newsletter by writing your email address in the form below.


Interfacing Guide for Handmade Bag in India

Hello,

Today I want to share about interfacing. Not the famous brand interfacing because we don't have those branded interfacings here in India. I often receive a message asking what interfacing I used in my bags, pouches, and wallets.

Many of you probably already read interfacing guide by Sew Sweetness but since we - in India - don't have all those brands, we are back to square one, right?

I have been experimenting with many kinds and quality of interfacings. Which interfacing to use depends on what kind of project and what look that I want. Floppy, firm, sturdy, quilted, etc.

I recently purchased a roll of heavy woven interfacing and I am happy that I finally found it. It took me several trips to the wholesaler. He was kind enough to let me check through all kinds of interfacings without asking  "what are you making, ma'am?" which is pretty much the habit of an Indian (male) shopkeeper/salesperson. And it always pisses me off, cos what I am making is none of his business ^^.

Anyway, I found what works best for my projects.


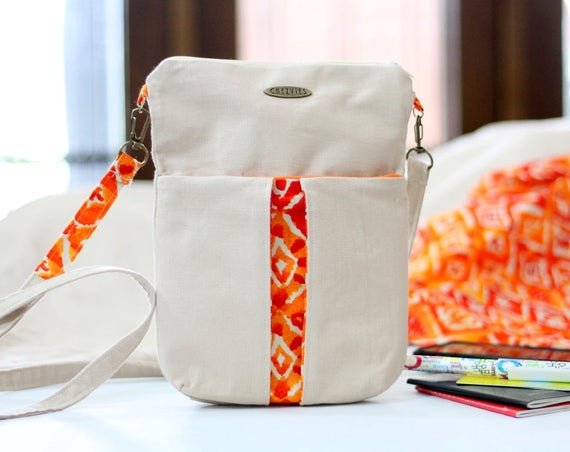
I use this very frequently to make small projects like small pouches or pencil pouch, and also bags.  This will make cotton fabric feel like home decor weight fabric. Not as thick as canvas though. I used this to make the Phone Pouch and Kindle Cover, pencil pouch, and Tote bag.  With this interlining, adding batting to the pouch won't be a problem.


Result: Soft /floppy and wrinkle-free, which means you can smoothen it with a warm iron.


I discovered this recently. It's thicker than all-purpose interlining. It gives a good shape to the bag and pouches.

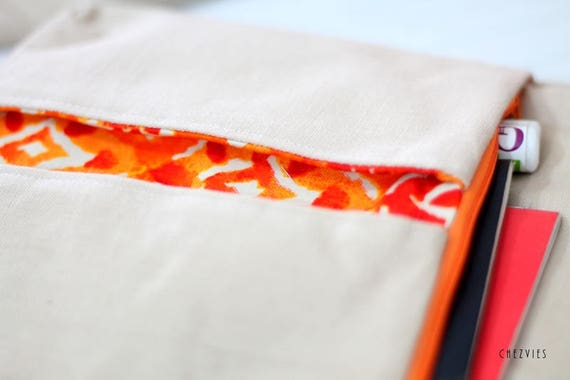
You can see the fabric print more prominent on the all purpose interlining
Medium = MCL 3001 Madura Coats India

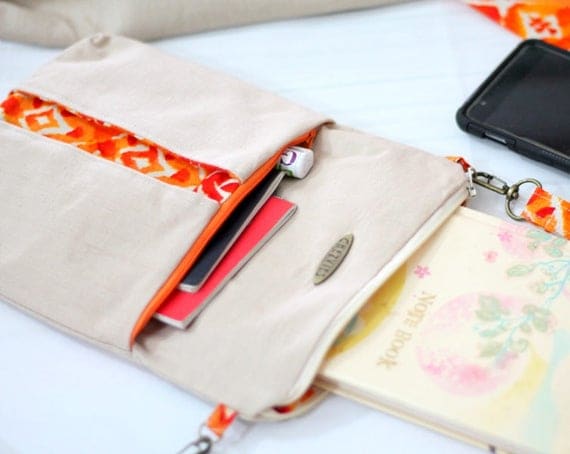
I use this for a  pouch or any purse that I don't need to be padded or add batting, but more sturdy without being too stiff.  Sometimes I use this interfacing for wallet or passport wallet too, combined it with Heavy Interfacing.


Heidi Mini Foldover Bag


This is also woven but heavier. This will make your fabric feels like canvas.

MCL 1616 (Madura Coats India)

I use this for my family passport wallets and women's wallets. The result is a firm/sturdy but soft wallet. Since it's a cotton base, it makes the hand sewing less painful.

Quilting Family Passport  wallet, large passport holder, passport case, family travel wallet, family passport cover, 6 passport organizer

4. Buckram 

This is my alternative if I could not get the heavy interfacing for my wallet. This is the one with a papery feeling and it makes the fabric very stiff. I only use this for wallets. Since I don't have to do "birthing", it works out fine. You can read HERE to learn more about Buckram.


I remember I made a tote bag with buckram and it wrinkled beyond repair LOL. I used it for a shopping bag. (Update: I stopped using buckram for my bag and wallet projects) 

All the above are iron-on or fusible. Which means one side is glue coated. I normally spray the fabric with water and place the glue side on the wrong side of the fabric, and iron it on a cotton setting. For lighter interlining use a setting in between wool and cotton.

5. Lightweight Non-Woven Interfacing.

This transparent fusible interfacing is called "pasting" in India. I use this a lot for my wallet card slots, quilted pouches, and also applique. 


It's good to give just enough thickness especially for card slots, or the inner pocket of a bag. But you have to be extra careful because it will shrink and wrinkled if the iron is too hot. I use a wool setting while ironing this interfacing. If you're careful, you will get a nice and smooth result. 


Card slot from Trifold Women's Wallet


I always use this interfacing to make a quilted purse. With this interfacing, the quilted bag or purse will be soft but sturdy, even after washing 

I also use this for quilted pouches and bags, especially when I work with Indian Fabric.

You can easily buy this interfacing in a "button shop" in India. Sometimes, they sell it meterage, but I always buy in a full package. It's around INR 150 for a pack of 10 meters.


Quilted Zipper Pouch
Quilted Zipper Pouch 


UPDATE: There are many brands of interfacing in India, what I wrote here is the one I am using and that works best for me. 

Where to buy it?
I bought my interfacings from a local dealer in the market. You can get them online on Amazon India or other websites, but make sure to contact the seller first. Because there is no clear description in the listing that I saw in Amazon India, and the seller will casually write interfacing or interlining as buckram. 

That's all for today. Don't be scared to experiment. Make the best of what you can find locally. I hope this simple guide will be useful for you. 

Thank you for stopping by and read my blog. Don't hesitate to leave a comment or two.

Until then,

Elvira


Latest Fabrics

Latest Video