Powered by Blogger.

Scrappy Log Cabin Quilt


I started this scrappy log cabin quilt last year after I organized my scraps in buckets. When this does not really make a dent to my scrap baskets but I'm super thrilled to finished this one just before the trip to Japan last January. My friend and me, we decided to take at least one quilt this time too. Last year I took the small log cabin quilt :D 


Last January I only had 6 blocks completed. The block size is approx 12 x 12 inches and totally made from scraps. 


This was my "just having fun" kind of quilt. I cut the scraps into 1.5" strips and using sew and cut method. Almost like quilt as you go method without the quilting part. 


The fabrics were of all kind of weight, as long as the color match! I did not follow any rule and I kind of loving this process. 


I pieced and quilted using my Jack sewing machine. I decided to just do wonky lines quilting ehmm it's called organic lines, right? And I loved the result! and so are my family and friends :D 


And here's my quilt hanging on the tree trunk at Inokashira Park! It was a nice sunny day when we decided to take the quilts out and find a good place to take photos :D. Yeah, we're crazy like that! Many morning walkers were glancing/looking and smile at us :D . 


And another shot at Arashiyama Bamboo Forest
I still have a lot of scraps. I've cut a few in different sizes and have a couple of ideas. Let's see I hope I can create something bigger than this scrappy log cabin! 
Thank you for stopping by & spend time reading my blog!

have a nice day!

- Elvira -


Linking up to:

Handmade Monday
Oh Scraps!

Tokyo International Quilt Show 2019


The Tokyo International Quilt Show held annually at Tokyo Dome. It needs no introductions. Last January, I've been very lucky to be able to go and see for the 3rd time  and it still never failed to amaze me. The quilts and the people.

We were lucky to be given free opening ceremony tickets (read in my previous post) and we were there before 9 AM on the opening day! We stayed in Mystays Hotel Higashi Ikebukuro which has easy access to Tokyo Dome. From the hotel, you can take either JR line from Otsuka Station to Suidobashi Station or Subway Marunouchi Line from Shin Otsuka Station to Korakuen Station (This is the fastest!) and great view too. 

It was really amazing experience since  we could see all the displayed quilts before the crowds entered.

look at those bags!!

Without further ado, here are few of my faves! You can see more pictures HERE

Grand Prix 1st Place
Chiyoko Takayama


Winner of Youth Category

And the crowd favorite!

The Kimono Quilt - There are 1500 of them !!

Different Colors and Different Style
Reversible Quilt

Side #1
Side #2
Main display featuring Monet's Garden - my fave!
The Monet's Garden was simply marvelous! The artist's interpretation from the real Monet's garden was simply amazing! 


2 happy girls outside the Tokyo Dome :D

Once inside the Dome, we were lost in the quilt wonderland! Before we knew it, it was dark and time to head out with a box full of fabrics & books and head full of ideas. The quilts, the shopping, the generous people! Like someone wrote on her blog, going to Tokyo Quilt Festival was like watching Olympic . Absolutely right! Quilt Olympic that is! 

Check out the rest of the photos HERE 

Thank you for stopping by and reading my blog.

Have a nice day!
- Elvira-

Zip Around Wallet with Binding Tutorial


As promised here is the tutorial for the zip around wallet. This method is finished with binding. We are going to use bias binding here and you can check how to make bias binding in this Post

What you need:

- Bias binding 1.75" wide 
- #5 zipper - 24" long
- ZIpper Foot (Optional)

Let's start :

1. Assembled the passport wallet as per the pattern instructions, minus the FLAP making part. Mark the centre top and bottom of the wallet with erasable pen. Then mark approx 3/8" to 1/2" on each side of the centre mark, like shown the in the picture below. 


2. Prepare the zipper : 

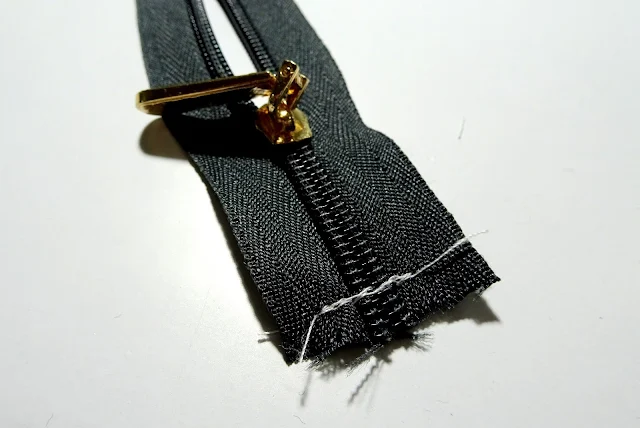
On the open end, fold the zipper tape diagonally like the above picture

Then fold it down and hold it with a clip or pin

sew along the edge like the above picture.


Sew across the close end of the zipper to prevent the zip puller from slipping off

3.  Attaching the zipper.

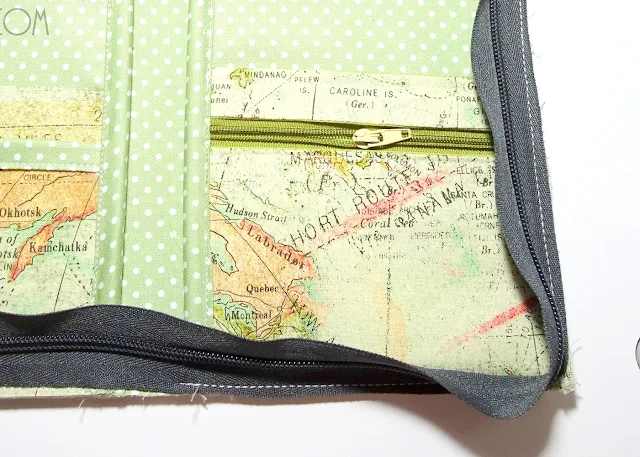
We will attach the zipper from the interior part of the wallet. Open the zipper and start at the top, align one folded end of the zipper , right side up,  on the right side mark. 


 Using wonder clips, clip the zipper tape all around and start sewing from the top with 1/8" seam allowance and stop when you reach the right side mark at the bottom. 


Go slow around the corners. Sew one stitch at a time as you maneuver the wallet. 


Now close the zipper and draw a line on the zipper tape from where the stitch end, like in the picture below. 


Now open the zipper again and place the marked zipper tape  in line with the left side mark at the bottom. Clip all around and start sewing from the marked line all the way to the top of the wallet with 1/8" seam allowance and stop on the left side mark. 


When finished, it will look like the pictures below: 


4. Attaching the binding. 

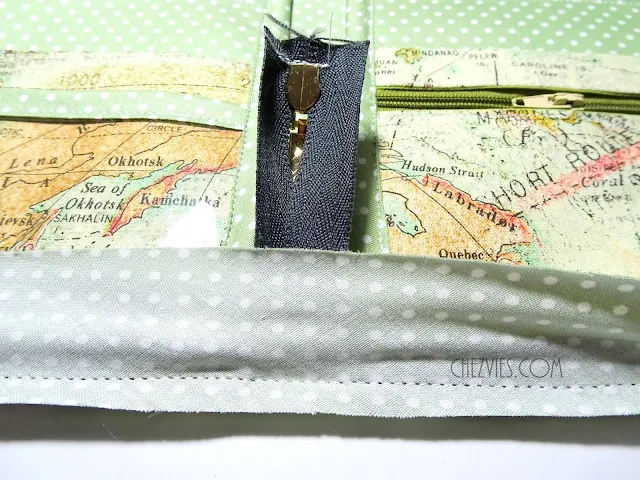
Fold end of the bias binding  diagonally and place it on one side of the wallet, covering the zipper tape. Sew with scant 1/4" seam allowance. 


Be careful while maneuvering around the corners. Remember to always push the zipper teeth away. Setting the machine speed lower will help. 


when you reach the bottom, just pull the zipper tail inward and continue sewing. 


Before turning the bias binding, slightly cut /round the corners and make small clips on the zipper and binding fabric in the corners.  


Now, put on your fave movie and start hand sew the binding :D


Last step, trim the zipper end by about 2" and encase the end of the zipper tape with a matching fabric. 

et Voila!! Pat yourself on the back for completing your beautiful wallet with all around zipper! 


I hope the tutorial is clear enough. I will try to make a video tutorial when I make my next passport wallet! It was kind of difficult to take photos and video at the same time ^_^ 

here is the wallet in action on my YouTube Channel


Do tag me in Instagram if you make one based on this tutorial. 

Thank you for your patience reading this long post :)

Happy Sewing!

- Elvira -


Zip around Family Passport Wallet

Hello,

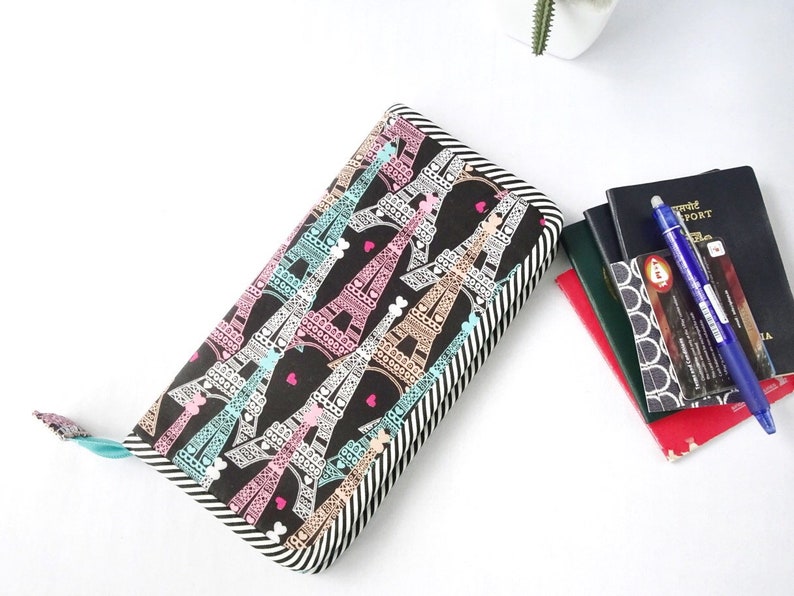
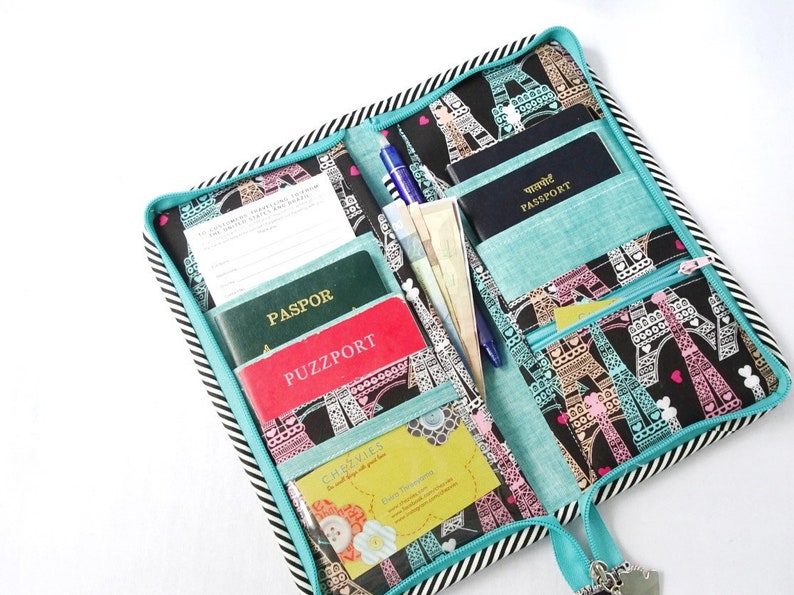
Many people asked me on Etsy if I make zip around wallet and finally I now I can give the option. Introducing the new zip around family passport wallet!


image 0

Installing all around zipper is quite tricky, because the wallet is interfaced with heavy interfacing plus batting.  So I made several changes on the interfacing. I used heavy interfacing only on the main lining and using woven interfacing on the main exterior and used the same thin fleece batting for the padding. It worked out beautifully.


I will take photos and maybe videos when I make the next wallet and write a tutorial for it in my next post.  Make sure you subscribe to my blog so you won't miss the post.
This Paris family passport wallet is now available on Etsy You can choose for 4 , 6 or 8 passports. It's very handy and keep everything securely inside.

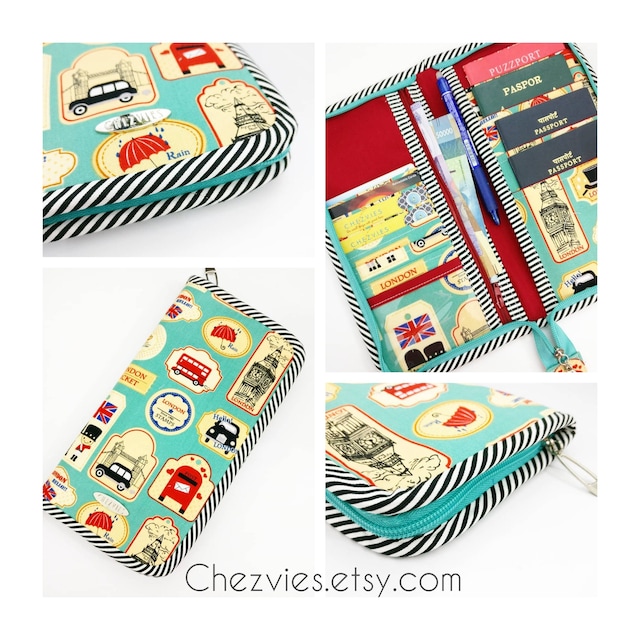
I also made the above travel wallet ( a custom order) with zip around closure. I will make more of this for stock (and I need to sew up those stash!) . The green London print fabric is finished now but I have the peach one in case you want the same print.

You can buy the Family Passport Wallet Pattern HERE , ETSY or in my WEBSHOP

Thank you for stopping by,
 Have a nice day!

- Elvira-

Tokyo Discovery Day 2

The previous day, we went to Swany and I bought a few half yard cuts mostly suitable for making wallets and bags. The shop has 3 sections in different floor, but since it was almost closing time, we only explored the 2nd floor which mainly section for bag making. And if your purchase is more than certain amount, you could get any bag pattern for free.Yes, the pattern for all those bags that are on display!

Swany Yokohama
 On Day 2, we wanted to visit Country Quilt Market fabric shop. But first, in the morning we visited Inokashira Park near Kichijoji Station. The park is huge with many recreational facilities, a shrine, zoo and pond. The area around the Kichijoji station is really worth checking out. Many antique and vintage shops, cafe shop with interesting design. I think it's called for the second visit and hopefully in different season ;)

Inokashira Park


From Kichijoji station we headed to Country Quilt Market in Nishi Ogikubo.  It's a little fabric heaven! I say, they have my kind of print and colors!! It's a 2 storey shop. On the ground floor, mainly fabrics from pre cut to yardage. On the 1st floor, they have laces, button and liberty fabrics. I had to hold on my wallet extra tight here. LOL

Country Quilt Market


They also have a small room where classes are happening. I can easily spend a day in this shop!
The owners are super nice and they even gave us a free ticket to Tokyo Quilt Show. Opening ceremony tickets! Thank you so much!!!

At Country Quilt Market

I love the Hexies Tile 


We had an appointment to meet mbak Sari from Handcraftku at lunch time, so we had to leave the shop but not without filling out small suitcase with lovely fabrics! 

Indonesian Halal Food!! at Bintang Bali 


Love the Roof at Okubo Station
After lunch, we planned to go to another Patchwork Show which according to the post we saw on Facebook was happening in Tokyo Hilton. We supposed to catch the shuttle bus from Shinjuku station but we got lost in Shinjuku LOL. Who doesn't?? We could not find the Shuttle bus stand!! Anyway, it was not meant to be, but there was an interesting story related to this when we were in Osaka. That will be in my next post!!

Alright, if you're a muslim traveller and looking for a praying room, there was one in Takashimaya Shinjuku. The room is quite spacious and we spent few mins here to read our prayers. 

Since the Hilton plan failed and we were in Shinjuku we decided might as well we go to Okadaya. The best thing about Okadaya is they have everything craft related from Quilting, embroidery, knitting, crochet, etc! and plenty of fabrics!! 


Stay tuned for next post about The Great International Tokyo Quilt Festival. 

Thank you for stopping by!

Have a nice day!

Elvira

Latest Fabrics

Latest Video