Powered by Blogger.
Showing posts with label zip around wallet tutorial. Show all posts

Pattern Update - Voyage Passport Wallet

 Hello, 

Passport Wallet Small


Recently I updated the Voyage Passport Wallet pattern to include the zipper closure tutorial, especially for those who prefer the written tutorial to the Video Tutorial. The pattern is the same as the original one and I only added the instructions for zipper closure. 

If you purchased the Voyage Passport Wallet Pattern before Dec 7, 2023, you can download the tutorial for FREE. The Add-On file DOES NOT INCLUDE a complete tutorial to make the passport wallet.

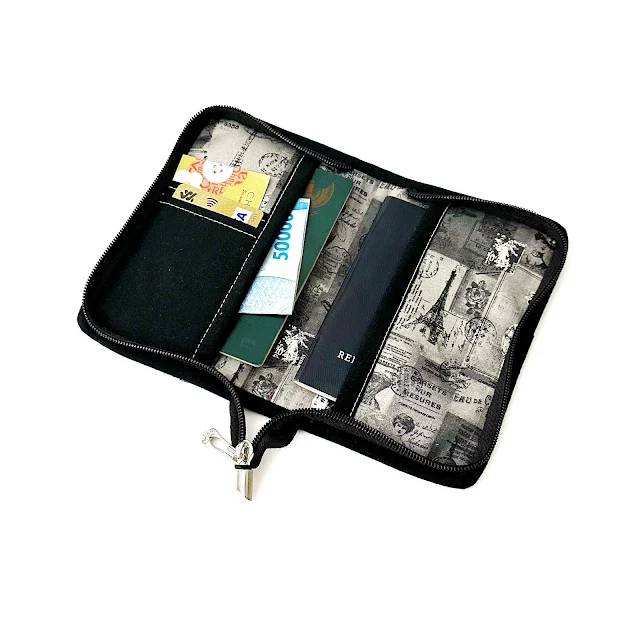
The Voyage Passport Wallet is a quick and easy-to-make accessory with a minimalist design that can hold a lot of items. It can hold up to four passports (two on each sleeve), as well as two cardholders. Its compact size makes it perfect for carrying it in your travel handbag or backpack.


Small passport wallet
Voyage Passport Wallet Pattern

Small passport holder

A few video resources are also included in the pattern now, such as how to machine sew the binding and how to make DIY Bias Binding.


The trick for sewing a zip-around wallet is to always use a zipper foot! I don't always use it as the regular foot I am using is pretty narrow (don't be like me 😀 ) and if you can set the speed, use the slower speed. Take your time to learn. It's not rocket science, so with enough practice, I am sure you can master it too. 


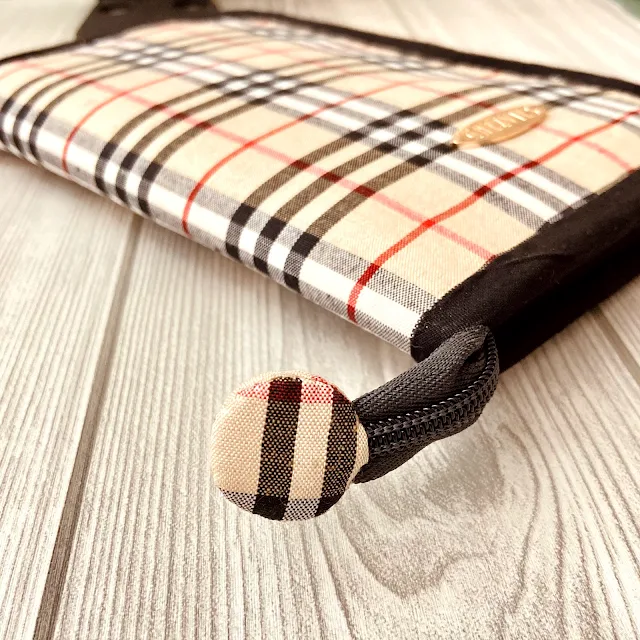
In the tutorial, I showed how to sew the zipper end tab the easy way, but you can always use the metal zipper end or the button style like in this video

Don't forget to use the coupon code CVG20 when purchasing the pattern either from my WEBSITE or ETSY SHOP.

Thank you so much once again for your continued support! If you have any questions regarding sewing or quilting and want me to make video tutorials, simply reply to this email. I'd love to hear your ideas! 


Until next time,


Happy Sewing!


Elvira


New Video Tutorial - Passport Card Wallet

Guwahati, Assam, India

Passport Wallet Pattern
Voyage Passport Wallet


Hello,

As promised in my previous post, finally the video tutorial for the small passport wallet is up on my YouTube channel now. And as I edited the original pattern to add the link, I also gave a name to the pattern. Well, I am really not good at giving names but then, as I make more patterns, I suppose it's inevitable for me to give a certain name. This time, I go with the simple name Voyage Passport WalletI plan to update the original pattern with better photos when I get the time, so please bear with me.

In the video, I cut the pattern pieces slightly bigger than the original one, because I want to use it for Journal Cover like in my previous post

For the zipper version, all the basics remain the same as the original pattern. If you want to make it with zipper closure, here are the additional materials to cut/change: 

✓ Cut 2 -  Medium or All-purpose interfacing for main exterior and lining

✓ Cut 1 - Fleece Batting  - the same size as the main exterior 

 ✓ #5 Zipper – 24” Long (based on the continuous zipper that is cut to size) 

✓ Bias binding (follow THIS TUTORIAL)

Without further ado, here's the video :


Passport Card Holder

Voyage Passport Wallet


If you're new here and wondering about the interfacing I used in my wallets, I wrote my secret guide for interfacing in THIS POST and THIS POST. My suggestion is to keep experimenting until you find the combination that you like the most. In the hydrangea passport wallet above, I used all-purpose interfacing for the main body and using medium interfacing for the sleeves' base. The wallet turned out softer and I can even fit it with more passports - up to 4 passports and it still closed nicely. 


I made another Voyage Wallet with Snoopy Print as a custom order. Some of the crafters, DM me on Instagram asking how to do bias binding nicely. As I mentioned in my previous post, before cutting the binding (cross-cut or bias), make sure the fabric grains are straight. This small step is very important to get a good finish. And of course, practice! Practice makes improvement. Sometimes even I had to rip off the already sewn binding because I didn't straighten the grain nicely and resulted in sloppy finish. 


Small Passport Wallet
Zip Around Passport Wallet

Passport Journal Cover

Another question is, can I use cross-cut binding instead? Yes, you definitely can. I made a couple of passport wallets with zippers using cross-cut binding. It will be like the usual wallet binding, like in THIS tutorial. When you want to use cross-cut binding for a zipper wallet, do not CURVE the corners. I will make the video next time when I am working on a wallet binding. 

Here is a few Ohana Passport Wallet I did for a custom order. 


Family Passport Wallet

Family Passport Holder
Mitered Corner binding


Family Passport Wallet
Cartoon Print Passport Wallet


I hope the video and a few tips above help your journey in the wallet making. Please let me know if you have any questions. 


Thank you so much for reading my blog. 

Happy Sewing,

Elvira


*****

Linking up to these wonderful BLOGS 


_______________________________


VIDEO TUTORIAL - SAFARI TRAVEL WALLET


Travel Wallet DIY
Safari Travel Wallet Video

Hello, 

Finally, the video tutorial for the Safari Travel Wallet is up on my YouTube Channel. I hope the video can help to visualize how to make the wallet from the beginning. I am trying to get a better angle as I recorded the video and also try not to skip the process. The video is sped up  2 to 3 times from the original. If you want to watch it at a slower speed, you can do so by clicking the setting on your YouTube screen.  


The original pattern only has instructions for flap closure which is pretty easy, but as many customers like zip-around closure more, I decided to make the video for the zip-around version. If anyone wants to see the flap closure version, I will record one when I make my next wallet. Do let me know in the comment.


Travel Wallet DIY
Cute Zipper End 


Zip Around Passport Holder
Zip Around Travel Wallet


I really enjoy recording the video and I really hope to share more sewing tutorials in the future. If you heard some funny noise in between the videos, that's because my son was watching a football match, or sometimes, someone came and asked something in the middle of the recording. Maybe I should put a sign like "recording in progress, do not disturb" LOL

I hope you find the video useful and you can understand the process of making the wallet. I'm looking forward to your feedback! 

Thank you for stopping by,

Elvira


Video Tutorial : How to sew family passport holder

 Hello again, 


how to sew passport wallet
Video Part 1

Finally, I finished editing the videos for the Family Passport Wallet pattern. The supporting video tutorial comes in 2 parts. The first part is the making process of the passport slots


I made a few changes : 

1. The LINING for the zipper pocket, I use ONE piece of lining 5" W x 6.5" H. (in the original pattern it was 2 pieces of lining fabric). 

2. Passport Slot construction is different from what's written on the original pattern. This new way I found it better and faster to make. 

Let's jump to the video below: 


For Part 2, I am showing how to attach the zipper closure using a single tape zipper. It's the same way as the Nuno Small Wallet. For the zipper length, I use the #5 nylon zipper approximately 44-45 inches long. This is my new fave in attaching a nylon zipper. 


I hope the video will give you a clear understanding of the pattern. I will update the pattern when time permits. Do let me know what you think in the comment below.


Thank you for reading my blog.

Happy Sewing!

Elvira


Mini Travel Wallet with Zipper Closure

When you get new zipper foot, you have to make another zip around wallet. This time I made mini travel wallet!


Well, I don't like changing foot while I am sewing, but sometimes it's worth the effort. Trust me. It's easier to sew zip around wallet with zipper foot. 
And unlike domestic foot, industrial machine foot is slimmer which make sewing zipper is smaller space is much easier. 

Get the Pattern on Etsy
It turned out neater even though I still don't like the foot changing part. LOL. 
 I really love this! The wallet turned out super cute. What do you think?
The wallet is available in  HERE (psst it's free shipping!) and if you want to try making the wallet yourself, you can get the pattern in my ETSY shop or my WEBSHOP. The original pattern is without the zipper though. but you can follow the tutorial HERE

Thank you for stopping by!
Happy Sewing
~Elvira~

********
Linking up to:

Sew Can Do


Zip Around Wallet with Binding Tutorial


As promised here is the tutorial for the zip around wallet. This method is finished with binding. We are going to use bias binding here and you can check how to make bias binding in this Post

What you need:

- Bias binding 1.75" wide 
- #5 zipper - 24" long
- ZIpper Foot (Optional)

Let's start :

1. Assembled the passport wallet as per the pattern instructions, minus the FLAP making part. Mark the centre top and bottom of the wallet with erasable pen. Then mark approx 3/8" to 1/2" on each side of the centre mark, like shown the in the picture below. 


2. Prepare the zipper : 

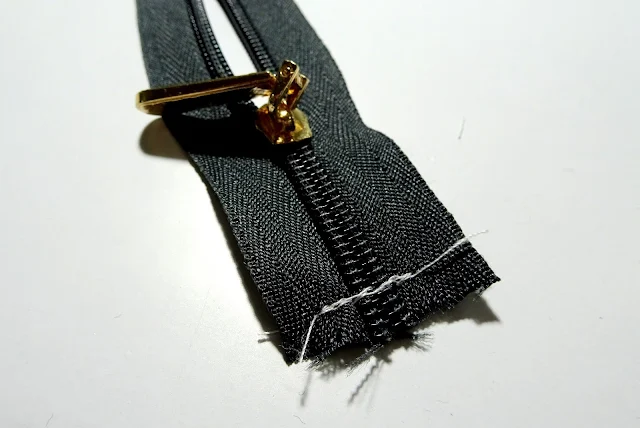
On the open end, fold the zipper tape diagonally like the above picture

Then fold it down and hold it with a clip or pin

sew along the edge like the above picture.


Sew across the close end of the zipper to prevent the zip puller from slipping off

3.  Attaching the zipper.

We will attach the zipper from the interior part of the wallet. Open the zipper and start at the top, align one folded end of the zipper , right side up,  on the right side mark. 


 Using wonder clips, clip the zipper tape all around and start sewing from the top with 1/8" seam allowance and stop when you reach the right side mark at the bottom. 


Go slow around the corners. Sew one stitch at a time as you maneuver the wallet. 


Now close the zipper and draw a line on the zipper tape from where the stitch end, like in the picture below. 


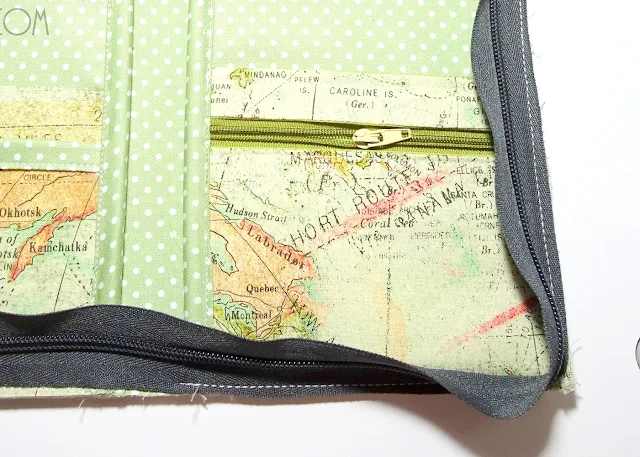
Now open the zipper again and place the marked zipper tape  in line with the left side mark at the bottom. Clip all around and start sewing from the marked line all the way to the top of the wallet with 1/8" seam allowance and stop on the left side mark. 


When finished, it will look like the pictures below: 


4. Attaching the binding. 

Fold end of the bias binding  diagonally and place it on one side of the wallet, covering the zipper tape. Sew with scant 1/4" seam allowance. 


Be careful while maneuvering around the corners. Remember to always push the zipper teeth away. Setting the machine speed lower will help. 


when you reach the bottom, just pull the zipper tail inward and continue sewing. 


Before turning the bias binding, slightly cut /round the corners and make small clips on the zipper and binding fabric in the corners.  


Now, put on your fave movie and start hand sew the binding :D


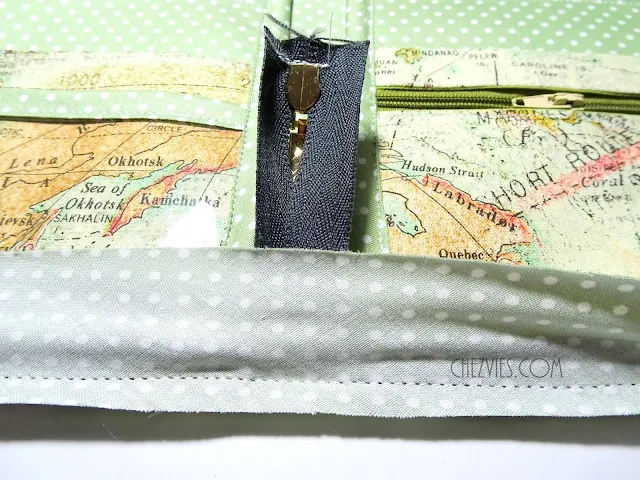
Last step, trim the zipper end by about 2" and encase the end of the zipper tape with a matching fabric. 

et Voila!! Pat yourself on the back for completing your beautiful wallet with all around zipper! 


I hope the tutorial is clear enough. I will try to make a video tutorial when I make my next passport wallet! It was kind of difficult to take photos and video at the same time ^_^ 

here is the wallet in action on my YouTube Channel


Do tag me in Instagram if you make one based on this tutorial. 

Thank you for your patience reading this long post :)

Happy Sewing!

- Elvira -


Latest Fabrics

Latest Video