Powered by Blogger.
Showing posts with label wallet binding. Show all posts

New Video Tutorial - Passport Card Wallet

Guwahati, Assam, India

Passport Wallet Pattern
Voyage Passport Wallet


Hello,

As promised in my previous post, finally the video tutorial for the small passport wallet is up on my YouTube channel now. And as I edited the original pattern to add the link, I also gave a name to the pattern. Well, I am really not good at giving names but then, as I make more patterns, I suppose it's inevitable for me to give a certain name. This time, I go with the simple name Voyage Passport WalletI plan to update the original pattern with better photos when I get the time, so please bear with me.

In the video, I cut the pattern pieces slightly bigger than the original one, because I want to use it for Journal Cover like in my previous post

For the zipper version, all the basics remain the same as the original pattern. If you want to make it with zipper closure, here are the additional materials to cut/change: 

✓ Cut 2 -  Medium or All-purpose interfacing for main exterior and lining

✓ Cut 1 - Fleece Batting  - the same size as the main exterior 

 ✓ #5 Zipper – 24” Long (based on the continuous zipper that is cut to size) 

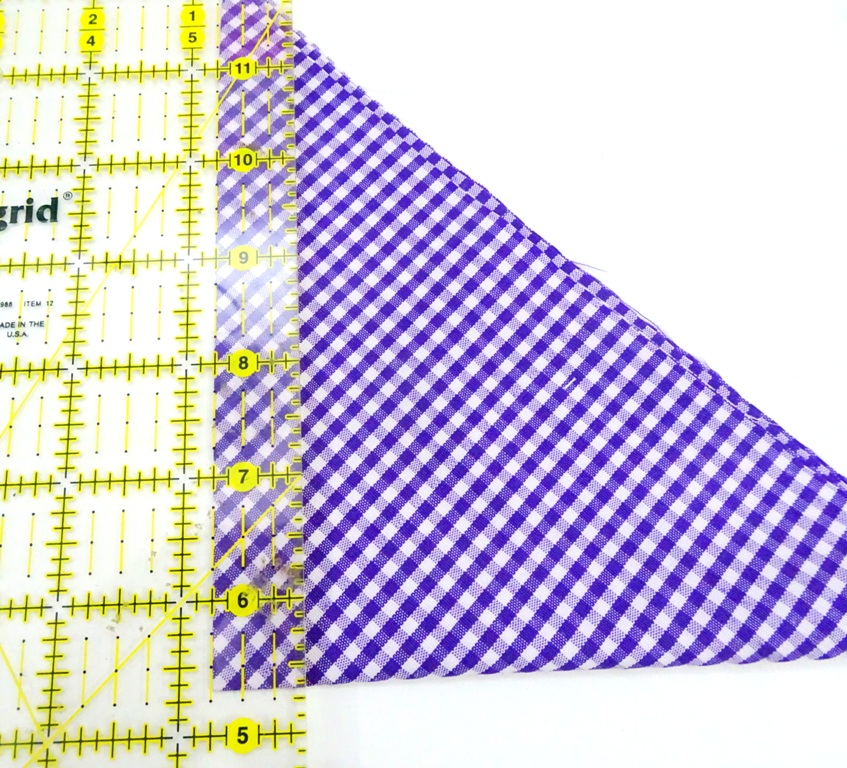
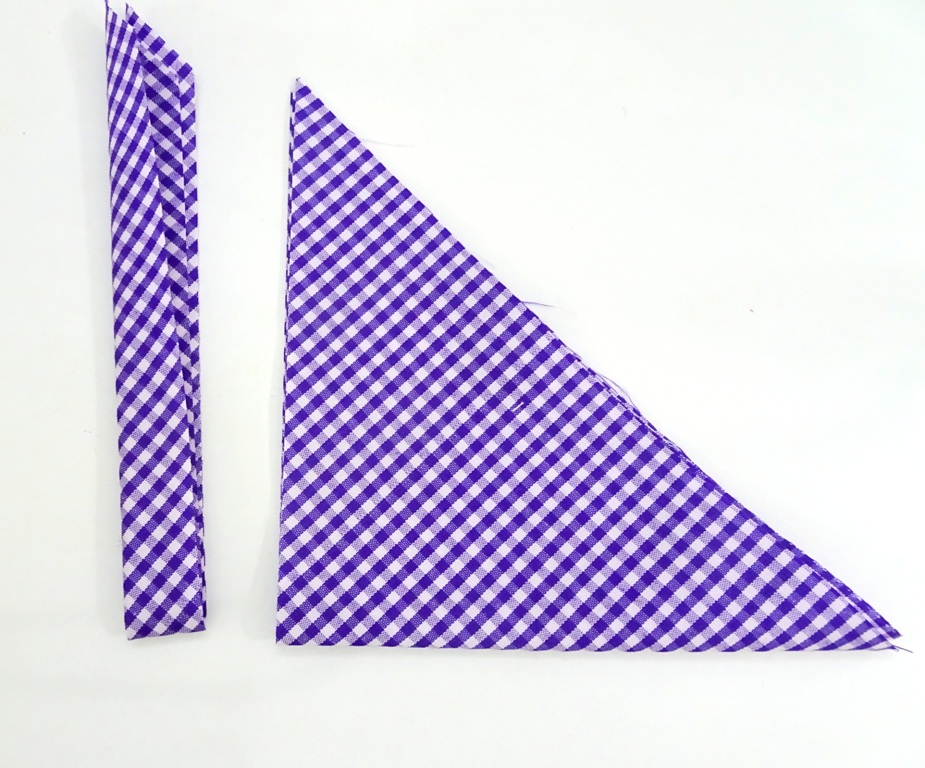
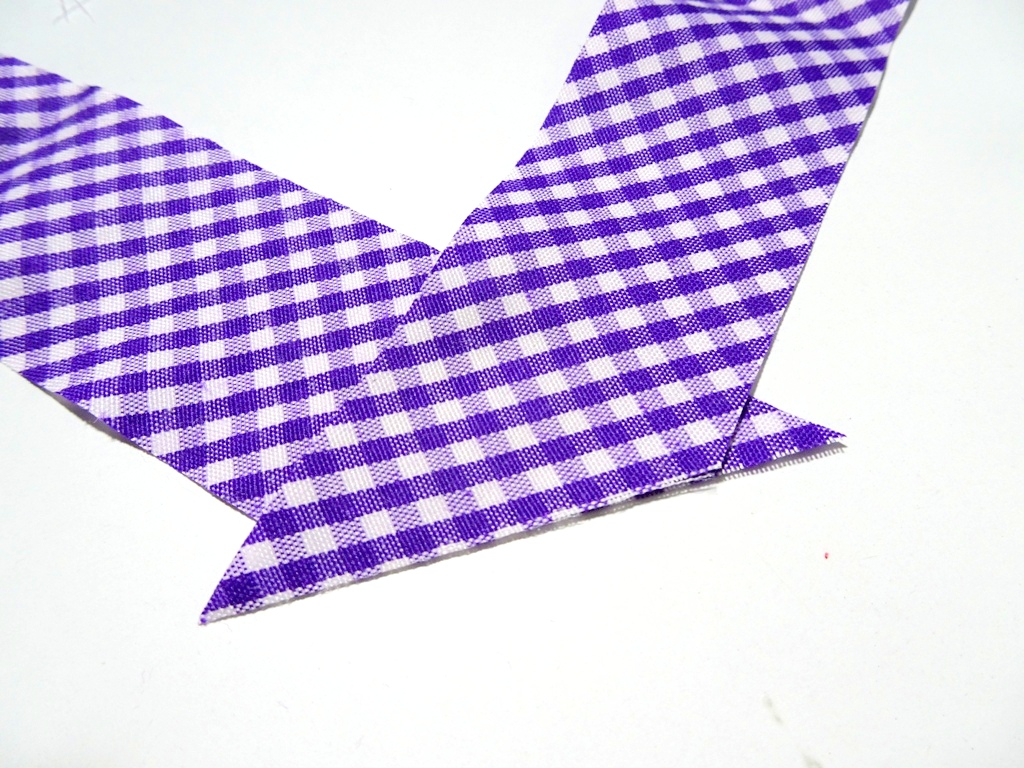
✓ Bias binding (follow THIS TUTORIAL)

Without further ado, here's the video :


Passport Card Holder

Voyage Passport Wallet


If you're new here and wondering about the interfacing I used in my wallets, I wrote my secret guide for interfacing in THIS POST and THIS POST. My suggestion is to keep experimenting until you find the combination that you like the most. In the hydrangea passport wallet above, I used all-purpose interfacing for the main body and using medium interfacing for the sleeves' base. The wallet turned out softer and I can even fit it with more passports - up to 4 passports and it still closed nicely. 


I made another Voyage Wallet with Snoopy Print as a custom order. Some of the crafters, DM me on Instagram asking how to do bias binding nicely. As I mentioned in my previous post, before cutting the binding (cross-cut or bias), make sure the fabric grains are straight. This small step is very important to get a good finish. And of course, practice! Practice makes improvement. Sometimes even I had to rip off the already sewn binding because I didn't straighten the grain nicely and resulted in sloppy finish. 


Small Passport Wallet
Zip Around Passport Wallet

Passport Journal Cover

Another question is, can I use cross-cut binding instead? Yes, you definitely can. I made a couple of passport wallets with zippers using cross-cut binding. It will be like the usual wallet binding, like in THIS tutorial. When you want to use cross-cut binding for a zipper wallet, do not CURVE the corners. I will make the video next time when I am working on a wallet binding. 

Here is a few Ohana Passport Wallet I did for a custom order. 


Family Passport Wallet

Family Passport Holder
Mitered Corner binding


Family Passport Wallet
Cartoon Print Passport Wallet


I hope the video and a few tips above help your journey in the wallet making. Please let me know if you have any questions. 


Thank you so much for reading my blog. 

Happy Sewing,

Elvira


*****

Linking up to these wonderful BLOGS 


_______________________________


Mini Tutorial - How to make bias binding strip for wallets

Hello,


Today I will share a little tutorial on how to make your own bias binding. If you follow my blog, I love using binding for all my wallets. Though sometimes, I tried to make one without binding like this wallet. 

Bias binding strip is a narrow strip of fabric cut diagonally (on bias). There are many tutorials and video tutorials on how to make a continuous bias binding, but I prefer the good old slow method. The extra minutes of making this binding will be so worth it!

Ok, in this tutorial I used a square fabric 10" x 10" which is sufficient to make binding for single wallet. Bias binding effect is best if you use gingham or stripe fabrics.

First, make sure that your fabric's grain is straight. If not, do straighten your fabric first. This is very important!

Now fold the fabric diagonally 


and then fold it again (upwards) to create a small triangle shape


 Then using the quilting ruler and rotary cutter, cut the first strip 0.75" wide. That will make a 1.5" Wide binding strip. 


 Then cut the next strip 1.5" Wide. Continue cutting until there's small triangle left. I normally do not use the smallest strip but I keep the leftover triangles for scrap projects. 

Now, take the first strip that you cut and straighten the end of the binding strip.


Take the second strip, lay the triangle end on top of the straight one, RIGHT SIDE TOGETHER and overlap  by 1/4" . 

Sew diagonally with 1/4" seam allowance and trim. 


Take the next strip and lay the triangle like in the picture below (right side together) and overlap by 1/4" and sew with 1/4" seam allowance.


The strip will look like in the picture below and ready to be sewn into the wallet!


I really love how this gingham binding look on this Purple Flower wallet


See, it's super easy! It may seem like a lot of work, but this method will always yield a perfect bias strips! Don't be afraid, go ahead and try it and let me know how do you like it!


Have a lovely day!
Until then,

~ Elvira~

LINK UP:


Latest Video