Powered by Blogger.
Showing posts with label passport sleeve pattern. Show all posts

Voyage Passport Wallets

Hello, 

This week I am pretty productive. I made a few wallet orders and then went on to finish two Voyage Passport Wallets. Last year I did not shop much for fabrics, instead, I was using what I had in my (huge) stash. Maybe I will let go of a few fabrics from my collection at some point of time this year. I just need some time to get organized. So, stay tuned! 

Now back to the two voyage wallets that are made from my stash. The first one was the peach lantern wallet. I think I got the fabric from the Moda shop in OsakaThe lantern design is very cute with the ribbon bows, etc. Not sure why I bought it in the first place though, but I am glad that I did! It reminds me of Chinese New Year. 


Lantern design passport wallet


The second one is the Alice in Wonderland Passport wallet. I am so happy I decided to make the wallet from this linen fabric. I was making a kodomo wallet using the same fabric for an order and decided to make a passport wallet with it. 

This time I also decided to make a curvy one because I have a bias binding ready. And I love how it turned out. I think I will make a few more with a curvy edge. The wallet closed with a snap button, I am thinking of making another one with a zippered closure.  What do you think?


Alice in Wonderland Passport Wallet


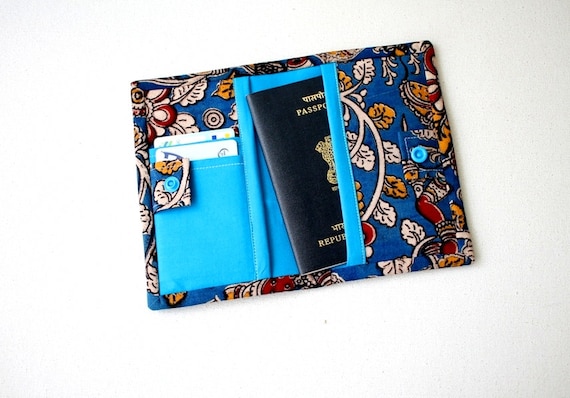
This voyage passport wallet can hold up to 4 passports (2 passports in each sleeve) plus 2 cards. Personally, I love to carry this one when I am traveling solo. It fits nicely in my purse. 

These wallets are available in my Etsy shop as well as on my Website. I've been making a few changes to the website in the past few weeks, like I merged back the fabric section into the website. Hopefully,  I now can update the listing more regularly. Having a small business is not as glamorous as it looks on Instagram. But as long as we enjoy it, it's worth it! 


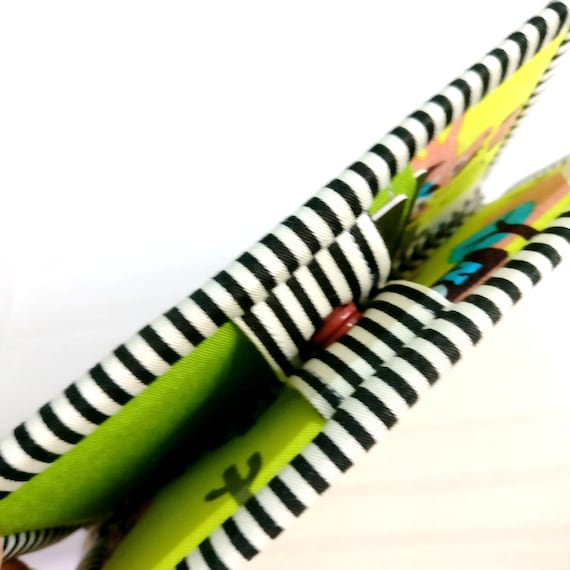
A few more passport holders


Thank you for stopping by today! 

Happy sewing!

Elvira


Linking up to these wonderful BLOGS


New Video Tutorial - Passport Card Wallet

Guwahati, Assam, India

Passport Wallet Pattern
Voyage Passport Wallet


Hello,

As promised in my previous post, finally the video tutorial for the small passport wallet is up on my YouTube channel now. And as I edited the original pattern to add the link, I also gave a name to the pattern. Well, I am really not good at giving names but then, as I make more patterns, I suppose it's inevitable for me to give a certain name. This time, I go with the simple name Voyage Passport WalletI plan to update the original pattern with better photos when I get the time, so please bear with me.

In the video, I cut the pattern pieces slightly bigger than the original one, because I want to use it for Journal Cover like in my previous post

For the zipper version, all the basics remain the same as the original pattern. If you want to make it with zipper closure, here are the additional materials to cut/change: 

✓ Cut 2 -  Medium or All-purpose interfacing for main exterior and lining

✓ Cut 1 - Fleece Batting  - the same size as the main exterior 

 ✓ #5 Zipper – 24” Long (based on the continuous zipper that is cut to size) 

✓ Bias binding (follow THIS TUTORIAL)

Without further ado, here's the video :


Passport Card Holder

Voyage Passport Wallet


If you're new here and wondering about the interfacing I used in my wallets, I wrote my secret guide for interfacing in THIS POST and THIS POST. My suggestion is to keep experimenting until you find the combination that you like the most. In the hydrangea passport wallet above, I used all-purpose interfacing for the main body and using medium interfacing for the sleeves' base. The wallet turned out softer and I can even fit it with more passports - up to 4 passports and it still closed nicely. 


I made another Voyage Wallet with Snoopy Print as a custom order. Some of the crafters, DM me on Instagram asking how to do bias binding nicely. As I mentioned in my previous post, before cutting the binding (cross-cut or bias), make sure the fabric grains are straight. This small step is very important to get a good finish. And of course, practice! Practice makes improvement. Sometimes even I had to rip off the already sewn binding because I didn't straighten the grain nicely and resulted in sloppy finish. 


Small Passport Wallet
Zip Around Passport Wallet

Passport Journal Cover

Another question is, can I use cross-cut binding instead? Yes, you definitely can. I made a couple of passport wallets with zippers using cross-cut binding. It will be like the usual wallet binding, like in THIS tutorial. When you want to use cross-cut binding for a zipper wallet, do not CURVE the corners. I will make the video next time when I am working on a wallet binding. 

Here is a few Ohana Passport Wallet I did for a custom order. 


Family Passport Wallet

Family Passport Holder
Mitered Corner binding


Family Passport Wallet
Cartoon Print Passport Wallet


I hope the video and a few tips above help your journey in the wallet making. Please let me know if you have any questions. 


Thank you so much for reading my blog. 

Happy Sewing,

Elvira


*****

Linking up to these wonderful BLOGS 


_______________________________


Mini Travel Wallet with Zipper Closure

When you get new zipper foot, you have to make another zip around wallet. This time I made mini travel wallet!


Well, I don't like changing foot while I am sewing, but sometimes it's worth the effort. Trust me. It's easier to sew zip around wallet with zipper foot. 
And unlike domestic foot, industrial machine foot is slimmer which make sewing zipper is smaller space is much easier. 

Get the Pattern on Etsy
It turned out neater even though I still don't like the foot changing part. LOL. 
 I really love this! The wallet turned out super cute. What do you think?
The wallet is available in  HERE (psst it's free shipping!) and if you want to try making the wallet yourself, you can get the pattern in my ETSY shop or my WEBSHOP. The original pattern is without the zipper though. but you can follow the tutorial HERE

Thank you for stopping by!
Happy Sewing
~Elvira~

********
Linking up to:

Sew Can Do


Passport Card Sleeve Pattern - Testers Photos Part 3


Hello,
Passport Card Sleeve Pattern

I really love how the above black and white passport cover turned out. While making the pattern, I always did a few to make sure that everything was OK before I sent the pattern to the testers. Even with all the sewing, there's always something that I missed. Hence the pattern testing stage is very important, even for a basic simple pattern.

The ladies who helped me with this pattern were simply awesome and also I want to thank Namrata of Bagstock who helped me proofreading every single draft. A big thank you once again to everyone (group hugs!!!).

Now, let's jump in to see the last part of the tester photos! Some of the testers made a couple of Passport sleeve. You can also check their photos in my Pinterest.


As usual, don't forget to click the link to see more of their works!


Jenny Gomez


Sandra - Bags by Sandra D

Ellen Berline 

Haurox - Vallyria

Jeanne - LA Baggs & Stuff

Sandra - Bags by Sandra D


Prabha - Quiltaholics

Rassika - Made by Malko


No automatic alt text available.
Ulrike The Busy Sewing Room - Facebook, Instagram, Etsy

Aren't they amazing?
Also, check the tester photos PART 1 and PART 2 

The summer holiday is just around the corner, make few as a travel gift, or even sell them in your handmade market or pop up stores! It's very quick to sew. See the right panel to get your copy directly from this blog. 

Patterns also available here:
ETSY

Thank you so much for stopping by!

Have a lovely Monday!

- Elvira- 


Passport Card Sleeve Pattern - Tester Photos Part Deux

Hello,

Have you checked the first part of the tester photos? Now the show will continue with the next batch of the tester pictures! I must say, each one of them is really inspire me. To be honest, I tend to choose my color combo carefully, but with this scrap friendly passport cover pattern, you can just be free! Use any fabric in your scrap bin, as long as it matches the size and make a fun, one of a kind passport sleeve.


Now let's check out the testers photos. Click the link under each photo to see more of their amazing works!

Tammy Carter - Sugar n Spice Sewing

Kausalya Pandit - The Turquoise Paisley

Rassika - Made by Malko

Harsimran Kaur - Oye Hoye Bags - FACEBOOK, INSTAGRAM

Rebecca Ann - The Fiesty Thimble

Sobana Sundar - The Quilt Bug

Amita - Sewonder Crafts - FACEBOOK, INSTAGRAM

What do you think? If you wonder is this pattern for beginner? Yes it is! If you want to learn the basic of wallet making, this might be the pattern you want to try. The pattern is written in simple English with photos and diagrams to make it easier for non English speakers to understand. I know how frustrated it is to learn sewing from foreign language book! 

Now, go ahead and purchase the pattern while it's still on SALE in  ETSY as well as in the WEBSHOP and sew your weekends away ^_^. 

Stay tuned for the last part of the Testers Photos! Subscribe to my blog or join the FACEBOOK GROUP and let's have fun together!

Have a nice day!

Compact Passport Cover with Card Holder

Hello,


I have been working on this idea for quite sometimes now. I wanted a compact passport cover (a better version of the previous one), which can be slipped into a sling bag while traveling. 

Love this Cowboy theme

This passport sleeve is pretty slim. It fit into my sling bag nicely. I don't use too many layers of interfacing here. A layer of heavyweight interfacing for the main wallet exterior only.

Passport Card Holder - Pdf Pattern
The vertical card slots are very handy to keep your ID card and frequent flyer membership card. As you know, I love using binding for my wallet, because I love the handmade look of it. Besides, we can play with fun binding to make it one of a kind product. 

Snap Button Closure

It took me a while to decide what closure I want. I knew I wanted something that is easy to install and if possible easy to mend. Then I remembered the magnetic closure I used in this Ella Bucket Bag and 241 tote bag, and decided to use the same method. It works out perfectly. Yay!!


This a pretty quick project. It took me a little more than 1 hour to finish one. I could finish it faster, if I don't watch my Korean Drama while sewing :). All the new passport covers are now available in ETSY as well as in my WEBSHOP

Until next time,

Happy Sewing,

Linky Party:

Latest Video