Powered by Blogger.
Showing posts with label bias binding tutorial. Show all posts

New Video Tutorial - Passport Card Wallet

Guwahati, Assam, India

Passport Wallet Pattern
Voyage Passport Wallet


Hello,

As promised in my previous post, finally the video tutorial for the small passport wallet is up on my YouTube channel now. And as I edited the original pattern to add the link, I also gave a name to the pattern. Well, I am really not good at giving names but then, as I make more patterns, I suppose it's inevitable for me to give a certain name. This time, I go with the simple name Voyage Passport WalletI plan to update the original pattern with better photos when I get the time, so please bear with me.

In the video, I cut the pattern pieces slightly bigger than the original one, because I want to use it for Journal Cover like in my previous post

For the zipper version, all the basics remain the same as the original pattern. If you want to make it with zipper closure, here are the additional materials to cut/change: 

✓ Cut 2 -  Medium or All-purpose interfacing for main exterior and lining

✓ Cut 1 - Fleece Batting  - the same size as the main exterior 

 ✓ #5 Zipper – 24” Long (based on the continuous zipper that is cut to size) 

✓ Bias binding (follow THIS TUTORIAL)

Without further ado, here's the video :


Passport Card Holder

Voyage Passport Wallet


If you're new here and wondering about the interfacing I used in my wallets, I wrote my secret guide for interfacing in THIS POST and THIS POST. My suggestion is to keep experimenting until you find the combination that you like the most. In the hydrangea passport wallet above, I used all-purpose interfacing for the main body and using medium interfacing for the sleeves' base. The wallet turned out softer and I can even fit it with more passports - up to 4 passports and it still closed nicely. 


I made another Voyage Wallet with Snoopy Print as a custom order. Some of the crafters, DM me on Instagram asking how to do bias binding nicely. As I mentioned in my previous post, before cutting the binding (cross-cut or bias), make sure the fabric grains are straight. This small step is very important to get a good finish. And of course, practice! Practice makes improvement. Sometimes even I had to rip off the already sewn binding because I didn't straighten the grain nicely and resulted in sloppy finish. 


Small Passport Wallet
Zip Around Passport Wallet

Passport Journal Cover

Another question is, can I use cross-cut binding instead? Yes, you definitely can. I made a couple of passport wallets with zippers using cross-cut binding. It will be like the usual wallet binding, like in THIS tutorial. When you want to use cross-cut binding for a zipper wallet, do not CURVE the corners. I will make the video next time when I am working on a wallet binding. 

Here is a few Ohana Passport Wallet I did for a custom order. 


Family Passport Wallet

Family Passport Holder
Mitered Corner binding


Family Passport Wallet
Cartoon Print Passport Wallet


I hope the video and a few tips above help your journey in the wallet making. Please let me know if you have any questions. 


Thank you so much for reading my blog. 

Happy Sewing,

Elvira


*****

Linking up to these wonderful BLOGS 


_______________________________


Wallets, Quilts and Bias Binding Tutorial

India


In the past few days, I've been busy making a few wallet and placemats orders. I got a couple of passport wallet orders in the past two months. I think now that travel around the globe is eased, many people started to travel again.

This time, the zip around small passport holder seems quite popular and as usual, whenever I make for an order, I cut one extra to add to my shop. Because I am working solo and nowadays hardly have time to sew, this way I can add a couple of new designs in a month. Also, I will always have projects that are ready to sew. Although sometimes it takes days to finish and sometimes I can finish 2 wallets in a day. Well, as long as I can sew, I am a happy girl! 

Ah, I also recorded the video tutorial for this small passport wallet - which hopefully I can finish editing and put up on YouTube this week. 


small passport wallet


passport wallet for 4


I often got questions regarding bias binding. For beginners or someone who never makes or use bias binding, it can be a daunting task. There are a few ways to make a bias binding but this traditional method is my fave because the binding always turns out perfect. 
In this video, I made DIY bias binding using FAT 8 fabric (9" x 22"). The rule of thumb is, you must make sure the fabric grains (warp and weft) are straight. That way you will get nice and crisp bias tape. 
Please check the video below. I hope the video is clear enough. If you have any questions, you can contact me or leave a comment below. 


Here are more fabric wallets recently done and a couple of them are on their way to the new home. I love making this classic bifold wallet.  My first wallet was this bifold wallet and even after washing it several times, it is still in a good shape. The interfacing and padding did make the wallet sturdy and did not lose its shape. 

bifold fabric wallet


snoopy wallet

snoopy long wallet

GET THE PATTERN HERE


******

And here's the medium scrappy placemats I recently finish and sent out. I hope they will be received well. As a maker and seller, nothing more rewarding than a happy customer! 
I kind of love these medium-size placemats and I have a couple more to finish hand sewing the binding before I put them up in the shop. 

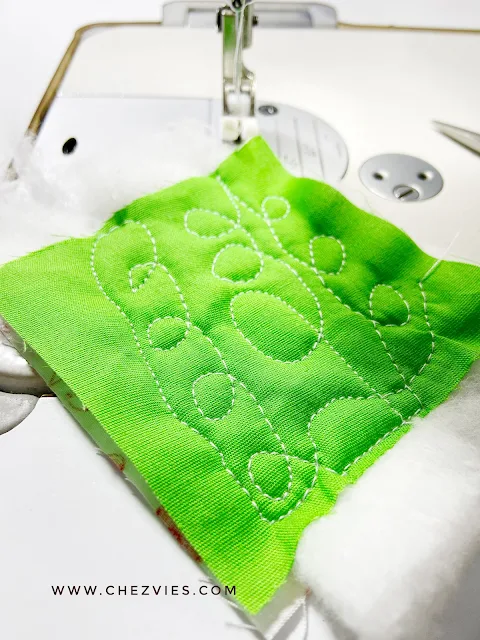
I also experimented with different quilting lines on my Industrial machine. I tried doing FMQ after watching a couple of  YouTube videos where people do freehand machine embroidery using a similar machine as mine. Well, guess what? I worked! I will try in my next project and hopefully can share a few tips with you all. Stay tuned! 

Scrappy medium placemats
Scrappy Placemats


FMQ on Industrial Machine
FMQ Trial 


*****

On the 16th, my SIL and I went to a wedding in a village nearby. It was great fun for both of us. And of course, I love watching how the folks are having a great time at the party. In the village, a wedding party can last a couple of days (2-3 days) from morning to midnight. People from all around the village and nearby village will keep streaming in, sitting and chatting. I love to see the young girls dressing up to the latest Bollywood trend. 

And of course, I enjoyed the ride through different small towns and villages. Since the harvest season is just over, most of the fields are dry now. But it was a  lovely day! 


The bride and the bridesmaids 

Henna -  a must in every wedding! 


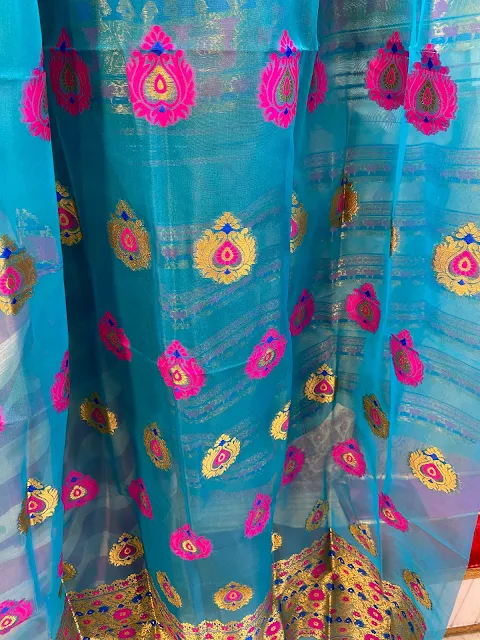
We also went to the market last week. We went saree shopping for one of our helper's daughter's wedding next month. Of course, I wore a double mask even a lot of people are not wearing masks now since the state government announced that all pandemics restrictions are lifted off. 
I really enjoyed looking at those colorful sarees. Even though I don't wear colorful clothes myself, looking at those bright colors, makes me happy! And no, I did not buy for myself, I only went to my regular fabric shop to get denim material. I suppose to go look for Mekhla (Assamese dress) border for my kawandi project but it was getting late, so maybe next time! 


That's all for today. I hope you enjoy reading my blog. Thank you for stopping by and please leave a comment or two.

Until next time,

Elvira


******


Mini Tutorial - How to make bias binding strip for wallets

Hello,


Today I will share a little tutorial on how to make your own bias binding. If you follow my blog, I love using binding for all my wallets. Though sometimes, I tried to make one without binding like this wallet. 

Bias binding strip is a narrow strip of fabric cut diagonally (on bias). There are many tutorials and video tutorials on how to make a continuous bias binding, but I prefer the good old slow method. The extra minutes of making this binding will be so worth it!

Ok, in this tutorial I used a square fabric 10" x 10" which is sufficient to make binding for single wallet. Bias binding effect is best if you use gingham or stripe fabrics.

First, make sure that your fabric's grain is straight. If not, do straighten your fabric first. This is very important!

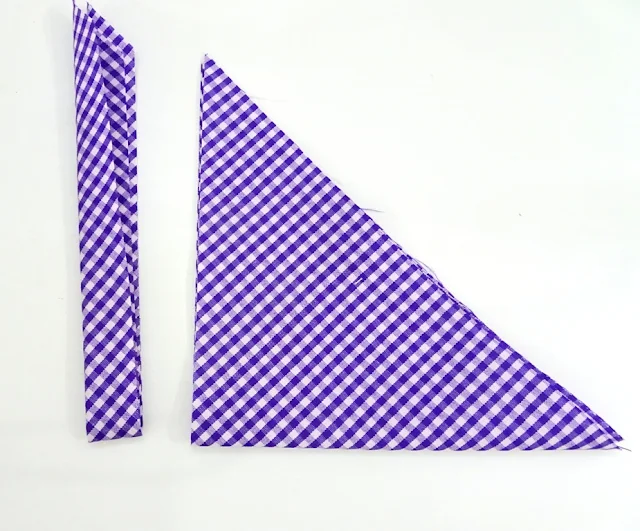
Now fold the fabric diagonally 


and then fold it again (upwards) to create a small triangle shape


 Then using the quilting ruler and rotary cutter, cut the first strip 0.75" wide. That will make a 1.5" Wide binding strip. 


 Then cut the next strip 1.5" Wide. Continue cutting until there's small triangle left. I normally do not use the smallest strip but I keep the leftover triangles for scrap projects. 

Now, take the first strip that you cut and straighten the end of the binding strip.


Take the second strip, lay the triangle end on top of the straight one, RIGHT SIDE TOGETHER and overlap  by 1/4" . 

Sew diagonally with 1/4" seam allowance and trim. 


Take the next strip and lay the triangle like in the picture below (right side together) and overlap by 1/4" and sew with 1/4" seam allowance.


The strip will look like in the picture below and ready to be sewn into the wallet!


I really love how this gingham binding look on this Purple Flower wallet


See, it's super easy! It may seem like a lot of work, but this method will always yield a perfect bias strips! Don't be afraid, go ahead and try it and let me know how do you like it!


Have a lovely day!
Until then,

~ Elvira~

LINK UP:


Latest Fabrics

Latest Video