Powered by Blogger.

Potholders Swap


Patchwork Potholders


Hello, I hope everyone is doing fine. It's the end of October already. The past few weeks, I have not done much sewing, cos my spondylitis is giving me trouble again. The therapist told me to stop working for a couple of weeks and exercise more regularly. The latter I'm still struggling with. Ha! 

But I managed to finish the potholders swap for our Desi Quilters Pot of Gratitude Swap. It's now received with so much love. Thank you, partner!! Well, working with the mood board assigned to you is pretty challenging. I was assigned this cool mood board by Kuppulakhsmi.  


mood board


It took me a couple of days to think about what would be the best fit. I browse Pinterest and Instagram and even made a couple of blocks that I thought would work out, but it was not. So I add those blocks to my PHD bin. I decided to make mini granny square blocks, using 1.5" squares and the color palette in the photos. Well, some shades and added green to brighten it. I found the blue bird print in my stash that is perfect for backing. 


pot of gratitude


WATCH NOW: HOW TO MAKE SCRAPPY POTHOLDER


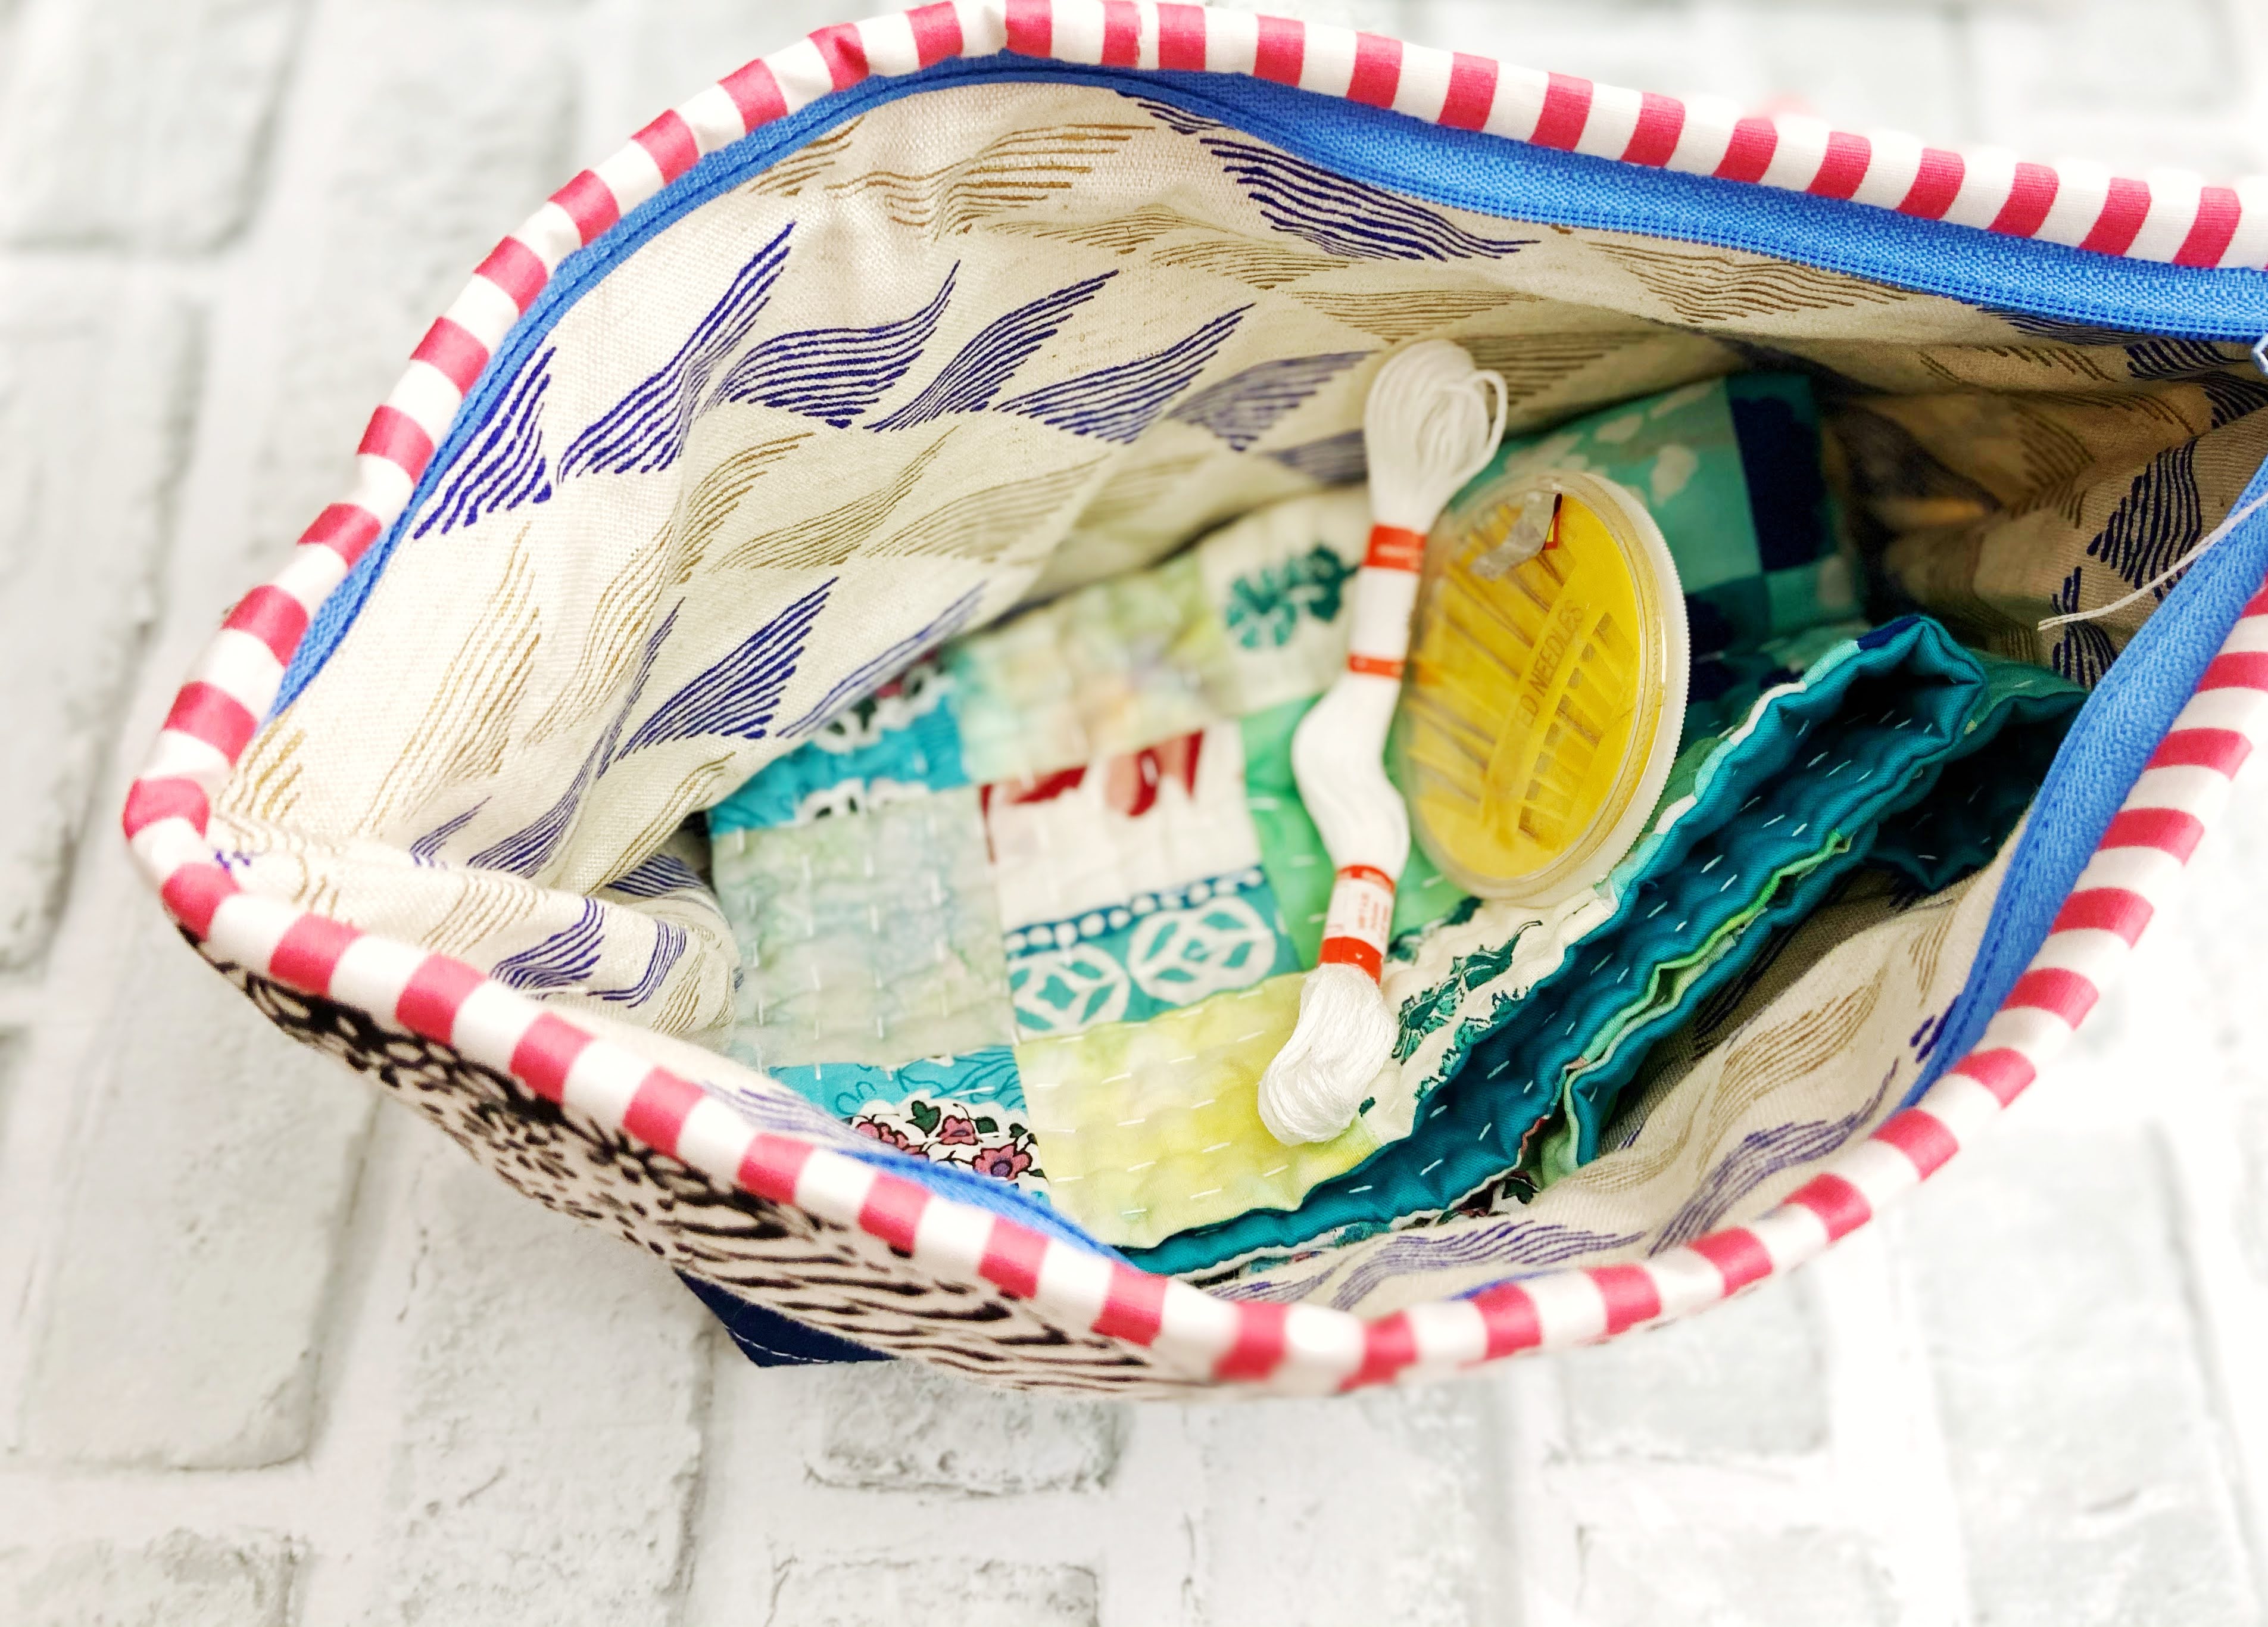
And I also got my swap package from Preetha. When she posted the pineapple potholders in the group, I sort of know it's for me but I was not sure. So I'm very happy when they arrived with all the other goodies she sent. The color thread cones are fantastic. I've been searching for one but did not find it in my regular shop. And don't miss the pretty keyring, my initial!! The potholders are so cute that  I put them up in my sewing room now. I don't have the heart to use them. Thank you so much Preetha for the thoughtful gifts! She told me the lady who made the beautiful keyring is battling cancer. If you happen to read up to this part, please send a prayer to her.


pot of gratitude

As I said, making these potholders is pretty challenging. Besides we have to make according to the mood board, we also learn to make a small block that fits the idea. You can choose, either color or shape from the mood board or a mix of those. I was thinking of different ideas, including making flower appliques, but decided to make a simple one, a granny square block, but using smaller pieces so that I can fit in more colors. Now that reminds me of my UFO Granny Square quilt


ALSO READ: How to make a granny square pillow with zipper


All in all, swap is a great learning process and the feeling of receiving gifts of love from our online friends is really warms my heart. 


Thank you for stopping by,

Take care & happy sewing!

Elvira


The Chatai Fish Kantha

 Kantha framed work


After the Kantha Workshop last year, I bought  Inspiration Kantha by Anna Hergert on Amazon to learn more. The book is very good if you're looking for some in-depth knowledge about Kantha, which I also learned during the workshop. Anna also wrote very detail about what kind of fabrics and thread to use, etc. Well, reading the book is not enough, right. We must try and experience it to learn more.

Frankly, when people heard about Kantha, the most common response would be "ah it's only running stitch, right?" but believe me, this "only running stitch" business can be overwhelming or intimidating especially for beginners. I mean, you have this notion that "it's easy" but when you get down to work on your piece, you will start to feel anxious because your stitches are not even, too big, too small, too ugly, etc. Also, there's a question of where should I start, how to end the stitches neatly, and a lot of other things going on inside your head. Well, at least that's what I felt when I started working on this Chatai fish design. 

chatai fish kantha


When working on the fish, I tried to follow the book. The outline work was not tough but when I started the running stitches, I made a few detours. By the way, I am using 2 layers of cotton khadi which I got from the local market just before the pandemic. I tried my best to do smaller stitches but in the beginning, I did a lot of unpicking, because as I said, I feel the stitches are too big or the gap between the lines is too wide. It took me a while to get into the rhythm because I was doing this piece after I finished the placemats which have bigger stitches. 

chatai fish kantha
I love the texture of this khadi fabric


Now, doing the fill-up stitches, I was confused should I work from inside out or just working from the top row by row. It's pretty tricky. I decided to work from inside out by echoing the fish. I imagined the echo stitches are like the splash on the water as the fish swimming away. After a few lines, it's time to take the stitches in a different direction. 


I worked on a section here, one corner at a time started from the bottom. When filling up the top part, I decided to go row by row moving upward. You can see the stitches are going in different directions in the picture above. It showed how confused I was while working on this piece. I even browse Instagram and blogs/websites to learn more about Nakshi Kantha and stumbled upon Fairly Worn website . Valerie is working with an NGO in Bangladesh and Tripty Boutique. Check them out, they are simply stunning. 

The back


Well, I still have a long way to learn and I really really enjoyed doing the hand quilting /hand sewing and this ancient technique is really intriguing and interesting to learn. Yes, there is a lot of work that goes into one piece of (original) Kantha, fair trade or not. But as you start learning the art, you will start to appreciate it more. Kudos to Valerie who decided to work with the NGO in spite of everything. It takes courage to support those people, especially across many continents. 

I hope more people especially in India and Bangladesh will revive this art of Kantha to its former glory. Because Kantha is not just a running stitch! I hope one day I can travel to Bangladesh (which is actually pretty near to my state) to see more about Kantha. 

Kantha Wall Hanging


Now this Chatai Fish Kantha is done, framed, and put up on my wall. I still have a few hand quilting projects for my small quilt shop and have a few ideas for my next Kantha project! Stay tuned! 

Check out more of my Kantha Journey 

Until next time,

Happy Sewing,

Elvira

*****


VIDEO TUTORIAL - Potholders from Scraps

 Hello,


I have a mountain of scraps in buckets and bags all around the house. Somehow I just don't have the heart to throw them away. Whenever I see my fabric scraps I feel inspired and full of ideas, but then those ideas remain on my "bucket list". 

A few weeks ago, Tina and I discussed the next swap, after the successful swap we has last month in Desi Quilters. This time she has with the idea of exchanging Potholders and as usual, she came up with the most suitable name "pot of gratitude". This is to remind us to always be grateful during this Pandemic and by making a gift for our virtual friends who always be there to help in our crafting or quilting journey. 


Potholder Tutorial

So, let me talk about potholders that I usually make.


1. Batting

The first question that people ask is always about what kind of batting to use for potholders. Well, we don't have thermal batting for retail here in India. I usually use double or triple layers of cotton batting. A few years ago before cotton batting was easily accessible, I use a few layers of cotton flannel (like THIS coaster). If you have scrap batting, you can use it even if it's narrow strips you can layer them. 


mug rug tutorial


2. Fabrics. 

Store-bought potholders usually use thicker or canvas cotton. I normally use quilting cotton or poplin cotton. And if I use Indian fabrics (mulmul) I usually use nonwoven interfacing to give additional weight. On the back, you can use casement fabric or canvas if you have one.


crumbs quilt


3. Quilting.

You can either sandwich two layers of batting with top and backing and quilt them together or you can quilt the top and back separately like in THIS mug rug. I personally prefer the latter because it turned out thicker which is perfect for potholders. You can quilt the top with denser quilting lines but I'd suggest using less dense quilting lines for the backing. 

potholder tutorial

potholder tutorial


4. Binding

For square or rectangle potholders, I'd suggest using a jellyroll strip. A 2.5" wide is a good one, but if you use thicker batting, you might want to use a 3" wide binding. I normally used 1.5" wide binding for small quilts, but since we're going to use the potholders a lot, thicker binding is always better. 

The same applied to bias binding. In this pumpkin potholder video, I use scraps of about 11" x 17" fabric to make 2.5" wide binding which yields around 1.65 meters of binding strips. Enough to make 2 potholders. 

I wrote about making bias binding in THIS POST using a square of fabric. You can make bias binding from fat eighth or fat quarter like in THIS VIDEO


Bias binding tutorial
Bias Binding Tutorial


Alright, now about the POT OF GRATITUDE SWAP, here are the rules:

- It should be pieced or appliqued

- Should be quilted by hand or machine

- Embroidery can be added but avoid beads and sequins

- The edges must be finished with binding or facing.

- There must be a loop for hanging the potholders.  

- Must be made according to your partner's mood board. Sonalee wrote how to create a mood board on her blog HERE

In the videos below, I shared 2 projects that I made using fabric crumbs. Not really make a dent in my scrap bins but I am using only scraps here. So I'm pretty happy! 


scrappy potholder


Let's get down to work now


For the Crumbs Potholder, you need: 

- 5" long crumbs strips 0.75" or 1" Wide (1.5 to 2 cm)

- Lightweight Fusible Interfacing 8" x 8" (20 x 20 cm) - cut 1 (optional).
Not necessary if using quilting cotton

- Cotton Batting 9" x 9" (23 x 23 cm) - cut 2

- 1 strip Jellyroll or 2.5" x WOF (6.5 Cm x WOF)

- Potholder Loop 2.5" x 3" (6.5 x 7.5 cm) - cut 1


And here what you need to make the Pumpkin potholder:

- Download the Template HERE

- Skinny Strips 1" x 7.5" Long - 20 pieces or so

- Backing Fabric: 7.5" x 9" - Cut 1

- Cotton batting 7.5" x 9" - Cut 2

- Fabric for bias binding - I used 11" x 17" which yields around 65" (165 cm) of 2.5" wide bias

binding. Enough to make 2 potholders.


I hope you find the video helpful, especially for beginners. Please do let me know in the comment below if you have any questions. 


pumpkin potholder


Thank you for stopping by!

Happy Sewing

Elvira


Linking up to these wonderful BLOGS


A few WIP hand quilted projects

India

Quilt in Progress


Hello, 

Time flies when you have fun. For the past 2 weeks, I have been busy with a few quilt projects and wallet making for my Etsy Shop. And I also working on my Kawandi QAL which sadly I have not been able to work on it so much. I really enjoy doing this hand quilting and want to start quilting on bigger quilts when I have enough confidence. Right now I have a few smaller projects going on, I'll do it one at a time as time permits. Now both my sons are going to have board exam for grade 10 and 12 and that really make me nervous, though they seem to relax, this hand quilting projects help me to calm down a bit. My DH keeps telling me not to get anxious and he keeps sending me to my sewing room hahaha. 

Kantha table topper
hand quilted table topper 14 x 14 inches


Quilt in progress
QIP using Handloom /Shotcotton fabrics


On the (small) business side, yesterday I finally got the dust bags for my wallets from Canvas2Craft. I ordered the bags a couple of weeks ago and Poonam is very helpful and lovely to work with. She updates me about the progress and makes sure everything was per my requirements. 

camo family passport holder
Dust Bag and Family Passport Holder

I always wanted to make dust bags as an added bonus for my customers, so that they can reuse the bag. Instead of wrapping them in paper, this reusable bag will be more useful and eco-friendly too. So here is the first order that goes in the bag. Yes, the small quilt above. I think I will order another size. 

chezvies quilts

Another happiness last week comes from Saira my secret swap partner in Desi Quilters Love and Healing Swap. When she posted her pouch in the group, I secretly wish for it et voila! My wish come true. The bag is so spacious and I use it to keep my hand quilting projects. She also sent me the pin and magnetic pins. If you're a hijabi, like me, you know these magnetic pins are a game-changer. Thank you so much, Saira!


I also completed a few wallet orders from my Etsy Shop. These two wallets are popular. I only have enough fabric to make a few more wallets. And now that many states are going to restart offline school, I made a couple of triple and double zipper pouches too. They are very versatile as you can keep extra face masks for them. I guess, we all have to accept the fact that wearing a face mask is necessary even when the pandemic is over. At least, that will be our first guard against any virus, IMHO. 


handmade wallets
My fave wallets


multi zipper bag
Multi Zipper Bag


triple zip bag
Triple Zipper Bag


Thats' all update for today. I hope you enjoy reading my blog. 
Take care and stay safe!

Elvira

Linking up to these wonderful BLOGS


VIDEO: Making an Adjustable Handle

India


Hello,
Today I shared a short video for making an adjustable strap with a buckle for the mobile sling bag. This may look easy but for those who just started their journey in bag making, this can be a bit confusing.

In the video, I am making 3/4" wide strap with patchwork. The length of the strap can be varied, between 50" to 55" inches. If you're making it for kids, 50" should be long enough. 

Here's what you need to make the long strap: 

 * 2.75" W X 50" - 55" inches long fabric 
 * if making patchwork strap: 2.75" W x Wof (44") plus 2 - 2.75" W x 7" Long accent fabrics 
 * All-purpose interfacing: cut 1 - 2.75” W x 49” or 54” 
* If using interfacing roll: cut 2 – 1.25” W x 49” or 54” 
*  2 x 0.75" swivel hooks 
* 1 x 0.75" Buckle

First, if making a patchwork strap, sew the accent fabrics on each end of the main fabric. Then fuse the interfacing on the wrong side of the strap piece.

Let's watch the video:


This mobile sling bag is my fave project to go. I am using one regularly too when I go out also use it to store my hard disc and power bank. It's super versatile. Today I made one using this pretty bird print fabric that I have in my stash. 
mobile sling bag
Mobile Sling Bag


mobile pouch
Mini Sling Bag


On the home front, not much sewing happened last week, except finishing a few wallet orders. Instead, I was busy trying out a few recipes I found on Youtube. I've been craving lemon tart after I watched one Cdrama. We used to have a few shops selling in my town before the pandemic but I am not sure now. I decided to look up the recipes on Youtube and the result is yummy! Well, I am not much of a baker, when this turned out good (my boys approved), I feel good. 

lemon tart
Resource: Tart Shell | Lemon Curd


I hope you enjoy the video and thank you so much for stopping by. 
The weather is changing, so stay safe & healthy!

Happy Sewing,

Elvira

*****


Latest Fabrics

Latest Video