Powered by Blogger.
Showing posts with label DIY Cloth Mask. Show all posts

Video Tutorial How to Sew Spacious 3D Face Mask

Sometimes we run too fast and think too little ~ To Dear Myself (CDrama)


Finally, I finished a couple of Trio 3D Face Masks. Don't you love these rose print masks? I got the fabric from Indonesia and I made a couple of wallets with it, you can see them HERE.

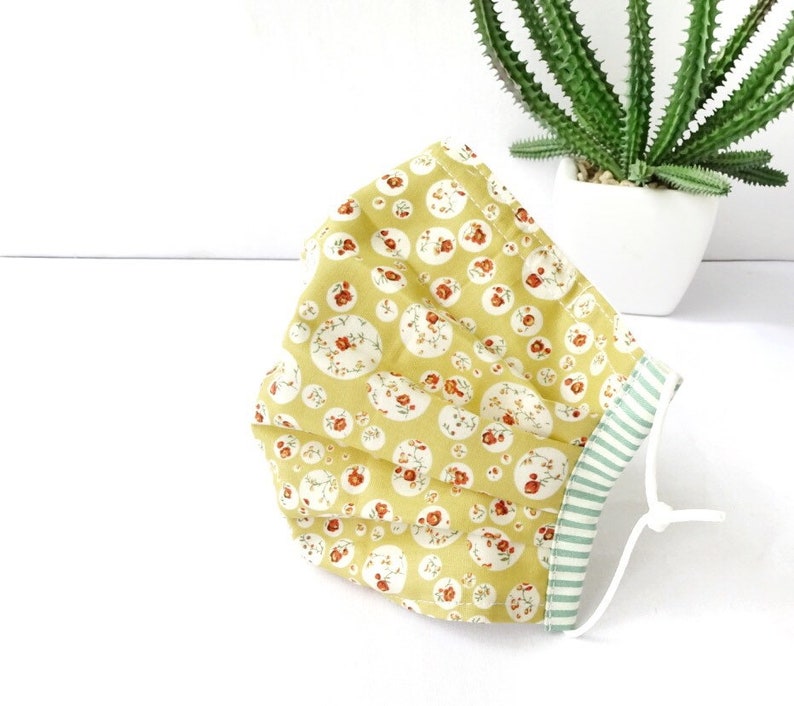
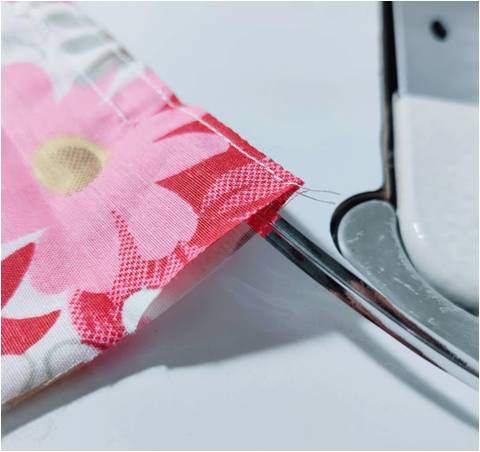
This mask is now fave with everyone. My SIL loved it cos it's not fogging her spectacles so much. That's an added bonus. I put up a video on how to put this 3D Face Mask together. I hope the video will help those who need to see a clearer picture.


I quite enjoyed making the video, but the editing part it a bit tiring. My son said to do voice over, I need to learn that. Trust me even a simple video tutorial needs a lot of retakes and editing. I have to keep several masks ready to sew, incase I mess up :D. 

Since Etsy is introducing video features, I've been learning to take a short video (15 seconds max) that is quite informative for the customer. It is really a challenge but it's fun to learn new things. In the beginning, I was not sure if 15 seconds are enough to show your products, but now I really enjoy creating it. It's good for my Instagram Reels too. If you observe all these video features on social media, people can be really creative within those 15 seconds. 
You might find people complaining, but for me, instead of complaining why not use the time to learn. If others can do it, we can also do it.


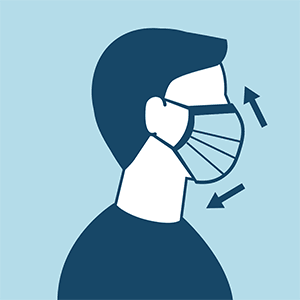
Before Etsy introducing this new feature, I used to post videos on my Youtube Channel under Product Review and post the link on my Etsy Listing description. It helps to a certain extent especially for first buyers who are not sure about my products. Like this short video, I make to show how to adjust the elastic cord on the mask. 


Another thing I'm busy with nowadays are attending webinars conducted by Etsy India. Our seller support group on Facebook is quite active and informative. This online community is really great, even for seasoned sellers. There's always something new I learn. Truly, if you want to keep doing what you do, you have to keep learning, be observant, and do your own research in your own niche.  There's no short cut to success. You gotta do the hard work, be it researching your SEO, retaking your product photos, redoing your listing, etc. 


If you find the video tutorial helpful, please share it especially to those who might need it. 

Thank you for stopping by!

Stay safe & happy sewing!

Elvira


Still making mask

New Pleated Mask

Hello, how's everyone doing? Are you still making masks? well, I do though now I am slowing down a lot. I've got a little pain in my wrist which makes sewing a bit uncomfortable. A little stretching exercise does help. The sew must go on, right? :D


My recent fave is making this pleated mask. The measurement is based on the Free Dust Mask tutorial. The difference is I use 2 fabrics measuring 7.5" x 7.5" for adult size. And for the pleats, after making the small box pleats at the center (like in the video below), I added another pleat on top and bottom. it's a bit of a hassle in the beginning. I usually make the center box pleat, sew it in place, and then add the additional pleats and sew it again. It's because I don't like using pin or clip so much. You can definitely use pin or clip to hold the pleats prior to sewing them in place.


Here are a few more I finished recently. This type of pleated mask is comfortable to wear. The multi pleats create more room for breathing. I've been wearing one myself. The size is quite generous, it covers the face nicely. I added nose wire for a better fit.

Mustard Floral Pleated Face Mask 2 Layer Cotton Face Covering image 0
Small floral face mask


Pink Floral Pleated Non Surgical Face Mask 2 Layer Cotton image 2
Pink Floral Pleated Mask

Yellow Floral Pleated Non Surgical Face Mask 2 Layer Cotton image 1
Paisley Pleated Mask

****

These guitar 3D Face Masks were for the giveaway winners on Instagram. There was a loop giveaway organized by ZoomIn with 3 other brands (all small businesses) and it was fun. It was my first time doing loop giveaway :D.  


It was supposed to be a gift hamper but since all of us are from different cities, we decided to send directly to the winner. During lockdown domestic shipping has been severely delayed. It takes at least 10 business days to deliver, especially from my place here in Guwahati to the rest of the country. 


Another thing I really like these days is the weekly review video that's generated automatically on my phone. I took a LOT of videos and photos every day and this weekly video sort of a glimpse of what's going on in the week. What do you think?


Thank you for reading my blog, stay creative, & stay safe!

Have a nice weekend ^^

- Elvira


******

TUTORIAL - How to Make Easy Fabric Ear Savers

Necessity is the mother of invention.

That quote is so true and looks at how people can be so creative with a mask during the pandemic. They even come up with the name, yes, ear savers.
I remember during my trip to Japan 2 years ago, I struggled with earloop masks because I'm wearing a hijab. Luckily my dear friend brought masks from Indonesia which is designed for hijaber, like me. Basically, it was like ear saver only it was a string of elastic. When I saw many people started making and sharing in Pinterest, I remember the one I wore in Japan. 

Today I finally get a chance to make one for myself and here is how I made it. The measurement is based on my measurement, so please feel free to reduce or add the length as necessary. 

Materials and Measurements: 

1 piece of fabric 8" w x 4" H (20 cm x cm)
1 piece of lightweight interfacing or all-purpose interfacing 7" x 2" (18 cm x 5 cm)
2 pairs of kam snap button 


Let's Have Fun : 

1. Center and fuse the interfacing on the wrong side of the fabric and fold in all around seam towards the wrong side. 


2. Now fold the fabric lengthwise, clip it using wonder clips, and sew all around the perimeter using 1/8" seam allowance.


3. Installing snap buttons. Remember, the button stud and socket should be installed on the same side. First, install the stud on the outermost (3/8" or 1/2") from the edge. And the socket 1" from the stud. 


And voila! Your DIY ear saver is ready.  Now go ahead and make a few in different colors! If you wear hijab, you maybe want to pull the ear saver a little up so the mask won't slip down your face. I was thinking to use velcro but velcro tends to ruin my hijab or tangle your hair.  If you need more inspiration, I put together a board on Pinterest for this. Check it out. 


I hope you enjoy the tutorial. Do share with people who you think might benefit from this tutorial. After all, sharing is caring.

Thank you for stopping by today!

Take care & stay safe,

- Elvira - 


Which fabric to use for face masks and how to wear them

India
Triple-layer masks

Slim Pleated Masks
There are so many articles since the early days of the pandemic. From fabric mask is not advisable to now mandatory wearing any covering.  Now, which fabric is to use? After reading different articles, I came across this article from The Brussels Time. Quoting from the post: 

“The fabric is not important. The tissue must be sufficiently dense so that it can stop as many drops as possible, that is the most important thing. At the same time, it must also allow for comfortable breathing. It is this balance between tissue density and still allowing smooth breathing that needs to be monitored" Steven Van Gucht." 

When I read the article, I was like "yes! ", Not because of anything, but because the common people here cannot afford good quality quilting cotton, let alone designer ones!

Glace Cotton & Rayon Cotton Mask

In a country as big as India, maintaining physical distancing after lockdown will be impossible. I saw most people are using kerchief or any cloth to cover their face which will be difficult for them especially when they have to wear it for a long time. 


Now I have so many Indian cotton fabric that is lightweight, but some of them are tightly woven, like the glace cotton or rayon cotton mix. That's when I decided to make 3 layers mask using the same fabrics.  And if you think you need it denser, you can always add a hanky or tissue paper inside the mask and remove the tissue as it becomes moist (ok this word always remind me of PM Justine Trudeau Presscon ^^)


Side view of an individual wearing a cloth face covering, which conceals their mouth and nose areas and has a string looped behind the visible ear to hold the covering in place. The top of the covering is positioned just below the eyes and the bottom extends down to cover the chin. The visible side of the covering extends to cover approximately half of the individual’s cheek.

Depends on your personal choice and best fit to your face shape, cloth face coverings should : 
  • fit snugly but comfortably against the side of the face
  • be secured with ties or ear loops
  • include multiple layers of fabric
  • allow for breathing without restriction
  • be able to be laundered and machine dried without damage or change to shape. (Source : CDC)

I just put up a video on how to make triple layers face mask. There are different kinds of pleats you can do, but here I'm sharing the slim pleated one here. Super easy to make and it's possible to do hand sewing too if you don't have a machine. (see the resources below this post for other types of mask videos)


Here are a few masks I made using different styles. For a double layer mask, I use cambric or poplin cotton fabric. 

Double Layer Cotton Masks

For people who find it difficult to breathe through mixed cotton masks, I made these triple-layer masks using mulmul cotton. 

Mulmul Fabric Mask

Here is how the slim pleated mask looks like. It's perfect for someone who has a slim face or a petite face. 

Slim Pleated Mask

And here's the comfort fit face mask which is favorite with everyone. It's a double layer, I used thicker cotton fabric on the outside (cotton mix, combed cotton, etc) and softer cotton (cambric or poplin) on the lining. 

some review from Etsy :

Such an easy and well fitting pattern. Very clear instructions both written and in pictures.I’m over the moon.
Nice pattern and worked well for a couple of people that have trouble with other masks. Thank you for sharing!!!!!! (Source : Etsy)


Don't forget to wash the mask properly with soap after every use and dry it in the sun.
If you know how to sew or have access to a tailor who can sew for you and people around you, you can follow the tutorial from my previous post or visit links below.  Support your local fabric shops, local tailor, local community, we must support each other! 
Thank you for visiting my blog. 
Take care & stay healthy everyone!

- Elvira- 

*****
Linking up to :
Handmade Monday

Free Pattern - DIY Dust Mask with Nose Wire

Winter in my place means dry and dusty. It's time to make a dust mask again. This time I share how to make a surgical mask type. It's super-duper easy.


All you need is :
- 2 pieces of fabrics - 7.5" W x 6" H
 (Kids Size : - 6” W x  5.5” H)
(widen and lengthen as needed)
- 2 pieces of binding strip - 1.75" w x 5" H
- 10" Long Elastic Cord

  Although cloth face mask may not be as effective as N95 mask in filtering fine dust, but it is better than nothing. I'd suggest adding a layer of folded tissue paper when you wear the mask, which I believe can screen as much as 75% of dust particles, according to THIS report. I'd suggest using tightly woven fabric for better results.


I'd also suggest to wash the cloth mask everyday after your use it. It's always better to make a few, especially if you're highly allergic to dust and pollen. I hope this little bit of information will be helpful for you. 


You can download the full PDF Version below  and start making.

Pattern Update : Added instruction for adding nose wire, as follows:


Adding Nose Wire :


I use twist and tie as nose wire, it works like a charm.  To add nose wire, BEFORE making the Pleats,  sew one line 1/4 Inch away from one of the long edges, approx 5” long and centered. 


Cut twist and tie approx 5” long (or as needed) and insert it in the tube line you just created. 


 Stitch both end of the tube to prevent the wire from sliding off. 


And now you have a surgical mask with a nose wire that can properly fit. 


I hope this helps, let me know if you have any questions. 


Buy Now

Other Mask Patterns:

Pleated Mask with Filter Pocket


3 D Mask with  Filter Pocket & Video Tutorial


Happy Sewing! 

- Elvira - 


Latest Video