Powered by Blogger.
Showing posts with label DIY 3D Fabric Mask. Show all posts

Snug Fit Face Mask Video Tutorial

Snug Fit Face Mask Tutorial


Well, I am still sewing face masks, though mainly I made to giveaway to friends and families. And now as the weather is getting more humid and hot, we need several masks to wear throughout the day, right?
I've been making the above-pictured snug fit face masks and I shared the templates and video tutorial on my Youtube Channel.


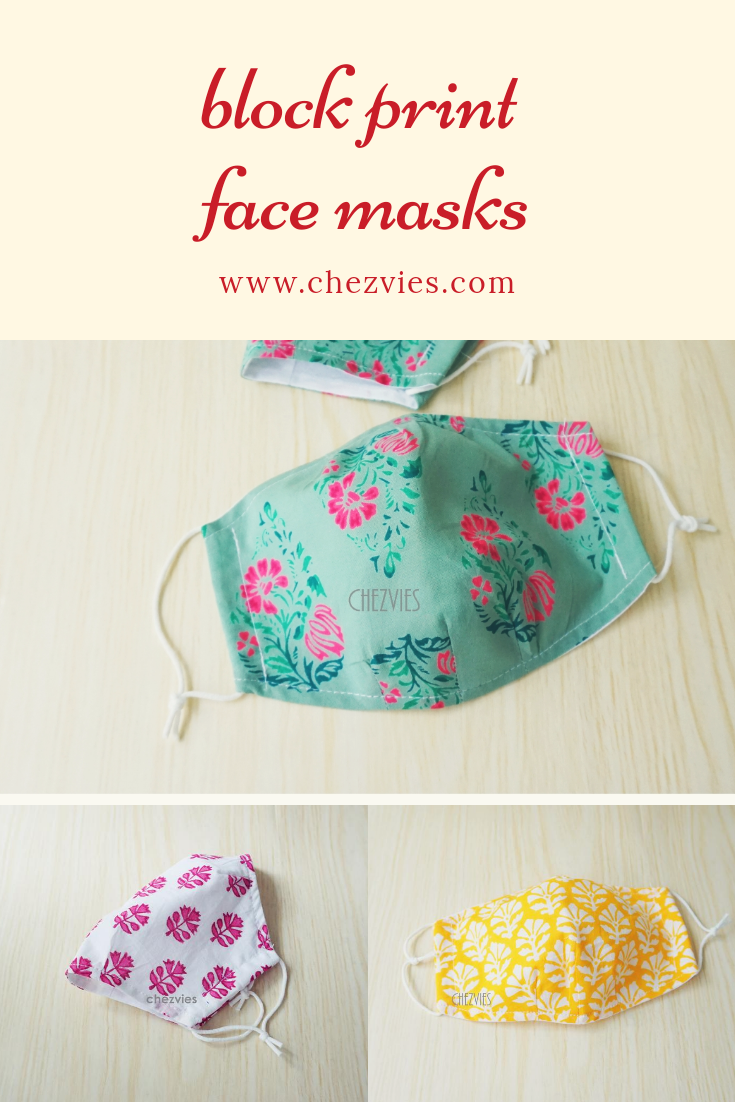
This snug-fit face mask is comfortable to wear. I like to wear it when I do my daily chores. As I have quite bad dust allergies, I need to wear a mask even when I cut fabrics and sew. The snug-fitted face mask has pleats on the sides so that there's no gap and also helps in creating 3D shape and makes you breathe easily.


Snug Fit Face Mask


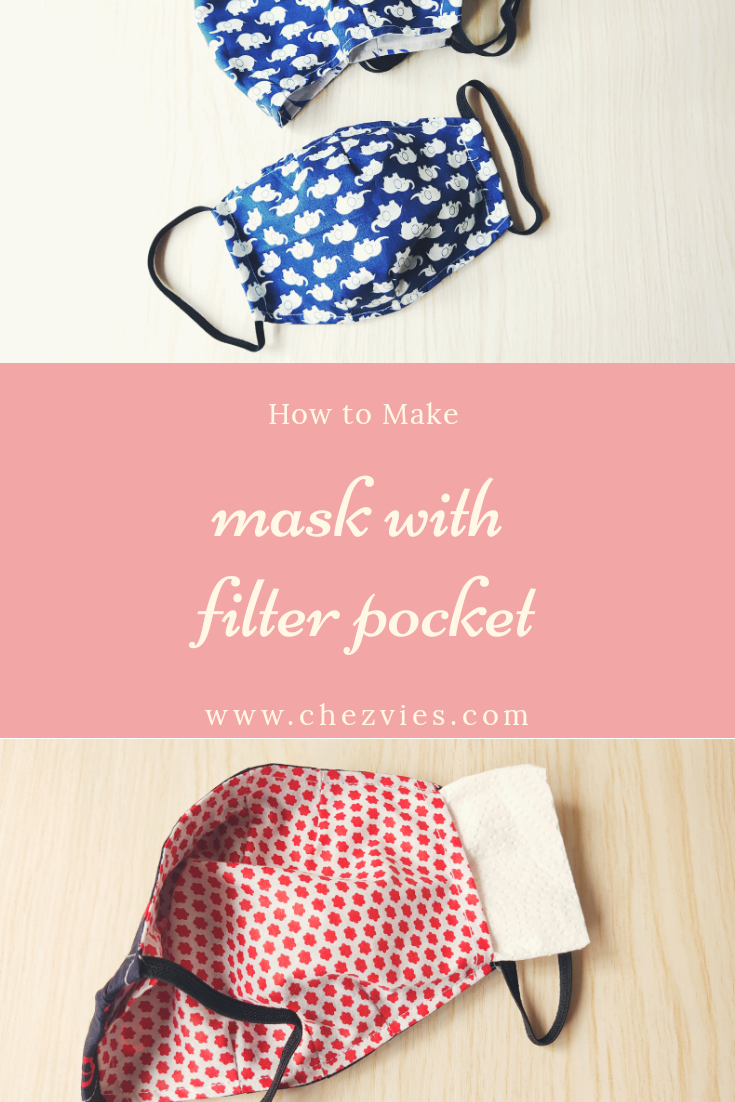
These are other Extra spacious face masks I made recently. This mask style is my boys' favorite cos they don't feel suffocated when they wear it. And this is a great mask to wear as an outer layer with your disposable mask. 


Extra Spacious Face Masks


I also made these pretty Indian print 3D masks that were a custom order. I made extra for myself too as I love the prints and this is my fave mask style. But on these masks, instead of having the elastic go through the casing, I simply sew in the elastic. The fabrics are very soft and I use either poplin or cambric cotton for the lining. 


Comfortable Fit Face Mask


Source: Today

Looks like the face mask is here to stay. Personally, I like wearing a face mask when I go out even before the pandemic. And now with new Covid19 variants discovered almost every week, I would not feel safe without a face mask even if  I got vaccinated. I believe by protecting myself, I am protecting my family and my society. 


Source: Pinterest


Thank you for stopping by today. Stay safe & healthy!

Have a nice day!

Elvira

*****


Video Tutorial How to Sew Spacious 3D Face Mask

Sometimes we run too fast and think too little ~ To Dear Myself (CDrama)


Finally, I finished a couple of Trio 3D Face Masks. Don't you love these rose print masks? I got the fabric from Indonesia and I made a couple of wallets with it, you can see them HERE.

This mask is now fave with everyone. My SIL loved it cos it's not fogging her spectacles so much. That's an added bonus. I put up a video on how to put this 3D Face Mask together. I hope the video will help those who need to see a clearer picture.


I quite enjoyed making the video, but the editing part it a bit tiring. My son said to do voice over, I need to learn that. Trust me even a simple video tutorial needs a lot of retakes and editing. I have to keep several masks ready to sew, incase I mess up :D. 

Since Etsy is introducing video features, I've been learning to take a short video (15 seconds max) that is quite informative for the customer. It is really a challenge but it's fun to learn new things. In the beginning, I was not sure if 15 seconds are enough to show your products, but now I really enjoy creating it. It's good for my Instagram Reels too. If you observe all these video features on social media, people can be really creative within those 15 seconds. 
You might find people complaining, but for me, instead of complaining why not use the time to learn. If others can do it, we can also do it.


Before Etsy introducing this new feature, I used to post videos on my Youtube Channel under Product Review and post the link on my Etsy Listing description. It helps to a certain extent especially for first buyers who are not sure about my products. Like this short video, I make to show how to adjust the elastic cord on the mask. 


Another thing I'm busy with nowadays are attending webinars conducted by Etsy India. Our seller support group on Facebook is quite active and informative. This online community is really great, even for seasoned sellers. There's always something new I learn. Truly, if you want to keep doing what you do, you have to keep learning, be observant, and do your own research in your own niche.  There's no short cut to success. You gotta do the hard work, be it researching your SEO, retaking your product photos, redoing your listing, etc. 


If you find the video tutorial helpful, please share it especially to those who might need it. 

Thank you for stopping by!

Stay safe & happy sewing!

Elvira


Mask Pattern Hack Link - See through Mask Tutorial from Sarah


When Sarah from Confession of a Fabric Addict tagged me on Instagram that she made a see-through version of Trio 3D Face Mask I was so happy, to say the least. I mean, I follow her blog for many years and sometimes posted on her popular blog link party "Can I get a whoop whoop?" 

Everyone who sews has been making masks for family, friends, donation, and for sale. And with the pandemic, people can be really creative. When I started sharing my first mask tutorial, I never thought that in the next few months mask design will evolve so much. And Sarah's see-through mask is one of them! This kind of mask is important for lip readers so that they can communicate while being protected! Yes, wearing masks is about being considerate of others, even though it's a little uncomfortable!
If you already bought the TRIO 3D face mask, you can check out Sarah Tutorial on her blog HERE. 

Go and check the tutorial!


I'm still busy making masks too and here's a stack of Trio 3D Mask I made recently, already sent and received with a lot of love. Thank you! I'm still making a few more batches of masks. Batching is boring but that's the fastest method. Collecting fabrics, iron the, cut the strips, separate it by part, put on my fave Kdrama and start sewing. Even if I have only 1 hour sewing time before bed at night, at least I can finish sewing some parts. 


Download Trio 3D Face Mask

I already have a few orders lined up for the next few weeks and I'm making for my mom and sisters in Indonesia. If you sew, you can download the pattern from my webshop or EtsyAnd if you need help, simply email me!

Thank you once again Sarah for sharing the tutorial! You can check my other mask tutorial HERE. Some tutorials come with Pdf Printable version and some are not. 

Thank you for stopping by!
Happy Sewing & Stay Safe!

- Elvira- 


SHOP UPDATE - Shipping update and Intermittent Lockdown


Hello, how's everyone doing? We're still on strict lockdown here in my city as cases crossed 11K. The lockdown is for 14 days which hopefully will end by 12th July. This week several relaxations were announced but not including activities for e-commerce.  That means I have to wait until 13th July to be able to ship orders again. Meanwhile, I am working on a few orders and also preparing for all fabric orders. So once the e-commerce activities are allowed, I can start shipping immediately. 

I made several changes for shipping in my Etsy Shops (Fabrics Shop and Handmade Shop) because there is uncertainty with India Post when they are going to start international services again. I will only use expedited shipping for now and onwards via DHL e-com and will give FREE UPGRADE to Express Shipping (5-7 business days delivery) if you shop for $50 and above.  

I will be adding more fabrics in the coming weeks. My supplier just sent me a few collections. They've been rather badly hit by the intermittent lockdown since March with most of the market area being closed for months. And when it was allowed to open, there were no customers. Most of the shop owners here are not familiar with selling online, even if they are, their stocks are all in their shop, which means, no sales for months. 


On the handmade side, I finished these wallets but not able to send them as yet. In between sewing face masks, sewing wallet is like a fresh breeze in spring :). Took me a couple of unpicking too. Well, for months out of practice. 

Compact Bifold Wallet

Another wallet I really enjoyed making was this zip-around bifold wallet. It was on my list for a long time and finally, I made it. I made it slightly wider than the original pattern because she wanted to put her phone too. The original one is good for the phone too, but with zip closure, it's better to make it slightly wider. I think I'm going to make one for my self when time permits. You can find the Zipper Closure tutorial HERE


The state government has done a tremendous job to provide quarantine centers, from hotels to university hostels. Please do take precautions, maintain social distancing, wear a mask when you're not alone in public places, wash your hands frequently. We just need to learn to be a little discipline, a little considerate, use common sense if we want the curve to flatten. No unnecessary gathering. 

Here my recent fave from Indonesian Idol finalist - Lyodra & Judika - The Prayer 


I pray you'll be our eyes
And watch us where we go
And help us to be wise
In times when we don't know
Let this be our prayer
When we lose our way

Lead us to a place
Guide us with your grace
To a place where we'll be safe


Thank you for stopping by!

Take care & Stay Safe

- Elvira - 

TUTORIAL - How to Make Easy Fabric Ear Savers

Necessity is the mother of invention.

That quote is so true and looks at how people can be so creative with a mask during the pandemic. They even come up with the name, yes, ear savers.
I remember during my trip to Japan 2 years ago, I struggled with earloop masks because I'm wearing a hijab. Luckily my dear friend brought masks from Indonesia which is designed for hijaber, like me. Basically, it was like ear saver only it was a string of elastic. When I saw many people started making and sharing in Pinterest, I remember the one I wore in Japan. 

Today I finally get a chance to make one for myself and here is how I made it. The measurement is based on my measurement, so please feel free to reduce or add the length as necessary. 

Materials and Measurements: 

1 piece of fabric 8" w x 4" H (20 cm x cm)
1 piece of lightweight interfacing or all-purpose interfacing 7" x 2" (18 cm x 5 cm)
2 pairs of kam snap button 


Let's Have Fun : 

1. Center and fuse the interfacing on the wrong side of the fabric and fold in all around seam towards the wrong side. 


2. Now fold the fabric lengthwise, clip it using wonder clips, and sew all around the perimeter using 1/8" seam allowance.


3. Installing snap buttons. Remember, the button stud and socket should be installed on the same side. First, install the stud on the outermost (3/8" or 1/2") from the edge. And the socket 1" from the stud. 


And voila! Your DIY ear saver is ready.  Now go ahead and make a few in different colors! If you wear hijab, you maybe want to pull the ear saver a little up so the mask won't slip down your face. I was thinking to use velcro but velcro tends to ruin my hijab or tangle your hair.  If you need more inspiration, I put together a board on Pinterest for this. Check it out. 


I hope you enjoy the tutorial. Do share with people who you think might benefit from this tutorial. After all, sharing is caring.

Thank you for stopping by today!

Take care & stay safe,

- Elvira - 


Alternative Filter Pocket for 3D Fitted Face Mask

Face Mask with Filter Pocket

Everyone has their own preference and that's including masks. Some people prefer a surgical pleated mask, some prefer box pleated masks, some people prefer 3 D mask without filter pocket (including yours truly). As I wrote in my previous post, in a homemade mask the most important is as long as it dense enough. 

As I progress making more 3D masks, I improvised the pocket construction for the 3D Fitted Mask. Instead of cutting 2 lining fabrics like in the pattern, I cut one piece of lining and reduce the sides to create a pocket. The advantage of this pocket is you need less time to sew them together. 

So here's how to do it:

  1. Cut the short sides of the lining fabric by 0.75". I usually fold it in half, mark it using an erasable pen and cut it on the line. 

2. Fold the raw edge by scant 1/4" and fold it again by 1/4" and topstitch the short edges. The mask lining will look like in the picture below. 


3. Sew the lining and exterior panels together as per the pattern and turn the mask right side out.  Now, with the lining facing up, press the seam of the exterior panel nicely and topstitch all along the top and bottom seams only. 


4. Fold the short edge of the exterior panel towards the wrong side by scant 1/4 inch.


5. Fold it again by 1/2" and pin/clip in place.


6. Now the tricky part (don't worry, you can do it!). As you feed the fabric under the needle, pull the lining fabric gently so that it's away from the fold that you're going to stitch. Put the needle down, backstitch a couple of stitches and sew to the end. As you reach the end, gently pull the lining fabric again, away from the end of the fold. Finish sewing with a couple of backstitches. 


7. Tada! now your mask with filter pocket is ready. Insert elastic or fabric ties as you prefer.


Here I used a kitchen paper towel and folded it a couple of times. Insert the paper and you're ready to head out. 


3D Fitted Face Mask in ETSY

What do you think? which type of mask and filter pocket do you prefer? Let me know in the comment below. 

Thank you so much for stopping by.

Take care & stay safe!

- Elvira


3D Fabric Mask With Filter Pocket Pdf Pattern with Video


I've been working on this mask for a couple of weeks. I tried different model but not really happy. I want the mask that leave a little space in between for ease of breathing. Especially for mask that I wear when I go out, since I usually layer it with tissue. At home, while doing my chores, I wear the surgical type mask. So, I came up with this easy to sew 3D mask. 


Mask with Crochet Cord 

I realize that your nose shape play important role here, when you make mask without nose wire. Because nose wire is not easily available here,  I have to come up with something else. My younger son who has long /sharp nose, said he likes this fit best, because it doesn't make him feel suffocated :D. Here's my pictures wearing the mask (my sons refused to be my model -_-). 


Kids Size Mask
Filter Pocket at the back

I'd suggest tight woven fabric, especially for the exterior and softer cotton for the lining. Layer of Tissue or non woven fabric  will help in filtering. (Read this article).


The pattern has 2 sizes for Adult and Kids
Adult Size : 7.5" W x 5.5" H
Kids Size : 6" W x 4.5" H


The Pattern is available in ETSY as well as on  Payhip 


UPDATE : 

I just added a video tutorial how to make this mask: 


Thank you for stopping by! Please take care of your health and stay safe!

- Elvira - 


Latest Video