Powered by Blogger.

Wallet Pouch Story

Hello,

I have not done any sewing since I came back from my trip to Delhi last week. I have not been well these last few days due to my usual winter rash problem and had a diarrhea for a few days. My friend, mbak Sari in Japan who owned the pretty Kanzashi shop in Etsy, told me that during winter it's better to consume food that grow under the ground. Well, I am not a fan of potato, but upon reading her suggestion, suddenly I was craving for boiled potato and have been eating potato for the last few days. I feel much better today and hopefully tomorrow I can finish my custom order due on Monday.

Anyway, I think have not shared this wallet pouch I made in October. I needed a pouch-cum-wallet which can fit it my phone, a couple of cards and a zipper compartments for cash/change.


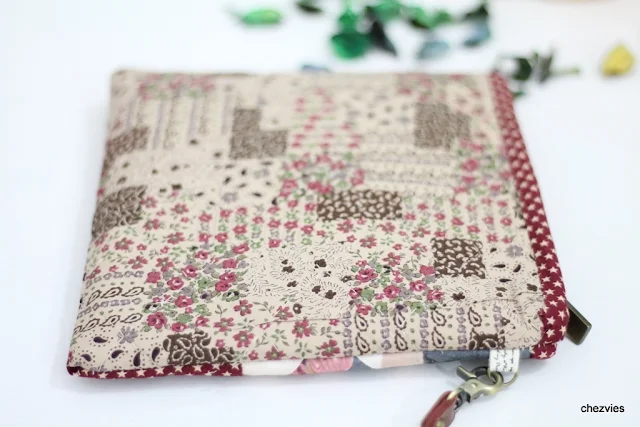
This is my 5th wallet that turned out perfectly. There was a few ideas I tried with the previous wallets for the card slots but didn't work out as I would like it to be. Esp. the card slots. 


But I love the flower print. It's so feminine :)


My first idea is to use wristlet that the picture above. But on second thought, the detachable one would be better.


Then decided how many cards should I incorporated. Some people carry a few cards but some carry many. So, I thought 6 cards should be good enough. I am quite minimalist, I carry 2 cards and 4 cards when I travel. We don't have so many shops which offer membership cards here, and if they do, it is enough to tell them my phone number to avail the points. 
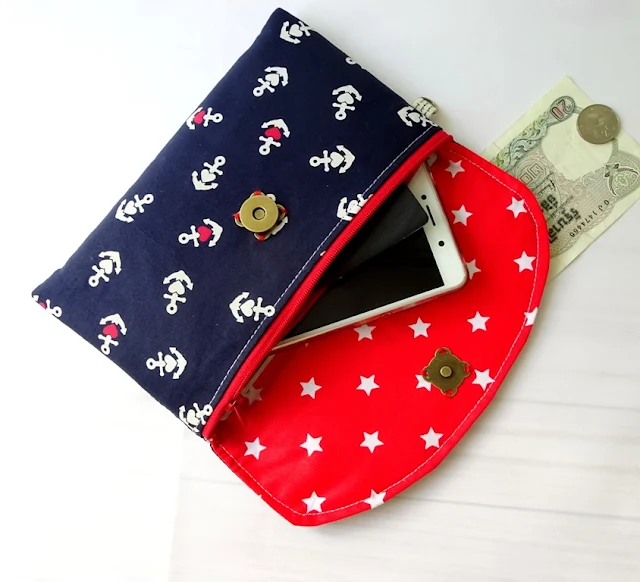
Anchor Wallet Pouch 

The blue anchor and the orange patchwork one are made slightly bigger than the floral one. As I was working on these wallets, I thought this will be a good travel wallet too. Especially for those who loves practicality and often going for solo trip.


 and if one want to go for a quick coffee with friends, a detachable medium short strap can always be added. 


Patchwork Wallet Pouch
 I am making the pattern for this Wallet Pouch, but still finalizing for a few details and need to make a couple more to try out which material combination and technique that will work best/easiest even for beginner sewist. I love wallet that is light and sturdy but easy to make.  What about you?


Until then,

Happy Sewing!


Mini Family Trip

Hello,

Last week I went to Delhi for my passport renewal work. It was a nice mini trip with my small family. Of course the boys got more excited. The younger one was a little upset because he had to miss his high jump final round in the inter house competition at school. Anyway, he was later quite happy after he got a new running shoes. 

Here are a few photos from the trip: 

#1. Travel Organizers
Of course we never have enough pouches and wallets. The passport wallet was really handy to keep all my family passports and the necessary documents as live in a foreign land. 


My Travel Must-Have organizer:   small pencil pouch, shoe lipstick pouch,  tissue pouch and the small pouch to keep urgent medicines. 
The patchwork pouch for my phone and hotel keys as we go for breakfast. The red one was for my make up bag

Travel Must-Have 
2. Spices and Teas

The House of Tea in Central Mall Delhi Aerocity

Dry Fruits

Pink salt and spices

Arqa at Central Mall
For Tea lovers like me, it's difficult to choose :)
#3 The Delhi Road
Spotted near the Indonesian Embassy

Equal Rights 

Horn Please:)

quick fix 

Embroidered bags and clutches. My boys didn't let me go closer :(
They surely knew my weakness for anything ethnic ^^

We met my hubby's friend for Indian dinner at Karim's in Gurgaon. There were so many grand weddings going on while we were on our way to Karim's. The white horses, the singing and dancing et al really amazed me. I wish I could just take photos. I tried but one could not get decent photo while riding Indian taxi, right? 

We also went to visit hubby's aunt and had a great time chatting and catching up on family gossips. While coming back to the hotel (we stayed in Novotel in Aerocity), the uber driver was really bad. He drove very carelessly, if not dangerously :(

Novotel Green Garden 

two of my favorite things :D

Until Next Time, New Delhi
It was fun trip ( although sans fabric shopping), though the traffic was really bad. Even at almost midnight there was traffic jam!! Maybe next time we should try the Delhi Metro. 

Now all the dirty clothes are taken care of, it's time to get back to (sewing) work. 


Happy Sewing,


Holiday Shopping Coupon Code for you

Hello again,

This week has been crazily busy for me. Sewing wise not much is happening this week except a couple of custom orders that I managed to finish in time. 

Alright, now let's get down to business. In my previous post, I mentioned about coupon codes for my Indian readers and customers! As a token of appreciation for your continued support, please find 2 coupons for your holiday shopping. The coupon valid through Dec 1, 2017. 

Here are the coupons details: 

Eligible for all patterns - You can shop form the link on the right panel of this blog too!! 


10% off on minimum INR 2500 total order.


For Fabrics - Except BALI BATIK - all are eligible for the sale. 

Once again thank you so much and I'm looking forward to your continuous support! 


Happy Shopping,


It's a cyber week sale in Etsy

Hello, 

Just a quick shop updates! 

Yes, the cyber week sale on Etsy is up and running through Dec 1st.  With Etsy's new sale feature, it is now easier to run a sale without creating a coupon code.


here are the details

All PATTERNS are on 20% off 
you can visit CHEZVIES or CHEZVIESPATTERNS
(both are on etsy)

SHOP PATTERNS


All READY to SHIP items are on 10% off  (no minimum order!) yay!!

SHOP HANDMADE

and for FABRICS  20% off on total order USD 25 or more!


SHOP FABRICS

Thank you so much for supporting small business!!
I hope you enjoy your shopping experience in my small shops!!


PS: If you are in INDIA, wait for my next post on Friday! I'm preparing coupon codes for you! Subscribe to my blog so you won't miss the chance!

Have a good day,


From Bundle to Quilt

India
Hello,

I hope you had a wonderful weekend. On Saturday, my boys had a music competition in their school. It's a rock band competition. Both the boys performed with their own group and too bad parents were not allowed to see. So I had to rely on their information. The younger one was busy practicing with his friend for the last few days before the D-Day. He played guitar and just started to learn for the last few months. When I showed my mom  his practice video, she asked: "what song is that?" LOL.
The boys also got new pets - a pair of rabbits- my BIL brought back from the village. They were excited but I hope this is a short-term thing, though they are really cute.

And from my sewing room, I finally finished this mini quilt. The quilt sandwich was done one year ago or so. I meant to do hand quilting, but I used the wrong batting. I did few diagonal lines of hand quilting, but because the batting is thick and uneven cotton, it was too tough.
After chatting with Mbak Belly - my quilting friend, I decided to just go ahead and finish it by machine. After all, finish is always better than perfect, right?

Indian Quilt

I used Indian fabric for this quilt. IMHO, Indian fabric has gorgeous colors and prints that even a simple quilt will look attractive.

This quilt size is around 34' x 34" square. I quilted using straight line quilting 3/8" apart. I just kind of eyeballed it. I really love a dense line quilting. It sort of pop the quilt up easily.

Straight line quilting on my Usha Stitch Queen

Don't you love the backing? :D

 Many Indian quilters hesitate to use Indian mulmul fabric, like the one I use here. They are lightweight but have the coolest color shade and prints. The trick is to always starch it. Normally I will prewash the fabrics and dip in a starch solution water. Just like my MIL did with her sarees. That will give just enough stiffness. 

After cutting and after each piecing, whenever I iron the seam, I spray a little bit starch too. You can buy spray starch or make your own solution using starch powder. Nowadays we even get liquid starch! 


After finishing this quilt, I want to make a bigger version. May not be the same design but using the Indian Fabrics. Since I love Indian Kantha Quilt, I thought making my own quilt will be fun. Let me. If the batting is right I might do the hand quilting too. 


As usual, when I am not sure what binding to use, I always use black and white! The binding fabric, I got from Namrata. It was a diagonally print stripe fabric. Simply love it!! Just cross cut it and you get a bias-look binding!!

here are the rabbits
So, what are you working on this week? Whatever that is, I hope you enjoy working on it! 

Happy Sewing,

Linky Party:

(Mini Tutorial) How I do my Foundation Piecing Quilted Pouch

Hello again,

I hope you all had a great weekend. Well, I did. Last Saturday the boys went to school picnic and would be back by evening. That means I have a whole day and afternoon free. Woohoo!

I was working on one custom order of mini sling bag, but my mind kept wandering to the bag under my computer table. The Pandora bag (not box) that hold my  Quilted Bag Kit from my bestie, Winda. She gave it to me 2 years ago when we met in Jakarta. The kit was a bag kit and she already started making 2 or 3 blocks. So I put away what I was working on and pulled out the bag, sorting out the pieces, interfacings, batting, etc. That was on Friday evening. The next day, after the boys were out of the house and a quick housework,  I started piecing the blocks and here's my pouch. 


At first, I thought of making a tote bag after I saw this Instagram Post. Then decided to do less ambitious one first.

Here's what I learned during the weekends. 

Many blogs wrote about using Freezer Paper for foundation piecing, which is not available here in North East India (or even India for that matter). The kit (it's Japanese Craft Kit) used a fusible stabilizer which is a thicker version of what we called "pasting" in here.  That is a thin lightweight nonwoven fusible interfacing. So I tried using our own desi interfacing and it worked like a charm. Yay! I remake the pattern on my computer based on the original size and print it on the interfacing. I cut the interfacing slightly smaller than the A4 size paper, fuse it lightly on the paper and run it through the printer, et voila! No more tracing pattern one by one !! (it's the same method I used for this DIY Printed Label)


 I didn't really follow the pattern instructions. What I did as cutting a strip of fabrics that will be used and do it like quilt as you go method. 
First, lay the 1st piece of fabrics on the glue side of the interfacing, right sigh up. 


Then place Fabric No. 2 on top of fabric No.1 right side together matching the seam. Make sure that when you flip the fabric (no.2), it will cover the triangle no. 2 plus around 1/4" seam allowance. 


Flip it to the reverse side, pin and sew on the line 

Like this


Now open fabric no. 2 away from the seam and finger press. 

Trim fabric No. 2 so that it has 1/4" seam allowance. 

Continue in the same manner until you cover the template. Don't be discouraged when it looks ugly ^v^.


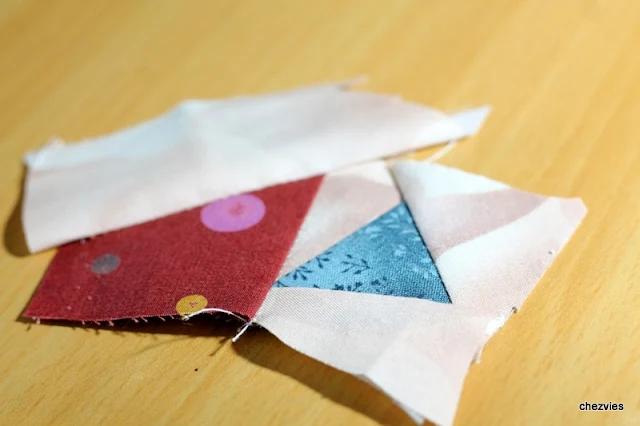
Because after you trim the excess fabrics you will get this pretty little blocks.

Reverse Side After trimming
Aren't they cute?
Front View

I almost proud of my self (well, I do actually) to be able to complete this. Paper Piecing is something that I always feel it's difficult and a lot of work. Especially if I have to trace the pattern one by one. 
After an hour here what I got!

Blocks size : 3 1/4" x 3 1/4" after trimming

After lunch and a quick nap, I started working on the pouch. I decided to do hand quilting. Hand quilting is one thing that I always want to do. I realized with the right batting, hand quilting is so easy to do. And if you have your fave Korean drama on, it's the better. It's like killing 2 birds with one stone. LOL. 

Hand Quilting with Gutterman Cotton Thread
I didn't tear off the interfacing since I am making a pouch and I love a slightly structured pouch, so the interfacing will work out great. I just needed to add the batting. 
Front Side 
I used Sevenberry fabric for the back of the pouch. Isn't that lovely? I picked up the fabric during my visit to Indonesia last year. 


Sometimes, we have to face our fears and just do it. Sometimes things look difficult and complicated until you actually do it.

So, what are you making this week? 

Until then,

Happy Sewing, 

Linky Party:


Latest Fabrics

Latest Video