


 |
| Triple-layer masks |
 |
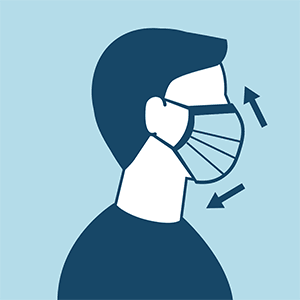
| Slim Pleated Masks |
There are so many articles since the early days of the pandemic. From fabric mask is not advisable to now mandatory wearing any covering. Now, which fabric is to use? After reading different articles, I came across this article from The Brussels Time. Quoting from the post:
“The fabric is not important. The tissue must be sufficiently dense so that it can stop as many drops as possible, that is the most important thing. At the same time, it must also allow for comfortable breathing. It is this balance between tissue density and still allowing smooth breathing that needs to be monitored" Steven Van Gucht."
When I read the article, I was like "yes! ", Not because of anything, but because the common people here cannot afford good quality quilting cotton, let alone designer ones!
 |
| Glace Cotton & Rayon Cotton Mask |

Now I have so many Indian cotton fabric that is lightweight, but some of them are tightly woven, like the glace cotton or rayon cotton mix. That's when I decided to make 3 layers mask using the same fabrics. And if you think you need it denser, you can always add a hanky or tissue paper inside the mask and remove the tissue as it becomes moist (ok this word always remind me of PM Justine Trudeau Presscon ^^)
Depends on your personal choice and best fit to your face shape, cloth face coverings should :
- fit snugly but comfortably against the side of the face
- be secured with ties or ear loops
- include multiple layers of fabric
- allow for breathing without restriction
- be able to be laundered and machine dried without damage or change to shape. (Source : CDC)
I just put up a video on how to make triple layers face mask. There are different kinds of pleats you can do, but here I'm sharing the slim pleated one here. Super easy to make and it's possible to do hand sewing too if you don't have a machine. (see the resources below this post for other types of mask videos)
Here are a few masks I made using different styles. For a double layer mask, I use cambric or poplin cotton fabric.
 |
| Double Layer Cotton Masks |
For people who find it difficult to breathe through mixed cotton masks, I made these triple-layer masks using mulmul cotton.
 |
| Mulmul Fabric Mask |
Here is how the slim pleated mask looks like. It's perfect for someone who has a slim face or a petite face.
 |
| Slim Pleated Mask |
And here's the comfort fit face mask which is favorite with everyone. It's a double layer, I used thicker cotton fabric on the outside (cotton mix, combed cotton, etc) and softer cotton (cambric or poplin) on the lining.
some review from Etsy :
Such an easy and well fitting pattern. Very clear instructions both written and in pictures.I’m over the moon.
Nice pattern and worked well for a couple of people that have trouble with other masks. Thank you for sharing!!!!!! (Source : Etsy)

Don't forget to wash the mask properly with soap after every use and dry it in the sun.
If you know how to sew or have access to a tailor who can sew for you and people around you, you can follow the tutorial from my previous post or visit links below. Support your local fabric shops, local tailor, local community, we must support each other!
Thank you for visiting my blog.
Take care & stay healthy everyone!


