Powered by Blogger.

Quilting Bee Update - February March Blocks


Hello,
In the past few months, I am enjoying making blocks for the quilting bee that is going on in the Desi Quilters Group on Facebook. This red quilt as your go block is for Deepti. Oh, I love doing QAYG, and looking at what others have made in the group is really inspiring. This red QAYG block is approximately 14.5 x 14.5 inches unfinished. 

The challenge of making a bee block is when the Queen Bee is only asking for the unfinished block size without specifying what kind of block or what color they prefer. When this happened I tend to choose the traditional blocks. Like this Purple Star Block. Aparna was asking for 101/2 inches block and I am in the mood to do some HST.


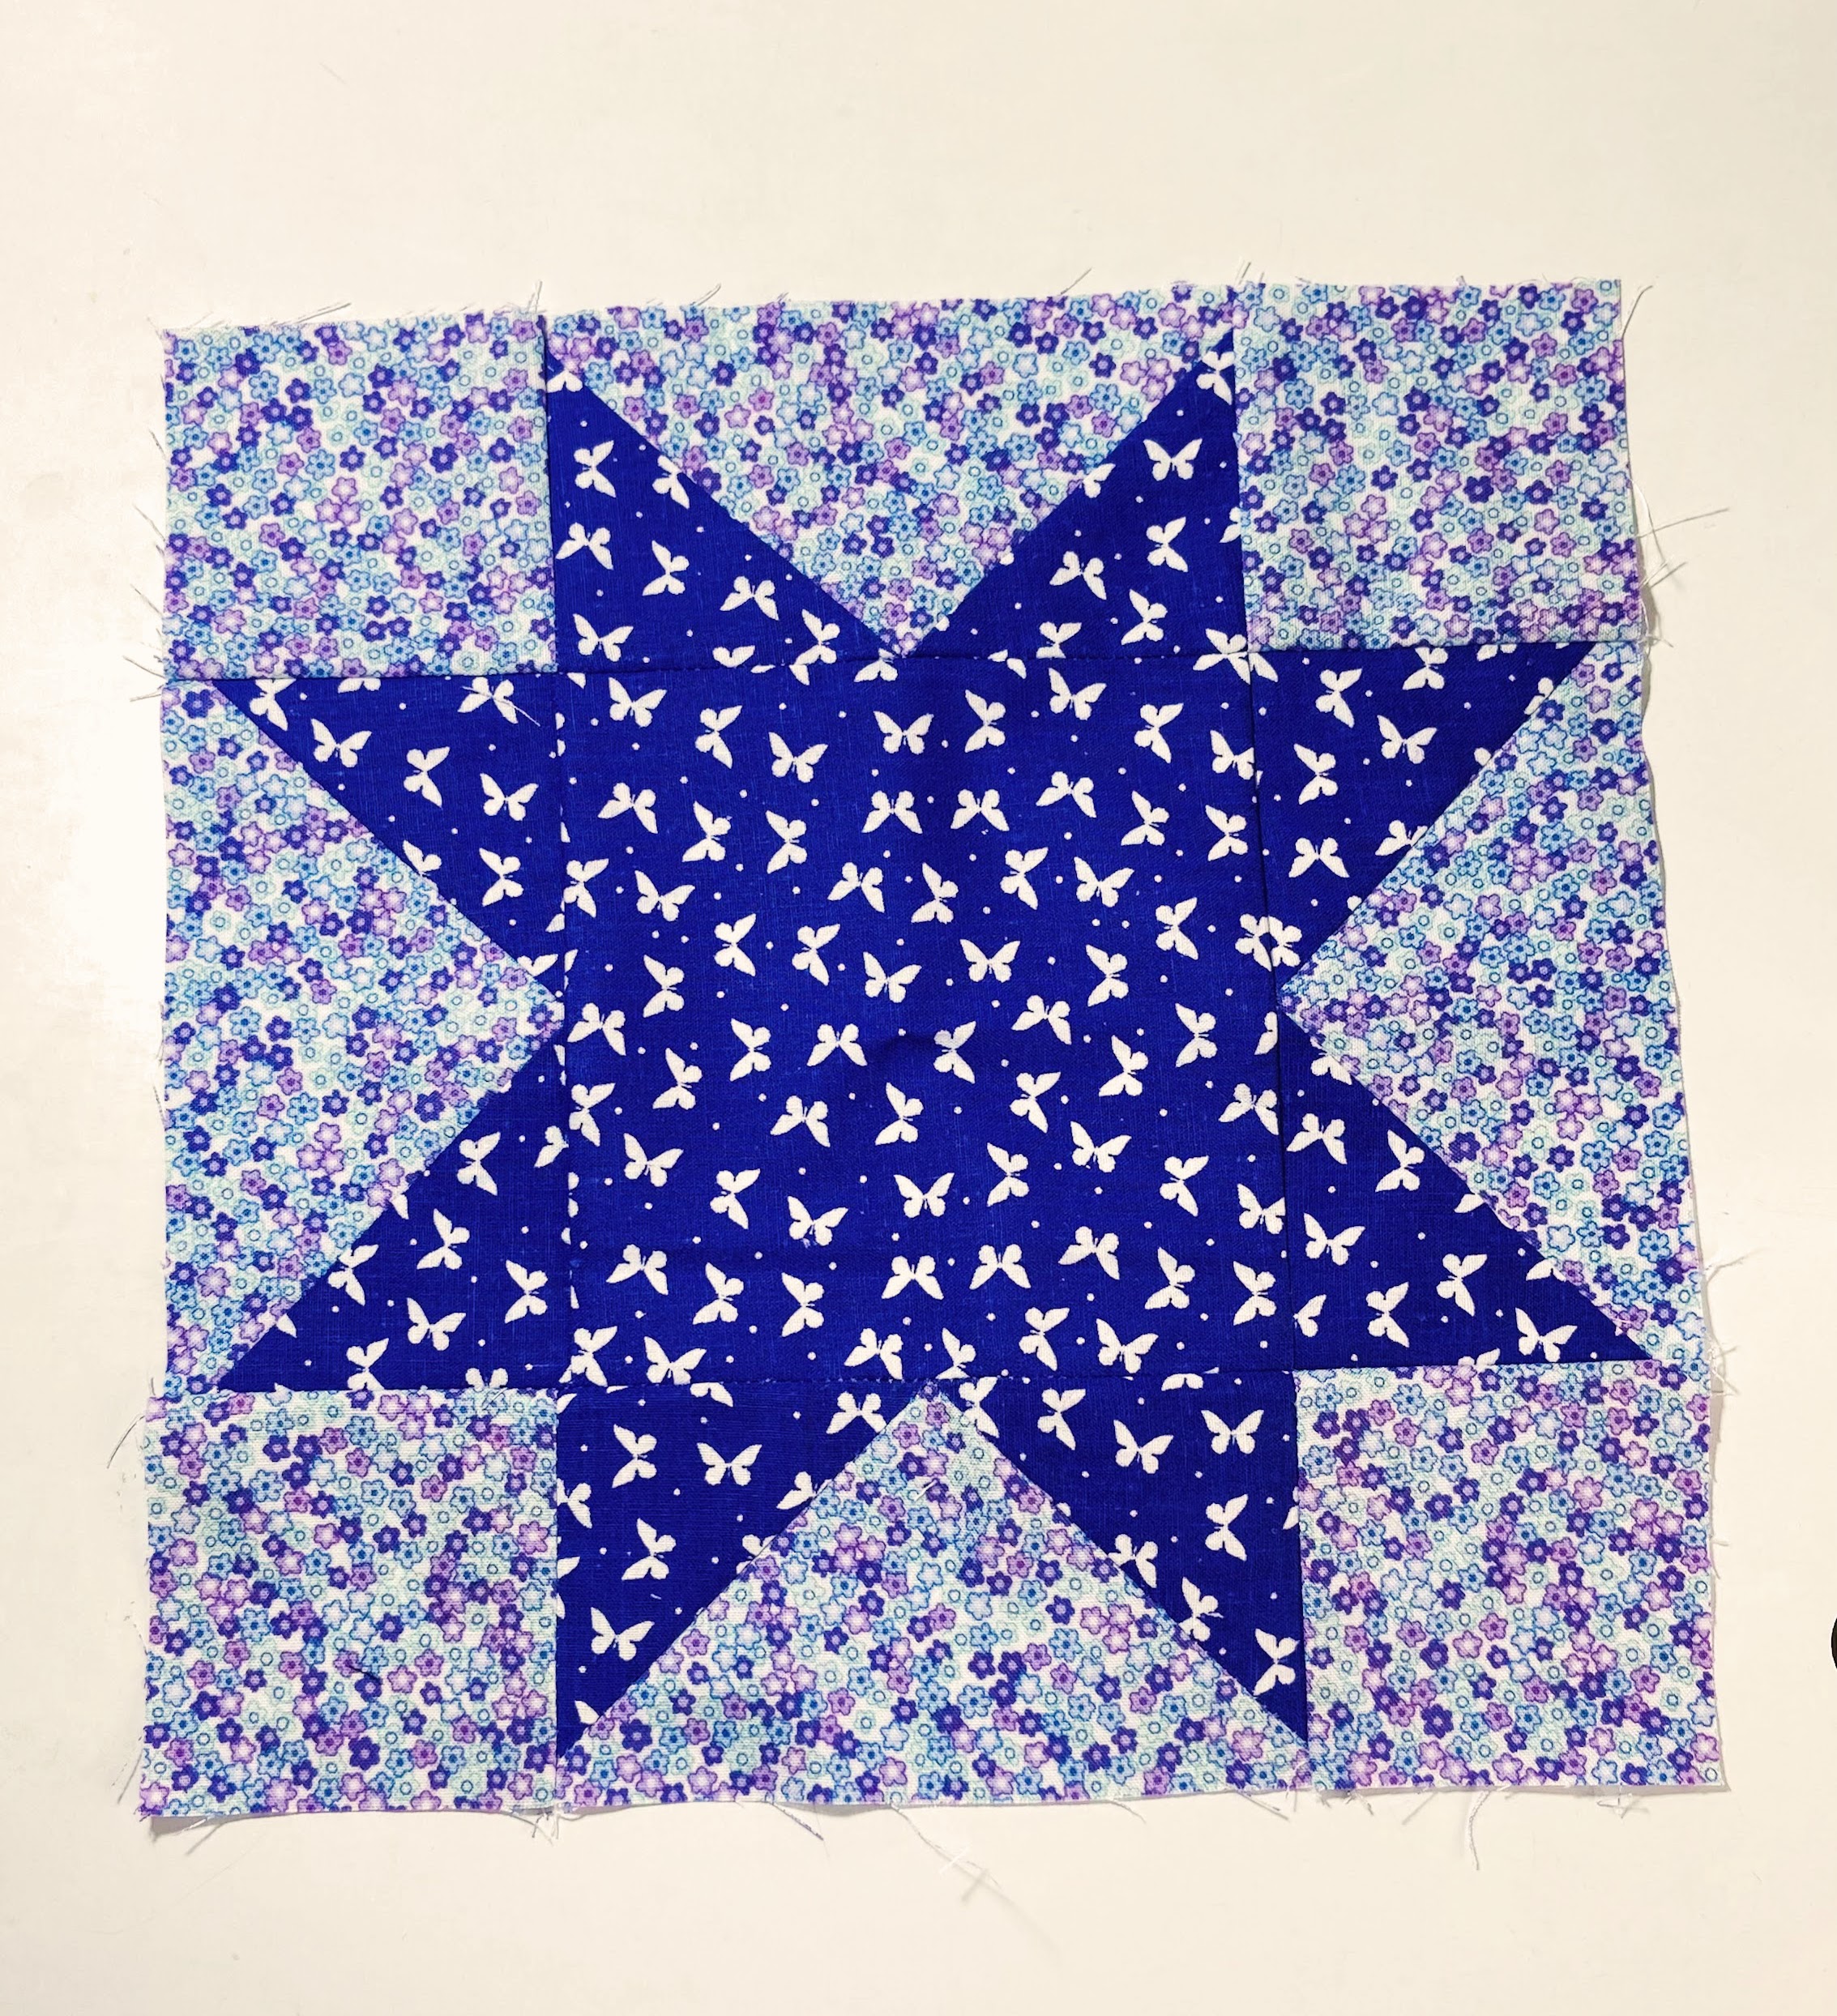
I searched on Pinterest and found this star block from Bernina  Summer Sparkle Quilt Along on We All Sew. I thought this will be perfect! 


Made another one using Indonesian Batik


As usual, I recorded the video as I sew just for fun! 


Another block I made is for Revathi. She wanted courthouse steps log cabin block. The log cabin is another fave block of mine and I'm so excited to make this one. Here's what I sent to Revathi. The block is based on THIS tutorial
The centerpiece is 3.5" square and the strip is 2" wide. You can cut the fabric strip before sewing them together, or (my preferred method) is just sew and cut later like in THIS video


Courthouse Steps Log Cabin for Revathi


And of course, I made a mini version just because I love this pink and blue bundle! The block is 7 x 7 inches unfinished, I think I am going to make a coaster with it. 


This quilting bee is really a great and fun learning experience for me. For some blocks, I made a few and keep, and maybe will assemble them together later on. Meanwhile, I have received all my blocks! I will share them in my next post! I always plan to write regularly but never happened. I really should make an effort to write more.  

Thank you for stopping by today! 

Happy Sewing! 

Elvira


*************


*************

A few wallets

 Hello,


Last week, I was pretty productive. I made a couple of wallets for orders and also finished 2 wallets from my WIP bucket! It feels good to be able to finish a few from the WIP list. 

This pink strawberry wallet is one of my best sellers! There's a Blue and Red one too in the shop. I love making this Nuno Small Wallet and is still my fave wallet to use for everyday, and I made one for my son too! 
 

Cute Strawberry Wallet


I love this wonderland fabric from Rifle Paper Co. Well, I love all their fabrics and purchased a few fabrics before the pandemic,  but now it's too expensive to buy because the shipping charge is pretty high. Anyway, I recorded the video when I was making this Wonderland wallet. I am still editing it now and hopefully will be able to share it soon! Pattern available HERE. 


Wonderland Bifold Wallet


When making a wallet, choosing the fabric combo always takes a long time for me. Sometimes, I even end up using a different combo than what I initially picked. 
(I had fun making the BTS video below!) 


The second WIP I finished was this Red Floral Wallet. The fabric is from Sevenberry and I love the tiny floral print. This time, I used metal zipper and I love how this turned out. Also for the zipper end, I used the metal zipper end cap. I kinda love it although putting the tiny screw on the cap was a bit hard for me! I need to get the small screw driver! 


Floral Small Wallet

Small Bifold Wallet  


Earlier this week, I went to the Post Office with Meenakshi, from Rustic Origin. We thought we'll check the latest update regarding sending parcel via India Post. It was totally waste of time because the person in charge in the main Guwahati PO were not interested or not willing to help.  So we deciced to go hang out for a bit at the Starbucks at the Brahmaputra Heritage Center. It's good we decided to go there because the view is so good. I think during sunset would be lovely! 


Brahmaputra Heritage Centre


Brahmaputra River


After chilling out in Starbucks we went back to the PO and I still could not send my parcels. I decided to go the the University PO near my house, instead. The lady at the PO is very nice and seems to be well informed, and very helpful. Finally all my packages were on their way. 


In front of the University PO

This week, I will catching up on my Quilting Bee block. I have 2 blocks to finish! Wish me luck! 


Until next time,

Happy Sewing


Elvira

********

Linking up to these wonderful BLOGS

********


Scrappy Patchwork Pouch

Hello, 

A few months ago  I made a quick patchwork pouch from block print fabric when I was creating fabric bundles for the shop.  but did not get to share them here on the blog. Cutting fabrics always boost my sewing mood.  And who can resist when you see these beautiful fabrics! 

If you have a lot of scrap fabrics, here is a fun project to make. This project is super easy and it's a great gift to make. Everyone loves patchwork pouches! 


Here's what you need to make the pouch: 

1. Fabric scraps of various prints, sizes, and colors. I am using these fun fabrics

2. Scrap Cotton Batting (9" x 13" approx)

3. All Purpose Woven interfacing (7.5" x 12" ) - ( if you are in India, you can get it HERE)

4. Lining Fabrics (7.5" x 12") 

5. All Purpose Zipper #3  - I am using a 9" zipper. 

Now, let's watch the video on how to make this cute quilted-as-you-go pouch. 


Isn't it fun? The pouch turned out very soft and just the perfect size to carry essential makeup! You can whip up this pouch in a few minutes to make a quick gift! Let me know what you think in the comment below.

Thank you for stopping by today!

Happy Sewing

Elvira


Linking up to these wonderful BLOGS


**************************************************************************************


HAND BLOCK PRINT FABRIC BUNDLES


How to make trifold wallet video tutorial


Classic Trifold Wallet Pattern

Hello, 

I hope you're all doing well! I've been pretty busy in the past few weeks, especially with the holy month of Ramadan going on. But I am happy to finally put up a video tutorial for the Classic Trifold Wallet. Actually, I've been working on it for a couple of weeks. Whiles sewing and taking videos don't take much time, editing really needs a good mood and of course a lot of screen time. 


I made the pattern when I just started out, and after getting a lot of feedback, I decided it was time to revise the pattern. While there are no drastic changes in the pattern, this time, it is written in a better way and also uses real photos and also diagrams to help understand the process better. And also I hope with the video, people can have a better understanding. 

The changes I made with the pattern are only on the construction of the interior zipper pocket and also added better templates for the card slot construction.  You can watch it in the video below: 


Wallet features:

- Sturdy construction that makes the wallet last longer
- 12 and 16 cards variant
- Spacious to carry cards, a smartphone, a passport, etc
- Binding to hold the wallet together and also give a unique handmade look. 
- Various supporting video tutorials


The lavender wallet below I made using printed linen and combined it with shot cotton fabric. It turned out very crisp and chic! 

For the materials needed to make this wallet, you need:


You can purchase the pattern using the link below or you can get them from ETSY . Use coupon CVG20 to get 20% off. 


Thank you for stopping by today! 

Have a nice weekend,

Elvira


Kodomo Kids Wallet Video Tutorial

Kodomo Wallet


Hello,

Today I want to share the new beginner's friendly wallet pattern, KODOMO WALLET, that I recently released on my Webshop as well as in my Etsy shop. Kodomo means child in Japanese and this is what exactly the wallet is about. A simple and functional wallet that is perfect for kids as well as adults.

I have been making this kodomo wallet in my handmade shops and it is popular with my customers. They love the simplicity and functionality of the design, and also the fun print choice we can use. 

If you are a beginner or novice sewist in wallet making, this might be the perfect pattern for you.

The materials needed to make this pattern:
3 Fat eighth (9” x 22”) quilting weight fabrics for exterior, interior, and card slots
1 Fat eighth  lightweight  fusible non-woven interfacing for card slots
 1 – 0.75” diameter cute button
 5” long 1/4” wide elastic
 #3  all purposes zipper – 9” or longer


And of course, video tutorial is also available on my YouTube channel for those of you who are more visual learners. 


I made a couple of wallets for the shop using this kids' print fabric that I have in my stash.  These Alice in Wonderland Wallets are really cute and are popular with my customers. 

Kids Wallet Pattern

More wallets for kids! They are so fun, right? 

Red Riding Hood & Dinosaurs Wallets


The Kodomo Wallet has 6 card slots, and 1 zippered compartment and is closed with an elastic and cute button. Just perfect to keep cards, cash, and coin. The size is also pretty compact at 4" x4.5" and can easily fit into a pocket or small bag.

The pattern is written in English with step-by-step instructions that are easy to follow and also comes with full-size templates. 


More Alice in Wonderland Wallet

I hope you enjoy making the wallet, and if you have any questions, please leave a comment here or on the Youtube Video. I'll be glad to help you! 

Happy Sewing!

Elvira


******************


*******************

Latest Fabrics

Latest Video