Powered by Blogger.
Showing posts with label wallet tutorial. Show all posts

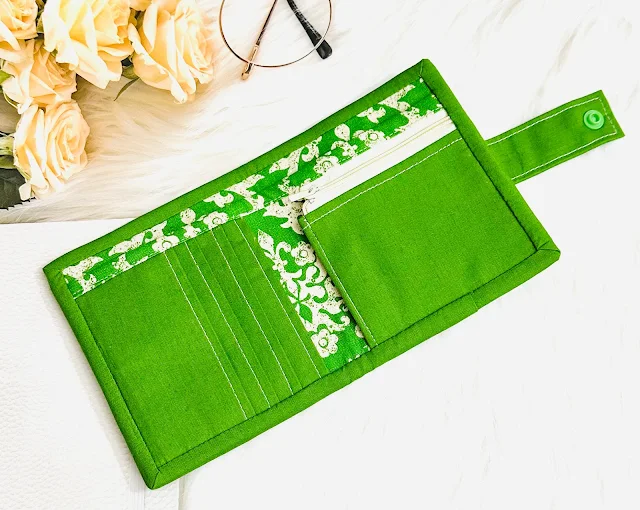
Pattern Update: Adding Zipper Coin Pocket on Nuno Wallet

Nuno Wallet with Zipper Pocket 

Hello, 

A few weeks ago I had a customer asking for a zipper pocket instead of a flap pocket for the Nuno Wallet. While making the order, I decided to take photos of the process and share it with you. In this additional tutorial, I will also share how to create Faux Binding.


So without further ado, let's start.


Additional Material and Cut:

- #3 All-purpose zipper 5" long

- Cut the divider panel lining piece 4.75" wide.

Please note that this is an additional tutorial for Nuno Wallet. The original pattern may not include this tutorial.


WATCH THE VIDEO


Let's go:

1. Use #3 or an all-purpose zipper around 5" long or longer. Fold the end of the zipper tape as shown in the picture below.


2. Place the zipper right side facing down on the right side of the fabric, 1.5" away from the center crease. Baste stitch with a seam allowance of 1/8" (3 mm).


3. Now bring the left part of the pocket fabric on top of the previously sewn zipper and top stitch with a seam allowance of 1/4" (6 mm). Don't forget to backstitch at the beginning and at the end.


4. Turn the wallet right side out, poke the corner, and finger-press the seam flat. Now, top stitch with a seam allowance of 1/8" (3 mm). Trim the excess zipper tape.


5. Fold the pocket 1.5" away from the left at the point where the zipper is and top stitch with a seam allowance of 1/8" (3 mm). Backstitch at the beginning and end.


6. From this point, follow the pattern by placing the pocket panel and the card slot panel on the divider piece. Then, Place the assembled panel on the divider lining piece. Baste stitch along the sides and bottom with a seam allowance of 1/8" (3 mm).


7. Fold the extended lining piece towards the wallet's raw edge and then fold it to encase the raw edge. Make sure it covers the previous stitching line. Pin in place.


8. Carefully topstitch close to the edge.


and that's it! It's pretty simple and easy, right? Sewing a wallet or bag with a zipper is not difficult. I personally like to baste the zipper first before doing the permanent stitch. That way it will come out neater.


VIDEO TUTORIAL:


Small Bifold Wallet


Now you have an option for making The Nuno Wallet with a zipper pocket instead of a flap pocket. This Nuno small wallet is very compact and functional. With cashless payment becoming a trend everywhere now, many people carry fewer cards.

I hope you can learn a few things from the tutorial. Do let me know in the comment below if you have any questions.


Thank you for stopping by!

Happy Sewing

Elvira


Mini Trifold Wallet Video Tutorial

India

 
Wallet Video Tutorial
Midori Wallet Video Tutorial

Finally, the video tutorial for the Midori Wallet is up on YouTube and  I am happy to cross one list from my to-do list!  A few days ago I was cutting a Wonderland fabric to make a small bifold wallet for order and I had a small piece left, which is just perfect for the flap part of this trifold wallet. So I went ahead and cut another set. It's still on my RTS (ready to sew) box. I hope I can finish it by next week.


Get the Pattern on ETSY


Midori wallet is pretty easy and quick to sew. Also, it doesn't need a lot of materials. The wallet can hold 6 cards and more. I personally carry about 4 cards and nowadays in India mobile payment via Google Pay is very common. You can even purchase candies and Gpay it. And during the lockdown, we always bought most of the things online and now I sometimes forget to carry cash when I go out. 


Wallet sewing Pattern
Zipper Pocket 


Wonderland Trifold Wallet


If you love a minimalist wallet, this project is perfect for you. The pattern comes with full-scale templates that you can print out at home. Do let me know if you make one or if you have any questions. I'd be glad to assist you. 


Thank you for stopping by,

Happy Sewing!

Elvira 
*****************


******************


NEW PATTERN - Nuno Small Bifold Wallet


Hello there,
Finally, the pattern for this small wallet is now available both on Etsy as well as on my Webshop. It's on 20% Off till Monday - India time! 

The pattern has full-scale templates with step-by-step photo instructions. It has 2 options for flap closure as well as zip-around closure with only using a single zipper tape! A super quick and easy project you can do over the weekends. 


I've been making and selling this wallet in the shops and everyone loved it! It's a perfect project to use your fave scraps fabrics. I'm currently using one too cos I love going minimalist. I can just put the wallet in my small sling bag and I am ready to go. 

The pattern has been sitting in my draft folder for a long time. Truly, I enjoy the sewing part more than the writing part. 


I'll be working on the video tutorial, Insha Allah I can share soon. I recorded the making videos but I need to find time to sit and edit it properly. So, if you purchase the pattern and have questions, don't hesitate to email me. I'd be glad to help you. 

Thank you so much for your supports!

Happy Sewing,
Elvira


{Mini Tutorial} - Passport Wallet Lanyard

I just released my first PdF Pattern in Etsy "The family passport Wallet". I made my first Family Passport Wallet 2013 and it was an instant hit in my Etsy shop. The wallet has been going through a lot of redesign. It's my friend Namrata of Bagstock who encouraged me to write the pattern. 


and yes, I was nervous and excited. I will post here in my blog if there is any changes or updates or what improvisation you can do with the pattern. 

And this first post is about the lanyard. I did not include the lanyard tutorial in my pattern as nowadays many people prefer to use leather strap which is really cute and can give a vintage-y look about your wallet. I did few for my etsy customers and they loved it. 

But personally I still like making fabric lanyard for my handmade wallet. So, here's how : 

What you need {this is Lanyard for Passport Wallet}

2.5" x 16" fabric strip
1.5" x 15" woven interfacing
3/4" swivel hook

Let's get started 

 Iron the woven interfacing on the wrong side of the fabric strip. 


I have this 1.5" woven interfacing strips which I simply LOVE. It's my favorite for making bag handles/strap. There is a 3/4" one too. 


Fold the side seam and iron nicely


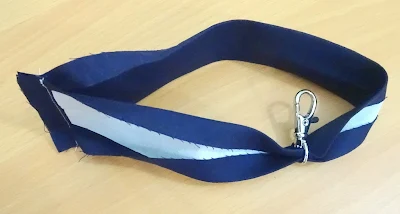
insert the strip into 3/4" swivel hook


now, fold the strip so the short ends meet and sew with 1/2" seam allowance(like in the picture)


make sure you put it correctly / not twisted ^_^  


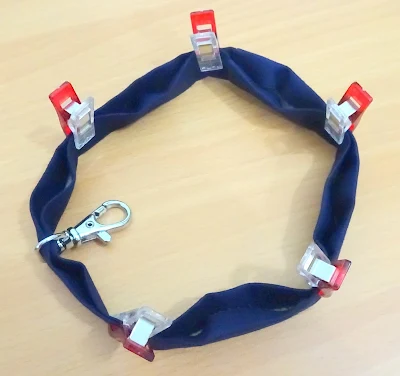
Now, fold and clip and sew along the both edges with 1/8" seam allowance


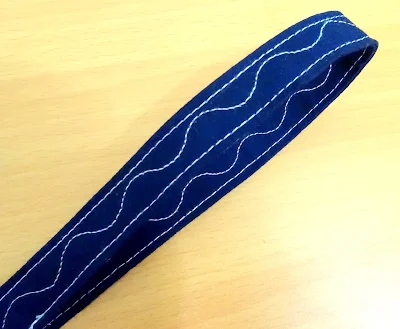
and you can use your decorative stitch too. That will make your strap unique. I love using different kind of decorative stitch but this serpentine is my favorite. 


Now, finish your lanyard by sewing 1/2" under the hook. 


Voila! You have a pretty handmade lanyard to go with your passport wallet.


The Family Passport Wallet Pdf Pattern is available here :


Thank you for stopping by today

Happy Sewing


Latest Fabrics

Latest Video