Powered by Blogger.
Showing posts with label Wallet PdF pattern. Show all posts

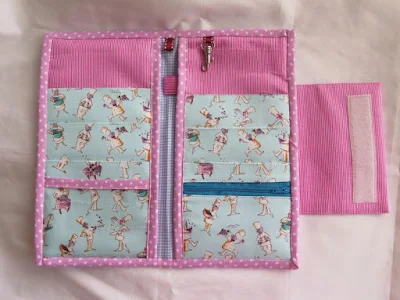
Pattern Update: Adding Flap Closure on Rosie Wallet

Handmade wallet
Rosie Cardholder Wallet


Hello,

Today, I will share how to make a slim flap for Rosie Wallet. This can be another alternative to the original pattern with the hidden flap. 


Materials:


Contrast fabric - cut 1 - 2" x 5.5" (5 x 14 cm)

Interfacing - cut 1 - 2" x 5.5" (5 x 14 cm)


STEPS: 


1. Iron the interfacing on the wrong side of the contrast fabric and fold the longer sides towards the center like in the picture below. 


2. Now fold the flap so that the short ends meet.


3. Sew around the three sides, leaving the raw edge side unsewn.


4. Place the flap on the center left of the exterior panel and baste stitch. The seam allowance is 1/8" (3 mm).


5. On the right side, install the snap button socket, approximately 1" (2.5 cm) away from the center.


6. The button cap should only placed through the exterior panel and the first lining panel. You can install the button cap before attaching the binding or after. 


7. On the flap, install the other part of the snap button approximately 0.5" (1.3 cm) away from the top.


Now continue finishing the wallet as per the pattern. That's super easy, right? 


If you are not sure whether you will be able to sew Rosie Wallet yet, you can watch the video below for more guidance. 


If you already purchased the pattern and have any doubts, feel free to email me. If you have not,  don't forget to use the coupon code CVG20 when purchasing the pattern


Thank you so much once again for your continued support! If you have any questions regarding sewing or quilting and want me to make video tutorials, simply reply to this email. I'd love to hear your ideas! 


Until next time,

Happy Sewing!


Elvira


Coming Soon ~ Card Wallet Organizer Pattern

I'm so excited to announce that my second PdF Pattern is coming  real soon. Right now it's being tested by my fabulous Facebook Friends (I love facebook for that!!) 

The tester photos have been coming out really fabulous!! I love how everyone is using different kind of fabrics and each one is so fantastically pretty. (sneak peek photos soon!!)

I have made few wallets from this upcoming pattern few months ago (here and here)
 

Pattern making is a learning process for me. Even if I wrote several tutorials before, but selling pattern is totally different. There is a certain degree of  responsibility that I feel. Maybe it's just me, but I want those who buy my pattern will feel "yes, it's worth it".  From my First Pattern I learned  how to convey what's in my head  with less confusing sewing terms or less confusing photo angles. I tried my best to use a simple English that can be understood by non English speaker. 


This time around, I learned to make graphics (instead of photos) to use in the instructions and also added alternative designs (yay!!)


I've been trying out the pattern using different kind of interfacings too, I will elaborate more in my next blog post. 

I'm so excited about this pattern! I'm sure you will love it. 
Sign up for updates in the top right corner of this blog and get the first  updates of the release.

Until then,

Happy Sewing


{Mini Tutorial} - Passport Wallet Lanyard

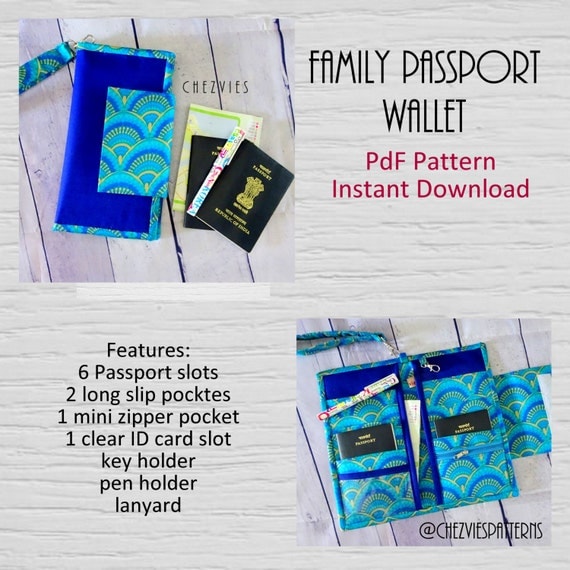
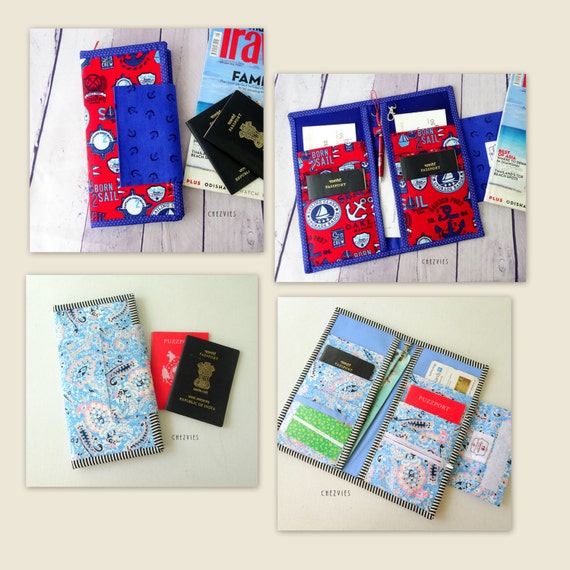
I just released my first PdF Pattern in Etsy "The family passport Wallet". I made my first Family Passport Wallet 2013 and it was an instant hit in my Etsy shop. The wallet has been going through a lot of redesign. It's my friend Namrata of Bagstock who encouraged me to write the pattern. 


and yes, I was nervous and excited. I will post here in my blog if there is any changes or updates or what improvisation you can do with the pattern. 

And this first post is about the lanyard. I did not include the lanyard tutorial in my pattern as nowadays many people prefer to use leather strap which is really cute and can give a vintage-y look about your wallet. I did few for my etsy customers and they loved it. 

But personally I still like making fabric lanyard for my handmade wallet. So, here's how : 

What you need {this is Lanyard for Passport Wallet}

2.5" x 16" fabric strip
1.5" x 15" woven interfacing
3/4" swivel hook

Let's get started 

 Iron the woven interfacing on the wrong side of the fabric strip. 


I have this 1.5" woven interfacing strips which I simply LOVE. It's my favorite for making bag handles/strap. There is a 3/4" one too. 


Fold the side seam and iron nicely


insert the strip into 3/4" swivel hook


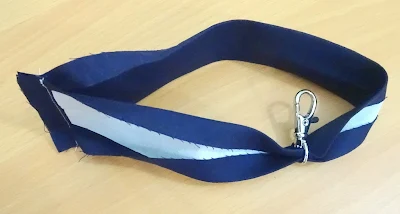
now, fold the strip so the short ends meet and sew with 1/2" seam allowance(like in the picture)


make sure you put it correctly / not twisted ^_^  


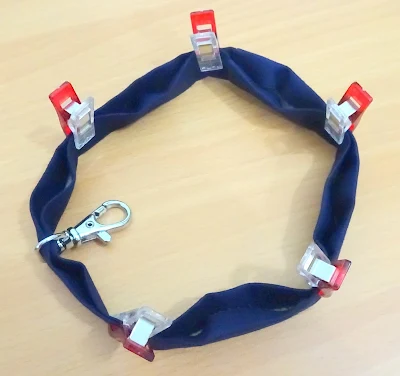
Now, fold and clip and sew along the both edges with 1/8" seam allowance


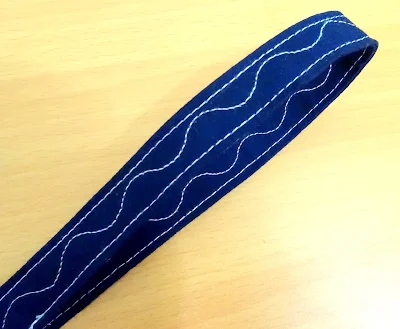
and you can use your decorative stitch too. That will make your strap unique. I love using different kind of decorative stitch but this serpentine is my favorite. 


Now, finish your lanyard by sewing 1/2" under the hook. 


Voila! You have a pretty handmade lanyard to go with your passport wallet.


The Family Passport Wallet Pdf Pattern is available here :


Thank you for stopping by today

Happy Sewing


{NEW PATTERN} Family Passport Wallet PdF Pattern

I'm so happy to announce my new Pattern, Family Passport Wallet PdF Pattern now on Sale in Etsy and my Shop
The past 3 months have been a huge learning experience for me. 


Thank you for my wonderful friends who helped me testing the patterns. I am really grateful for their feedback and their beautiful creations. 

here are some photos from the testers :

Chera from the famous Phipody made this lovely wallet. Chera is favorite with many bag designers. Her works showed how much love she puts into each creation. I was  very grateful when she said she will test for me. 


 She used leather for strap which make the wallet stands out and looks very smart.


This cute multi color elephant passport holder is made by Prabha Matthew of Quiltaholics. She told me even her son said it's very cute :). Prabha made beautiful quilts. I was very grateful when she was readily said yes to test my pattern.

 I love the blue and grey combination. She used mesh for the ID Card slot which is very clever choice.

This beautiful pink Passport Wallet was made by my dear friend Hernik of Ninu' Handmade.

Mbak Hernik was very excited when I asked her to test for my first pattern in spite of her busy schedule, she managed to make this pretty pink wallet. Thank you so much!!


And this pretty Lavender wallet was made by my bestie, Agnes. She's a sewing enthusiast  who's busy raising her cute daughter. 


When I told her that I wanted her to test my first pattern, she was happily agreed. Thank you so much for putting up with my crazy ideas and for being my sounding board. 


This Family Passport Wallet pattern is a quick sew and will be a great handmade gift for your family and friends, especially for family who loves to travel or moving abroad. 

My family of 4 loves to travel and whenever we travel, we have to carry a lot of documents and passports. And since I'm Indonesian living in India, I have to carry more documents. This travel wallet help us to be organized and not to worry about misplacing any travel documents. 

Family Passport Travel Holder PDF SEWING PATTERN, Hold 6 Passports, Instant Download, Family Passport Wallet Pattern

The pattern is now ON 10% SALE in ETSY 
or you can buy directly from my Shop using the link below: 
(Currency conversion will happen during the check out with PayPal)


Latest Fabrics

Latest Video