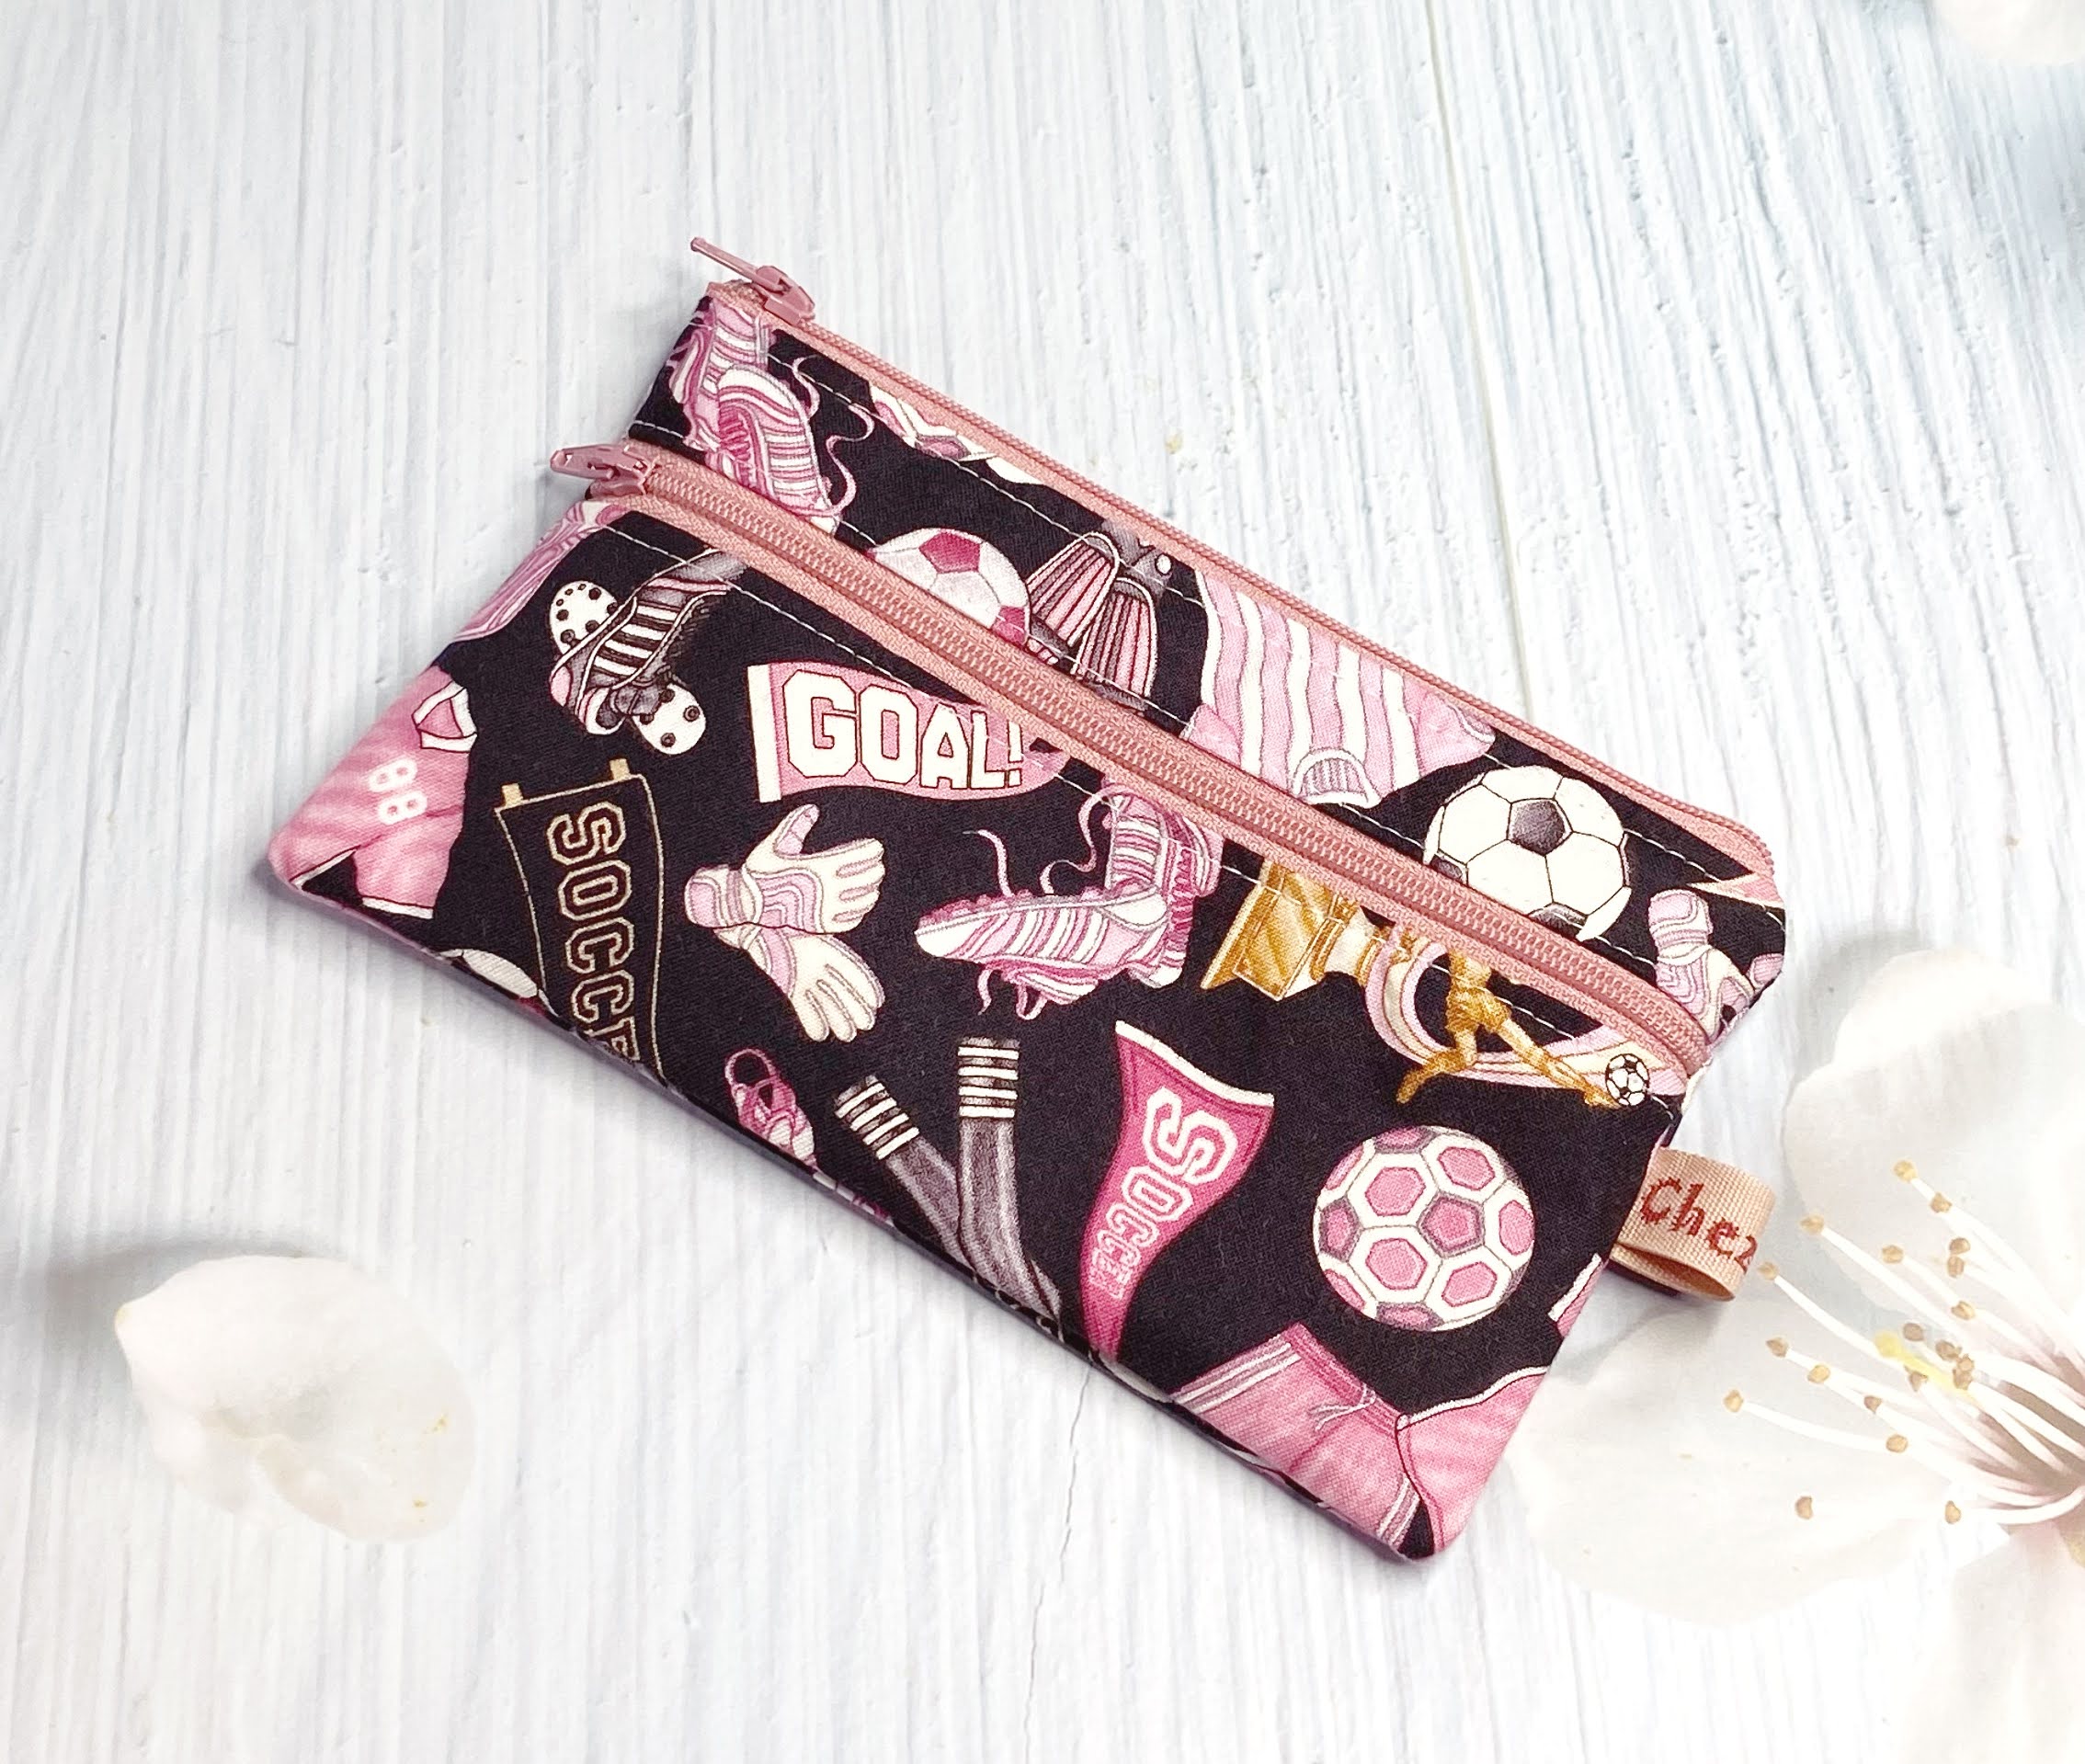
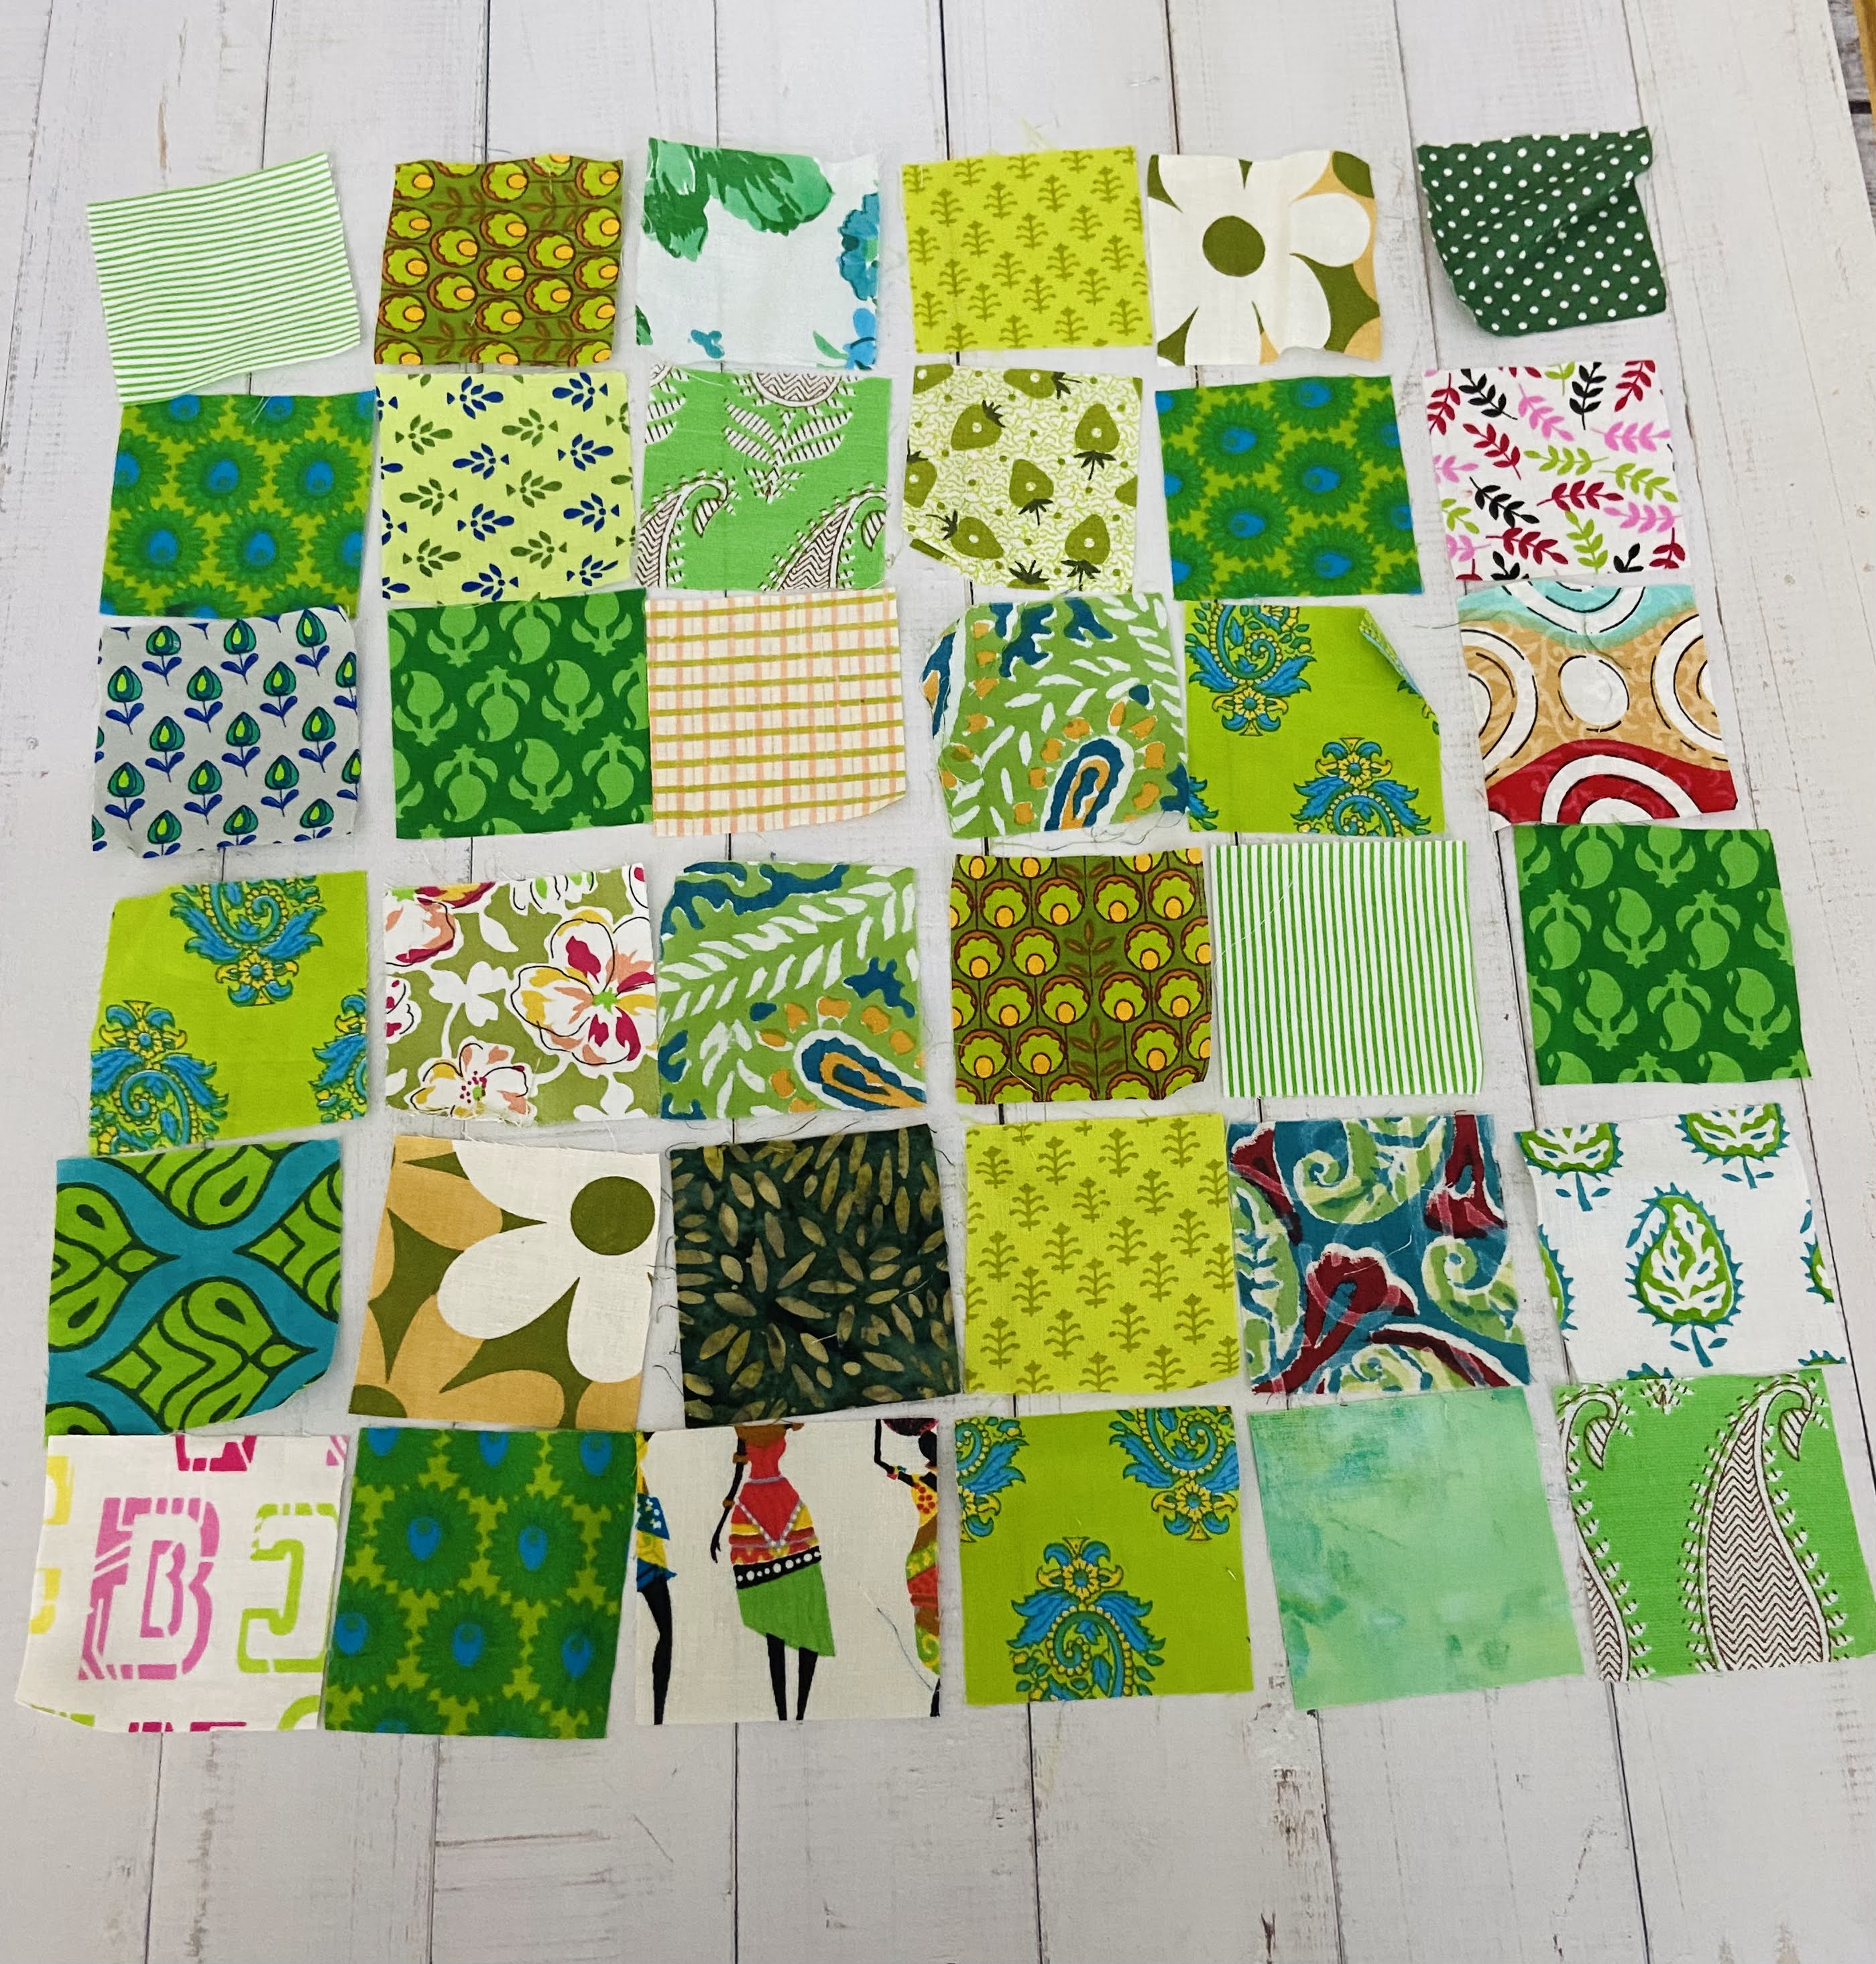
A few months ago I made a quick patchwork pouch from block print fabric when I was creating fabric bundles for the shop. but did not get to share them here on the blog. Cutting fabrics always boost my sewing mood. And who can resist when you see these beautiful fabrics!
If you have a lot of scrap fabrics, here is a fun project to make. This project is super easy and it's a great gift to make. Everyone loves patchwork pouches!
Here's what you need to make the pouch:
1. Fabric scraps of various prints, sizes, and colors. I am using these fun fabrics.
2. Scrap Cotton Batting (9" x 13" approx)
3. All Purpose Woven interfacing (7.5" x 12" ) - ( if you are in India, you can get it HERE)
4. Lining Fabrics (7.5" x 12")
5. All Purpose Zipper #3 - I am using a 9" zipper.
Now, let's watch the video on how to make this cute quilted-as-you-go pouch.
Isn't it fun? The pouch turned out very soft and just the perfect size to carry essential makeup! You can whip up this pouch in a few minutes to make a quick gift! Let me know what you think in the comment below.
I hope you're all doing well! I've been pretty busy in the past few weeks, especially with the holy month of Ramadan going on. But I am happy to finally put up a video tutorial for the Classic Trifold Wallet. Actually, I've been working on it for a couple of weeks. Whiles sewing and taking videos don't take much time, editing really needs a good mood and of course a lot of screen time.
I made the pattern when I just started out, and after getting a lot of feedback, I decided it was time to revise the pattern. While there are no drastic changes in the pattern, this time, it is written in a better way and also uses real photos and also diagrams to help understand the process better. And also I hope with the video, people can have a better understanding.
The changes I made with the pattern are only on the construction of the interior zipper pocket and also added better templates for the card slot construction. You can watch it in the video below:
Wallet features:
- Sturdy construction that makes the wallet last longer
- 12 and 16 cards variant
- Spacious to carry cards, a smartphone, a passport, etc
- Binding to hold the wallet together and also give a unique handmade look.
- Various supporting video tutorials
The lavender wallet below I made using printed linen and combined it with shot cotton fabric. It turned out very crisp and chic!
For the materials needed to make this wallet, you need:
Today I want to share the new beginner's friendly wallet pattern, KODOMO WALLET, that I recently released on my Webshop as well as in my Etsy shop. Kodomo means child in Japanese and this is what exactly the wallet is about. A simple and functional wallet that is perfect for kids as well as adults.
I have been making this kodomo wallet in my handmade shops and it is popular with my customers. They love the simplicity and functionality of the design, and also the fun print choice we can use.
If you are a beginner or novice sewist in wallet making, this might be the perfect pattern for you.
The materials needed to make this pattern:
3 Fat eighth (9” x 22”) quilting weight fabrics for exterior, interior, and card slots
1 Fat eighth lightweight fusible non-woven interfacing for card slots
1 – 0.75” diameter cute button
5” long 1/4” wide elastic
#3 all purposes zipper – 9” or longer
And of course, video tutorial is also available on my YouTube channel for those of you who are more visual learners.
I made a couple of wallets for the shop using this kids' print fabric that I have in my stash. These Alice in Wonderland Wallets are really cute and are popular with my customers.
The Kodomo Wallet has 6 card slots, and 1 zippered compartment and is closed with an elastic and cute button. Just perfect to keep cards, cash, and coin. The size is also pretty compact at 4" x4.5" and can easily fit into a pocket or small bag.
The pattern is written in English with step-by-step instructions that are easy to follow and also comes with full-size templates.
I made a few double zippers pouches a few months ago and record a video as well, but somehow the editing got shelved. However, this morning, I woke up with the idea of finishing the editing work!
Since I got my new iPad 10 a few months ago, I prefer to edit my videos on my iPad. My favorite is the InShot app. I've been using the app for years. I wasn't able to use InShot on my previous iPad Air since it was no longer compatible, but with my new device, I can continue to use this app for all my video editing needs. What is your fave editing app?
So yeah, now the video is live on my Youtube Channel. In the video, I scaled down the pattern a little bit. I used the doitrei pattern and reduce the height by 1/2 inch. It turned out pretty cute and just perfect for a wallet and even holds my iPhone 11. You can add tabs on both sides and turn the pouch into a hipster bag or mini sling bag!
This pouch is very easy to sew especially for beginners who want to learn to sew with a zipper. I use quilting cotton fabric and all-purpose woven interfacing. The interfacing is only applied on the exterior pieces. You can always use it on both the exterior and lining if you want a more structured pouch or add batting on the exterior piece.
Do let me know what you think of the video and if you have any questions, simply leave a comment under the video. I really enjoy making videos and I have a few that I still need to edit now and some I don't get to post on the blog (it's on my drafts actually). I'll publish the blog in the next few days or weeks.
Here's another double-zipper pouch I made! I cut a few more pouches to sew and now I am waiting for the mood to kick in. LOL. Nowadays I am batching everything when I am working on orders. That way I can always have something to sew.
Spring is almost here. Well, in our part of the world, February is always dry and dusty and then followed by seasonal flu season. I hope you all stay healthy!
Last week, we at the Desi Quilters group on Facebook started Quilting Bee. It's been years since we did the quilting bee. There are 24 participants divided into two groups - Oddbees and Evenbees. I am the first queen bee for the Oddbees group. When Tina announced at the beginning of February that we are going to have a quilting bee again, I am very excited. I mean, this is the way you can learn and in the meantime get your blocks done in no time, right?
I know I wanted to make a 36-patch block made up of mini charms in different colors. It's been high on my list. So for the 1st bee block, I go with this simple block! I made a 36-patch quilt a long ago and it's still my fave.
This block is very easy and my block finished at 12" square. The fabrics I used are assortments of cotton fabric scraps that I previously cut and keep.
So for this particular 36-patch bee block, I want one block in ONE color shade, and the scrappier the better.
It's super easy to make. All you need is 36 pieces of assorted 2.5" square pieces of fabric.
1. First step is to arrange the fabric pieces to your liking, alternating between light and medium/dark. Although it's not always easy, that's fine!
2. I like to make them into a 9-patch section. Sew them together with a 1/4" seam allowance and press the seam to the darker side.
3. After finishing 4 mini blocks of 9-patch, iron the blocks. I am using assorted fabrics, some fabrics get a bit stretched after ironing. That's fine for me.
4. Now, trim the blocks to 6.25" square.
5. Sew the 4 blocks together and voila you get a 12" square block.
I made 2 blocks as samples for the quilting bee and I am so excited to see everyone's block. We have 14 quilters in the odd bees group. And guess what? I already got one in the mail yesterday. Priya sent me her pretty pink block along with lovely gifts!! Thank you, Priya!!
There are several blocks already posted in the group and I am so looking forward to receiving them. I will update again when I receive all the blocks!
It's been a long time and I hope
you all are doing great. There are a lot of things happening right now at ChezVies,
some are sewing related and some are not.
At my sewing corner, recently I
updated the Phone & Kindle Pouch pattern after getting a lot of
constructive feedback via emails as well as comments on Youtube.
Oh, I also name it the MiniMax Crossbody bag. It's a mini bag with
maximum utility. Truly giving a name to a pattern is not easy, it took me 3
days to find the name that I feel will match the bag.
For the second one, I also added
instructions for adding a back zipper pocket, which I also previously shared in my blog.
In the new version, instead of a
picture diagram, I used real photos in the tutorial with clear step-by-step
instructions. I also added a video tutorial for using faux leather or vinyl.
Thank you for being part of my
sewing journey and this creative community! If you shared on social media
please use hashtag #chezviespatterns. I would love to see your lovely
creations.
I recently made some changes to the blog URL. It's been on my mind to do this, to streamline the website. Now https://www.chezvies.com will be the landing page where people can choose where to go from there. The BLOG URL now changed to https://blog.chezvies.com.
I'm still working on changing the backlinks (that is the links that go to my older posts). It will take a while. But just in case you end up with a BROKEN LINK, simply add BLOG. (with "dot) on the URL address on your browser.
For e.g: https://chezvies.com/2017/04/ will result in a broken link, so simply add BLOG. like this https://BLOG.chezvies.com/2017/04
Please bear with me as I am not very savvy. A lot of things have changed and keep changing and I am hardly able to catch up with these technological changes nowadays!
A lot has happened in the past few months, like my elder son finally settling into college and enjoying his new college life at the University of Bath in the UK. In the past 2 months, he has been learning a lot, from living a sheltered life to living alone, and making new friends in a new country. Adapting to the new environment. It's not easy, especially for 19 year old but as a parent, we are really proud of him, as he evolves to become an independent human being living and adjusting in the new country. Now we can only pray that God will always protect and guide him.
Also, I finally went home to visit my mom and my sisters in October. I went with my younger son and both of us had a nice time in Indonesia, catching up with family and friends. It was really a much-needed trip, especially for me.
Before going to Indonesia, I managed to finish a quilted handbag. The patchwork was a leftover block from this wall hanging. It was a sudden decision. As usual, before leaving for a holiday I always have this urge to make a few projects. I am glad I did it though. The idea was to make a small sling bag just for a phone and wallet. But since the block was pretty wide, I decided to add a faux leather accent at the bottom. I did not have time to make the handle though. So I just used the handle from another bag! As long as it served the purpose, it's fine. I always prefer a fabric bag as it's lighter and even if you fill it up with lots of stuff, like passport wallets, a cardigan, etc it is still light.
From my sewing room, nothing much has happened. I am still doing whatever I can right now from the corner of my drawing room. I am truly grateful for those who keep supporting my small businesses. I'm happy doing and sharing what I made with all of you.
As we are nearing the end of 2022, I don't really have any resolutions. I guess I will keep doing what I've been doing, maybe working on my Youtube Channel and sharing more tutorials and stories. And writing more on the blog.