Powered by Blogger.
Showing posts with label 2021 Quilting. Show all posts

VIDEO TUTORIAL - Potholders from Scraps

 Hello,


I have a mountain of scraps in buckets and bags all around the house. Somehow I just don't have the heart to throw them away. Whenever I see my fabric scraps I feel inspired and full of ideas, but then those ideas remain on my "bucket list". 

A few weeks ago, Tina and I discussed the next swap, after the successful swap we has last month in Desi Quilters. This time she has with the idea of exchanging Potholders and as usual, she came up with the most suitable name "pot of gratitude". This is to remind us to always be grateful during this Pandemic and by making a gift for our virtual friends who always be there to help in our crafting or quilting journey. 


Potholder Tutorial

So, let me talk about potholders that I usually make.


1. Batting

The first question that people ask is always about what kind of batting to use for potholders. Well, we don't have thermal batting for retail here in India. I usually use double or triple layers of cotton batting. A few years ago before cotton batting was easily accessible, I use a few layers of cotton flannel (like THIS coaster). If you have scrap batting, you can use it even if it's narrow strips you can layer them. 


mug rug tutorial


2. Fabrics. 

Store-bought potholders usually use thicker or canvas cotton. I normally use quilting cotton or poplin cotton. And if I use Indian fabrics (mulmul) I usually use nonwoven interfacing to give additional weight. On the back, you can use casement fabric or canvas if you have one.


crumbs quilt


3. Quilting.

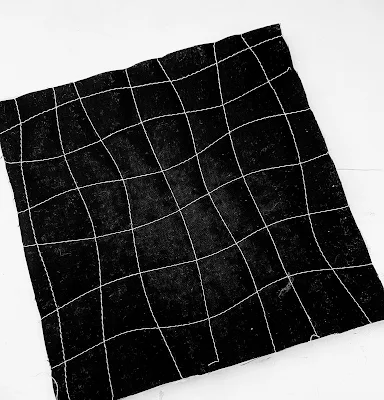
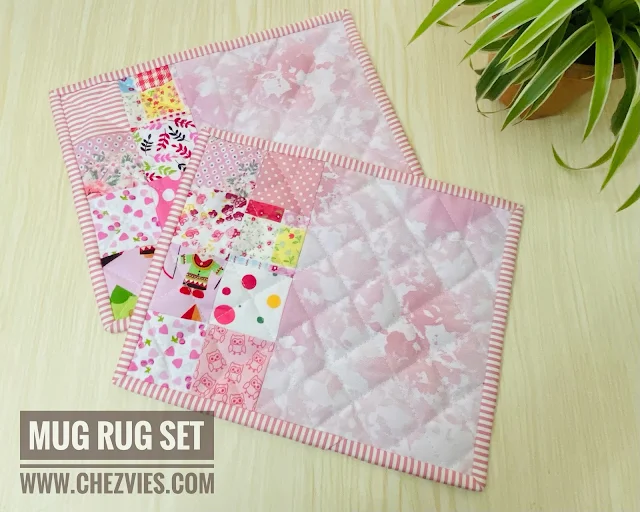
You can either sandwich two layers of batting with top and backing and quilt them together or you can quilt the top and back separately like in THIS mug rug. I personally prefer the latter because it turned out thicker which is perfect for potholders. You can quilt the top with denser quilting lines but I'd suggest using less dense quilting lines for the backing. 

potholder tutorial

potholder tutorial


4. Binding

For square or rectangle potholders, I'd suggest using a jellyroll strip. A 2.5" wide is a good one, but if you use thicker batting, you might want to use a 3" wide binding. I normally used 1.5" wide binding for small quilts, but since we're going to use the potholders a lot, thicker binding is always better. 

The same applied to bias binding. In this pumpkin potholder video, I use scraps of about 11" x 17" fabric to make 2.5" wide binding which yields around 1.65 meters of binding strips. Enough to make 2 potholders. 

I wrote about making bias binding in THIS POST using a square of fabric. You can make bias binding from fat eighth or fat quarter like in THIS VIDEO


Bias binding tutorial
Bias Binding Tutorial


Alright, now about the POT OF GRATITUDE SWAP, here are the rules:

- It should be pieced or appliqued

- Should be quilted by hand or machine

- Embroidery can be added but avoid beads and sequins

- The edges must be finished with binding or facing.

- There must be a loop for hanging the potholders.  

- Must be made according to your partner's mood board. Sonalee wrote how to create a mood board on her blog HERE

In the videos below, I shared 2 projects that I made using fabric crumbs. Not really make a dent in my scrap bins but I am using only scraps here. So I'm pretty happy! 


scrappy potholder


Let's get down to work now


For the Crumbs Potholder, you need: 

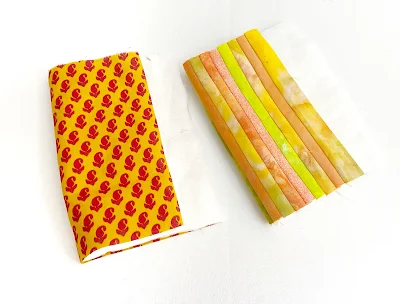
- 5" long crumbs strips 0.75" or 1" Wide (1.5 to 2 cm)

- Lightweight Fusible Interfacing 8" x 8" (20 x 20 cm) - cut 1 (optional).
Not necessary if using quilting cotton

- Cotton Batting 9" x 9" (23 x 23 cm) - cut 2

- 1 strip Jellyroll or 2.5" x WOF (6.5 Cm x WOF)

- Potholder Loop 2.5" x 3" (6.5 x 7.5 cm) - cut 1


And here what you need to make the Pumpkin potholder:

- Download the Template HERE

- Skinny Strips 1" x 7.5" Long - 20 pieces or so

- Backing Fabric: 7.5" x 9" - Cut 1

- Cotton batting 7.5" x 9" - Cut 2

- Fabric for bias binding - I used 11" x 17" which yields around 65" (165 cm) of 2.5" wide bias

binding. Enough to make 2 potholders.


I hope you find the video helpful, especially for beginners. Please do let me know in the comment below if you have any questions. 


pumpkin potholder


Thank you for stopping by!

Happy Sewing

Elvira


Linking up to these wonderful BLOGS


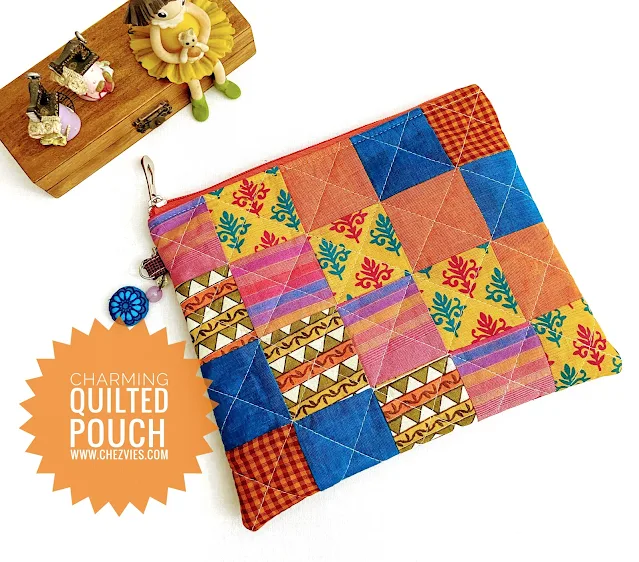
Let's make charming quilted pouch


patchwork bag tutorial
Charming Quilted Pouch (video tutorial)


When Tina Katwal asked me if I'd like to make a quilted pouch tutorial for our Desi Quilters group, I immediately said yes. I was thinking of making one with handloom fabrics as the 7th of this month was National Handloom Day! So it was like serendipity. 

So, I decided to make this pouch or bag using my fave precut - mini charms (2.5" x 25" pieces). To make this bag, you don't need much. 

Materials you need:
20 pieces mini charms of your choice
(40 pieces if you make a patchwork of both sides)
A few Fat Eighth or FQs for Back Panel and lining
Batting (fleece or cotton)
#5 Zipper at least 10" long
(you can use #3 zipper if you wish)
Non-Woven Lightweight Interfacing  
Finished Size 9.5" x 8" (approx)

This patchwork pouch tutorial is for the Love and Healing Swap in our Desi Quilters Group on Facebook. The pattern is for using mini charms but you can easily adapt it using any kind of block or orphan blocks that you have in your UFO baskets. The key is to make the patchwork piece the same size as the interfacing. 
The interfacing will give a perfect finish for the quilted pouch or bag, no matter what batting you're using. I made many patchwork quilted bags and I found this combo is the best. 


Working with handloom fabrics is pretty challenging. If you decided to make one using handloom fabrics, consider prewashing your fabric first. I normally don't ;). As handloom tends to shrink and become out of shame from frequent ironing. Spray starch also helps. 


National Handloom Day


I'm getting a little bit better with the new editing app. I also found a good angle to place my ring light while recording videos :)
Editing does take time but when the mood is good and the boys are happy with Domino's, I can get it done pretty quickly ^^


zipper charms


I hope you enjoy the video! Do let me know in the comment :)
Now, download the pattern below, and let's start sewing those scraps!


Happy Sewing,

Elvira


Starting Kawandi QAL


Kawandi QAL
Kawandi QAL


Hello and happy Monday! 
I mentioned in my previous post about the plan for Kawandi QAL. It was started a few months ago by Brinda Ma'am and we have a Whatsapp group to share our progress. 
 Well, I finally get my quilt prepped up and started making the border. I have a few mulmul fabrics in half-meter cuts and decided to use one of them for this. It's going to be a big-ish table runner. 
I thought of making a lap size quilt but I don't have the confidence to finish it. At least this one will be doable for now. We have to finish it by end of the year. Well, I have a long list of Historical Chinese dramas to company me LOL. 


Kawandi Quilt progress


To motivate me, I make a progress video and will update as I make more progress. I'm very bad at following QAL or SAL, so I hope by making a progress video I can push myself to finish it. 


Hand sewing side effect :)


Kawandi Quilt Making


And why not making two kawandi ? Yup, I'm easily distracted like that. I was searching for scraps and found leftover strips from the Jellyroll Quilt I made earlier. I thought why not started another one? I am making one without border as I plan to turn it into maybe a tote bag? My mind keeps changing as I am quilting it. 

What about you? What are you working on this week? 


Happy Sewing,

Elvira 


Linking Up to these wonderful BLOGS

More scrappy placemats

Scrappy Quilted Placemats
Small Table Mats


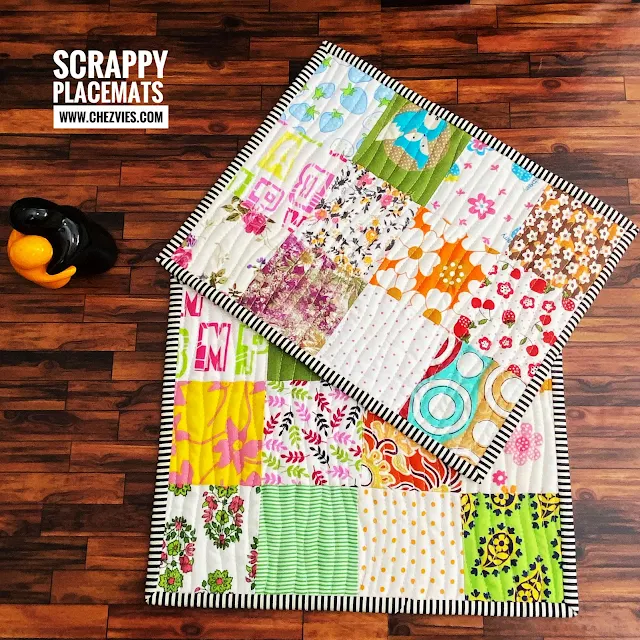
Last week I finished a few small placemats using scraps from my wallet and face mask making. It's fun to pull up scraps cut them into workable pieces. That totally my mood booster activity. Even though these placemats don't really make a dent into my ever-growing scraps, but I am happy to make them into something. I mean, we don't want to waste those pretty prints, right? 

For these medium-size placemats, I cut the patchwork pieces into 3.5" square. My fave is 2.5" but I kinda love this size too. I have a bunch of 3.5" squares cut and will make another set of placemats when  I have time. 


Scrappy Patchwork Mats


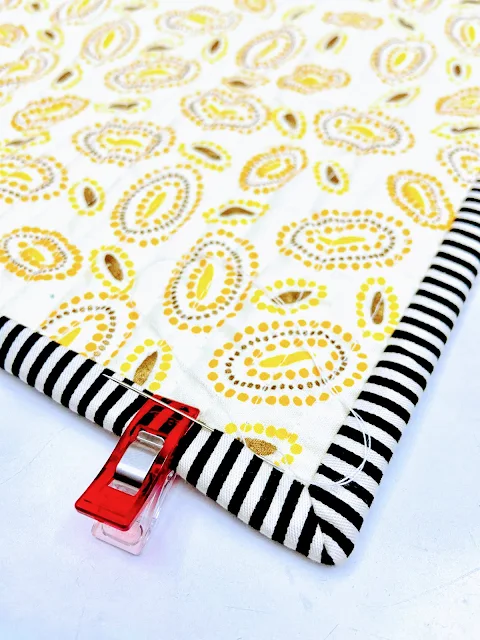
I'm using this yellow dot with golden print cotton fabric on the back and you can easily make these placemats a reversible one, right?  Hand sewn binding is always my personal favorite. For smaller quilts, I like to cut the binding at 1.5" wide, because I found 2.25" wide is too heavy for small quilts. Each placemats measures about 9.5" H x 12" W.


Handsewn quilt binding


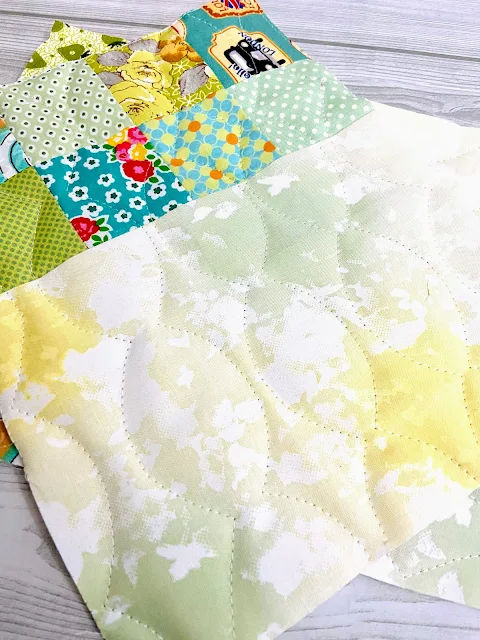
Another set I made was this green small placemat. I am still using the Camo Blenders fabric I got from the Squareinch last time. I posted the pink version of these placemats in my previous post.  On the back, I use a cute chicken print cotton fabric. Making small quilts like these are addictive. So stay tuned for more :)


Small Quilted Placemats
Green Small Placemats


These small mats size is 8" H x 10" H (20cm x 23 cm) and it's just a perfect size to place a bowl of ramyeon while watching my drama. Or for my son's cereal while he's on zoom class. 

I used my scallop ruler to draw the quilting lines and quilt them on my Jack machine. For the small quilts, this hack works well and I like the result. 
 

Quilted Mugrug


Small Quilted Placemats


Scrappy placemats
Scrappy Medium Placemats


Scrappy drawstring bag
Scrappy Drawstring Bag


I have a few scrappy tops done and waiting to be made into something. As you know, I love making simple things, something useful and giftable, just like the drawstring bag above. It's my fave bag to keep essentials like an extra facemask, wet tissue, and hand sanitizer while going out.

I hope I will have time to play with my scraps next week. What about you? What are your fave scrap projects to make?


Until next time,

have a nice day!

Elvira

*****


A few more Kantha quilts


I made a few more small Kantha quilts last month but have not written about them here. I made a larger version of the moonshine and valentine, the size of placemats. I am still using shot cotton fabrics and using Anchor Pearl cotton no. 8. I got a few pearl cotton threads from my SIL and luckily I keep them. 


I still have a few placemats to quilt with more fun colors. I hope I can finish them soon. I got sew easily distracted doing other projects :D


And here are another rectangular Kantha coasters that I finished and added to the Shop. And still using handloom cotton. I really love the handloom border and since some of the handloom fabrics only have one side borders, these coasters are very limited in stock.

what is your fave tea?


Great for your mug or indoor plant mat

And here are a few in floral print and tie-dye combo. 

I had so much fun making all these mini quilts. Handloom ones are rather hard to quilt, but the floral ones are easier and I can finish it quickly while catching up on my Cdramas :)

Thank you for stopping by!

Have a lovely day!

Elvira


Mini Quilts with Camo Blenders


Mini Table Topper

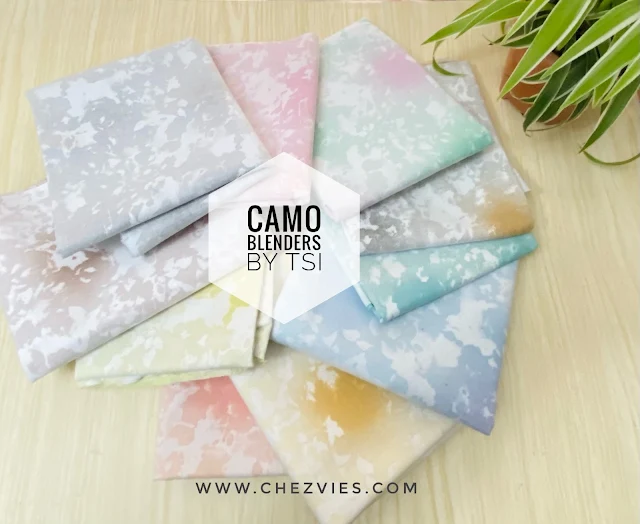
When I got the Camo Blenders bundle from The Square Inch, I was so excited to start making something, but could not decide what to make. The colors are so pretty that I have several ideas in my head. After a few days of contemplating I decided to make a few mini quilts. You know I love making mini quilts. 


Camo Blenders by TSI


I decided on this block I saw in one of my Japan Quilt magazines (according to google translate the magazine is Patchwork Class - 2018 Edition)  and I scaled down the size a little bit. Since the weather is getting warmer, I thought I'll mix cool and warm colors. Don't they blend beautifully? 


The block is pretty simple and quick to do. I used 1.5" wide strips in here. The fabric is quilting weight cotton and it's super easy to work with. I used poplin solid for the combination. 
Deciding how to quilt is always tough for me and the best way when you're confused is to use simple quilting lines. 


And since I am in the mood, I went ahead and made these 2 mug rugs. This is one of my go-to quilt projects to make when I have a lot of things going on in life. I made the mug rugs based on this tutorial


Camo Blenders in 10 Color Ways


I have a few more sets to make with the Camo Blenders! It's just a perfect blender fabric when you need something that can add zest to your projects! Camo Blenders have 10 colors and come in Yardage, Layer Cakes, Jelly Rolls, and Fat Quarters at The Square Inch


Now, I better go and finished a few more mug rugs! Thank you so much for stopping by!

Stay safe & Happy Sewing!

- Elvira-


Patchwork Wallet

Patchwork Travel Wallet


There are so many things you can make with 2.5" squares and it's my fave size to play with.  After making a few drawstring bags, I thought let me make a travel wallet! Since the pandemic started last year, I have not made travel wallets much. And patchwork one should be fun to make, right?

I'm using my own Safari Travel Wallet for this one. If you plan to make one, I pieced the patchwork panel 5 x 4. You have to adjust the length and width according to the pattern. And instead of using all-purpose interfacing, I used lightweight fusible interfacing and batting. This will make the wallet sturdier. 


In the interior, I used different prints of fabrics too and it really gives a fun one-of-a-kind look. Now, I wish I could travel! Let's hope and pray, we can start traveling without much worry! 


For the closure, normally I use a Kam snap button, but this time I used the sew-on magnetic snap! I am glad I bought a few before the Pandemic! I always stock up on bag hardware since we don't get it here. Bag making /quilting supplies and tools are hard to find in retail in India. So, I tend to buy in bulk whenever I get a chance.   


***

The photo below is of a lake on the way to my sons' school. Since the school started last week, I still feel very worried and uneasy but on one side, I feel that it is necessary for them to start going out and learning to be disciplined in following the Covid-19 protocols. We have not let them go on the school bus as yet, luckily the school is only 15 mins drive. So I enjoy my morning ride to drop them :).


Wild Cotton Tree

The wild cotton trees along the highway are blooming. Spring is here!  I hope you stay warm and well wherever you are!

Until next time, thank you for stopping by!

Happy Sewing

- Elvira -

Linking up to these wonderful blogs


Sunbonnet Sue and DIY KIT

I was going through my UFO bins last week and found one Sunbonnet Sue Applique which I did a couple of years ago. I think it must be around 2012 or so when I made my Sunbonnet Journal Cover. I love doing cute applique once in a while. I guess now I'm being too busy that sometimes I forgot to have fun.


Now what to do with this orphan block? Well, why not just frame it!! I bought a set of frames from amazon a few months ago and still have a few small ones that fit perfectly for my Sunbonnet. I simply cut the piece to fit in the frame and voila, I got a new wall decor. 


*****

Yesterday made another drawstring bag using Indian mulmul fabrics. I cut them into 2.5" squares and sew them together. Working with lightweight fabric is challenging, so always use a smaller stitch length and proper needle size.
I did hand quilting in this bag and I love how soft it is when finished. Hand quilting definitely gives a soft cuddly feeling. Love it! I must do more :)
This time, I made box bottom type and added a D ring on the side so that I can attach a long strap and carry it as a sling bag. I am inspired by the wuxia dramas that I’ve been watching for the past few months. The bag turned out so cute!!


See behind the scenes in this video below. 


If you want to learn how to make the bag and not sure about the materials, now you can purchase the DIY KIT in my webshop. In 
I will add more DIY KIT for beginners bag makers or quilters and some will come with Pdf Patterns.
I realized that many people hesitate to start because of the lack of information regarding bag making and quilting in India. Especially for bag making, it took me years to finally found the right materials that go into creating a decent bag. 


This week, I have a couple of hand quilting projects to complete. That's my main goal for this week. I hope I won't be distracting to making other things as I just got my new Quilts Japan last week! 

Thank you for stopping by!

Stay safe & Happy Sewing

Elvira


Latest Video