Powered by Blogger.
Showing posts with label Pattern update. Show all posts

Double Zip Pencil Pouches


Hello,

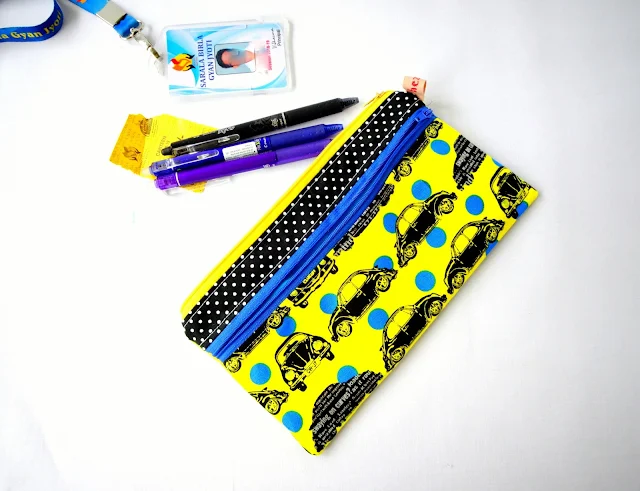
Last month I made these pencil pouches for gifts. It was Sunday morning and my son said he needs a gift for his friend's birthday in the afternoon. I need to make something that's easy and quick. 
When I said I'll make a pencil pouch, he immediately agreed. I've wanted to make this style of pencil pouch, anyway. 

I used the Doitrei Pattern for the double zipper pouch one. (The pattern is now on sale in my Etsy Shop)


It's super easy. From the Double zip Pouch pattern, I extended the width from the pattern to 10 1/2 Inch and proceeded as per the pattern instructions. 

Double Zip Pencil Pouch

This really makes a great gift for anyone. With multi compartments, they can easily stay organized and also they can keep their canteen coupons and ID Card (which are frequently forgotten ~ sigh)


This is my fave gifting pattern now since I love collecting scraps I can easily use them like the blue stripe I used here is from my previous project. 


By changing the fabric print, you can make gifts for men or women, or boys and girls. 

Well, everyone always needs pouches. All kinds, styles, and sizes of pouches. 

If you need to make last-minute gifts, it's time to grab the pattern.
You can purchase from the Webshop (use coupon CVG20) or in my Etsy Shop (it's on sale through Monday!)

Thank you for stopping by,

Have a nice weekend,

~ Elvira ~


How To Hand Sew Wallet Binding Tutorial on YouTube

Hello,


Many of you asked if I can make a video tutorial for hand sewn wallet binding. I took the video quite sometimes ago when I make this matryoshka wallet and I just got a new mobile phone tripod which was just perfect. At least it's better than the mini tripod  I had earlier. With this mobile phone tripod I can get a good angle to shooting the video. The video was shot using my One Plus  phone


Lightweight Tripod

Really, there's nothing scary about hand sewing. If anything, it is easier than machine, since you're totally in control!


Do check out the video, like and subscribe! I am hoping to do more video tutorial in the future, Insha Allah.

Happy Sewing,

Elvira


*******
Some of my posts may contain Affiliate links,which mean if you purchase something through the links in my blog, I may get a small commission at no additional cost to you. I only recommend products and/or services that I personally use and believe will add value to my readers. Thank you so much for your support!

Alternative Card slot on Matryoshka Travel Wallet

Hello,

It's June already and I'm always looking forward for my summer break to Indonesia!
Did I mention that I am working on the pattern of this passport cover? It's now on the testing stage and I'm so grateful for my amazing testers who not only they're giving me their honest feedbacks and suggestions, but also they're also working hard making beautiful wallets,which I am sure will make you inspired!! I will be sharing their posts once the pattern is released next week! so stay tuned or subscribe to my blog so you won't miss the date!

In the meantime, I finished this matryoshka travel wallet. 


I tried a different flap this time and happy with the result. I also tried using a different combination for the card slot. If you already purchase the pattern, here what you can do: 

From the main card slot pattern, reduce the height (or the length) by 3". Then cut an exterior or contrast fabric 8"W x 4" H and sew it to the main Card slot panel with 1/4" seam allowance.

Once they are sewn together, mark the lines from the bottom to the top referring to the diagram given on the pattern. The first mark line should be on the stitching line (see diagram  above). 
Once done, continues as per the pattern's instructions and here how it will look like! 


Let me know what do you think in the comment below or your can join the discussion on my Facebook Pattern Group


I hope you like the tutorial. And if there's any tutorial you'd like to see in my blog, feel free to comment or email me :). 


Develop a passion for learning. If you do, you will never cease to grow. Anthony J. D'Angelo


Thank you for stopping by ~ Have a nice day!

Bifold Wallet and binding mini tutorial

Hello,

 Red Wallet


The sons are having their annual exam until next week. Wish us luck!! Since my MIL is away in Delhi, I tried a few baking recipes from youtube which surprisingly turned out well. 

Another great news from my sewing space is I decided to gift myself an industrial machine. I've been thinking for a long time and finally decided to get this one. I will write a review next week, Insha Allah, after it's assembled. 

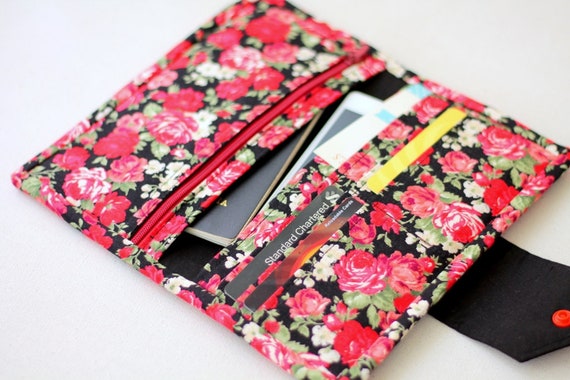
Meanwhile, servicing my Singer HD, I whipped up 2 bifold wallets. It is slight upgrade from the previous one. I made slightly wider version so that it can double up as a phone wallet or to keep passports while traveling.


This red roses wallet was the second one I made. It was finished with binding, as usual. And frankly, it is my preferred method of finishing a wallet. 

The first one I made was a birthing style. If you're a bag maker, you'd know what it means? ^_^. It means, you sew the wallet panels right side together, leave a gap in certain part unstitched to turn the wallet right side out. 


Though it came out really nice,  my sons and SIL all voted for the binding one.I really love the peachy pink color though!


For this peach wallet, I used only woven interfacing without any padding. In the red roses wallet, I added fleece batting. 


Both wallets are the same size and even after filling it up with cards, phone and passport, it still close up pretty nicely. Love how slim it remained. I wish I could be too (after stuffing myself with homemade cakes and puddings! that too with extra cream! LOL)

Day before yesterday, Shweta from Arnel's mommy asked how to finish the corner of the binding. As with my other wallet patterns, I sewed the binding by machine on one side and hand sew the other side. Why hand sewing? Because I love a neat finish. So, here is a mini tutorial, how to sew when you reach the corner. 
But before cutting the binding strip, make sure that the fabric grains are straight. This is important to get a good finish!


1. When you reach the corner, fold the raw edge and pull out the edge so that you get that straight diagonal line. Finger press it. 

2. Fold it over, so that it covers the previous stitching line and clip in place. Trim the wallet raw edge if necessary. I usually trim as I go along.

3. Now continue slip stitch until you reach the corner intersection. 
  
4. Then slip stitch towards the wallet's corner

5. And stitch back towards the inner corner/intersection. 

6. Continue stitching !
I hope that helps! 
So, that's all for today. Keep experimenting, keep sewing! 


Have a blessed Friday!

Linky Party:
Finish it up Friday

Monday Updates

Hello again,

Last week I completed another improv on the family passport holder. This time I converted interior slip pocket into a zippered pocket.


Hopefully, I can write a tutorial for that soon. I forgot to take photos this time. It's very easy and I love how this turned out. I hope she will like it!!


I think I am going to offer this option in the shop along with other options, like an exterior zippered pocket 


 Sewing wallet binding is my favorite. It's like a lava cake after a Pizza dinner LOL. I have a tutorial coming up tomorrow! 

In the meantime, I'll be working on another improvisation this week. Don't you just love when with a single pattern you can make so many varieties?

You can get the passport holder pattern HERE.

It's Monday and here sneak peek to cheer you up this Monday ^^
All these beauty will be available tonight! Limited stock available! 

GO TO SHOP to see what other fabrics are available now 

Pretty Paisley 
  
One of a kind Travel Theme Cotton Fabric

Glace Cotton Ikat Print Fabric

That's all for today,

Until then,

Happy Sewing


{TUTORIAL} Adding Zipper Pocket

Hello,

The last two days was euphoria for me. It's the first time I got published in an online media and that too on Ecwid Blog! I was contacted by them by email early this month and was so excited about it. You can read my Behind the Scene Story in Ecwid Blog. I hope I can inspire more mothers who decided to left 9 to 5 job and pursue her dreams.

adding zipper pocket tutorial

Now let's get down to the fun stuff. I got email from Patti, asking about how to add zipper pocket on the Phone Pouch. Thank you so much Patti!!
Adding zipper pouch is very easy. If you already got the pattern  here is what you have to do. (if you haven't,  you can get it at the end of this post)


After you cut all your Exterior, Lining and Interfacing pieces as per pattern instructions, cut 2 extra lining pieces of Main Panel.


1. Fuse the interfacing on to the wrong side of the back exterior piece. Mark 1.5" down on one of the short end and cut.

Mark down 1.5" 

Do the same with one of the lining piece.


2. Put the lining and exterior pieces right side together (see picture below) and sew with 1/4" seam allowance. Once done turn right side out and press the seams.

sew with 1/4" seam allowance

3. Take 8" zipper and place the lined exterior pieces you just made on both sides of the zipper. Refer to the picture for placement.


4. Top stitch close to the seam and repeat with another line of stitching, approximately 1/4" apart.


I used a leftover zipper and added a contrast color zipper pull. So fun!!

I hope you can see the double line stitching there. 
5. Now, take one piece of lining and place the zippered exterior panel on the lining. All right side up.


6.  Pull the zipper head to the middle and baste stitch all around. I love doing baste stitching instead of using pin or wonder clip. It's totally personal preference.


7. Trim the excess zipper and now your Main Exterior with Zipper pocket is ready.  


Once this part is done, you can proceed as per the pattern instructions. 

It's easy, isn't it? 

You might ask whether you should cut the main exterior piece - that you want to add zipper pocket - bigger? It's not necessary. The zipper will make up for the seam. But if you're not sure about the 1/4" seam allowance, you can cut the exterior piece and 1 lining slightly bigger. Maybe 1 inch bigger to be on the safe side. You can always trim it later.


While making this pouch, I also made the flap slightly rounder. YOu can do that too by drawing  a curvy lines like in the picture below. Use a bottle cap or  plate to draw the curve.

You can use this technique to add zipper pocket in any pouch or bag.


I hope you enjoy the tutorial. Let me know what you think about it and don't forget to share so others can learn too. Sharing is caring ^^.

Thank you for stopping by


Until then,

Happy Sewing

Like this tutorial? Subscribe to get more updates !


Latest Fabrics

Latest Video