Powered by Blogger.
Showing posts with label scrap buster project. Show all posts

Scrappy Quilted Mouse Pad


Hello, I hope everyone is safe and well!

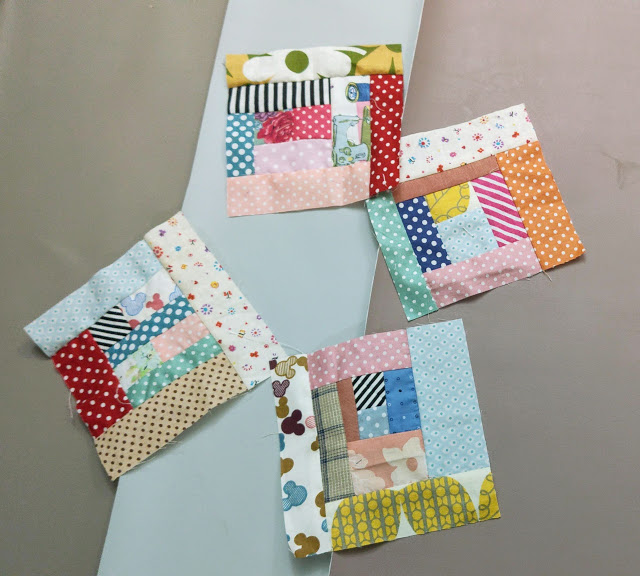
My scrap bag is growing rapidly with every single day from making face masks. I keep them in a laundry bag which now already overflowing. One day I was watching Darlene Video on Youtube about how she turned her skinny strip of fabrics into interesting panels and I just had to try it! 

I have a lot of scrap interfacing and batting. I found one that is around 6" x 8" all-purpose interfacing from making the phone sling bag and I thought it was just perfect. I pulled out a bunch of scraps and start arranging them randomly. 


This is liberating. you just arrange them the way you like it on the glue side of the interfacing and press them nicely. No rule here just covers the interfacing with fabrics!!


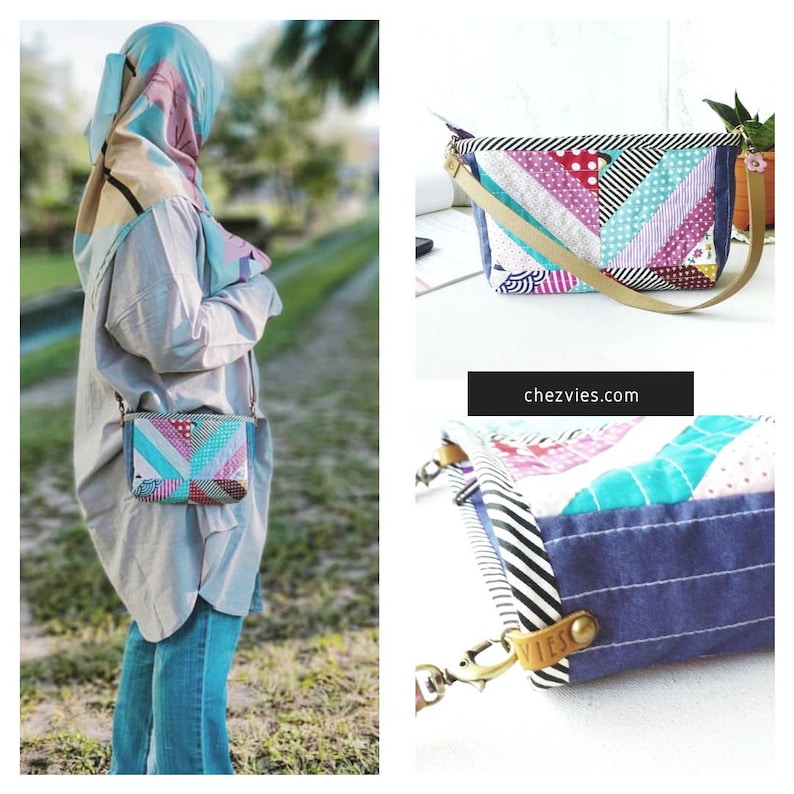
After ironing, I put the panel on a scrap batting and start quilting it pretty densely. The quilting really gave character to the panel, right? And once you're passed this stage the possibility of interesting projects will start popping in. I thought I'll make a mobile sling bag, this will make an interesting flap, right?  
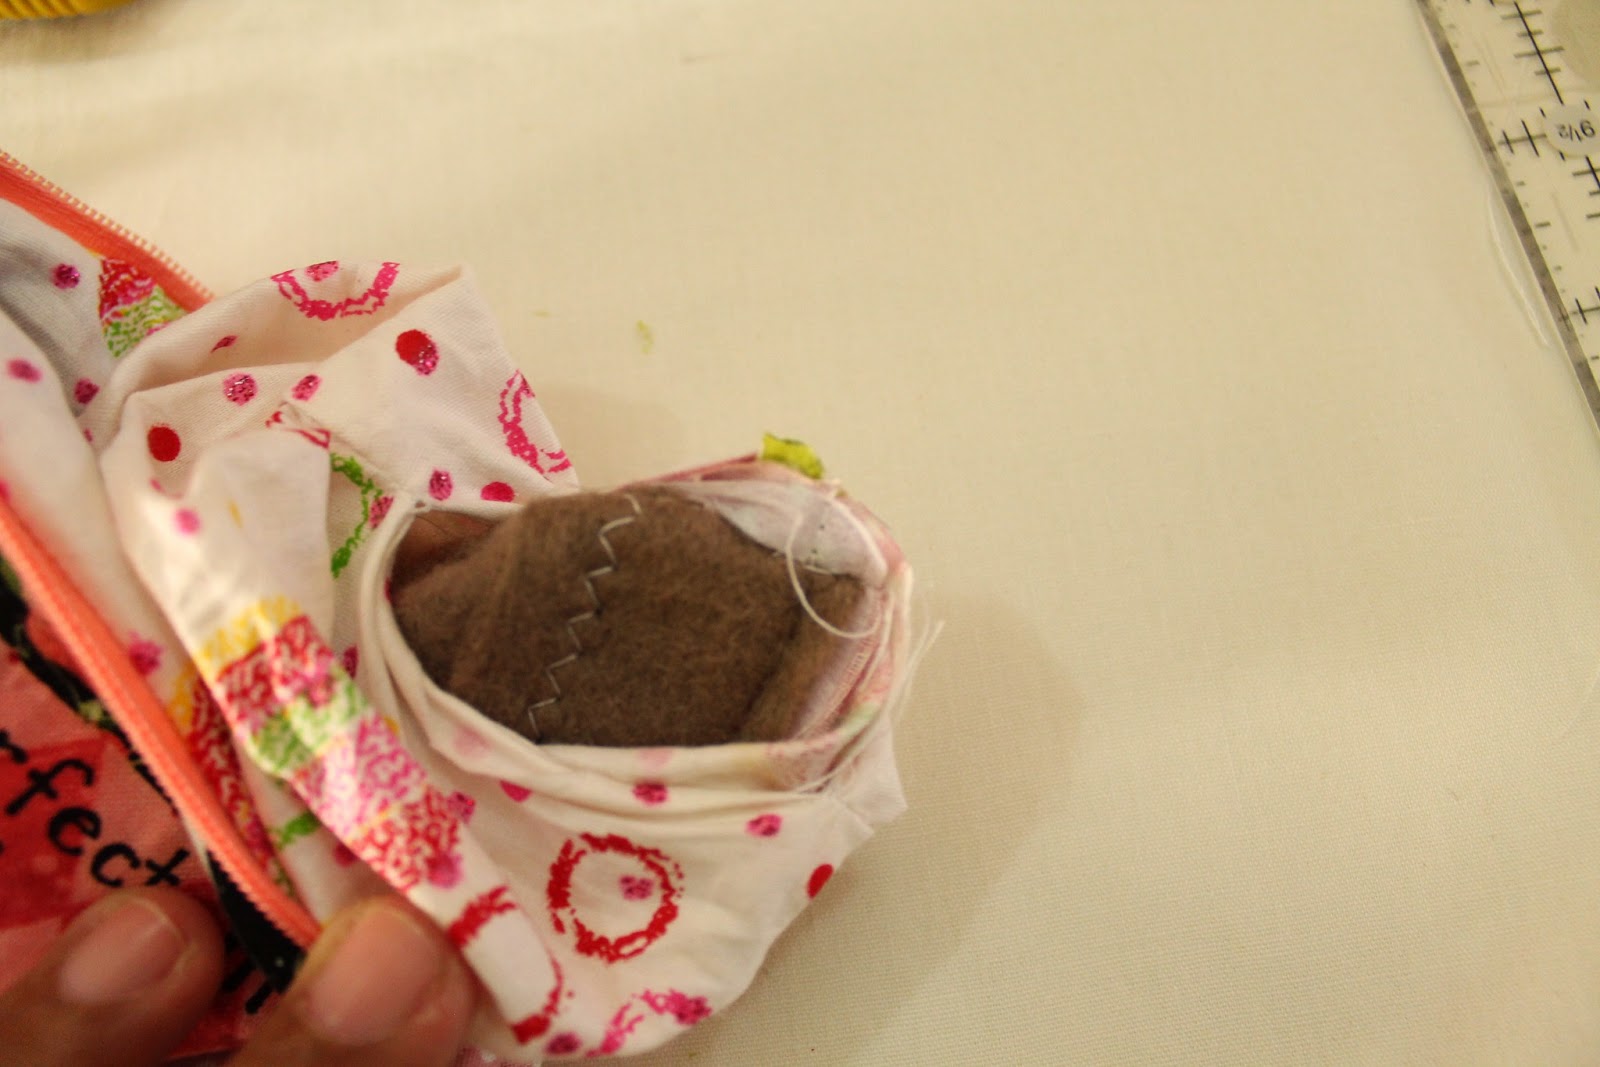
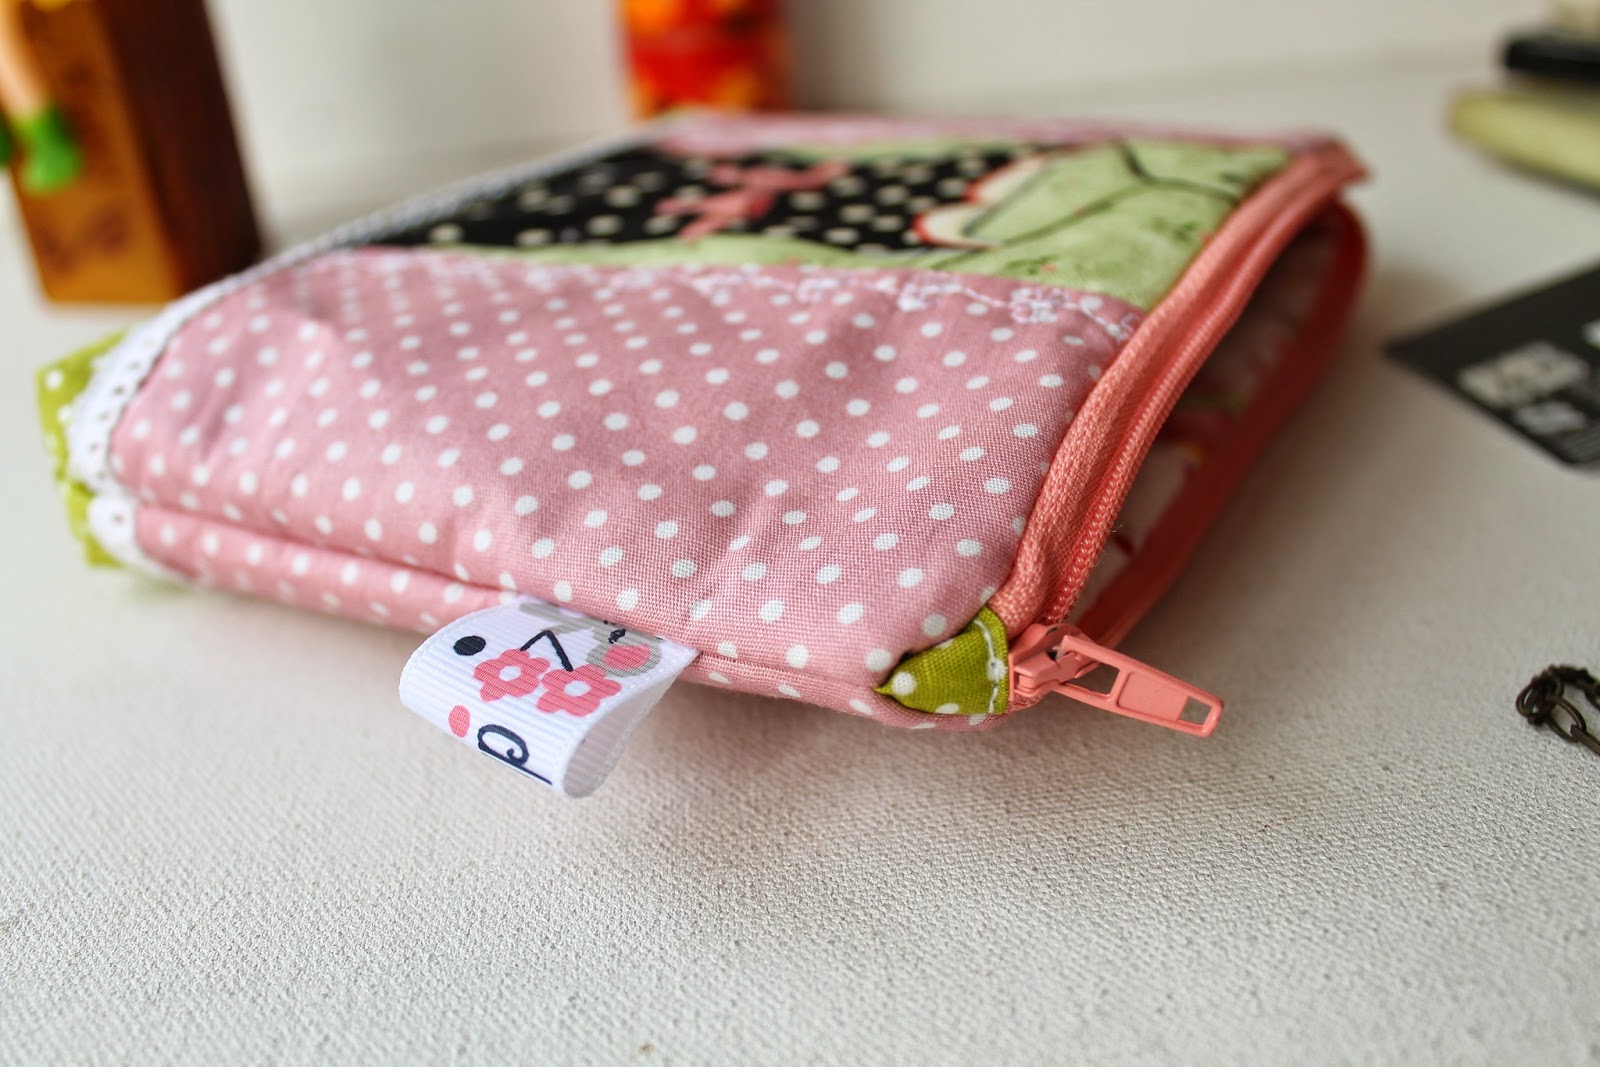
But I decided to make a small mouse pad because I need one :D. It turned out just perfect. 


Did you recognize some of the scraps? It's a fun project and a small reminder of this ongoing pandemic. I'm still making masks and also working other projects Finished a couple of wallet orders, but yesterday the state government suddenly announced that we're going into strict lockdown again next week. Hopefully, after a week, there will be relaxation so that I can sending out your orders. Ah, one good news, from now I'll be sending all orders via DHL e-com or FedEx depends on your total orders! Remember my post about the shipping problem we're facing as an Etsy Seller in India? Well, Alhamdulillah more or less they are solved. A few orders have successfully delivered via FedEx. Thank you to all delivery men out there! May the Almighty always keep you safe & well! 

So, don't throw away your scraps, make something from them. Check out Darlene's video below to see her tutorial and her collection of scraps!! Now I feel less guilty of having 10 buckets of scraps LOL


What is your fave scrap project? leave your comment and link in the box below, I'd love to see them!!

Thank you for stopping by!

Stay creative & stay well!

- Elvira -

TUTORIAL Granny Square Quilted Pillow

India

I've collected quite a lot of scraps from sewing masks in the past 2 months. I can't wait to cut them out into usable pieces. My fave is 2.5" and 2" squares. 
Few days ago I sorted out the purple scraps and I so wanted to make something scrappy. I mean after days of making masks I feel like doing something else just for fun. 

I started granny square projects few months ago and I cant wait to go back to working on it. Sometimes I just want to make something simple project that I can finish quickly. So I decided to make this scrappy granny square pillow cover.

In case you want to learn to make one, here's my step by step making granny square pillow cover.
What you need :
13 squares 2.5" x 2.5"  - scrappy color (purple)
12 squares 2.5" x 2.5" - background fabric (white)
2 border fabrics 4" x 9" 
2 border fabrics 4 "x 16" 
1 backing fabric 16" x 13"
1 backing fabric 16" x 4" 
1 batting 18" x 18"
16" all purpose zipper (I used 18" )
Cross cut single fold binding 2.5" x 65" 

1. Arrange the scrappy color fabrics like in the picture below. Make sure to alternate dark and light color value. This is important later on ;) 


2. Next, add the white pieces all around the outer border. 


3. Now we're going to start sewing them together from the second row using 1/4" seam allowance. 
Once you're done, press the seam to the dark side, like in the picture below. Repeat with the subsequent rows.


4. Now we'll sew the rows together. Remember, we're still using 1/4" seam allowance here :). Once you're done sewing up all the rows, irom the block flat. I usually press the seam on the wrong side first to set it and then turn it to the right side and press it again. 


5.  Now, we will trim the pointy side leaving 1/4" seam allowance. The block should finish at around 9" x 9" 


the block is ready and now we're ready to turn it into pillow cover!

6. Add the border fabric 4" x 9" on both sides of the granny square block. Sew using 1/4" seam allowance. Press the seam towards the border side and  trim the excess if necessary.


7. Now add the 16"  border fabrics on the top and bottom. I cut longer border fabric here because my fabric stretch a little.  Sew using 1/4" seam allowance and press the seam towards the border fabrics. Trim pillow top piece to measure 16" x 16" square. 


8. Place the pillow top piece on top of the batting, baste and quilted as desired. Trim the excess batting and keep the quilted pillow top aside as we will prepare the backing.  


9. Now let's prepare the backing. With the bigger piece of backing fabric right side up, line the zipper tape on top of it, right side down and sew with 1/4" seam allowance.


10. Flip the zipper up, finger press the seam and top stitch using 1/8" seam allowance.


11. Place the smaller piece of backing fabric (right side down) and line it up with the unsewn zipper tape. Sew with 1/8" seam allowance.  Then draw a line (yellow line) 0.75" from the top. Fold the fabric up on the yellow line and pin in place. 

12. From the wrong side, sew down the zipper again 1/4" away from the zipper teeth. 

13. Now it should look like this. I sewed the fold with 1/8" allowance. It's optional though. I did it because the fabric I used is a little lightweight. Trim the pillow backing to measure 16" x 16" square.


14. Put the pillow backing and the quilted pillow top WRONG SIDE together and sew around the perimeter using 1/4" seam allowance. 


15. Attach the binding. Place the binding on the back of the pillow and pin or clip in place. Leaving approx. 2" from the top of the binding, start sewing using 1/4" seam allowance. Stop approx 0.25" from the edge, turn the pillow 45 degree angle and sew to the corner. 


16. Flip the working binding outward and bring it down again to line up with the next straight edge, creating a crease at the top.  


17. With the crease pressed down, sew binding using 1/4" seam allowance. 


18. As you reach the end of the binding, overlap the binding approximately 1" and cut the excess. Insert the end of the binding in between the fold like in the picture below and  finish sewing the binding. 


Turn the binding to the front side of the pillow and finish it by hand or machine. I prefer to use machine for pillows because I have 2 teenage boys ^^. 


I have 3 more blocks which I plan to make pillows. But first, I need to finish a couple of scrub hats and 3D Masks. 


I hope you enjoy the tutorial! If you do, don't forget to subscribe or follow me by email. 

Thank you for stopping by,

- Elvira - 

********
Linking up to these wonderful BLOGS

5 Quick Sew for The Kitchen

I need to make few stuff to freshen up my kitchen and I'm looking for ideas from pinterest. Something that is easy and quick to sew. Here are my list:

I think it will be good as a host gift or housewarming gift, right? 


I always need cloth napkins to send with my sons lunch boxes. They are handy and of course one of a kind. Make it in your children's fave print. I 

Make Cloth Napkins for Your Child's School Lunches~ Buggy and Buddy


I think this will be good for bathroom hand towel too. You know when you have kids, they just throw the towel around after using :((


I don't find a tutorial specially for this, but I guess you can use this bag handle cover tutorial. It's basically the same. 


This is one thing I need to make. The pattern is actually for gardening, but I've seen in Kdramas, they wear this sleeve while cooking which I think very good especially if you have to do a lot of frying in summer :D. 

Protect your arms while working in the garden ~ Threading My Way

What do you think? Do you make stuff for the kitchen too? What is your fave?

Thank you for stopping by!

Much love & Have a nice day!

- Elvira

*** 
Linky Party :
Create With Joy
Hearth and Soul

Scrappy Patchwork Pouch


Another scrappy patchwork but this time it's a flat pouch!! I made few quilt as you go pouch few weeks ago from the scrap bag I keep near my sewing machine. The bag is overflowing with my recent scraps now and waiting to be sorted out. 


I took out a bunch and started playing with it for fun. I made 4 scrappy blocks and each is around 5" squares. And since I got new faux leather sheets, I decided to try to combine it. 


I use cotton batting, a scrap batting from my flying geese quilt and quilt it around 1/4" apart. I really love the effect of dense quilting on the pouch. I used high grade faux leather here. The color is almost salmon pink, a bit darker.


I added small slip pocket inside. I love the cute bear print lining. I found it in my stash! So glad to finally use it. 


I added this pretty pouch in the SHOP in case you want it ^^. The pouch dimension is 8.5" W x 5.5" H.

Working with patchwork is really fun, especially scrappy one. If you have orphan block lying around and want to try your hand on making patchwork bag, you might want to try THIS PATTERN.

Thank you for stopping by!

Happy Sewing,

- Elvira - 

****


Snappy Pouches


I need something to keep my wonder clips then I saw several tutorial about this snappy mini pouch. There are several technique to do it but I found this one the easiest.  (thank you Nancy-ssi for the tutorial)


I use my own measurements for this. Since it's pretty small, I decided to make several. It's always nice to have one handy for gifting, right? The blue cat  print is leftover from a passport wallet I did for a customer a few months ago. I thought I'd cut and added into my pre cut bin, but it was big enough to make this pouch :D

The blue and green is Indian fabrics. The leaf print blue is a handloom fabric, also leftover from passport holder and the patchwork print was a gift from a friend. 


The pouch is very cute and we can use it to keep many things, coins (the most popular), sewing kits , or like me to keep my wonder clips:)

I keep the other two for gift. 

It's always nice to learn something new, right?   Here's the video in case you want to make one too: 


Happy Sewing ^^

- Elvira -

First Quilt of the Decade Ground Cover Quilt Top


Hello everyone, 
I hope your new decade started with a bang! Well, though political situation still pretty tense, but the show must go on, right. The school was forcefully shut for 3 weeks in December here in my city,which made all plan went awry. The elder son pre board exam was postpone to January (just finished yesterday). Besides, he will participate in the Cadenza concert again, Insha Allah on 19th January. So these few days I've been busy taking him to his practice. Wish us luck!


On sewing front, I'm taking a break for custom order until maybe March and will slow down a bit to rethink and re focus! 


I started the new year with a bang tho. I finish a  quilt top!! woohoo!. After watching this Ground Cover quilt tutorial from MSQC on Youtube, I know I must make it. The fabrics are leftover from my wallet and bag making. I used to cut several set of fabrics for passport wallet and it turned out I always make wallet from different fabrics. Lesson learnt!
It took me 2 days just to make the layer cake! But once everything is cut, sewing them doesn't take much time. 


I also started to sort out my overwhelming scraps! well, it takes a LOT of TIME to iron them and them cut them into usable sizes but it's so worth it when you see them neatly in the box! I went to Fancy Bazaar especially to get the boxes, they are around INR 250 each! 


I am cutting by colors, since I already sorted them out in colors, it's easier just to pick up one bucket and start ironing them. I already started another quilt project, and Insha Allah I will write the progress in my next blog post!

My sewing room is in a big mess right now but I'm happy that my fabric scraps are turning into something! I will send the top to be quilted as soon as I found a matching backing fabric which I like. 

Well, we can say that's my resolution this year! Let see!

Thank you for visiting & reading my blog! 

Until next time,

Happy Sewing!!

~ Elvira~

*******

Linking up to these awesome blogs
Handmade Monday
Craftastic Monday
TGIFF - Simply Crafting

Dotty Mini Purse Sew Along and Pattern Giveaway

Dotty Pdf Purse Pattern Small Handbag e-Patterns Patchwork image 7

It's finally happening, as I mentioned in the previous Post, now the first Video from Sequoia is live on her YOUTUBE channel and BLOG. Head over there to win Dotty Mini Purse Pattern. Three Patterns to be won and if you're already bought the pattern , if you win, you can choose any pattern you like from Chezvies Pattern.

Here's the first Video!


Dotty Mini Purse is so versatile. The size is perfect for a pouch! If you know someone who carry around essential oils, this will a perfect one!! 

Pattern available in 

LINK :


Let's start using those lovely scraps and make special handmade gifts this year!

Happy Sewing!


TUTORIAL - Patchwork Zipper Pouch - Lots of pics!


In this tutorial, I use a simple zipper with a tab. There are several methods on how you install zippers in pouched and bags. I will try to post a few mini-tutorial on those methods. 


FAQ :

1. What interfacing do you use?
Interfacing depends on how you want the look that you want. It totally depends on you. I love soft pouches. I normally use fusible interfacing and flannel or fleece batting (that's a substitute for fusible fleece). For a stiffer pouch, I use canvas interfacing.

2. Batting
As I mentioned, I usually use flannel for quilted pouches or bags. Flannel gives a good structure and enough softness. I use fleece or cotton batting for gadget cases.

3. How to reduce the bulk?
Always cut your batting 1/2" smaller than the main and lining fabric. If you use thicker interfacing, cut the interfacing 1/2" less than the main and lining fabric. That will save you lots of headaches struggling with the machine.

4. Ironing

 Ironing is also very important. Iron your interfacing well. I normally set in Cotton and always use the DRY setting. Iron your fabric first then attach the interfacing. If you use anything other than cottons, like silk or cotton mix, do not iron on the fabric. Iron nicely on the interfacing, reduce the heat to (silk/rayon) then iron gently.

That's as far as I can remember. Ask away if you have more questions. 


*** Please refer to the numbering of each photo ***

Let's start 

Supplies :
Fabric scraps
Fusible Interfacing
Batting (fleece, cotton, or flannel)
Zipper {sorry forgot to include it in the photos)
Embellishment (ribbon, lace, buttons)

Zipper Pouch Tutorial


Cut the fabrics according to the pics and sew up the strips accordingly


iron flat and sew the green polka dots
Green polka dots: 3" x 9" 
**ironing is very important to get a crisp look **


Please NOTE that you NEED to frequently straighten your panel


Use DRY setting and COTTON setting to fuse the fusible interfacing
First, iron the fabric and then attach the interfacing. 
This is important, cos it's difficult to smoothen wrinkled-interfaced-fabric. 


here I cut the tab 1" x 2" 
Trim the metal stopper of the zipper and cut 8" (1" smaller than the panel)


Sew the tab to both zipper ends


now, decorate your pouch panel
this is the fun part


I did a little quilting with this decorative stitch in my HV
I love my Viking, it has all fancy decorative stitches 


Now ZIPPER time!
Don't be scared 
it's very easy!

Follow the steps in pic #9 below


remember, ALWAYS use zipper foot! 
you can either baste it first or you can pin and sew


1st zipper is done, now the second part
Open the panels as shown in pic #10
(remember, the position of the zipper should be like pic #9)


Bring the zipper to the main panel. Line up the sides properly
 you can pin the middle panel if you want


Now, fold the lining and line it up on top of the zipper


it should look like pic #13
now pin and sew the zipper


once the zipper is installed
pull out and separate the main and lining as shown in pic #13-1


we're almost done! yay

before pinning your panels, make sure that the laces are matched. You don't want as lopsided pouch, right?


and trim the batting 1/4" all around.
This is to reduce the bulk


match the zipper point
the seam facing the lining and pin


Don't forget to OPEN the zipper halfway!


Now all sides pinned
trim the zipper tab and start sewing
sew with 1/4" or 3/8" on one side
don't forget to back-stitch on both ends

On the other side, leave a 2" opening on the LINING side. 
This will be your turning point
Back-stitch on both ends and also at the opening points.
This is important, cos you don't want your stitch to unravel while you're turning the pouch


now, let's make the square bottom

Method #1: puff up the corner and pinch evenly and mark 1/2" from the corner


sew the marked line and cut the excess


or you can do 
Method #2
Cut 1/2" square at all corners 


and sew them close.
This is easier cos you tend to get a more even box bottom


So that's done, now turn inside out from the opening
do it gently! I know it's frustrating but it is DOABLE.


Once done, check the corners, if you're happy with the result, iron your pouch (main and lining)and sew the opening, either by hand or machine.


Yay! you got new pretty patchwork pouch you can flaunt to your friends.


and if the sewing machine is not your best friend, you can always visit my SHOP and I'll be glad to make one ESPECIALLY  for you ^^

I hope you enjoy my tutorial

Happy Weekends & Happy Sewing

Elvira

****


Latest Video