Powered by Blogger.

Bifold Wallets

Hello,

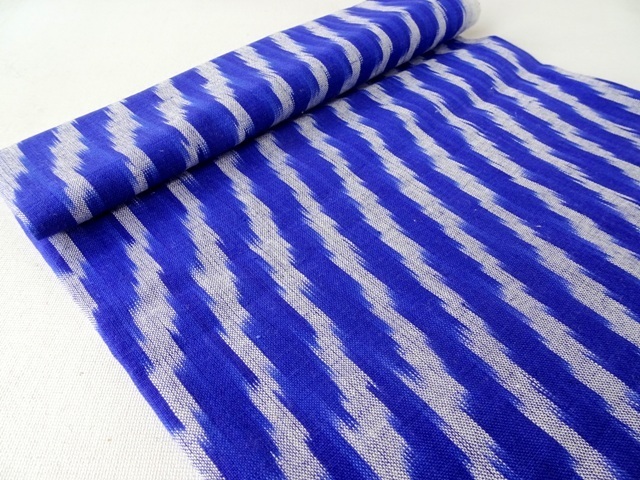
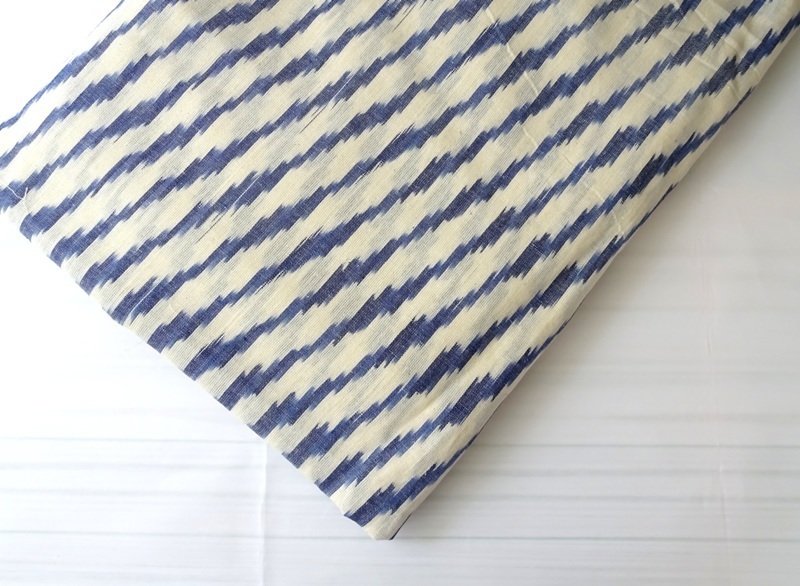
I've been very busy with fabrics in the past few weeks. I tried to destash some of my stocks by making them into fabric bundles and fabric duos. And in the process, loads of inspiration going through my mind and one of them was these kawaii (cute) bifold wallets


Matryoshka Bifold Wallet
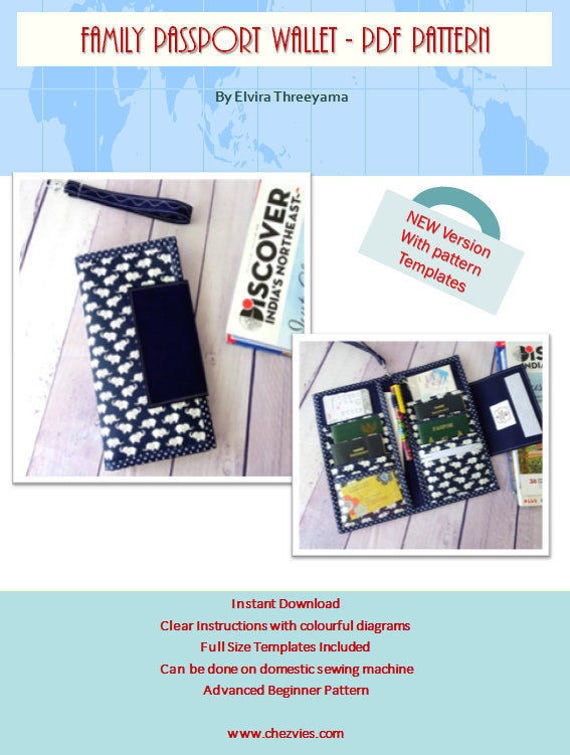
 I used the pattern from Napkitten Pattern in Etsy. The pattern is a bit confusing at first since it does not have a template. I decided to make templates based on the measurement given. 

Blue Owl 

After you get the hang of it, it sort of addictive. I'm happy because I can use some of the fabrics from my scrap bins. Leftover binding from my passport holders,


While making these wallets, I realized how much I enjoyed making small things from fabric remnants. Sometimes, we tend to be carried away by the current trend, that we lost our own focus. 


I realized I love making small things or something bigger with more details.  I find it more challenging and it gives me immense satisfaction when I can complete it. 

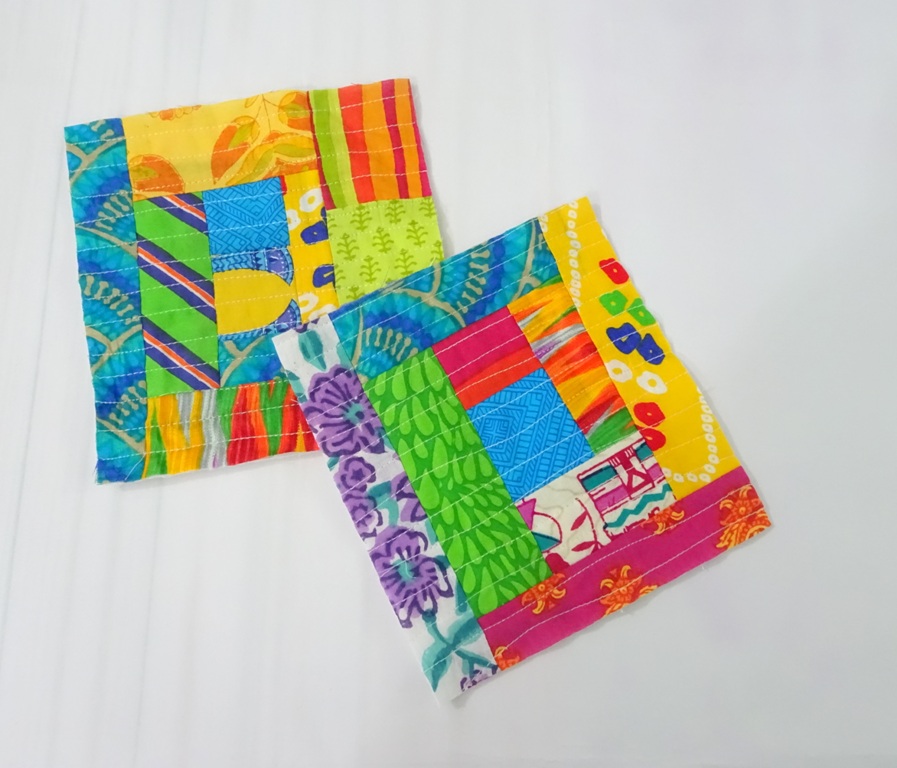
Quilted Bifold Wallet 

I like to try a new technique or new materials since in India we don't have fancy bag making materials. I like to experiment and to see how's the result.

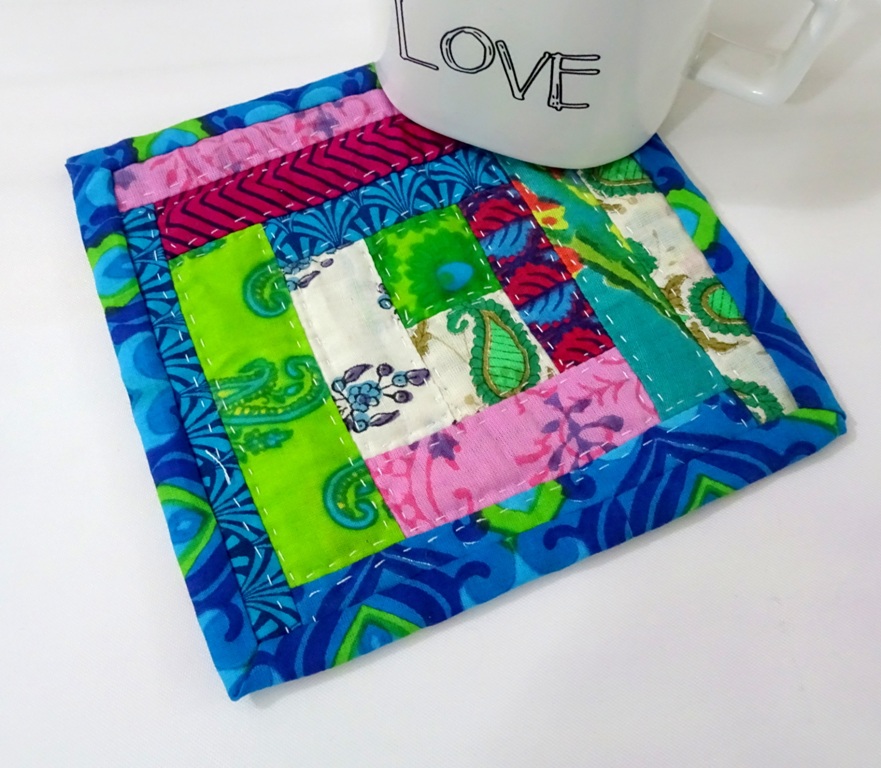
Pink Owl Bifold Wallet
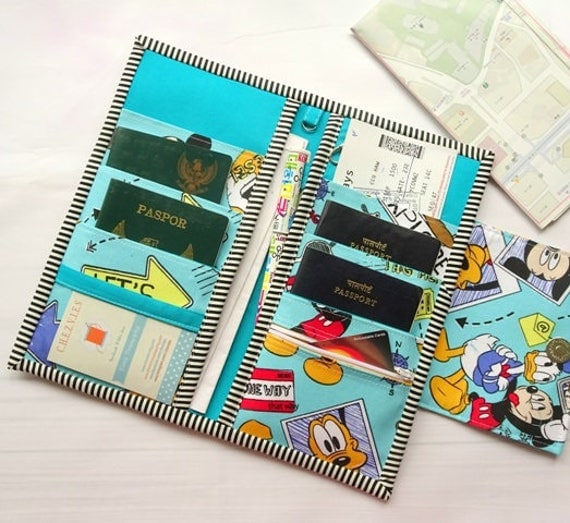
 The bifold wallet, even though it's quite small, it has bill compartment, slots for few cards, slip pockets and coin pouch. I am currently using one. It fits nicely into my fave sling bag. 


"SOMETIMES YOU HAVE TO LOSE YOURSELF TO DISCOVER WHO YOU MIGHT YET BE SOMETIMES WHAT FEELS LIKE BREAKING DOWN IS REALLY JUST BREAKING FREE" - CRISTEN RODGERS

Thank you for stopping by today,

Until then,


****************************************

LINKS:


Tutorial Reversible Quilted Trivet or Coaster

Hello,


I'm still in scrap buster mode. Now, let's make Reversible Trivets or coaster. It's really easy - mind numbing project. This is the kind of project that lifts up your spirit or gets your sewing mojo back.

Alright, here's what you need:
- Fabrics scraps of various sizes and colors. 
- Batting scraps - I am using flannel in this tutorial. 

First, you need to decide the size. I normally go with the whatever size of the batting scraps. In this project, the batting is roughly 6.5" x 7". 

Now grab 2 small pieces of fabrics and put them RIGHT SIDE TOGETHER in the middle of your batting piece. Sew with 1/4" seam allowance. You can go with 1/2" or 3/8 seam allowance. It doesn't really matter. 


Now flip them open and finger press. I trimmed the pink stripe fabric a little bit. For a small project, the narrower the fabric strip the better. At least for me.


Now take another strip of fabric and put them Right Side Together along with the longer side of the previous unit. Sew down with 1/4" seam allowance. 


Flip it open and finger press. 


Repeat the process until the batting area is covered. Once done, start quilting the panel. I love doing line quilting. You can quilt it in whatever design you like. Don't worry even if it's not straight. It's "your quilt, your rule" kind of project. 


Once it's done, trim the panel to the desired size. In this tutorial, I trimmed the panel into 5.5" x 5.5" roughly. It doesn't have to be square. 

Repeat the whole process with the other piece of batting and now you have 2 bright and beautiful quilted fabrics ready to make into something F U N. 


If you want to make a pot holder, you can add another piece of batting in between the two quilted panels. 


for trivet or coaster, it's not necessary. Put the quilted panels right side together, and sew all around, leaving 2" gap for turning. 


Trim the edges by cutting the corners diagonally. Be careful not to cut into the stitches. 


Now turn the coaster inside out. Close the gap by hand sewing the opening or apply fabric glue. 

Voile, your one of a kind coaster is done and you can admire it. 


Actually, whenever I made something from those small scraps I feel like I saved the world. LOL. I wish I could sew clothes like Zero Waste Daniel . 


Here is another one I did. This one was hand quilted and hand sewn the binding. 


You can make many things with those tiny scraps. 

Now go and make few from your scraps. Tag me on Facebook or Instagram if you made something from this tutorial.

And if you ever need fabric scraps, you are most welcome to join the CLUB or check the CHEZVIES SHOP

Thank you for stopping by.

Until then,

Happy Sewing

**************************************

Indian Fabric Bundles


Patchwork Pouch

Hello,

Never threw out even the smallest piece of your favorite fabrics! You can turn them into this pretty patchwork pouch


I was organizing my small scraps last Saturday and as a bonus, I decided to make this pouch. Actually I started out with card holder in mind. I even took out Suzuko Koseki book for guidance. 

I decided to do quilt as you go method since some of the scraps are quite tiny. And when the panel is ready, I was thinking, it will be better to make pouch! 
So here is the QAYG pouch with 2 different sides. One side is sober color and a bit brighter on the other side. 


I love zipper with binding, I made once and have not attempted again. So, this time I decided to do just that. Zipper with binding! and I love how it turned out.


I added faux leather tassle too. It's uber cute!! Each piece of fabrics in this pouch has a memory of it's own. Some of them are from the leftover binding, some are from the corner cuts of a bag, etc. It is  a special pouch! If you want to purchase the pouch, it's available HERE

I know I'll be making more, but there are so many other things I want to sew. My list keep growing. 

Thank you for stopping by!

Until then,

Happy Sewing


A lot of fun fabric bundles

Hello,

It's so good to be able to write the blog again. I've been writing in my mind all the time. I was so busy after I came back from summer holiday. I had a great time, by the way. I updated a few of the holiday photos in my Instagram account. 

So here's what happened. I made fabric bundles!! Yes, lots of them and I am still making more. This is part of my destashing program. 

Like these  Bali Batik Duos (it's Fat Quarter set of 2) 


Floral Fat Quarter Bundle


I really enjoyed the process, cutting, putting the colors together, folding and taking good photos. 


Looking at these pretty fabrics, really lift up my spirit. I still have a lot of bundles to make, if you're interested, you're most welcome to join Chezvies Fabrics Club  on Facebook where you can get the first dip on the bundles. 

Make sure you check the shop to see what's available now. 

Thank you for stopping by,

Until then,

Happy Sewing


Handbag and Wallet set - a gift set for Mom

Hello,

When Namrata showed me her (then) new pattern of Rose Handbag, I knew I will make one for my mom. I could not test it at that time because I hurt my pinky and could not do any sewing that needed "birthing".

And a few days ago I finally got down to make one. My mom loves florals, and she loves Blue and Red. So I picked this Japanese linen with Red Rose print. But of course, I have to make a set, with the trifold women's wallet. 


This is my 4th bag from Bagstock Designs and I love how this Rose turned out. For you who started to sew a bag, don't hesitate. Namrata's pattern is always easy to follow with clear photos and instructions.

I used Japanese linen and dark blue denim and my Singer machine worked like a charm going through all the layers. well, except the one with the D-rings for the removable strap. So, I skipped stitching just a few mm from there. 


I have a matching blue egg color polka dots which perfect for the lining and added a red zipper for fun. I know I'm going to make more of this bag! I need one for myself!

And when you have a pretty bag, you need a matching pretty wallet, right?


So I made one!! I thought of using denim and the rose print for the exterior but I changed my mind. Instead, I used denim as the interior base and love how this turned out.


I also tried a new technique for the interior zipper! I will post the tutorial soon! Subscribe to my blog so you won't miss the post!

I made the 12 cards variant. I think my sister will snatch this wallet from Mom. LOL. I hope I have a little time to make more wallet for my sisters before my trip next week! I still have few more wallet and bag to make.


Until then,


Linky Party:


The Linen Floral Sling Bag

Hello,

The wifi is not working properly since last week. I think due to the stormy weather. I've been quite busy finishing few orders and also managed to finish my tester bag for Namrata's newly released pattern. I told her, I won't be able to test in the beginning, but I managed to finish my Etsy orders in time and got 2 days before the due date.

The pattern is called Jasmine Sling Bag, the pattern is now available both on Etsy and Craftsy.

And here is my take on the pattern:

  I love making a small bag and have been asking Namrata to make the pattern and I love how she improvised it from the original design. The smart zippered flap is my favorite.


I made a reversed version from what the pattern called. I used solid linen for the main body and accented with floral linen just because I want the flap in floral ^^.


This bag surprisingly quite spacious. Besides the zippered flap, it has a slip pocket which I find it very handy. I also used a cute snap button I got from my recent trip to Japan.


Since the time was short, I decided to use the ready-made leather strap I got from Indonesia.

I've been using this bag a lot and it fits in my wallet, phone and a little notebook that I always carry.  I think I will be adding this bag to the shop after I come back from the holiday next August.

Meanwhile, I have a couple of projects I have to complete before I go for the holiday. Making list helps me to focus. And here's this week list :

1. Finish and send out the London Passport Holder.

2. Cutting few interfacings for Wallet and Crossbody bag for gifts to take back home.

3. Fabric Pull for The Artisan Corina Quilt Swap - I'm late  :(

4. Shop for gifts and souvenirs - this gotta be fun !!

Those I wanted to complete this week. I hope I can finish it !! Ganbatte!! :D

That's all for today, let's go back to the sewing machine now :)

Until then,


Get more updates and tips by signing up for my Weekly Newsletter!


Ikat and Pinterest

Hello,

Don't you love Pinterest? I know I do. I get lots of inspiration from there. I love a casual and loose fitting dress or tunic. I really want to make something with Ikat Fabrics. Ikat always fascinates me, be it hand woven or printed one. It simply beautiful. 

Ikat Print Fabrics

I browsed Pinterest and found these  red ikat dress  and the white ikat dress that I really love.


It will ber perfect for summer, but I will need a longer sleeve since I am wearing hijab ^^. 

Maybe this Blue one will look great for summer. 


or this White and Indigo one?


What do you think?

Check out a couple of NEW FABRICS I put up in the shop! 

If you're on Pinterest, follow my Pinterest boards  . I recently edited my boards as an effort to improve my SEO. 
I've been reading a lots of books on SEO and it's time to implement them, right? 

I will write more about it next time. Hopefully, I can share a few SEO tips. 

Until then,

Happy Sewing,


Get more updates and tips by signing up for my Weekly Newsletter!


Disney Mickey Mouse Family Passport Holder

Hello,

This week I’ve completed my last Etsy orders. Apparently, the Mickey Mouse Disney Passport holder is very popular in my Shop that I have to re-order the fabrics. And I love working with fun fabrics.

Blue Disney Family Travel Wallet for 6 Passport Holder   Mickey Mouse passport case document organizer, moving away gift dual citizenship
Disney Family Passport Holder
In this post, I was talking about batching and it helped me a lot this month. Managing shops and home single-handedly is not an easy task. I mostly spend half of my morning replying to emails and messages, before doing my daily chores. Since I already cut a batch of interfacings for Passport Holders and Mini Crossbody Bag, the sewing part is easy. While I love cutting fabrics, cutting interfacing bored me.

OK, back to the passport holder, I made 2 variations and the buyer chose one which has card slots and interior zipper.

Passport Holder & Card Wallet

 I still have a couple of local orders to finish now, and I won’t be accepting custom orders until I come back from Indonesia next August.
I have a couple for Ready to Ship items in my ETSY shop and Website (scroll down to buy).  And if you'd like to try to make passport holder for your next family holiday, you can get the pattern on Etsy & Craftsy

Family Passport Travel Holder PDF SEWING PATTERN, Hold 6 Passports, Instant Download, Family Passport Wallet Pattern
Family Passport Holder PdF Pattern

 Thank you for stopping by and supporting my small business.

Ramadan Mubarak!

Happy Sewing


Get more updates and tips by signing up for my Weekly Newsletter!


Latest Fabrics

Latest Video