Powered by Blogger.

Weekly Digest

Days go so fast when you're having fun or have deadlines, even during the Pandemic. I always want to be able to write more regularly, like a few times a week, but sometimes, words just don't come to my mind when I am sitting at my desk. 
I thought I'll do a weekly recap kind of post once in a while. 

Let's see what I've been doing in the past week(s):

1. SEWING

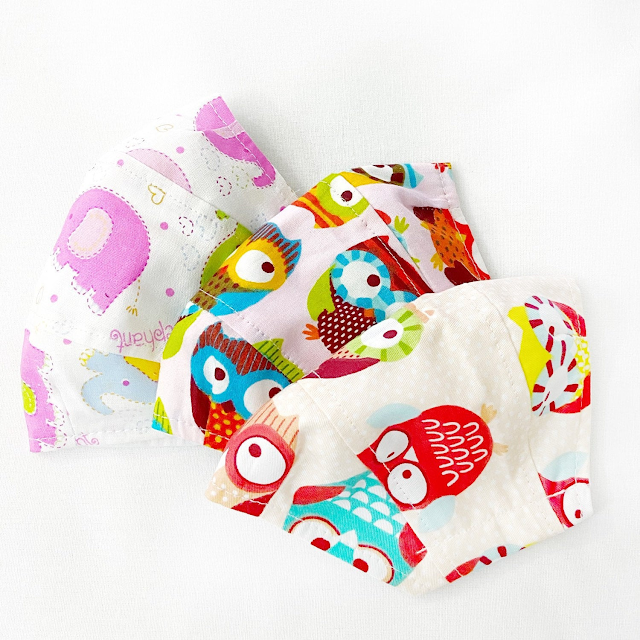
I made a few face masks and Doitrei Pouch orders last week and as usual, I made one or two extra for stock in the shop. I made this plaid black and white spacious face mask and it turned out really cool. I also ordered jute drawstring bags to pack the face mask orders. I am thinking, many people need reusable bags to keep their masks as they go through their daily routine. So now with every mask order, you will get this pretty jute bag. Yay!

Plaid Face Mask

Also made a few face masks from Quilts Japan book using Indian fabric bundle.


I usually use this double zipper pouch to keep an extra mask, hand sanitizer, and tissue. 

Double Zipper Pouch

A customer was asking for a bigger size triple zipper pouch and I kinda liked the size. I think I'll make a few more when I get time. 


I also made this cute card wallet. This is one of the bestsellers in my shop now! I think many people love this Wonderland Fabric :).

Mini Card Wallet


2. QUILTS & FABRICS 

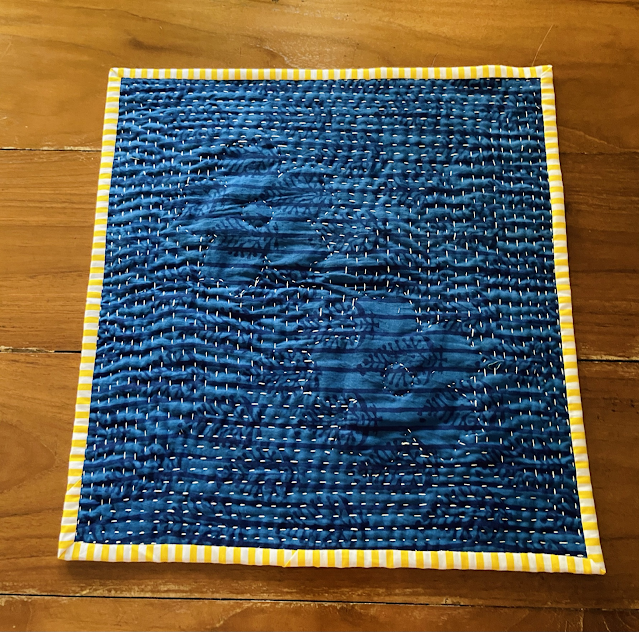
I finally completed the wall hanging which I posted in my previous Post and I also prepared a few coasters set for my small quilt shop! I'm so happy to get a few of my hand quilted coasters sold out! Thank you so much for the supports!!


For these teal and floral coasters, I tried using mercerized cotton thread. The effect is softer than using the anchor pearl (Perle) cotton thread but it's easier on my fingers :D


Floral Tie Dye Coaster Set
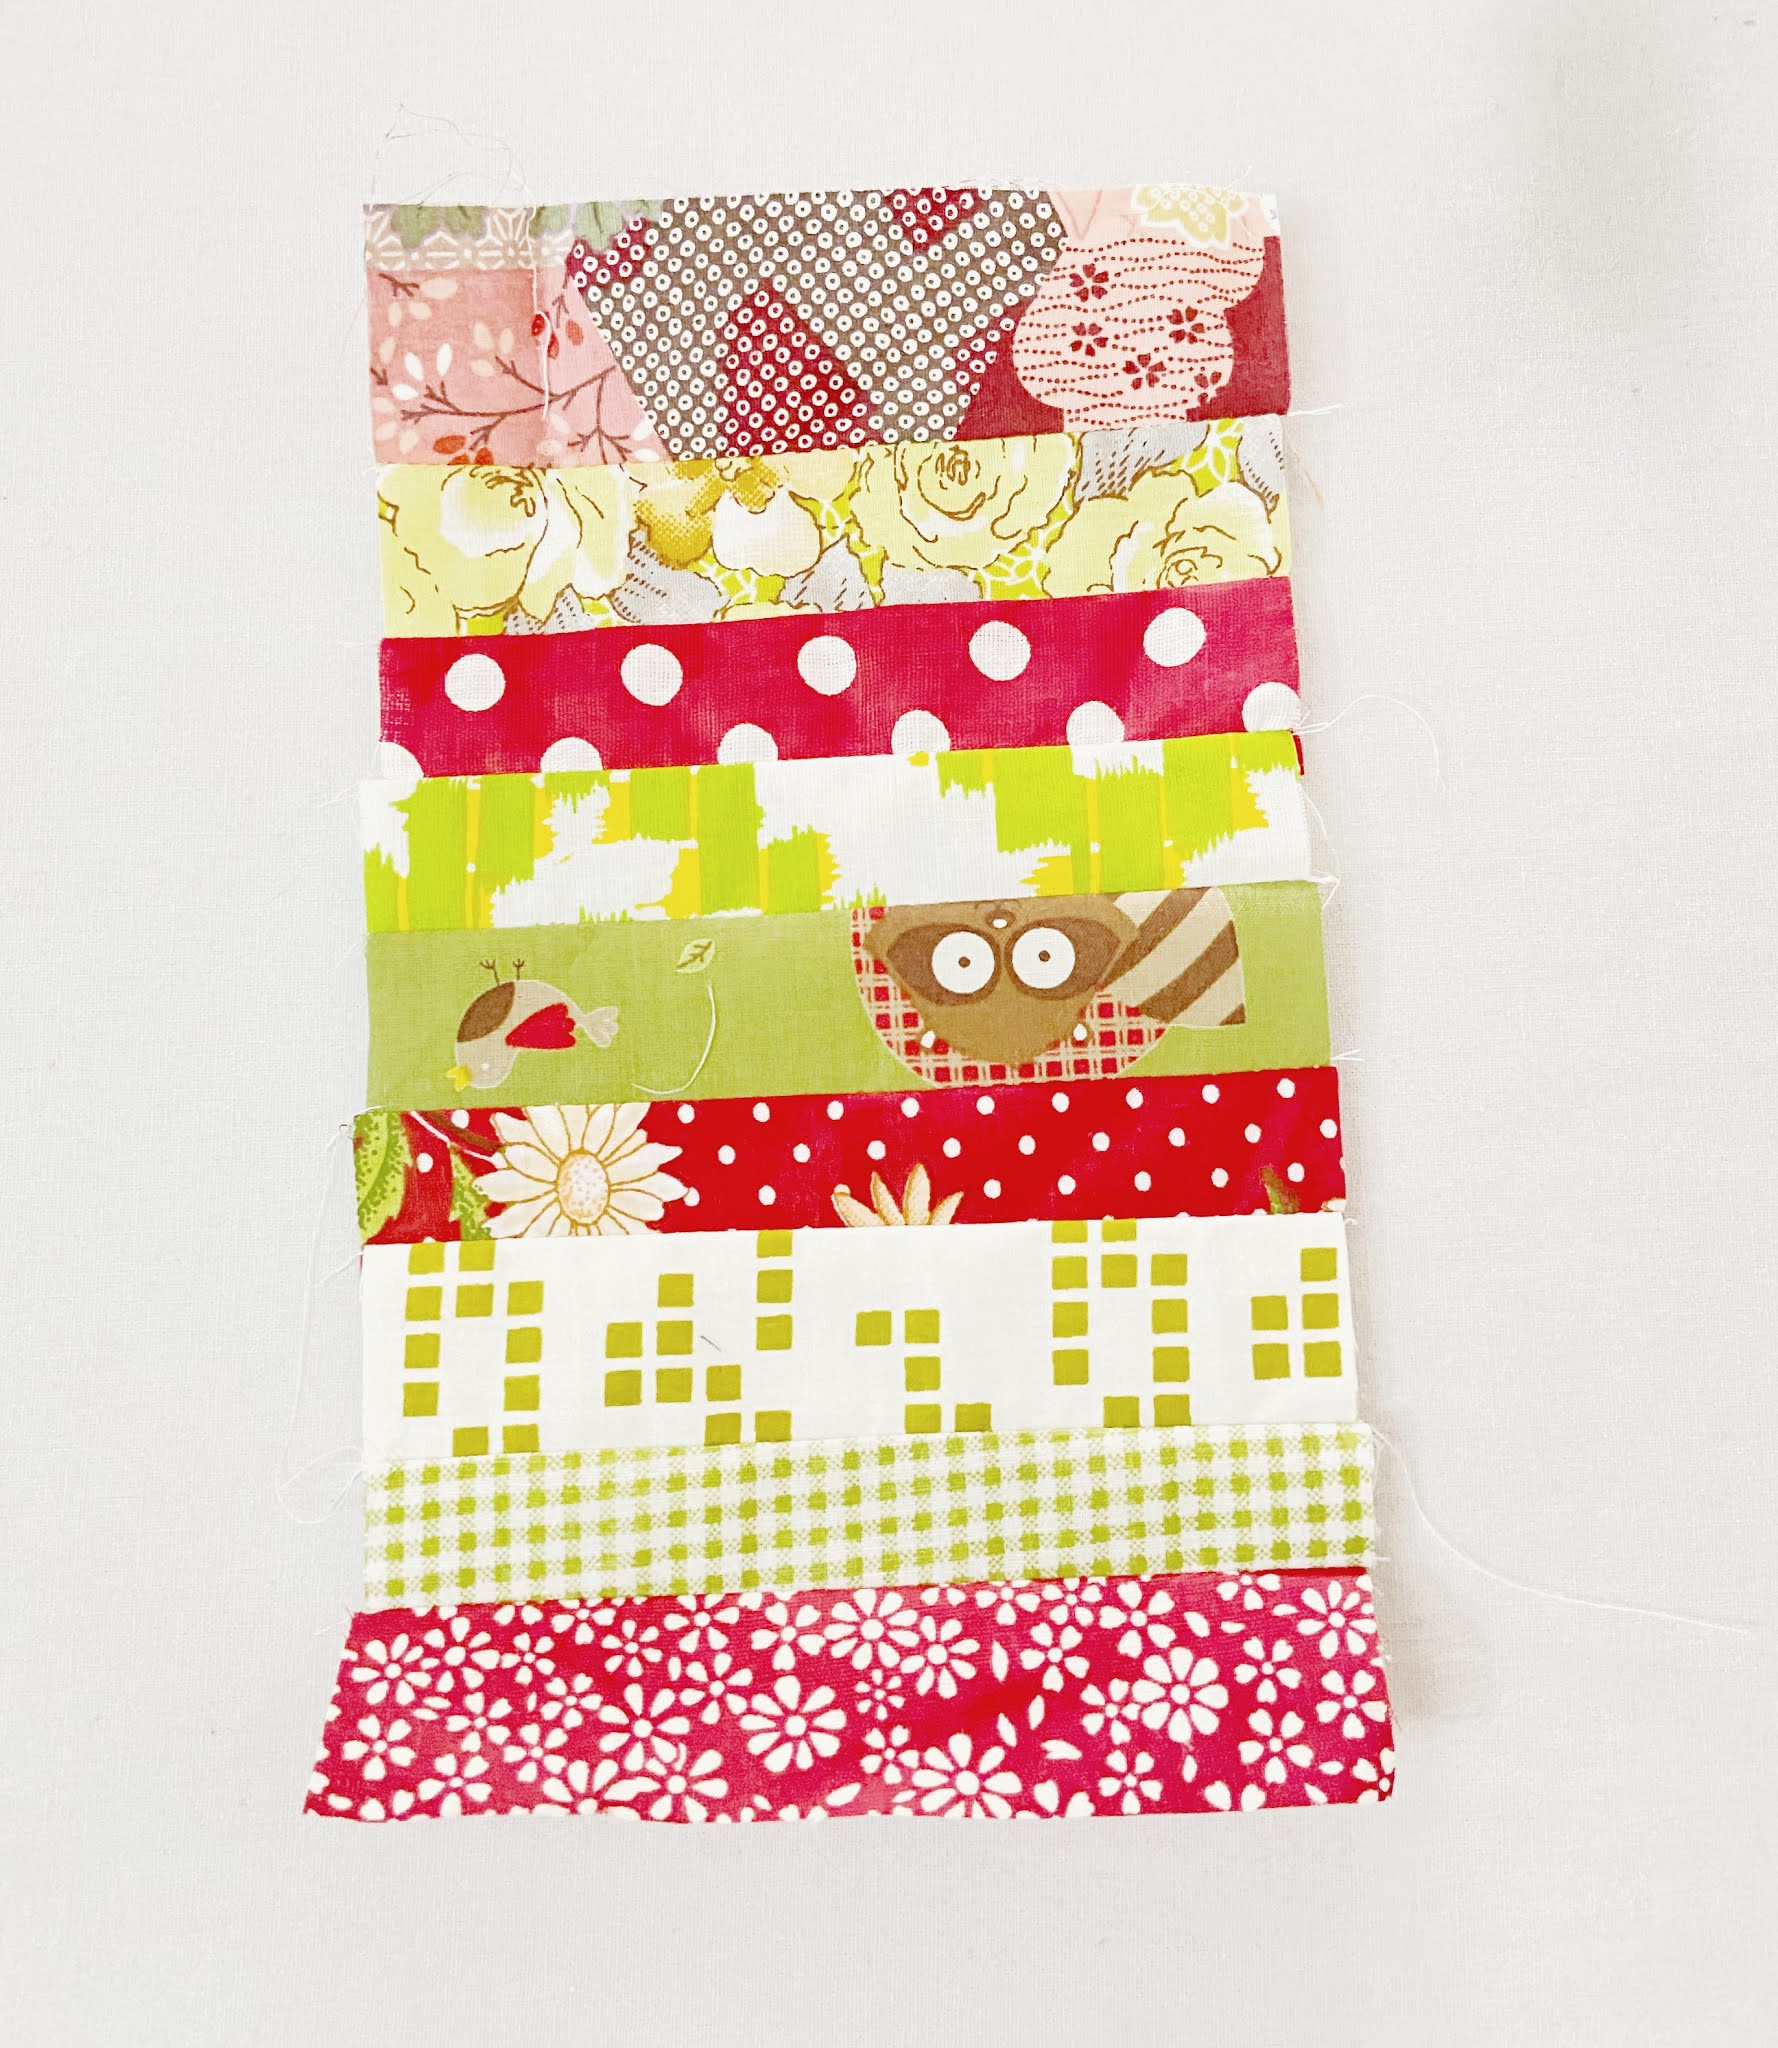

Coming up next....

A few mug rugs also in the making. I used this tutorial to make the above mug rug, but instead of using fabric strips, I am using 2.5" square pieces. What do you think?

New Floral Prints!


3. READING
I love reading Kathleen Tracy's Remembering Adelia. By the way, Kathleen is having a quilt along from her new book Schoolgirl Sampler. I was thinking to join in, but I'm very bad at following any QAL or SAL.


I also got 2 new Quilts Japan books! So excited to try and learn from the book. 


4. WATCHING

I'm watching this Korean Drama True Beauty on VIKI. Finally, one drama that I can enjoy watching and maybe rewatch again later. It's about the insecurity of being a teenager, the mental struggle they have to go through for being ugly, bullied by friends, etc. The story looks good so far. The actors are doing really well, esp Moon Ga-Young. Having 2 teenagers myself, I found watching coming-of-age drama helps me to know what the millennials are going through. Grew up in an all-girls family and now raising 2 boys, sometimes I feel clueless. I guess, we as parents, never stop learning. 


That's all from the last week or so. Thank you for stopping by!

Happy Sewing and have a lovely weekend!

Elvira

****

Resources:

Patterns: 
Double/Triple Pouch - Doitrei Pouch Pattern
Mug Rug - Scrappy Mug Rug


The Kawandi Style Mini Quilted Wall Decor


And here's my first finished quilt of 2021. A mini wall hanging which took me quite a while to finish:)

I started making the Bali batik background in 2019 I think. The plan was to make a panel for a tote bag. I even drafted the bag in detail! But then lockdown happened and we stuck at home. I know I won't need a tote bag! I kept the panel in my UFO Bin and got busy making face masks and whats not :D


And then the Kawandi class happened and I'm hooked to the Kawandi style of quilting. It's therapeutic to just do running stitch round and round, and the result is always satisfying! 

So I decided to make a mini wall hanging. And as I browsed Suzuko Koseki books, I saw the cherry blossom applique quilt. I made the applique before for my kindle cover and I decided to add applique. I chose a chikan white fabric which I have in stash and started making the applique pieces. I have not done applique for a long time so it took me a while to get finish the first flower. Well, practice makes perfect, the second one came out pretty quickly. 


Unlike my previous hand quilting projects (THIS and THIS) where I used cotton batting,  this time I decided to use needle punch batting. Actually, I tried using polyester batting but after I started quilting it, it shifted so much even with a lot of pinning. Although I quite like the result when I did the outline stitching around the flower. 

this is using polyester batting


So I unpicked the whole stitches and changed the batting. The best part about hand quilting is unpicking stitches is so much easier :). Well, there are a lot of learning experiences here, as I incorporated the Indian Kawandi/Gaudi style of quilting and the quilting from Suzuko Koseki's book. In her Playful Patchwork book, she did outline stitching around the applique and then quilt the background in diagonal gridlines. The Kawandi style quilting is done from outward going inward in a circular motion. In this quilt, I did the quilting by section as I quilted circling the appliques. Sometimes, I did the quilting from the back as I can see more clearly :)


As I was finishing the quilting, I drew the last lines using an erasable pen to keep track of where I should go. Oh, by the way, the quilting is around 1/4" apart. It's quite dense :).  While the kawandi quilt doesn't have binding, I used yellow and white stripes as binding here. It gives a good contrast with the indigo block print fabric at the back, doesn't it?

Well, I am happy now it's done and probably I will frame it! I will keep practicing hand quilting this year, Insha Allah, and let's see how this year will unfold. No more resolution for me. I will go with the flow, doing what I can, and hopefully, I can share more tips with you all.

I posted the video on my Youtube Channel from the process and a more detailed view.


Quilting Stats:

Finished Size: 15" x 15" 

Fabric: Bali Batik for background, Indigo block print for the backing, chikan cotton fabric for applique. 

Thread: Anchor Pearl Cotton No. 8


Thank you for stopping by!

Take care & Happy Sewing!

Elvira

Linking up to these wonderful BLOGS

Looking forward with hope


2020 was a challenging year for all of us and also a year where we learned about a lot of things. It changed our lifestyle and our way of thinking in a way we would never imagine. We learned to appreciate and be grateful for what we have. 

This year, let's be a better version of ourselves. Be more responsible as an individual as well as a member of our community. Love more and hate less. Appreciate more, and complain less. More focus on things that really matter! 


*******

I promised myself to write a blog more often in 2020 and I wrote 73 blog posts! Almost double from 2019. I am glad that I did. Even though social media have been very popular, I still feel to put what I make on a blog is important. It's always nice to look back and read what's been happening in the past years. 

Here I put up 5 popular blog posts from Chezvies :D. Just to give me a mental booster! I really appreciate your supports and thank you so much for reading my blog! 


1. Free Pattern - DIY Dust Mask with Nose Wire

I wrote the blog on February 4, 2020, and who would have thought that 2020 was the year where everyone needed to wear a mask! 


2.  Free Pattern- Pleated mask with Filter Pocket

By March 2020, many countries started to close their borders. Mask wearing was made mandatory but there was a huge debate about whether mask-wearing will be effective to curb the virus. Meanwhile, our hospitals and health workers experienced a huge lack of stock for disposable face masks. And our sewing tribe took the plunge and started making masks for their local hospitals, nursing homes, etc. 


3. 3D Face Mask with More Breathing Space

Within a span of 2 months, we learned a lot about face masks. There are people who felt claustrophobic if they have to wear a mask,  how many layers are effective, etc, as the countries around the world trying to cope up with the virus. The news on all media was only about Covid-19.


4. DIY Face Shield - Free Pattern

I remembered seeing a picture of a Chinese family cover themselves in plastic while trying to fly out of Wuhan in the early days of the Pandemic. Maybe it was around the end of January 2020 or early February 2020. And I was amused and did not realize that the next best thing after a face mask was a face shield! Especially for small children and those who cannot wear a mask for a long time. 


5. Spacious Face Mask 

By summer 2020, people are used to wearing a mask without being lathi-charged by the police :D (it happened in India!!). But the humid weather made mask-wearing a little bit tough. We need a new mask that made us comfortable wearing it for a longer period. I came up with this Trio 3D face mask. So far, it's a fave! You can wear it while talking or singing without your voice being muffled :)


Now entering 2021 with an updated version of COVID-19, I hope we keep vigilant and be a responsible citizen by maintaining SMS - Social Distancing, Mask Up and Sanitize! Just because the government doesn't publish updates about Covid-19 does not mean the Pandemic is over! Please remember in your prayer for all the doctors, nurses, health workers, and all the Covid Warriors who sacrificed themselves for the well being of the rest of us. 

Stay safe and healthy!

Happy New Year!!

Elvira


Linking up this these wonderful BLOGS


Sunday Stash - Fun Fabric Bundles and Project Ideas


I've been busy making a few fun fabric bundles again for the shop. Most of them are one of a kind bundle, which means only 1 bundle is available. I really love creating bundles but my time is limited and being a solopreneur doing 101 things, I feel a bit overwhelmed sometimes :)


This time mostly I made fat 8 bundles and a few fat quarter bundles as well. Check out below some of the bundles that I already put up in my Etsy Shop.

Kalamkari Fat Quarter Bundle


Fat 8 Bundle


Fuchsia Teal Fat 8 Bundle


If you just started your sewing or quilting journey, a fabric bundle is a good start. You can make many things from bundles. I made a few face masks and pouches and of course a few quilts too. 

Fun Fabric Face Masks


one of a kind fabric face masks


I made this pouch and the coaster too. I shared the tutorial for the pouch in my last post or you can see it on my Youtube Channel.


Or you can practice making fabric lanyard.


Thank you for your supports all these years, let's hope 2021 will bring some good news for us. 

Happy Crafting,

Elvira


Scrappy Patchwork Mug Rug - Scrap Buster Project


Making patchwork mug rug is my fave scrap buster project. This time I made this super easy one using strips of fabrics from my scrap bin. It's fun and quick to make plus it's a perfect project to make if you're looking for a quick last-minute gift.

Without further ado, here's what you need: Assorted fabric 5" long fabric strips 1" to 1.5" wide Contrast or solid fabric 6" W x 8" H Backing Fabric 12" W x 10" H Batting 12" W x 10" H

Binding 1.5" Wide x Wof (40")

Let's get sewing!

1. I used narrow strips, less than 1.5" wide. They should be enough to make 8" long patchwork panel. Don't be afraid to mix and match. The narrower the better, IMO :).


2. Sew the strips together using 1/4" seam allowance. You can use those selvages scraps too. My panel here finished at 5" W x 9" H. Iron the patchwork panel flat. 


3. Now sew the patchwork panel and the solid panel right side together using 1/4" seam allowance. Now your top panel is almost ready.


4. Iron the top panel flat and trim it into 10" W x 8" H. The patchwork panel is about 4" wide after trimming.


5. Now sandwich the batting in between backing and top panel and quilt it as desired. This time I did a diagonal gridline quilting which you can watch in the video tutorial at the end of this post. 


6. Once the quilting is done, trim the quilt top into 10" W x 8" H and now it's ready for binding. Watch the video below on how to sew the binding. I cut the binding 1.5" wide for small quilts, so it won't be too bulky. 


If you want to finish the binding by machine, attach the binding on the backing first. I attached the binding on the front first because I prefer to finish the binding by hand for small quilts.


Now your scrappy mug rug is ready to use. Make a few for your family and friends! 

I hope you find the tutorial helpful! Don't forget to subscribe to my blog or YouTube channel for more tutorials. 


Thank you for stopping by, 

Take care & Happy Holidays

Elvira


Linking up to these wonderful BLOGS


Tutorial: Let's make flat zipper pouch


Everyone loves handmade gifts and this gifting season let's make something for your loved ones. This flat pouch is my go-to project when I need a small gift to make. It's super easy to make. You can even make this from scrap fabrics and other supplies. 


What you need:

1. Exterior fabrics - 9" W x 6.5" H (cut 2)
2. Lining Fabrics - 9" W x 6.5" H (cut 2)
3. Pocket Fabrics - 5" W x 6.5" H (cut 1)
4. All Purpose Interfacing - 9" W x 6.5" H ( cut 2)
5. #5 Zipper - 9" Long and zipper pull
6. Cotton Batting  10" x 7.5" (Optional)
7. 3/8" D-ring and 3/8" wide fabric ribbon (Optional)
8. Fabric Zipper Tab  1.5" x 2" 

Fabrics & Interfacing:

Regarding fabric, in the video, I used lightweight Indian block print cotton fabric for the exterior and poplin cotton for the lining. Since poplin is thick-ish, I don't use interfacing for the lining as well as for the pocket. 
If you're using thicker fabric such as denim, you can change the interfacing to a lightweight one or omit the interfacing if it's stiff thick denim or canvas. Although I personally will still use lightweight non-woven interfacing to give a more structured finish. 

For this flat pouch, we're going to use All-Purpose interfacing which is fused on the wrong side of the exterior fabric. This interfacing is best to use for padded pouch or bag as well as no-padded ones. 


For this project, I am using cotton batting scraps from my quilts, because the pouch is intended to store mobile phone. You can make without batting or wadding, to make a floppy pouch. 


This flat zipper pouch is very handy. You can use it to keep a cell phone, a face mask, and a few cards or cash. Now, let's start making. If you have any questions, feel free to comment and I'll help as much as I can. 


If you like the tutorial, don't forget to share it with your fellow crafters. And if you make one, please use hashtag #chezviespatterns on your social media post or tag me on Instagram, Pinterest, and Twitter


Thank you for stopping by!

Happy Sewing
- Elvira-

Resources:


Etsy Cyber Sale

Hello,

Just a quick pop in to let you know that Cyber Sale is now going on across my Etsy Shops! No code necessary.


Here are a few new items I recently added to the shop


available in various sizes

The sale ends on 1st December 2020. 

Thank you for your support!

have a lovely weekends
- Elvira -

Latest Fabrics

Latest Video