Powered by Blogger.

On-Point Log Cabin Patchwork Batik Wallet

Quilted Wallet


I made this patchwork batik wallet a few months ago for my Kawandi guru. She wanted Rosie Wallet  after seeing these patchwork wallets.  After series of discussion, we decided to use Bali batik. So excited! 

She wanted more space for cards, so I added more more slots from the original pattern and increase the height by 1 inch to accommodate it. 

The wallet is pretty small, so deciding the patchwork style took longer than I expected. I tried different style of log cabin blocks but decided to settled for this on-point log cabin using 1" wide strips. I really love how the blocks turned out! 

 
On point log cabin block


I did not use interfacing in this wallet since the fabric is thick enough but I used needle punch polyester batting and  hand quilting it all around. The jewelry plyers really helps pulling the needle when hand quilting. I kind of liking it as I can stab a few stitches and pull it without any difficulties! But frankly, I really need to catch up with my weight training workout this year! 


Rosie Wallet is beginner's wallet that is easy to put together. I have full step-by-step video tutorial HERE. I really enjoyed the process of making this wallet! Here's more photos of the finished wallet. 


batik cardholder wallet
Interior: 6 card slots + 2 slip pockets + snap closure


patchwork wallet
The finished wallet 


handmade zipper wallet
2 in 1 zipper pocket

CLICK HERE TO SEE MORE WALLET COLLECTION


And here's the trial log cabin block. Let's see what I'll make, maybe a simple patchwork coin purse or another Rosie Wallet


The wallet is already received with love :). I'm so grateful for the support of fellow crafters here in India. It's really a great honor for me to make something for other makers! 

That's all for today. Thank you so much for stopping by!

Have a nice day,

Elvira


Vintage Style Passport Wallet

Handmade Passport Wallet
Vintage Style Passport Wallet


Finally finished this small passport wallet order and it's now on its way to Hawaii! I got a few orders from Hawaii this last few weeks. There was a little delay with the previous order as turned out the shipping to Hawaii fall under remote area delivery. After discussion with my courier partner, we decided to go with USPS as it's the most economical one, even though it cost a little bit more than what the customer paid. But it's alright. The express shipping by FedEx and DHL are also available but it's way more expensive.  

Anyway, I really love this vintage Paris theme fabric. Eifel Tower print is my all time favorite pattern. I have many in my stash! This was one of those impulsive buy, but when you go to Japan, you'd want to buy so many fabrics as you can! 

Anyway, I think this voyage passport wallet turned out really nice. I still have enough fabric to make 2 more wallets, so this wallet is available for pre-order in my Etsy Shop now. 


passport holder for 2


I also added another passport wallet in Navy theme. The color is a kind of robin egg blue, very pretty color but it's a bit of challenge to find the perfect combination. This blue polka dots is the best combo I can find in my stash. Maybe I should try with another combo. 


Handmade Passport Holder for 2


Zipper Passport Wallet
Zip Around Passport Holder

CLICK HERE TO SEE MORE PASSPORT WALLET COLLECTION


If you notice, I use a new photo background in the photos above. Nowadays we have so many options for photo backdrop. I think after the pandemic or so. Before that, it was  expensive, so I used to buy roll wallpaper and use it as a background for my photos! 
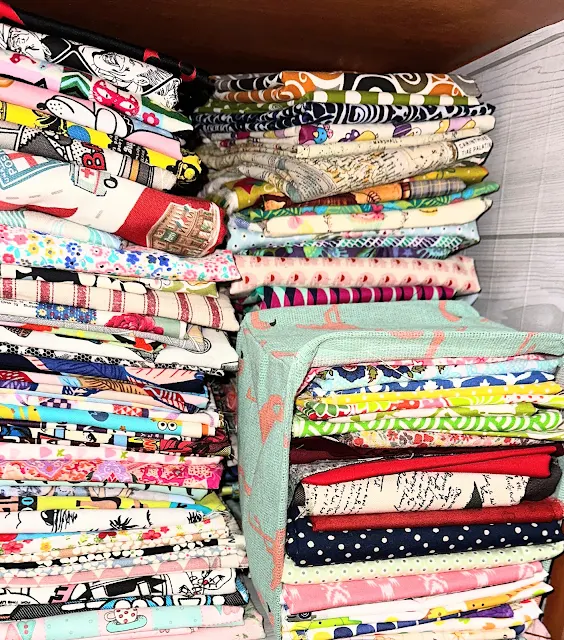
So now I’ve got these wallpaper rolls that I didn’t use, I figured I would put them on the inside of my fabric cupboard. The cupboard was custom made and the carpenter just painted the inside of the cupboard to save money. It is how it is, but I like the way it turned out. At least the wallpaper is not wasted.


I've been doing a lot of  organizing around my sewing room lately. I keep saying I should start de-stashing some of them. This year maybe I should! There are a few things I want to do this year, besides de-stashing, I'd like to again streamlining my website so that it's manageable for me, as I run my small business all by myself. There are a lot of scenarios and also things to think about. As I am going through perimenopauses stage now, it seems like my brain is scattered all over the place, so I need to make everything as simple as possible so that I can manage it well. Well, I'll do this slowly, Insha Allah within the next 6 months or so. 


That's all for today. Thank you so much for stopping by!

Have a nice day! 

Evira 


Pattern Update: Adding Flap Closure on Rosie Wallet

Handmade wallet
Rosie Cardholder Wallet


Hello,

Today, I will share how to make a slim flap for Rosie Wallet. This can be another alternative to the original pattern with the hidden flap. 


Materials:


Contrast fabric - cut 1 - 2" x 5.5" (5 x 14 cm)

Interfacing - cut 1 - 2" x 5.5" (5 x 14 cm)


STEPS: 


1. Iron the interfacing on the wrong side of the contrast fabric and fold the longer sides towards the center like in the picture below. 


2. Now fold the flap so that the short ends meet.


3. Sew around the three sides, leaving the raw edge side unsewn.


4. Place the flap on the center left of the exterior panel and baste stitch. The seam allowance is 1/8" (3 mm).


5. On the right side, install the snap button socket, approximately 1" (2.5 cm) away from the center.


6. The button cap should only placed through the exterior panel and the first lining panel. You can install the button cap before attaching the binding or after. 


7. On the flap, install the other part of the snap button approximately 0.5" (1.3 cm) away from the top.


Now continue finishing the wallet as per the pattern. That's super easy, right? 


If you are not sure whether you will be able to sew Rosie Wallet yet, you can watch the video below for more guidance. 


If you already purchased the pattern and have any doubts, feel free to email me. If you have not,  don't forget to use the coupon code CVG20 when purchasing the pattern


Thank you so much once again for your continued support! If you have any questions regarding sewing or quilting and want me to make video tutorials, simply reply to this email. I'd love to hear your ideas! 


Until next time,

Happy Sewing!


Elvira


Faux Leather Lace Keychains

Faux Leather Keyfobs


Hello,

Here my first sewing project in 2025! I made a fresh batch of faux leather lace keychains or key fobs! These keychains has been quite popular last year in the shop! The laces are really pretty and bought it from one of seller from Mumbai on Instagram. I love shopping online but sometimes they don't live up to your expectations. I heard so many stories from fellow crafters. So it's always better to check with your crafter friends before buying online. 


Faux Leather Keychains


For now, I have green, light brown and orange keychains that are ready to ship. I have a few good quality faux leather I bought from local furnishing shop. The faux leather is imported ones so they won't peel off easily. It's pretty strong and I have used it making a few bags in the past. This year I really have to start using the rest of the faux leather. Let's see! 


This keychains are so versatile. It can be used to carry keys, of course, and it’s also great as an accessory for your purse, backpack or tote bag. It’s definitely pretty enough to use as a gift for someone you love, too.

CHECK OUT MORE KEYCHAINS & KEY FOBS HERE


*****

The holiday season is over and yesterday we dropped the elder son at the airport for his midnight flight back to Singapore. There was a little drama in the morning, as suddenly his Indigo flight was cancelled and he has to be at the University on the 6th Morning. All of us was frantically looking for alternative flights. Since we don't live in Metro city, we only have a few options for International flights to the South East Asia that offer faster travel time. There was Druk Air which fly directly to Singapore but it already departed in the morning. After looking at all options, we decided to book with Air Asia. Luckily the seat are still available for that day and the flight is at midnight. 


Newly installed Digi Yatra gate

In a way it was a blessing in disguise. When booking Indigo a few weeks ago, my son kept saying he wish he could fly out from here instead of transiting in Kolkata. His wish came true! Alhamdulillah. It was also less tension for us as parents. I hope we will have more international flight from here this year. Right now for direct international flight we only have Air Asia (LCC) and Druk Air (full service). Although the fare is a bit higher compared to other big cities, but we can save a lot of travel time and hassle. 


Thank you for stopping by today!

Have a nice day,

Elvira


Linking up to these wonderful BLOGS


Latest Fabrics

Latest Video