The most FAQ regarding the mini crossbody phone bag is "can I make it with Vinyl or Faux Leather?"
Absolutely! So yesterday, I made one for myself and also recorded a short video as I sewed.
Sewing with faux leather is pretty fun, meaning I cut fewer materials and the result is always looking great! I used high-grade sofa leatherette that I bought from a local furnishing shop. It was pretty expensive but it's worth it! It's just the right thickness, pliable and a dream to stitch.
A few things to keep in mind when making this bag with Vinyl is to skip the interfacing and batting.
So basically you cut fewer materials! Unless the vinyl is thin and soft, you might want to add lightweight interfacing for that.
Another thing is to always double stitch the seam.
Faux Leather Bag
For the detachable long strap, I cut 2" wide x 58" Long faux leather. The finished strap is a little wider than 0.5" wide.
As for the D-ring tab, I cut 2 of 0.5" W x 2" H faux leather. Put them on the wrong side together and just top stitch along the edges. I still have a lot to learn about sewing with faux leather. I have a couple projects in mind, but I still keep procrastinating a lot!
Well, I hope these few tips will answer your doubts in case you want to sew the phone sling bag using faux leather. Do let me know if you have any questions, I will try my best to help you.
I have not done much sewing since Ramadan started but I have a few projects that are ready to sew when the mood strikes and I have time. Yes, bacthing your work does help! I have many projects (mostly wallets and small bags) that are ready to sew now.
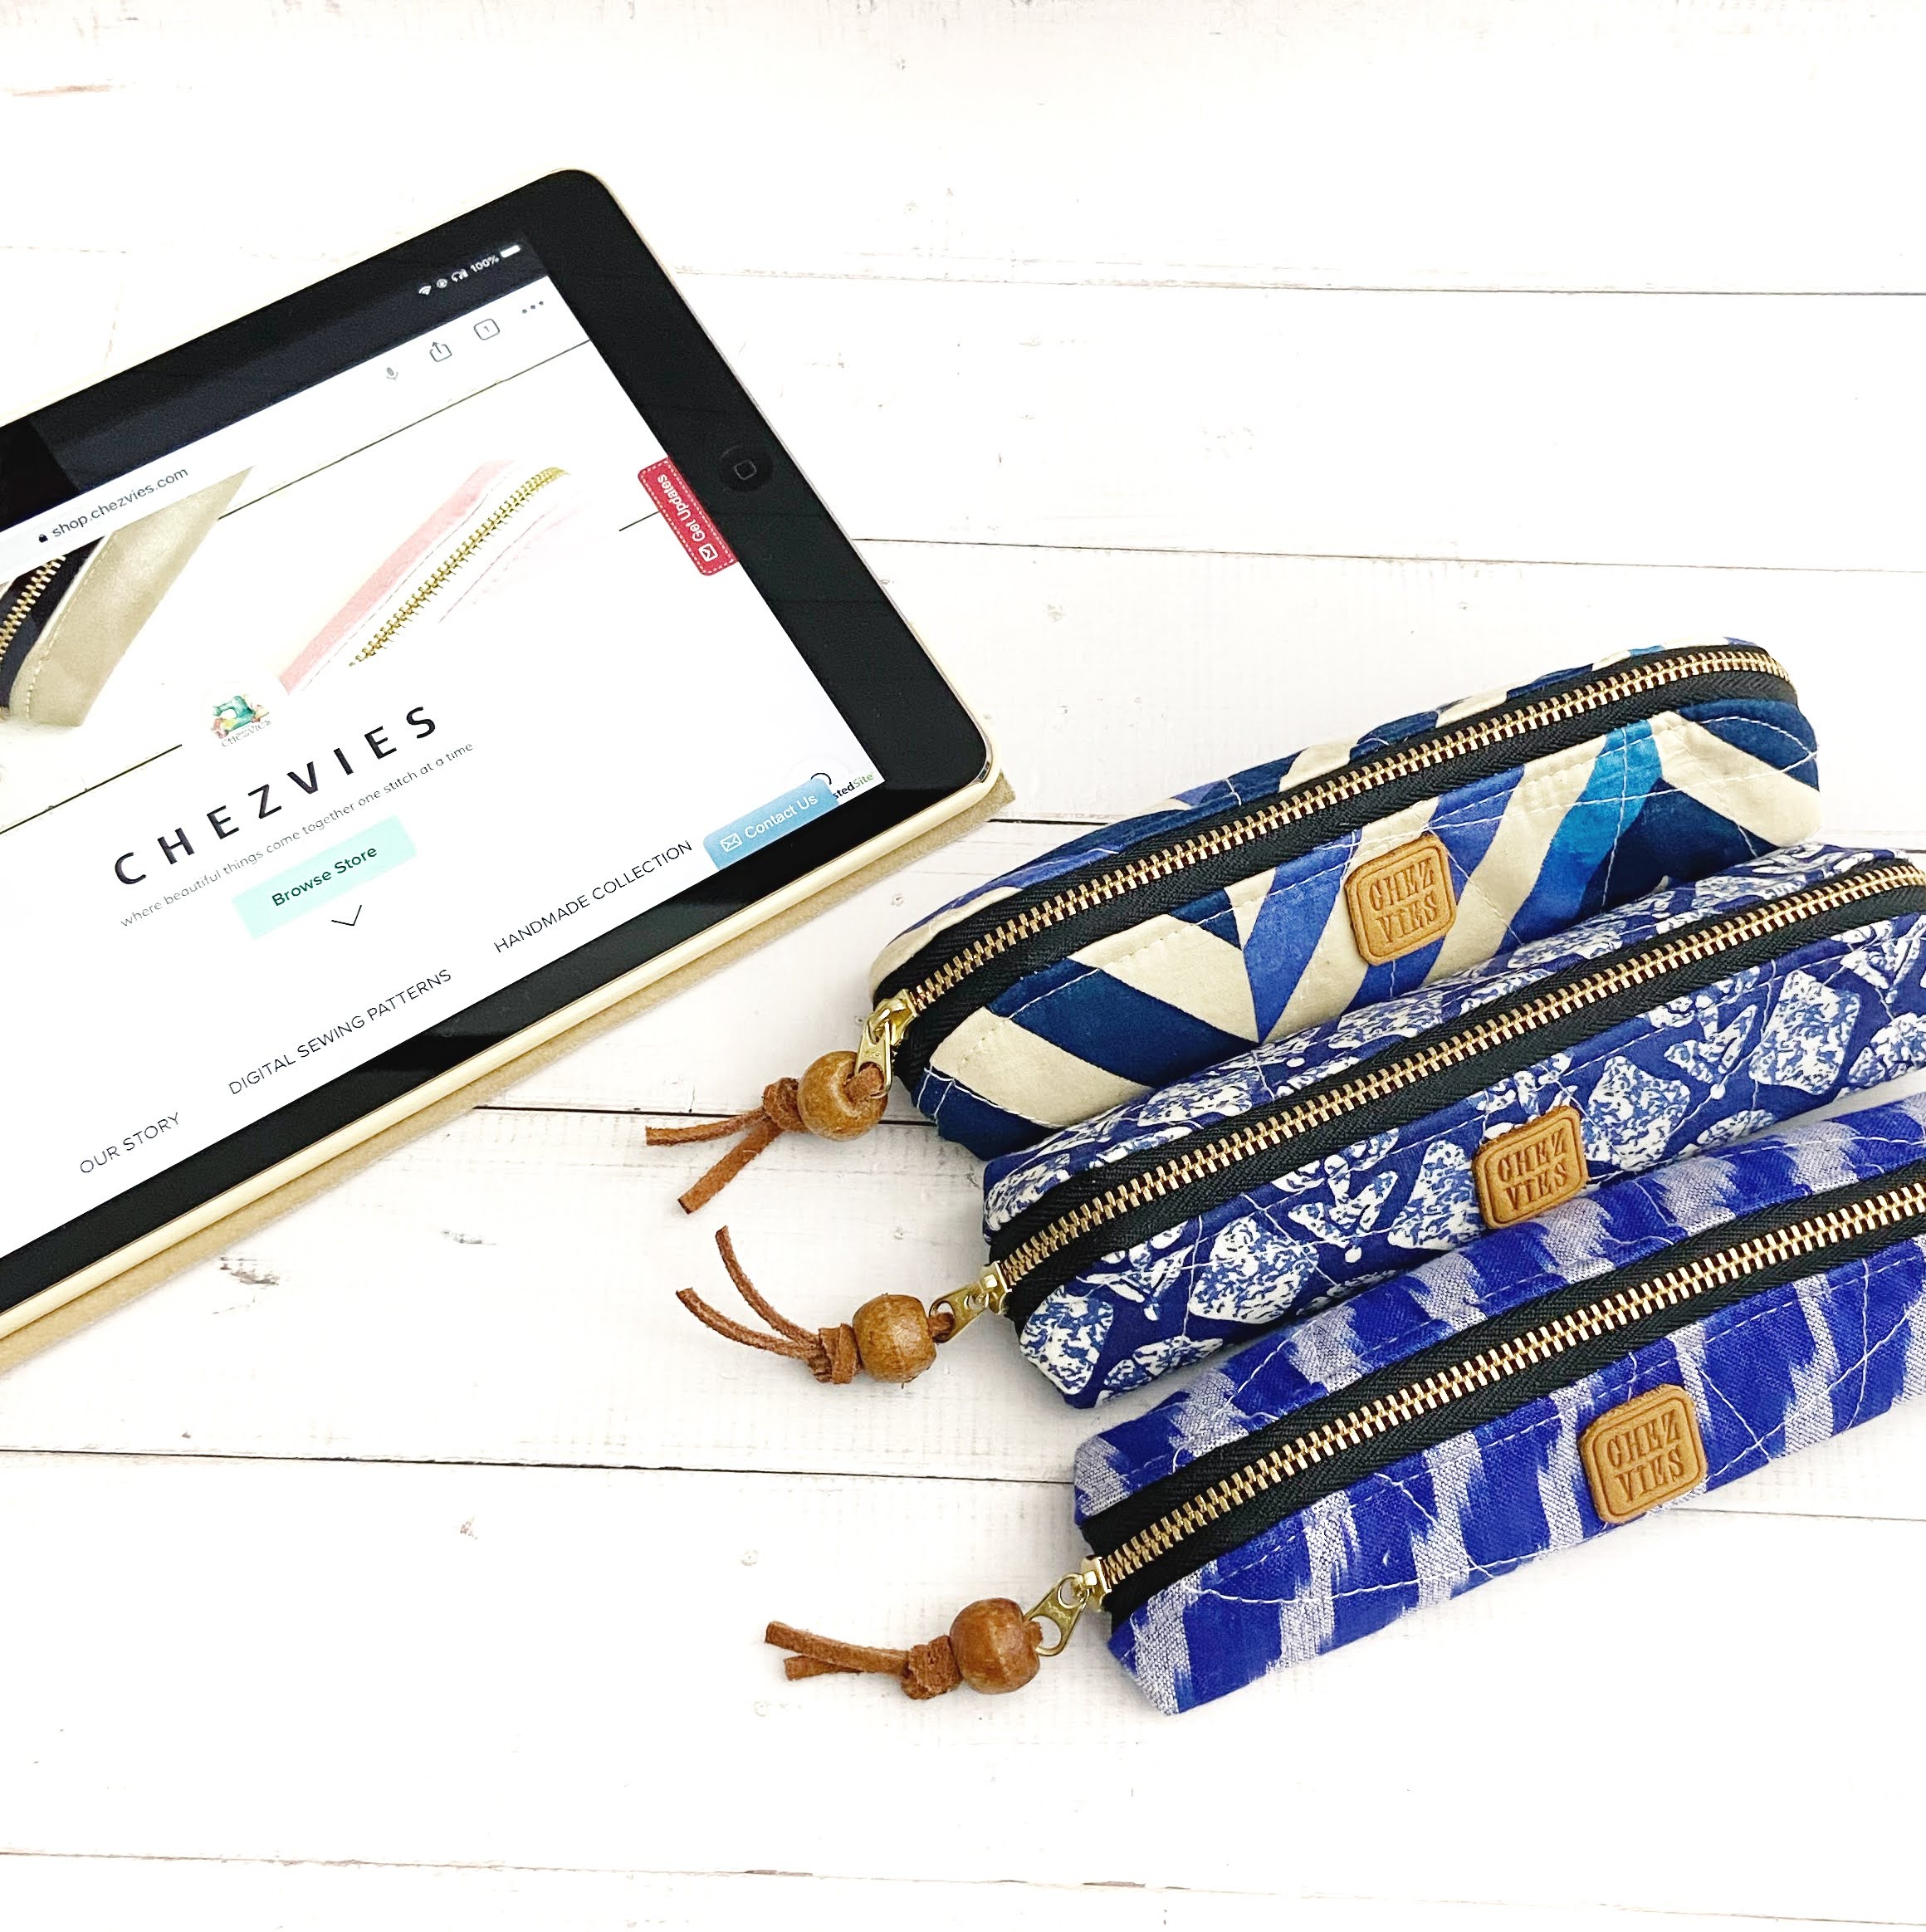
Today I finished these 3 slim pouches. I've always wanted to make these pouches. They are so useful to keep a few pens or digital pens, ear pods, or even brows and lipstick, and eyeglasses.
I used the small size template from the Trapeze Zipper Pouch pattern and added 2 inches length-wise. I placed the template 1" away from the fold and then cut the fabric piece accordingly.
I created the templates in such a way that's easier for you to resize them. Just like these pouches. Here's the comparison with the original size. They are so cute!
These pouched are quilted and my current fave is walking foot style quilting. Well, I am using my Jack sewing machine so I do not really use the walking foot. But the Teflon foot that I am using works out fine.
I added a wooden zipper pull using the suede string. I have a couple of suede strings I bought (impulse buying) from Amazon, and glad I can use them.
This is a super-duper easy project that you can sew over the weekends. I have the videos for the quilted version and the faux leather version on my Youtube Channel. I am thinking of making a couple faux leather slim pouches next, maybe sometime next month. Right now, a lot of things going on, and my mind is sort of all over the place. First thing firts!
The past few days I've been busy spring cleaning (and it's not done yet!). The weather is pretty peculiar this year. We had chilly weather throughout February and turned pretty dry and hot in March. And it's pretty dusty too. I usually start packing winter clothes and duvet around April, but this time I am doing it early. Yesterday, all duvet is washed and kept away today.
I have two quilts that came back from Tina at the Square Inch. The first one is the ground cover quilt top that I did 2 years ago. The top was quite big but Tina suggested making it bigger if it's meant for my elder son, who is 6.1' tall. After a few chats over WhatsApp, we agreed on this green border and black and white bear for backing! I used mostly scrap from wallets and bags, and I am glad I did. I still have lots of scraps that I don't have the heart to throw it away. When I look at this quilt, I can't help remembering what stuff I made with those fabrics.
I really love the emerald green fabric that Tina suggested. It really framed the patchwork well. For the backing, I chose the bear print fabric and love it!!
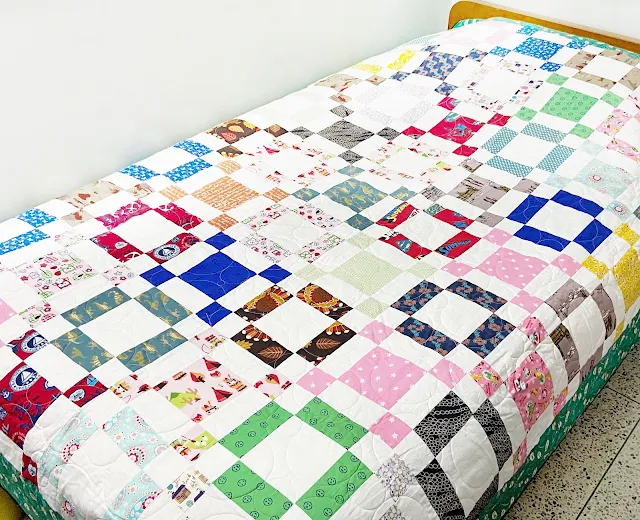
The second quilt is the Jellyroll race quilt in Batik. I think I finished the quilt top back in 2019 when I was doing this quilt. The JR was a gift from my BFF mbak Belly when we first met in Jakarta years ago. At the time, I just started learning about patchwork and quilts. I finally decided to make another Jellyroll race quilt with it. Once I did the top, I was still undecided on what to put for the border and backing. This part usually takes me so long to decide. And when I sent it to SQI and had a discussion with Tina, we decided to use Indian batik for borders and backing. The Square Inch has good collections for Indian Batik. Definitely, 2 heads are better than one, right?
The quilts are washed and now in use. I may need to make another one for my son when he goes to college, but still undecided what pattern to use. I took out one batik JR and also Indian fabrics in the shade of blue. Let's see which one will I finally make first! Just waiting for the idea to strike.
As promised in my previous post, finally the video tutorial for the small passport wallet is up on my YouTube channel now. And as I edited the original pattern to add the link, I also gave a name to the pattern. Well, I am really not good at giving names but then, as I make more patterns, I suppose it's inevitable for me to give a certain name. This time, I go with the simple name Voyage Passport Wallet. I plan to update the original pattern with better photos when I get the time, so please bear with me.
In the video, I cut the pattern pieces slightly bigger than the original one, because I want to use it for Journal Cover like in my previous post
For the zipper version, all the basics remain the same as the original pattern. If you want to make it with zipper closure, here are the additional materials to cut/change:
✓ Cut 2 - Medium or All-purpose interfacing for main exterior and lining
✓ Cut 1 - Fleece Batting - the same size as the main exterior
✓ #5 Zipper – 24” Long (based on the continuous zipper that is cut to size)
If you're new here and wondering about the interfacing I used in my wallets, I wrote my secret guide for interfacing in THIS POST and THIS POST. My suggestion is to keep experimenting until you find the combination that you like the most. In the hydrangea passport wallet above, I used all-purpose interfacing for the main body and using medium interfacing for the sleeves' base. The wallet turned out softer and I can even fit it with more passports - up to 4 passports and it still closed nicely.
I made another Voyage Wallet with Snoopy Print as a custom order. Some of the crafters, DM me on Instagram asking how to do bias binding nicely. As I mentioned in my previous post, before cutting the binding (cross-cut or bias), make sure the fabric grains are straight. This small step is very important to get a good finish. And of course, practice! Practice makes improvement. Sometimes even I had to rip off the already sewn binding because I didn't straighten the grain nicely and resulted in sloppy finish.
Another question is, can I use cross-cut binding instead? Yes, you definitely can. I made a couple of passport wallets with zippers using cross-cut binding. It will be like the usual wallet binding, like in THIS tutorial. When you want to use cross-cut binding for a zipper wallet, do not CURVE the corners. I will make the video next time when I am working on a wallet binding.
Happy Women's Day to all the wonderful women!! On this women's day, I've been honored to be featured on Yourstory.com Women's day edition. A few days ago when Disha from Etsy India sent me the questionnaire, I was sitting on my computer thinking what should I write? I am just an ordinary mother of 2, doing what I love the most in my spare time from one of the corners of my home. But when come to think of it, most of the mompreneurs or women entrepreneurs that I personally know, started the same way, from one corner of our homes.
Oh yes, we have many up and downs stories and I am glad I have a circle of craft entrepreneurs friends in my city that empower each other. Truly, I would not have met them if I was not in Etsy. Today, I'd like to give a shout-out to them, thank you girls for always being there for me!
Achumi from Treasured Elements, I met here 20 years ago when I first came to Guwahati. She was my makeup artist during my wedding!! We lost contact for many years, and finally met up again a couple years ago and this talented girl, now a self-made Jewelry designer. She mostly works with silver and precious stones and has her products displayed at Guwahati Airport and several stores in Northeast India.
Manisha of MrbWatercolor is a watercolor artist and is the first Etsy seller from Guwahati that I know. We chatted several times on Instagram before we met in person a couple of years ago. I love her style of watercolor painting (I got a couple of them!) and of course, her popular watercolor paints that she sells on her Etsy shop.
I first met Meenakshi from Rustic Origin during the Etsy event in Guwahati in 2019. She's a friend of Achumi's. We shared a common interest in fabrics and hand stitching. She loves doing boro sashiko and dyeing fabrics. We met a couple of times, and always planning to meet and do some sewing and quilting together. She runs her Etsy Shop, Rustic Origin Shop, where she sells woven loom home decor from Northeast India.
When we met, we talked about the hustle we have to do, the challenges for selling online now compare to a few years ago from shipping to compliance with the latest government regulations, to the worries for our children, etc. You know the real talk and we often forgot to take selfies! But here's the photo of us from 2019 just before the pandemic started.
Do visit their social media or Etsy shop whenever you are free. Yes, there are always untold hustling stories behind those pretty photos on Etsy and Instagram. For every woman who reads this blog, I hope you can be inspired to pursue your dreams. It's never too late to start doing what you love, what makes you happy! Whether it's a hobby or a business. Just do it!