Powered by Blogger.

Block Print DIY

Hello,

Do you remember this song?

"Celebrate don't you wait, never hesitate
Celebrate while you still got time

Celebrate, yeah it's great, do it right away

Turn your back it's celebration time"


Well, today I decided I will try the block printing!! Afterall I got the wooden blocks and fevicryl fabric paints a few months ago. 
I saw this tutorial on youtube (it's in Hindi) and decided to try it. And I did! 


So, here's few things I learned:

1. First, soak the wooden blocks in a cooking oil. She suggested til ka tel a.k.a sesame oil. I used whatever  I have in the kitchen. she suggested to soak overnight, I soaked for about 3 hours or so. 


2.  While the wooden blocks are being soaked,  wash the fabric that you are going to use. I used linen, the lady in the video used mulmul or voile cotton. 
After the fabric dried up ironed it nicely. I used layers of newspaper and flannel fabric as a base and laid out my piece of fabric there.


3. Now, take one kitchen scrubber, the sponge one, and a small plate to mix the colors. Transfer the paints onto the sponge. Wipe the wooden block with a paper towel first then press it onto the sponge and start stamping. One at a time. 

And here is the result.
 I love this bicycle print. 

 The Ship and Bell, more or less the same size as the bicycles. 


and I love the red florals and bells here. 

Now, I have to wait for 24 hours before I can sew them into something pretty. A wallet, sling bag, or maybe a pouch

If you ask where do I get the wooden block from? I bought it from Amazon India. There are lots of sellers who sell them in a set of few pieces. I think I am going to buy one more set. It's kind of fun. I will let you know how it is after 24 hrs. Subscribe to my blog if you don't want to miss the post. 

Yes, it's a small achievement today that worth celebrating. 
It was not perfect but then that's the beauty of handmade, right?

Until then,

Happy Diwali!!


NEW PATTERN!! Single Passport Wallet

Hello there,

Finally, after few months I completed the pattern and is now on Special Price in Etsy and Craftsy.

Single Passport Wallet
and if you're in India, you can check the pattern category on the top of this post or scroll down to shop directly.

Special thanks to Maria and Susan for helping me testing and proofreading the pattern. As English is not my first language, there's a lot to learn. At home, we speak English, Assamese, and Hindi. Also, I talk/chat with my family and friends in Bahasa Indonesia. So, at times, it's a bit confusing lol. 
But don't worry, I included a lot of photos and few diagrams to help you understand the pattern better, even if English is not your first language like me. 

Without further ado, let's admire what Maria and Susan have made:

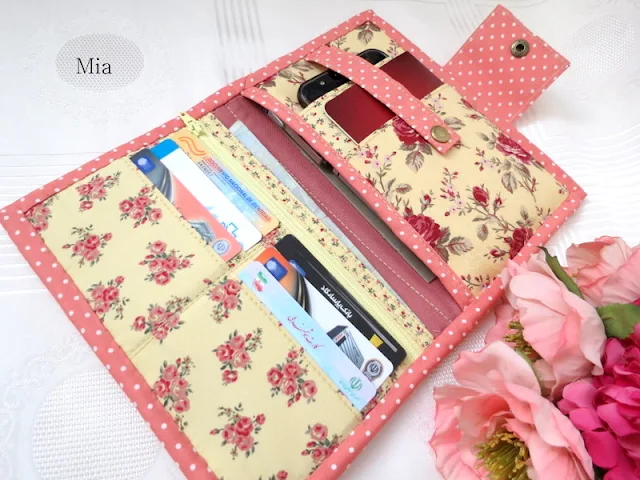
I simply love this hexagon wallet that Maria made. She and her florals can be very contagious lol ..if you see me making more florals in the future, the credit goes to her! 


When she asked me if she could improvise a bit, I said "definitely!!" and look what a smart addition she made. She said the slot is perfect for her smartphone! Very clever Maria.  


here a closer look!. I am going to add this next! Thank you, Maria! 


And here is Susan's wallets. She made 2  wallets and look how neat they are! 


she suggested that attaching the flap a few inch away from the wallet's edge is better for hand sewing the binding. 


 This is her second wallet and I LOVE the fabric. It looks like leather. It's perfect for travel wallet, isn't it? 


and even prettier inside <3 


The second wallet, she attached the flap away from the edge. It's the same method I used in the Family Passport Wallet Pattern


So, based on Susan's suggestion, I added a bonus tutorial for the flap. And of course, you can always make improvisations, like maybe a wider flap with a hexagon applique like the one I did previously. 


So, grab the pattern now and start making and selling. Don't forget to tag me on Facebook or Instagram  or use hashtag #chezvies or #chezviespatterns if you want me to find you ^^.

Until then, 

Happy Sewing


Small Passport and Card Holder

Hello,

Just a quick post. I've been busy writing the instructions for my next wallet pattern and able to finish these 3 wallets in 2 days! That was a record. What's the secret? Uninstall Facebook app from my phone! Yes, that is the secret! I found I spent too much time just browsing, most of the time aimlessly, on Facebook and less sewing. The "just 5 minutes" can stretch to 2 hours or more. I feel I need to be more focus on getting works done then just admiring other people works!

Anyway, the pattern is coming along very nicely, thank you for my dear friends who came forward to ask about my next pattern. I feel so blessed. Sometimes, I think it's a way of God to nudge me, to remind me that I have more important things to do then just snooping around on Facebook LOL. I do need that big nudge. So thank you once again! #hugs (you know who you are)!

So here are my wallets, now they are available on ETSY and CHEZVIES WEBSITE.

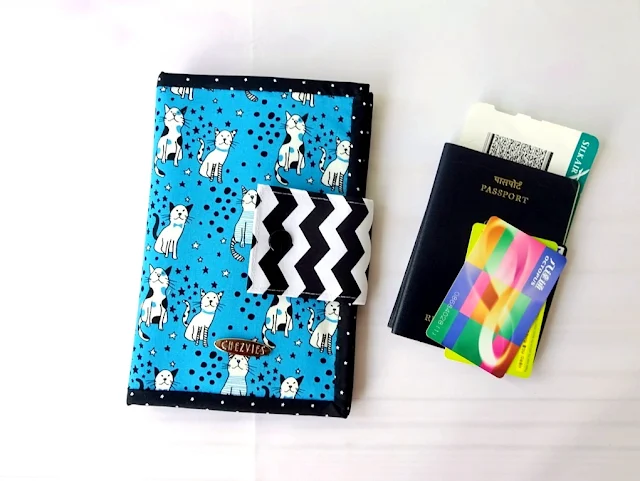
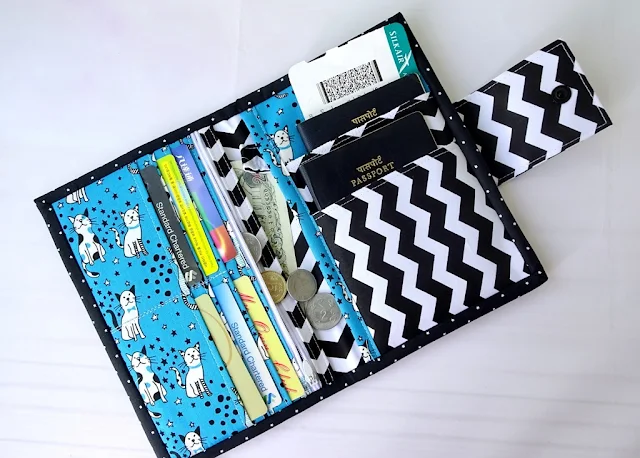
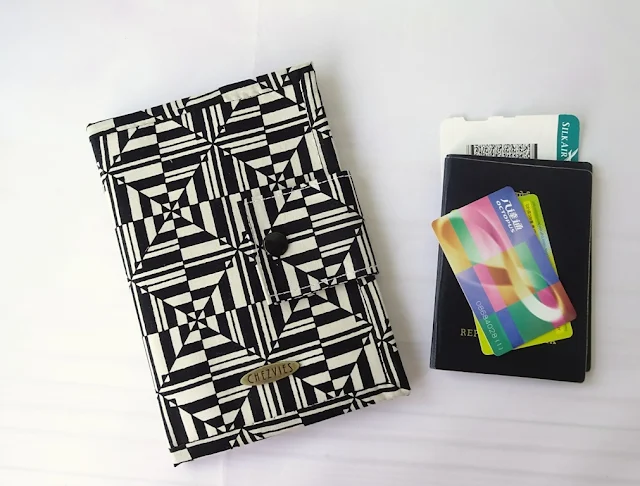
I have quite a few cute cats print fabrics and I took out two of them. First one is this blue cat wallet. Arent's they cute? I really love the black and white chevron too. The chevron I got from  Indonesia last year. 


http://shop.chezvies.com/HANDMADE-c22116625

The wallet is pretty quick to make and it's fun to make. I think that's the fabric effect. Ha! 

Passport Holder


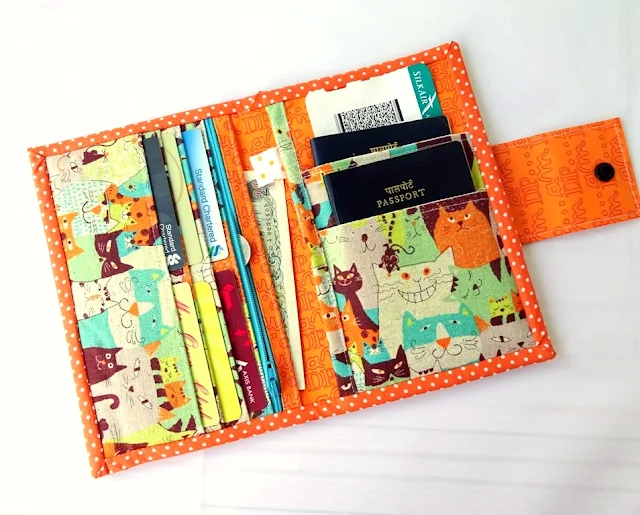
 The next one is this orange cat Wallet. My fave! Look at those naughty smiles. 

https://www.etsy.com/listing/563149643/orange-travel-wallet-organizer-passport?ref=related-1

I even hesitated for a while before installing the metal tag. Just didn't want to cover the smiles with my tag. 


I also made this retro type black and white wallet with bright pink and red combo. It's just perfect for those who love a little splash in life. 

https://www.etsy.com/listing/548866962/small-passport-holder-card-wallet-travel?ref=related-2

And I felt so happy when I found the flap matched perfectly. Well, life is full of surprises. Sometimes, even the best plan doesn't work out! 

https://www.etsy.com/listing/548866962/small-passport-holder-card-wallet-travel?ref=related-2

About the pattern, I hope to release it next Tuesday! So watch this space for more pictures from my friends. 


Thank you for stopping by today! 

Happy Sewing,


New Fabric bundles are up!

Hello,

It's festive season now in India. The boys just finished their half yearly exam and Durga Puja holiday just started. Now I can go back to settle my messy sewing room. It's  overflowing with fabrics from the process of making fabric bundles.
I used to be obsessed with finishing everything in a certain frame of time. But, recently I just take it as it comes. If I only have time to cut one fabric or to sew one pocket so be it. As long as I enjoyed it. Afterall I am my own boss, right?


Today few bundles are uploaded in  Chezvies Fabrics Club on Facebook. The group member can have early access to the bundles. Each bundle is different. They may be in similar colors but different prints. It's totally one of a kind bundles. Indian fabrics have so many color hues. Greens, pinks, yellows, oranges, reds and all of them are just too beautiful.

Join the Club to get FIRST ACCESS to the Bundles
If you love Kantha quilt and want to make one yourself, the pretty bundles will be a great start. Now that reminds me of my unfinished baby quilt. I have done the top but have not got the time to make the sandwich.

Right now, few are already posted in the group. More will be added from time to time as time permits. Selecting fabrics, cutting them into fat quarters, folding, taking photos and editing and finally put them up in the shops are taking so much time. Since I do everything alone. But I really enjoy the whole process. 

Now all photos are edited and I will put them up in the shops whatever is left from the CLUB. 
If you're into Linen, I also got gorgeous block printed linens. It's simply beautiful. Check it out below this post.

Thank you for stopping by,
Until then,

Happy Sewing


Bifold Wallets

Hello,

I've been very busy with fabrics in the past few weeks. I tried to destash some of my stocks by making them into fabric bundles and fabric duos. And in the process, loads of inspiration going through my mind and one of them was these kawaii (cute) bifold wallets


Matryoshka Bifold Wallet
 I used the pattern from Napkitten Pattern in Etsy. The pattern is a bit confusing at first since it does not have a template. I decided to make templates based on the measurement given. 

Blue Owl 

After you get the hang of it, it sort of addictive. I'm happy because I can use some of the fabrics from my scrap bins. Leftover binding from my passport holders,


While making these wallets, I realized how much I enjoyed making small things from fabric remnants. Sometimes, we tend to be carried away by the current trend, that we lost our own focus. 


I realized I love making small things or something bigger with more details.  I find it more challenging and it gives me immense satisfaction when I can complete it. 

Quilted Bifold Wallet 

I like to try a new technique or new materials since in India we don't have fancy bag making materials. I like to experiment and to see how's the result.

Pink Owl Bifold Wallet
 The bifold wallet, even though it's quite small, it has bill compartment, slots for few cards, slip pockets and coin pouch. I am currently using one. It fits nicely into my fave sling bag. 


"SOMETIMES YOU HAVE TO LOSE YOURSELF TO DISCOVER WHO YOU MIGHT YET BE SOMETIMES WHAT FEELS LIKE BREAKING DOWN IS REALLY JUST BREAKING FREE" - CRISTEN RODGERS

Thank you for stopping by today,

Until then,


****************************************

LINKS:


Tutorial Reversible Quilted Trivet or Coaster

Hello,


I'm still in scrap buster mode. Now, let's make Reversible Trivets or coaster. It's really easy - mind numbing project. This is the kind of project that lifts up your spirit or gets your sewing mojo back.

Alright, here's what you need:
- Fabrics scraps of various sizes and colors. 
- Batting scraps - I am using flannel in this tutorial. 

First, you need to decide the size. I normally go with the whatever size of the batting scraps. In this project, the batting is roughly 6.5" x 7". 

Now grab 2 small pieces of fabrics and put them RIGHT SIDE TOGETHER in the middle of your batting piece. Sew with 1/4" seam allowance. You can go with 1/2" or 3/8 seam allowance. It doesn't really matter. 


Now flip them open and finger press. I trimmed the pink stripe fabric a little bit. For a small project, the narrower the fabric strip the better. At least for me.


Now take another strip of fabric and put them Right Side Together along with the longer side of the previous unit. Sew down with 1/4" seam allowance. 


Flip it open and finger press. 


Repeat the process until the batting area is covered. Once done, start quilting the panel. I love doing line quilting. You can quilt it in whatever design you like. Don't worry even if it's not straight. It's "your quilt, your rule" kind of project. 


Once it's done, trim the panel to the desired size. In this tutorial, I trimmed the panel into 5.5" x 5.5" roughly. It doesn't have to be square. 

Repeat the whole process with the other piece of batting and now you have 2 bright and beautiful quilted fabrics ready to make into something F U N. 


If you want to make a pot holder, you can add another piece of batting in between the two quilted panels. 


for trivet or coaster, it's not necessary. Put the quilted panels right side together, and sew all around, leaving 2" gap for turning. 


Trim the edges by cutting the corners diagonally. Be careful not to cut into the stitches. 


Now turn the coaster inside out. Close the gap by hand sewing the opening or apply fabric glue. 

Voile, your one of a kind coaster is done and you can admire it. 


Actually, whenever I made something from those small scraps I feel like I saved the world. LOL. I wish I could sew clothes like Zero Waste Daniel . 


Here is another one I did. This one was hand quilted and hand sewn the binding. 


You can make many things with those tiny scraps. 

Now go and make few from your scraps. Tag me on Facebook or Instagram if you made something from this tutorial.

And if you ever need fabric scraps, you are most welcome to join the CLUB or check the CHEZVIES SHOP

Thank you for stopping by.

Until then,

Happy Sewing

**************************************

Indian Fabric Bundles


Patchwork Pouch

Hello,

Never threw out even the smallest piece of your favorite fabrics! You can turn them into this pretty patchwork pouch


I was organizing my small scraps last Saturday and as a bonus, I decided to make this pouch. Actually I started out with card holder in mind. I even took out Suzuko Koseki book for guidance. 

I decided to do quilt as you go method since some of the scraps are quite tiny. And when the panel is ready, I was thinking, it will be better to make pouch! 
So here is the QAYG pouch with 2 different sides. One side is sober color and a bit brighter on the other side. 


I love zipper with binding, I made once and have not attempted again. So, this time I decided to do just that. Zipper with binding! and I love how it turned out.


I added faux leather tassle too. It's uber cute!! Each piece of fabrics in this pouch has a memory of it's own. Some of them are from the leftover binding, some are from the corner cuts of a bag, etc. It is  a special pouch! If you want to purchase the pouch, it's available HERE

I know I'll be making more, but there are so many other things I want to sew. My list keep growing. 

Thank you for stopping by!

Until then,

Happy Sewing


Latest Fabrics

Latest Video