Powered by Blogger.

TGIFF - How to Make Quilted Sling Bag

Hello and welcome to TGIFF!

This week, I'm sharing a tutorial for foldover sling bag. 
A few weeks ago, hubby's aunt came and she said her morning walk friend wanted a sling bag like the one I made for her. It's a simple foldable sling bag with elastic closure. Very light and handy.

UPDATE : Download the PdF version HERE


So, here is what you need:

- Assorted of fabrics for exterior and lining
- batting (you can use fleece, flannel or cotton)
- Fusible lightweight interfacing (skip this if you are using fusible batting)
- Elastic cord or hair band
- Large Button
- Grosgrain ribbon
- Woven Interfacing Strip
- Swivel hook 0.5"

Measurement and cut

- Exterior Fabric :
   Top Panels  8" W x 3" H - cut 2
   Bottom Panel 8" W x 8.5" H- Cut 2

- Interfacing : 8" W x 22" H - Cut 1
- Lining Fabric : 8" W x 22" H - cut 1
- Batting  : 9" W x 23" H - Cut 1
- 0.5"Wide Ribbon  : 2" Long - cut 2
- Strap Fabric : 2" W x 44" H  - cut 1
- Woven Interfacing Strip 1" x 43 - cut 1

*RST - Right Side Together


Let's sew :

1. Sew the top and bottom panel together  on the 8" side (RST) with 3/8" seam allowance.
2. Sew the bottom of both exterior panel together (RST) using 3/8" seam allowance. You will get a long piece of exterior panel 8" W x 22" H.


3. Fuse the interfacing on the wrong side of the exterior panel and then place the it on the batting Right Side Up  and pin generously. The pins will prevent the fabric from shifting while you quilt it. Quilt as desired. Once you finished with the quilting, trim the excess batting.


I'm not very fond of free motion quilting, so I always use my walking foot. I quilted my bag using organic wavy lines approximately 0.5" apart.  Walking foot is just awesome! It goes through layers effortlessly like this bag and this bag.

4. Fold and attach the ribbons on the longer sides of exterior panel. Place it on the bottom panel part, just under the stitching line between the top and bottom part.


5 . Fold the elastic cord and make a knot. Center it on one of the exterior panel top edge. Top stitch with 1/8" Seam allowance. Run a couple stitch and back stitch to secure it.


6. Put the lining  and exterior  panels RST and sew the short edges (top) together with 3/8" seam allowance. Repeat with the other short edge.


7. Turn the bag inside out , pull the lining away from the exterior. Press the seam towards the exterior side and top stitch with 1/8" Seam Allowance.


It should look like the picture below.


On the wrong side , it should look like the picture below. 
Do not cut the knot.


8. Now pull out the lining and exterior panels separately, so that they are on opposite side. Match the top seam and secure it with wonder clips. 


9. Sew the longer side starting from the exterior panel with 3/8" seam allowance. Repeat with the other long side, but leave a gap around 4" or so for turning. Don't forget to back stitch at the beginning and end .


10. Diagonally cut the corners and turn the bag inside out through the opening, iron it and sew the opening closed.


Make the strap:

1. Center and fuse the interfacing on the wrong side of the strap fabric. You can opt out for the interfacing if using thicker fabric. Since I was using thin linen, I use  1" woven interfacing strip.
2. Fold it lengthwise and press to create a middle crease. Open the fold. (DIAGRAM A)
3. Fold in both short ends by 1/2” and fold both raw edges lengthwise towards the middle crease. (DIAGRAM B)
4.Press and fold it in half lengthwise again. Top stitch on both long edges with 1/8” seam allowance. (DIAGRAM C)


5. Install the swivel hooks on both ends of the straps and stitch the strap to secure it.


6. Sew fancy wooden button on the front of the bag. Fold top of the bag and mark the placement as you desired. And it’s done!! Yay!!


Do tag me on Instagram @chezvies if you make one!

Now, it's your turn to link up and show us your finish this week! Click the blue button below and start sharing~


Happy Sewing

Elvira


Book Review - More Adventures with Leaders and Enders

Hello,

If you're a seasoned quilter, the chance is you already know Bonnie K Hunter from Quilt Ville. I'm following Bonnie since years ago, I often watch her Quilt Cam series on youtube.

I finally recently bought her book More Adventures with Leaders and Enders. I must say, it's simply amazing for someone who love to collect tiny scraps like me.

More Adventures With Leaders and Enders
At first glance, you might find the quilt design is a bit intimidating, but after slowly read the instructions it all made sense. Last week, I tried out the Scrap Crystal. I started digging my scrap baskets for blues and greens. But I was so eagerly trying it, I thought I will do with a single color background.


After making one block I showed to a couple of friends and they said, it looked great, but I want the Crystal-y effect like the one on the book!!


So, I started cutting the neutral colors. The best thing is Bonnie includes all the details of what neutral colors she included in her quilt so that we can get ideas.


Here is the first scrappy block look like. I have not stitched them together.What say?


I mostly used Indian fabrics since they have bright and lots of shades. I'm hoping to finish the quilt after I come back from my holiday! Wish me luck, everyone!!

Until then,

Happy Sewing

Elvira


**********
Some of my posts may contain Affiliate links,which mean if you purchase something through the links in my blog, I may get a small commission at no additional cost to you. I only recommend products and/or services that I personally use and believe will add value to my readers. Thank you so much for your support!


How To Hand Sew Wallet Binding Tutorial on YouTube

Hello,


Many of you asked if I can make a video tutorial for hand sewn wallet binding. I took the video quite sometimes ago when I make this matryoshka wallet and I just got a new mobile phone tripod which was just perfect. At least it's better than the mini tripod  I had earlier. With this mobile phone tripod I can get a good angle to shooting the video. The video was shot using my One Plus  phone


Lightweight Tripod

Really, there's nothing scary about hand sewing. If anything, it is easier than machine, since you're totally in control!


Do check out the video, like and subscribe! I am hoping to do more video tutorial in the future, Insha Allah.

Happy Sewing,

Elvira


*******
Some of my posts may contain Affiliate links,which mean if you purchase something through the links in my blog, I may get a small commission at no additional cost to you. I only recommend products and/or services that I personally use and believe will add value to my readers. Thank you so much for your support!

Passport Card Sleeve Pattern - Testers Photos Part 3


Hello,
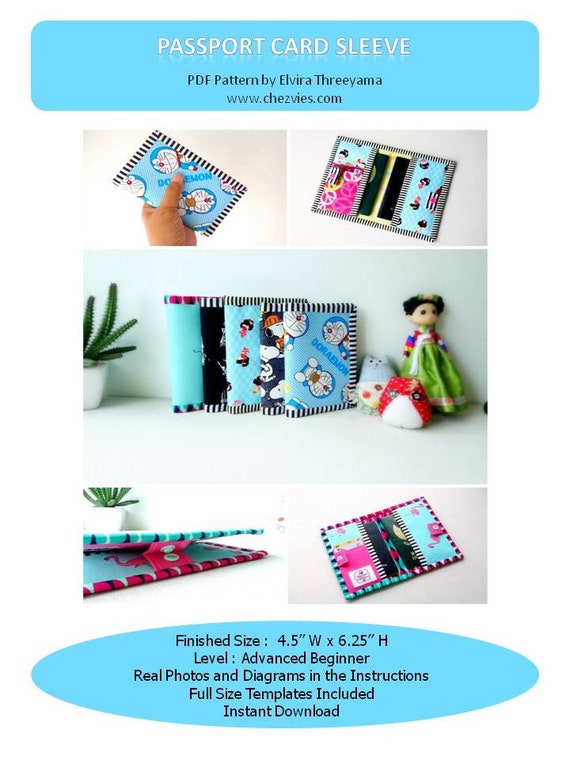
Passport Card Sleeve Pattern

I really love how the above black and white passport cover turned out. While making the pattern, I always did a few to make sure that everything was OK before I sent the pattern to the testers. Even with all the sewing, there's always something that I missed. Hence the pattern testing stage is very important, even for a basic simple pattern.

The ladies who helped me with this pattern were simply awesome and also I want to thank Namrata of Bagstock who helped me proofreading every single draft. A big thank you once again to everyone (group hugs!!!).

Now, let's jump in to see the last part of the tester photos! Some of the testers made a couple of Passport sleeve. You can also check their photos in my Pinterest.


As usual, don't forget to click the link to see more of their works!


Jenny Gomez


Sandra - Bags by Sandra D
Ellen Berline 

Haurox - Vallyria

Jeanne - LA Baggs & Stuff

Sandra - Bags by Sandra D


Prabha - Quiltaholics

Rassika - Made by Malko


No automatic alt text available.
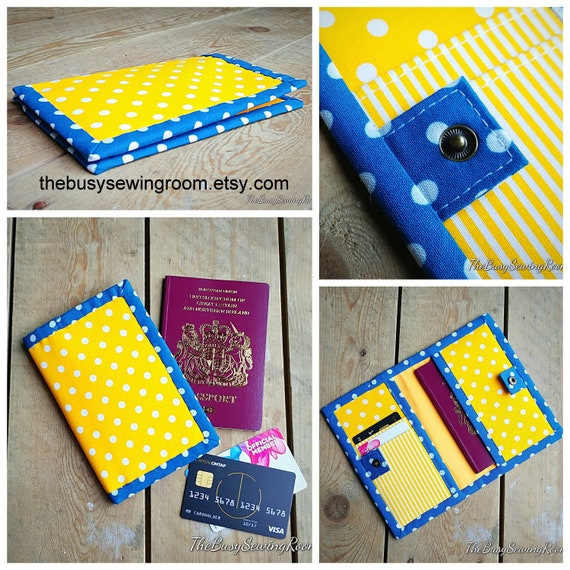
Ulrike The Busy Sewing Room - Facebook, Instagram, Etsy

Aren't they amazing?
Also, check the tester photos PART 1 and PART 2 

The summer holiday is just around the corner, make few as a travel gift, or even sell them in your handmade market or pop up stores! It's very quick to sew. See the right panel to get your copy directly from this blog. 

Patterns also available here:
ETSY

Thank you so much for stopping by!

Have a lovely Monday!

- Elvira- 


Passport Card Sleeve Pattern - Tester Photos Part Deux

Hello,

Have you checked the first part of the tester photos? Now the show will continue with the next batch of the tester pictures! I must say, each one of them is really inspire me. To be honest, I tend to choose my color combo carefully, but with this scrap friendly passport cover pattern, you can just be free! Use any fabric in your scrap bin, as long as it matches the size and make a fun, one of a kind passport sleeve.


Now let's check out the testers photos. Click the link under each photo to see more of their amazing works!

Tammy Carter - Sugar n Spice Sewing

Kausalya Pandit - The Turquoise Paisley

Rassika - Made by Malko

Harsimran Kaur - Oye Hoye Bags - FACEBOOK, INSTAGRAM

Rebecca Ann - The Fiesty Thimble

Sobana Sundar - The Quilt Bug

Amita - Sewonder Crafts - FACEBOOK, INSTAGRAM

What do you think? If you wonder is this pattern for beginner? Yes it is! If you want to learn the basic of wallet making, this might be the pattern you want to try. The pattern is written in simple English with photos and diagrams to make it easier for non English speakers to understand. I know how frustrated it is to learn sewing from foreign language book! 

Now, go ahead and purchase the pattern while it's still on SALE in  ETSY as well as in the WEBSHOP and sew your weekends away ^_^. 

Stay tuned for the last part of the Testers Photos! Subscribe to my blog or join the FACEBOOK GROUP and let's have fun together!

Have a nice day!

NEW PATTERN - Passport Cover Pattern & Tester Photos Part 1

Hello,


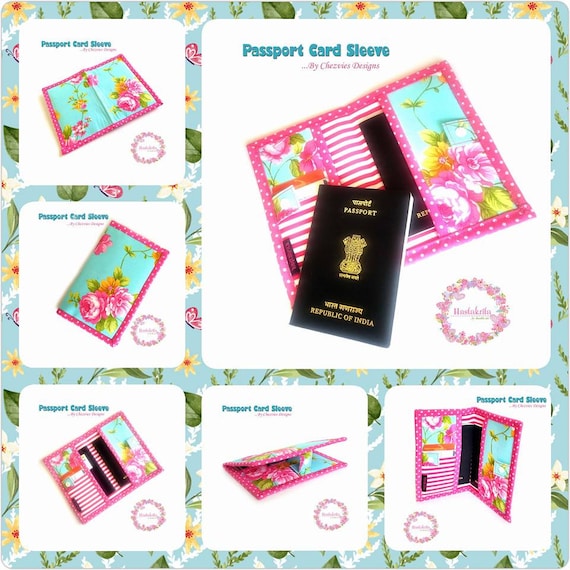
I just released a new pattern! When I first posted the passport cover I made in Instagram, many of my fellow crafters asked if the pattern will be available. Well, I said, why not? It's a super quick pattern to sew and I'm sure it will be popular in your handmade markets or pop up stores. The pattern itself is highly adaptable. One of my tester, Maria, said it is perfect for an everyday wallet. 
The pattern is now on 20% off both in my ETSY SHOP and WEBSHOP.

I'd like to thank my amazing testers for their effort to help me perfect this pattern. There was a lot of discussion in the group and I learned that certain countries' passports are bigger. The pattern comes with full-size templates and measurements are given in Metric as well as US System. 


Without further ado, let's check out a few photos from the testers! Make sure you click the link to check more of their works.

Ulrike's The Busy Sewing Room - FACEBOOK, INSTAGRAM, ETSY

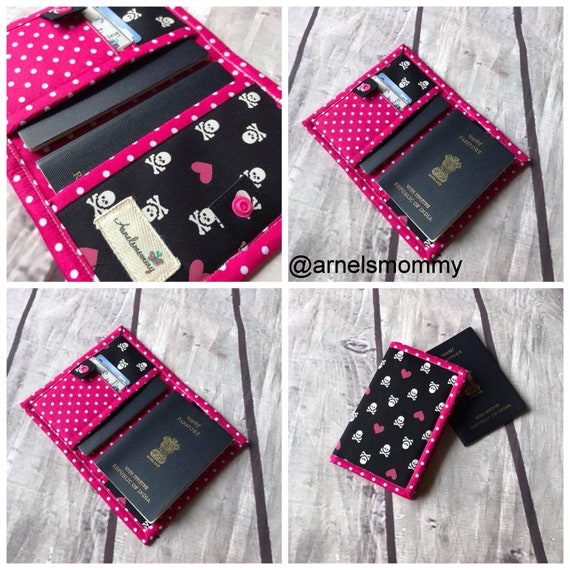
Shweta's ArnelsMommy : INSTAGRAM

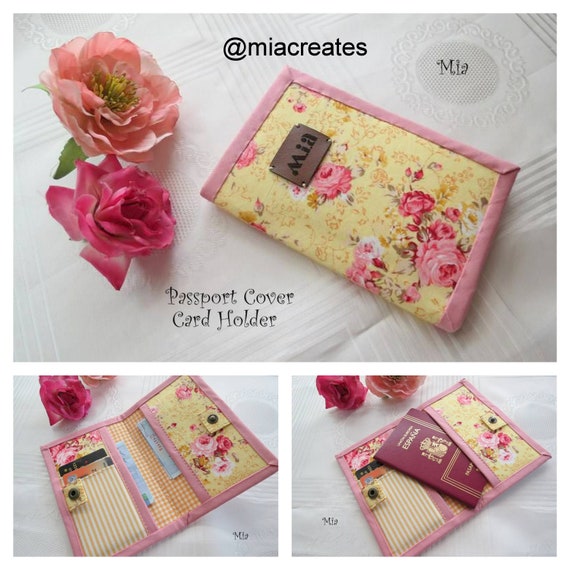
Mia Creates on INSTAGRAM
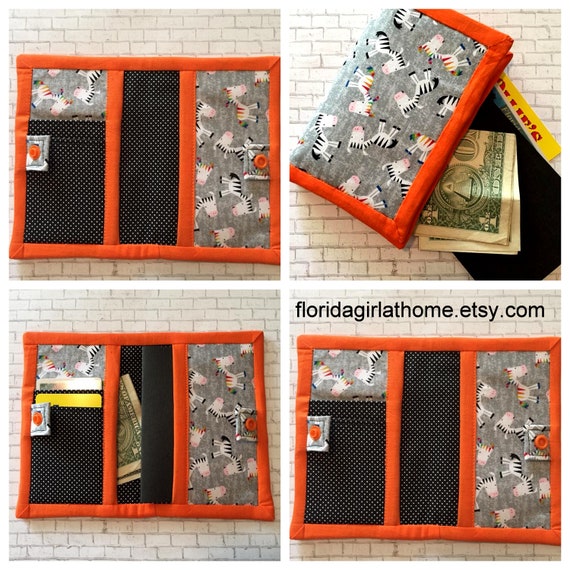
Allison's Florida Girl At Home  - INSTAGRAM

Shanti's Hastakrita on FACEBOOK

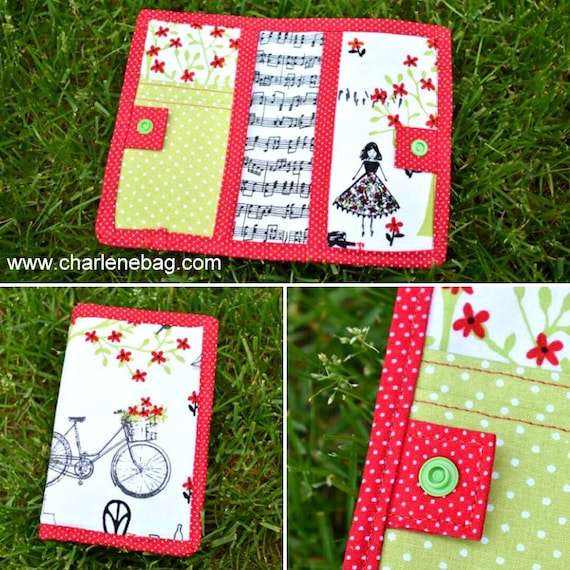
AnDrea's Charlene Bag - WEBSITE, FACEBOOK

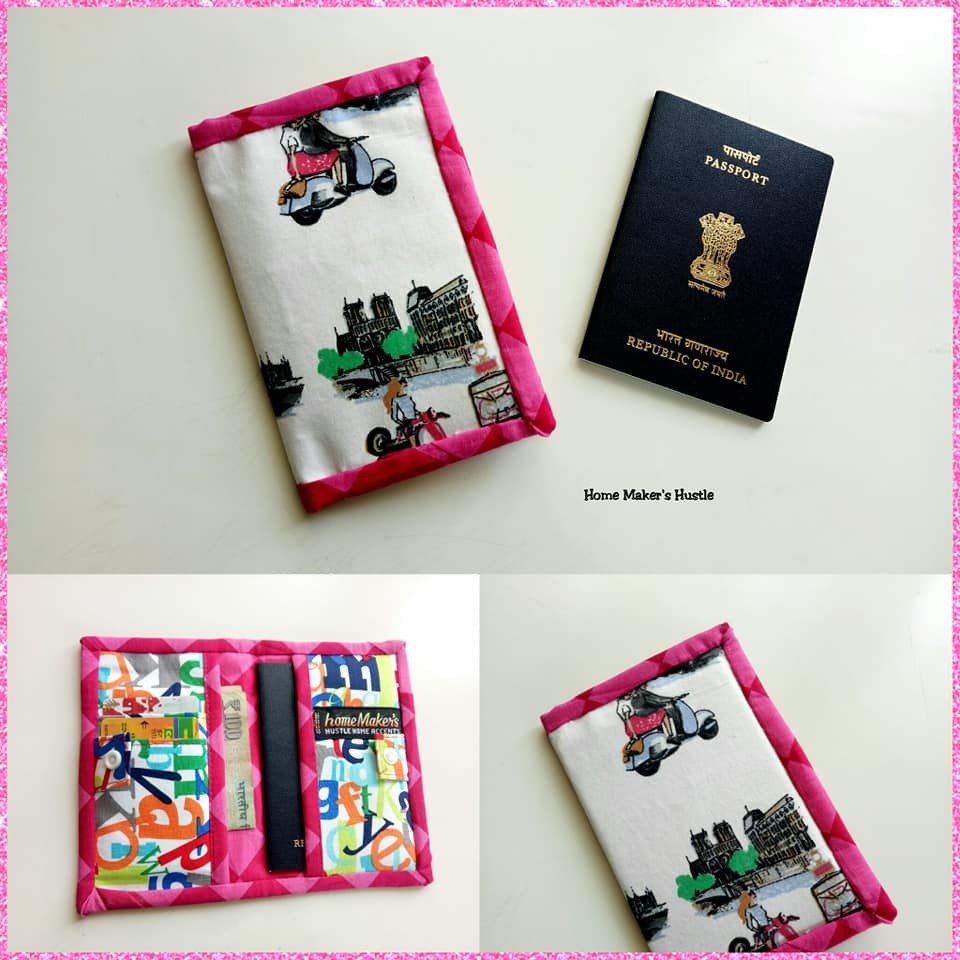
Raji's Home Maker's Hustle - FACEBOOK, INSTAGRAM

Aren't they beautiful? Some of the testers said it was the first time for them to try sewing the binding by hand and they loved it!! I included step by step photos how to create a neat mitered binding in the pattern and planning to add a video soon. As soon as I learn how to take a decent video, without embarrassing myself or my sons LOL. 

I will show you more photos tomorrow! Follow my blog by email so you won't miss the post or join the Facebook Group and mingle with the like-minded crafters. 

Until then,

Happy Sewing

- Elvira-


Alternative Card slot on Matryoshka Travel Wallet

Hello,

It's June already and I'm always looking forward for my summer break to Indonesia!
Did I mention that I am working on the pattern of this passport cover? It's now on the testing stage and I'm so grateful for my amazing testers who not only they're giving me their honest feedbacks and suggestions, but also they're also working hard making beautiful wallets,which I am sure will make you inspired!! I will be sharing their posts once the pattern is released next week! so stay tuned or subscribe to my blog so you won't miss the date!

In the meantime, I finished this matryoshka travel wallet. 


I tried a different flap this time and happy with the result. I also tried using a different combination for the card slot. If you already purchase the pattern, here what you can do: 

From the main card slot pattern, reduce the height (or the length) by 3". Then cut an exterior or contrast fabric 8"W x 4" H and sew it to the main Card slot panel with 1/4" seam allowance.

Once they are sewn together, mark the lines from the bottom to the top referring to the diagram given on the pattern. The first mark line should be on the stitching line (see diagram  above). 
Once done, continues as per the pattern's instructions and here how it will look like! 


Let me know what do you think in the comment below or your can join the discussion on my Facebook Pattern Group


I hope you like the tutorial. And if there's any tutorial you'd like to see in my blog, feel free to comment or email me :). 


Develop a passion for learning. If you do, you will never cease to grow. Anthony J. D'Angelo


Thank you for stopping by ~ Have a nice day!

Latest Fabrics

Latest Video