Powered by Blogger.

Cute Trifold Wallet - Lockdown Project


Finally this trifold wallet is done! It's a custom order which was finalized at the beginning of lockdown in March. She's a fan of Disney and wanted this specific fabric after she saw the family passport holder with the same print. Luckily I have just wide enough to make the wallet's exterior and a little bit for the wallet's interior. 


(use code FAVE20 to get 20% off)

Another addition she wanted was the ID window. For that, I used the 16 cards template from the pattern and added ID window on the top card slot. 
I personally love how this turned out and I hope she will too :). I just need to add personalization with her name. I'll update you on how I do it. 


Before I made the big trifold wallet, we were discussing color combo option. And just to  see how it works, I made the Midori Mini Wallet - a little version of the big one.  But here I used stripe handloom fabric for binding, which I must say, turned out very cute. 


By the way, I reopen my Handmade shop in Etsy and also my Webshop. The government has announced that domestic flight will resume on the 17th, which at least I hope I can start selling again. 
I know that this pandemic will not go away soon, but we have to cooperate with the government orders and keep maintain physical distancing, wear a mask and wash your hands. Maintain hygienic lifestyle.  

Thank you for stopping by.
Take care and stay safe, everyone!

-Elvira-

*******

SHARE & GET 20% OFF
Trifold Wallet Pattern


*****

Linking up:


TUTORIAL Granny Square Quilted Pillow

India

I've collected quite a lot of scraps from sewing masks in the past 2 months. I can't wait to cut them out into usable pieces. My fave is 2.5" and 2" squares. 
Few days ago I sorted out the purple scraps and I so wanted to make something scrappy. I mean after days of making masks I feel like doing something else just for fun. 

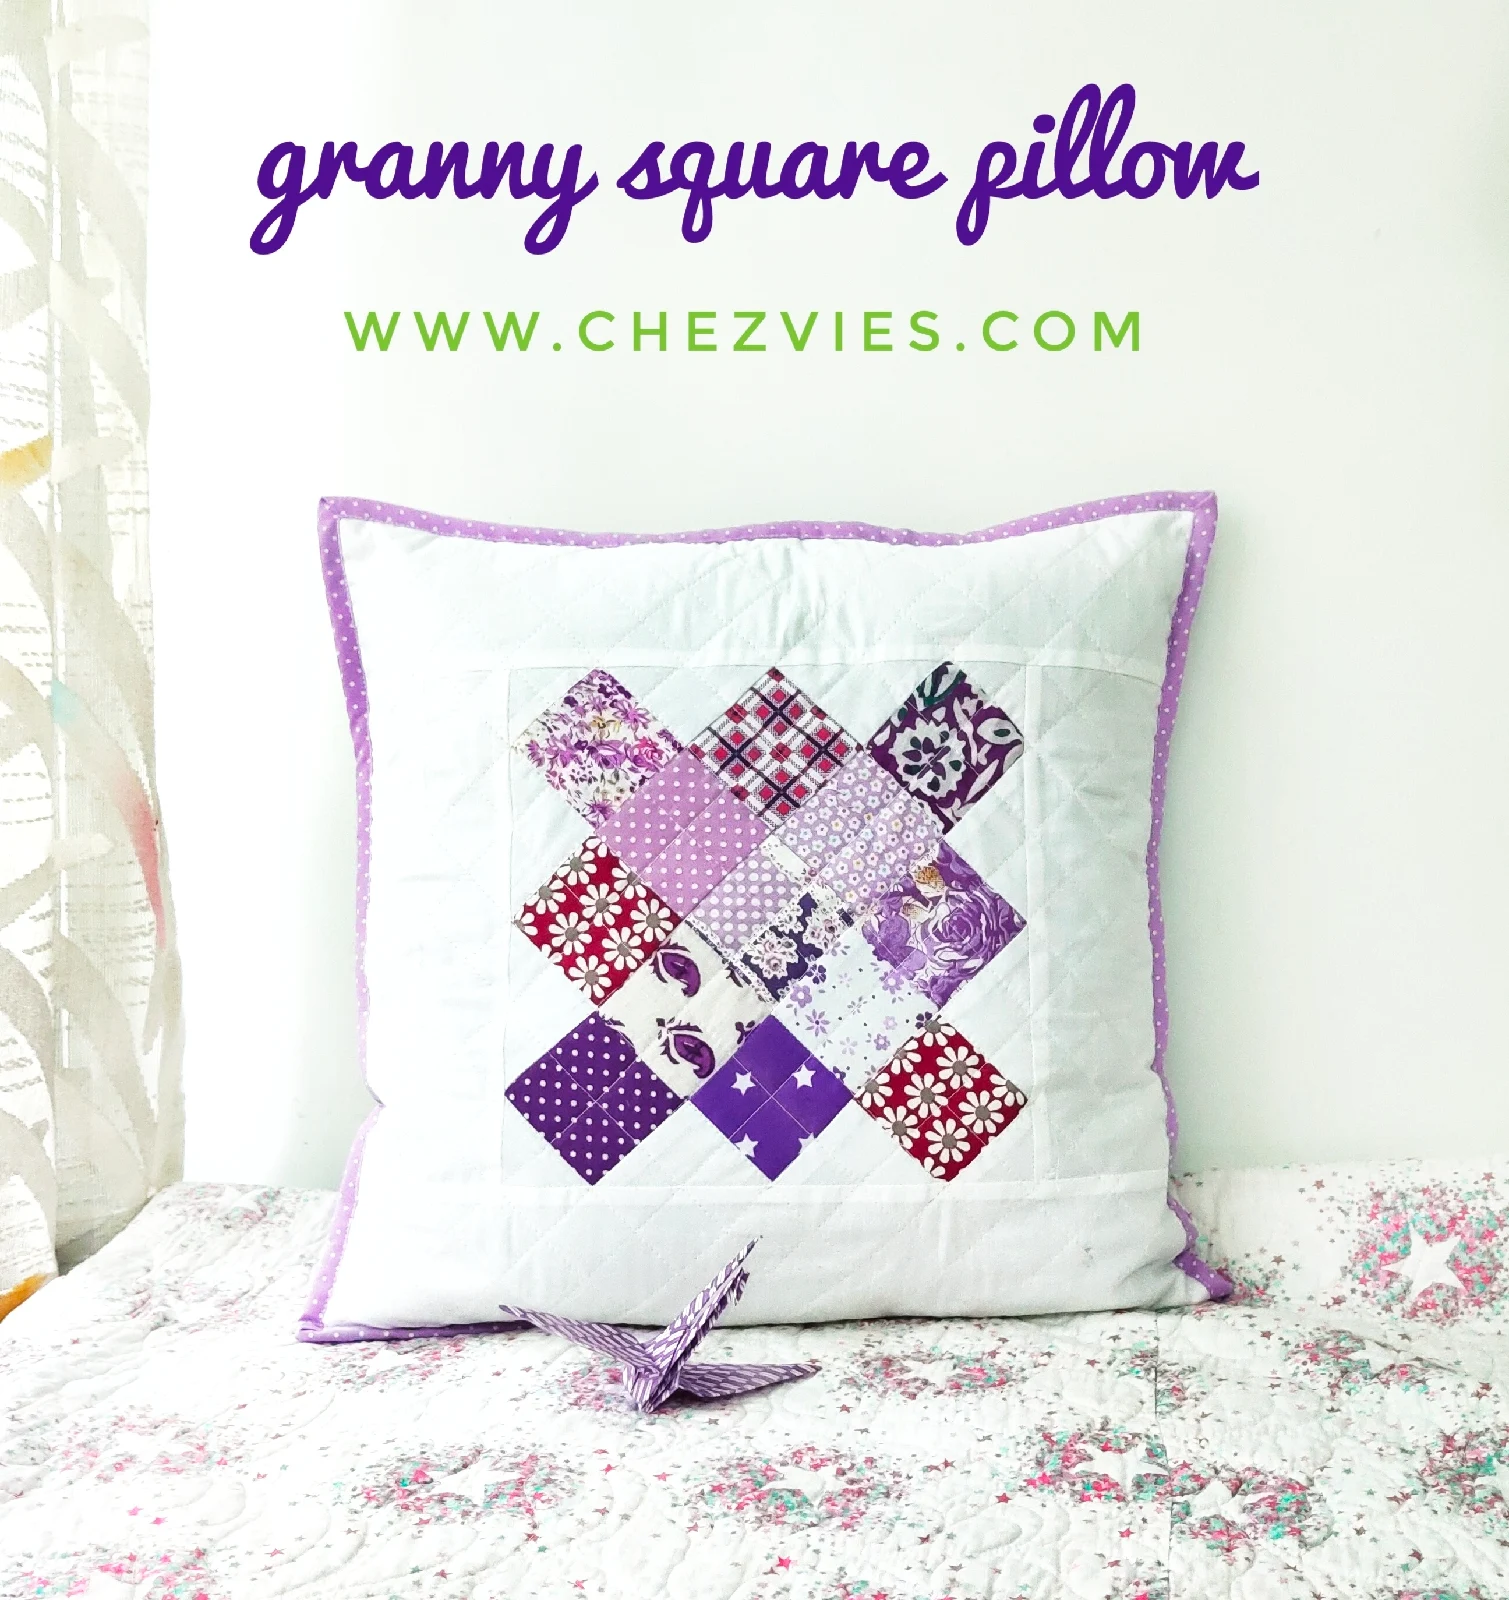
I started granny square projects few months ago and I cant wait to go back to working on it. Sometimes I just want to make something simple project that I can finish quickly. So I decided to make this scrappy granny square pillow cover.

In case you want to learn to make one, here's my step by step making granny square pillow cover.
What you need :
13 squares 2.5" x 2.5"  - scrappy color (purple)
12 squares 2.5" x 2.5" - background fabric (white)
2 border fabrics 4" x 9" 
2 border fabrics 4 "x 16" 
1 backing fabric 16" x 13"
1 backing fabric 16" x 4" 
1 batting 18" x 18"
16" all purpose zipper (I used 18" )
Cross cut single fold binding 2.5" x 65" 

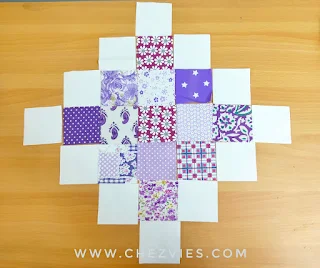
1. Arrange the scrappy color fabrics like in the picture below. Make sure to alternate dark and light color value. This is important later on ;) 


2. Next, add the white pieces all around the outer border. 


3. Now we're going to start sewing them together from the second row using 1/4" seam allowance. 
Once you're done, press the seam to the dark side, like in the picture below. Repeat with the subsequent rows.


4. Now we'll sew the rows together. Remember, we're still using 1/4" seam allowance here :). Once you're done sewing up all the rows, irom the block flat. I usually press the seam on the wrong side first to set it and then turn it to the right side and press it again. 


5.  Now, we will trim the pointy side leaving 1/4" seam allowance. The block should finish at around 9" x 9" 


the block is ready and now we're ready to turn it into pillow cover!

6. Add the border fabric 4" x 9" on both sides of the granny square block. Sew using 1/4" seam allowance. Press the seam towards the border side and  trim the excess if necessary.


7. Now add the 16"  border fabrics on the top and bottom. I cut longer border fabric here because my fabric stretch a little.  Sew using 1/4" seam allowance and press the seam towards the border fabrics. Trim pillow top piece to measure 16" x 16" square. 


8. Place the pillow top piece on top of the batting, baste and quilted as desired. Trim the excess batting and keep the quilted pillow top aside as we will prepare the backing.  


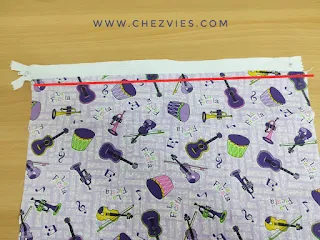
9. Now let's prepare the backing. With the bigger piece of backing fabric right side up, line the zipper tape on top of it, right side down and sew with 1/4" seam allowance.


10. Flip the zipper up, finger press the seam and top stitch using 1/8" seam allowance.


11. Place the smaller piece of backing fabric (right side down) and line it up with the unsewn zipper tape. Sew with 1/8" seam allowance.  Then draw a line (yellow line) 0.75" from the top. Fold the fabric up on the yellow line and pin in place. 

12. From the wrong side, sew down the zipper again 1/4" away from the zipper teeth. 

13. Now it should look like this. I sewed the fold with 1/8" allowance. It's optional though. I did it because the fabric I used is a little lightweight. Trim the pillow backing to measure 16" x 16" square.


14. Put the pillow backing and the quilted pillow top WRONG SIDE together and sew around the perimeter using 1/4" seam allowance. 


15. Attach the binding. Place the binding on the back of the pillow and pin or clip in place. Leaving approx. 2" from the top of the binding, start sewing using 1/4" seam allowance. Stop approx 0.25" from the edge, turn the pillow 45 degree angle and sew to the corner. 


16. Flip the working binding outward and bring it down again to line up with the next straight edge, creating a crease at the top.  


17. With the crease pressed down, sew binding using 1/4" seam allowance. 


18. As you reach the end of the binding, overlap the binding approximately 1" and cut the excess. Insert the end of the binding in between the fold like in the picture below and  finish sewing the binding. 


Turn the binding to the front side of the pillow and finish it by hand or machine. I prefer to use machine for pillows because I have 2 teenage boys ^^. 


I have 3 more blocks which I plan to make pillows. But first, I need to finish a couple of scrub hats and 3D Masks. 


I hope you enjoy the tutorial! If you do, don't forget to subscribe or follow me by email. 

Thank you for stopping by,

- Elvira - 

********
Linking up to these wonderful BLOGS

How to Make Three Layers Slim Face Mask with Video Tutorial

India

How's everyone doing? Lockdown has been relaxed with certain limitations here in my city since yesterday. We're in the green zone as of now, and I hope & pray it will remain that way.
Anyway, in between mask making, I am tidying up my fabric stocks. Since my fabric shop is closed temporarily due to lockdown, might as well do some care and love for them :D.
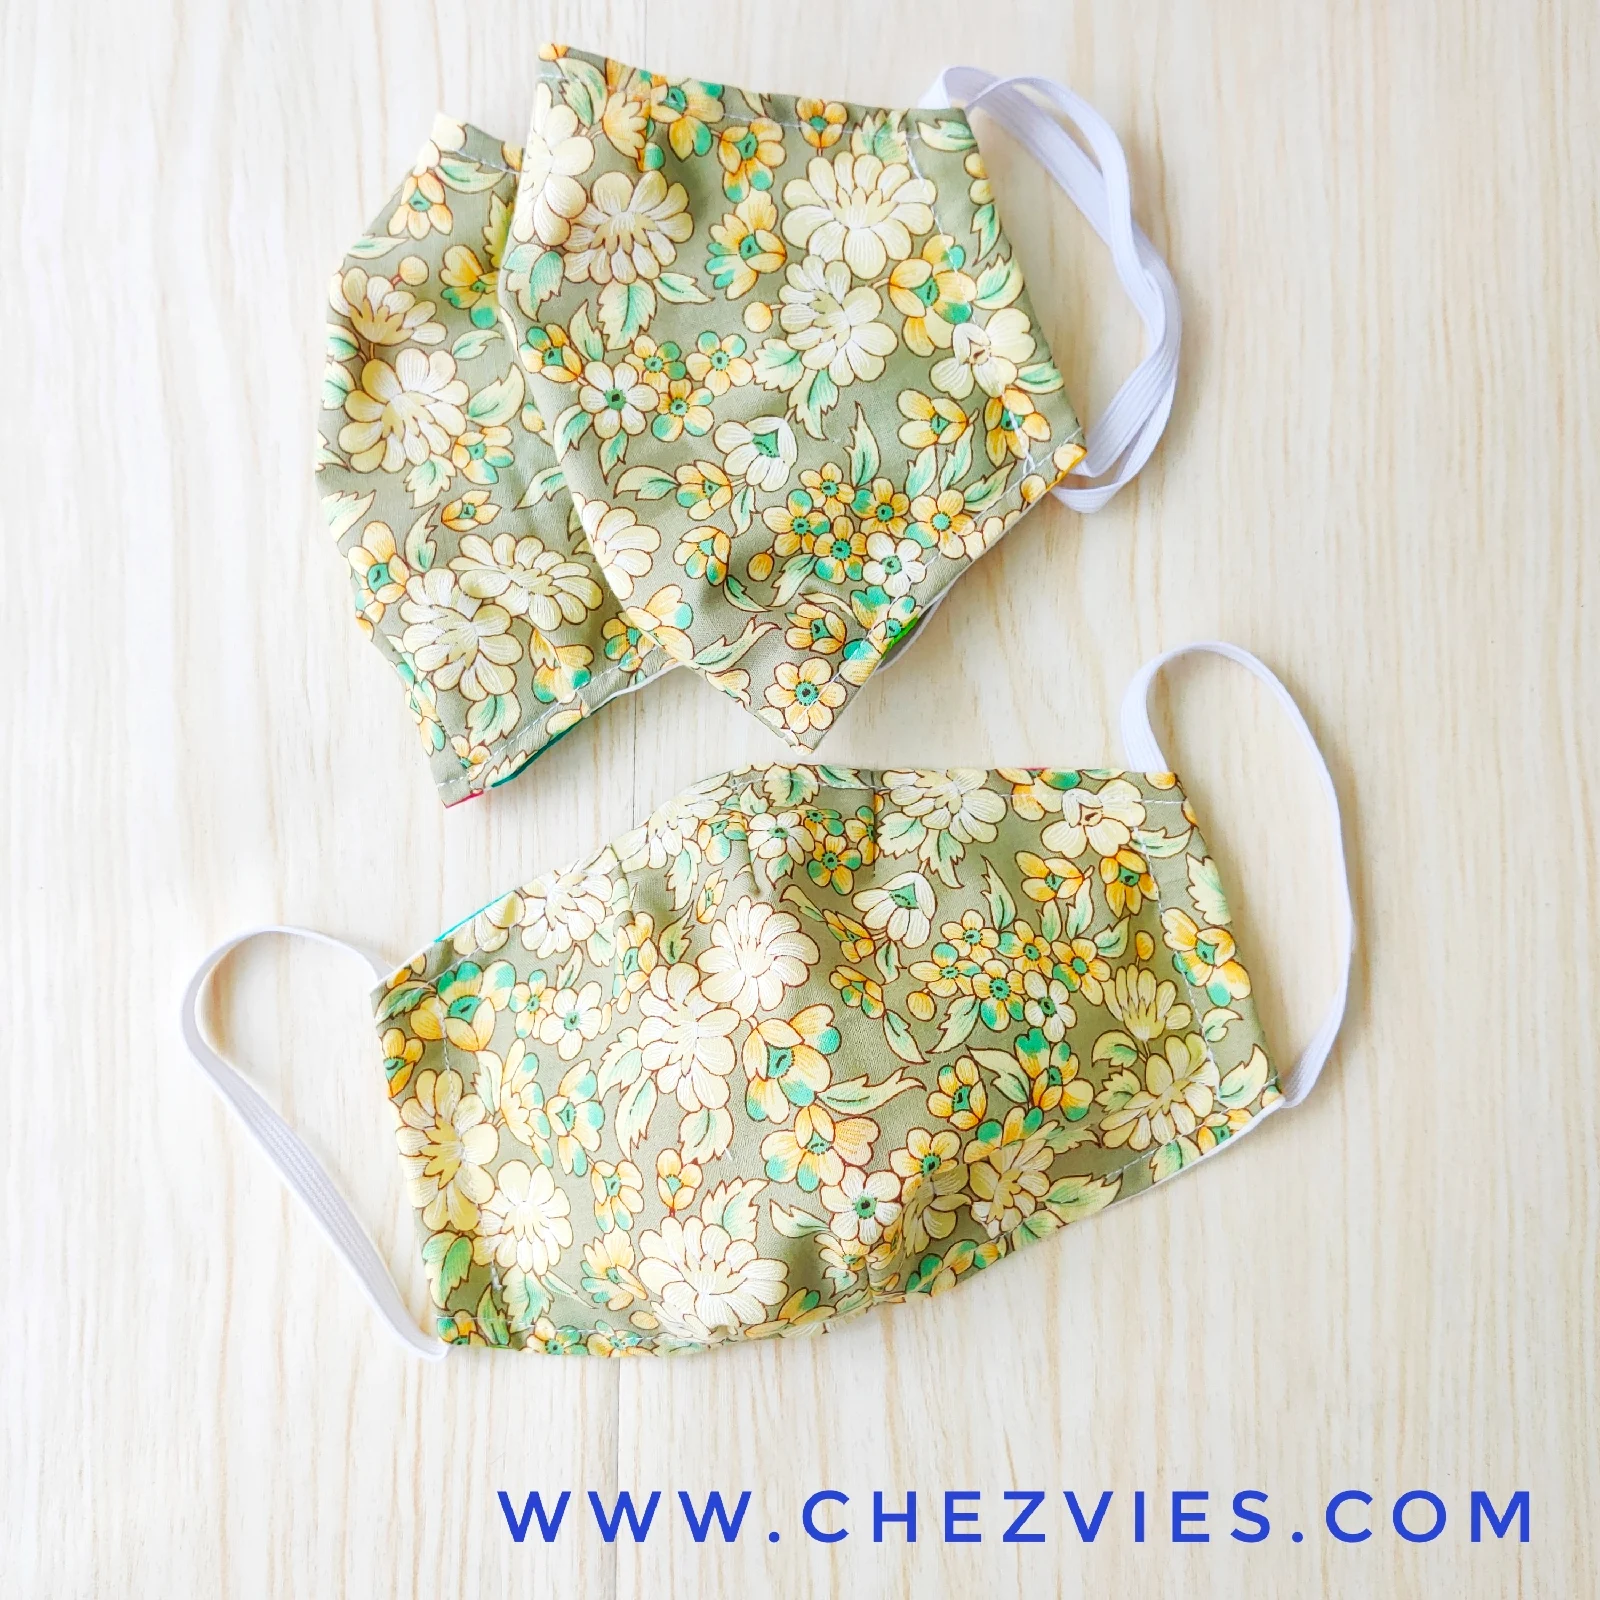
And when I saw these pretty fabrics, I know I wanted to make a face mask but then the fabric is quite lightweight. So I decided to make three layers mask. Super quick and easy. You only need 1 piece of fabric and 2 pieces of binding fabrics. (More about binding later on).


And as I progress making three layers masks, I made a slim pleated mask!! I kinda love how slim this mask turns out that you can literally slip it in your pocket or even wallet. 

Here is what you need : 
1 rectangle fabric 7.5" W x 19.5" H  (6.5" x 16.5"  for kids) - use fun fabric with border if you have. 
2 binding pieces 2" W x 3.5" H

Let's get sewing :

1. Place the fabric right side down. If you're using fabric with a border like I did, fold the border side first by 6.5" like the picture below. 


2. Then fold the other side on top of the first one and you will end up with 7.5" x 6.5" piece. 


3. Clip or pin to secure it and topstitch (on the 7.5" sides) using 1/4" seam allowance (mark with yellow line)


4. Turn the mask inside out on the pieces where the right side is facing. Press the seam and topstitch using 1/8" allowance (yellow line). Then make a marked line 1.75" from the top and bottom edges. (red line). 

5. Fold on the red line  


and then fold it back again to line up with the bottom edge. (I hope  I make sense here).


Repeat with the other side, pin it and sew the short edges with 1/8" seam allowance. 


6. Place the mask with a pleated side down on the right side of the binding.
Wrap the sides and pin as shown in the picture below and sew the binding using 1/4" seam allowance.


7. Open the binding and fold the raw edge.


8. Now wrap it around the raw edge. Topstitch using scant 1/8" seam allowance. Repeat with the other side and you're done. Now insert the elastic and using fabric ties

It's super duper easy, right?
So which one is your fave?
The regular pleats, the box pleats, or this slim pleated one? This slim pleated mask is finished at 2" x 7,5". If you wish yo make broader, you can use 21" x 7.5" fabric panel.


This is how it looks when worn. Basically, it will cover the same way since the face mask is made from a flat fabric panel. If you want a mask that has breathable space, you can try the 3D Face Mask with Filter Pocket or the new TRIO 3D Face Mask which has more specious breathing space.


Now, why three layers? Well, they said the more layer the better. Add another extra layer of cotton fabric still make the mask breathable and comfortable to wear especially during Indian summer. 

I personally prefer using binding to create a casing for the ties or elastic, instead of sewing the elastic or ties on the mask. That way, when the elastic becomes loose, I can always change it. Also if you notice my (mug)  photo above, the elastic can minimize the gap on the cheeks. Which I believe is important. 

I've been making three layers mask in the past few days using Indian fabrics for hubby's staff at the office. Indian soft cotton fabric is very soft and breathable. I used to make to wear it during springtime, but now with COVID-19 Pandemic going on, it's better to have an extra layer.

By the way, I don't add nose wire when I use soft fabric, because the fabric is lightweight, the twist and tie that I am using for nose wire tends to pierce out of the fabric. (I tried :D) 

I hope this tutorial will be helpful to you. I will try to make a Pdf version or a video tutorial next time when I sew. Here's the video tutorial to make this 3 layers face mask.


Thank you for stopping by! 
Stay safe, everyone!

- Elvira- 


Linky Party:
Craftastic Monday

How to Batch Sewing Masks

India

How's everyone doing? I am still sewing masks and taking a break in between. I usually cut the fabrics in batches. All you do is fold the fabric a couple of times and pin the pattern on top and start cutting. I laminate my pattern so that I can use rotary cutter 😄 

Next I will start chain sewing, one dart at a time. That way I can safe a lot of time, instead of finish one mask at a time, I can finish 10-12 pieces at a time. 

All you need is a little planning. Once you decide the fabrics, cut them multiple at a time. I usually cut 6 or 8 pieces of the same print. 


Once done, stack them together and when you have 15 minutes, simply pick up a few pair and start chain sewing. 


Don't forget to put on some good music or movie (or Kdrama for me ) . 
Before you know it, you will have a dozen finish. Don't rush! We're not on competition here, make a small batch each day as time permit. Remembers your health is also important to be able to keep sewing. Make sure you have enough rest so you won't lose steam midway! 

Ganbatte!!

-Elvira- 

Resources: 

How to sew easy scrub hat - video tutorial


Finally I have time to make (and edit) video tutorial for the Scrub Hat Pattern I posted few days ago. I hope this supported video will help for those who just started sewing. It is super easy and quick! 


I hope you find this supporting video tutorial useful. If you have any questions, don't hesitate to email me, I'd be glad to help you. 

If you enjoy the video and want more tutorial /video tutorial, please subscribe to my channel. 

I'm adding the Face Shield Free Pattern  with the Scrub Hat pattern on Etsy. So those of you who support me from Etsy will not have to download it separately. 
By the way, you can use coupon code FAVE20 on ETSY  to get instant discount of 20%. yay!


In the meantime, I've been busy tidying up my fabric stocks (since we're on lockdown and I cannot send physical products). I sorted them out by color and also by size. I still have a long way to go though. At least this will keep me busy, as I heard on the news few districts will have lockdown extension. Let's hope for the best!


I read on the news today that several countries will start easing lockdown and let people go back to work and they have to wear their own protective gear. Please do take care if you're one of those who has to go back to work and use public transport! I pray that God will always protect all of us and help the scientist to come up with vaccine soon!


Thank you for stopping by,
Take care & stay well!

Elvira

*******
Other Resources:


Midori Super Cute Mini Wallet Pattern


Finally this midori mini wallet pattern that's been on my draft folder for almost 2 years now available in my Etsy Shop and on special 40% lockdown discount! 


Title of the document Get the Pattern on Etsy

It's the mini version of the older sister - the Trifold Card Wallet Organizer. Come to think of it, I think I should give proper name to my patterns ^^. If you're wondering, Midori means Green in Japanese and the name is for obvious reason because I was working with the green apple print (ha!).

Anyway, Midori has this mini zippy pocket on the exterior, which is very handy! You will learn how to make invisible zipper pocket the easy way using all purpose zipper! 


This mini wallet also has 6 card slot and 2 mini slip pockets. It's perfect for those days when you just want to go out for midnight snack in the neighboring convenience store! It fits perfectly into your jeans pocket, it's only 4.5" W x 4" H afterall. 


Since it's pretty small, it's great for scrap buster project. You know for all those small cuts you keep waiting for a perfect project to come along :). Yup, this is a perfect one! And why learning something during this lockdown and drive away your blues! 

Thank you so much for keep coming to check out my blog. Oh, I had a little glitch at the Webshop yesterday and today, but it's resolved now so you can safely make payment via Paypal again. Well, it was  a little bit upsetting but hopefully all will end well! I trust God will never take away something from you without giving you back something more beautiful:)

Take care, stay home, stay creative and stay well!! 

- Elvira -


Latest Fabrics

Latest Video